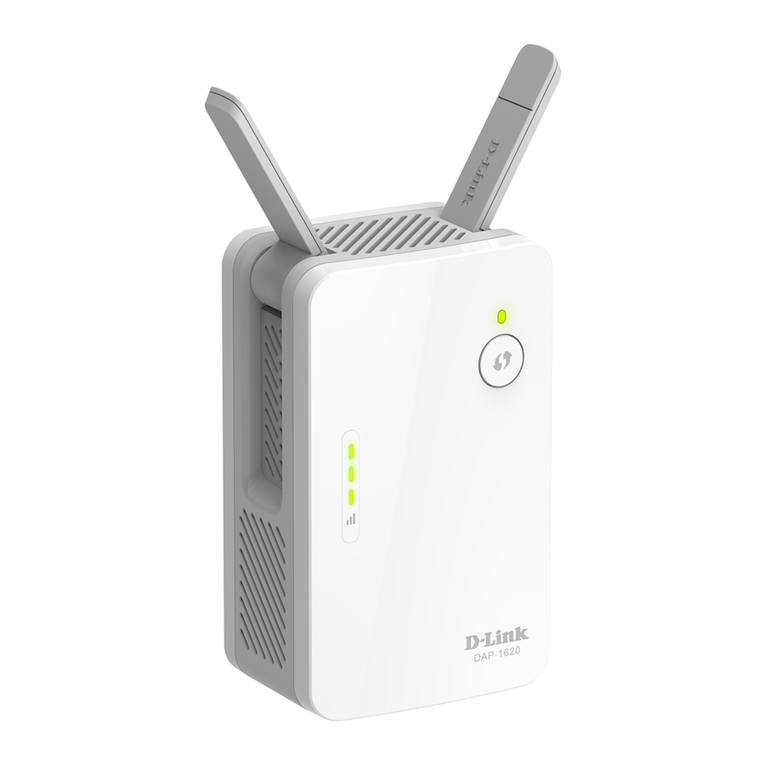
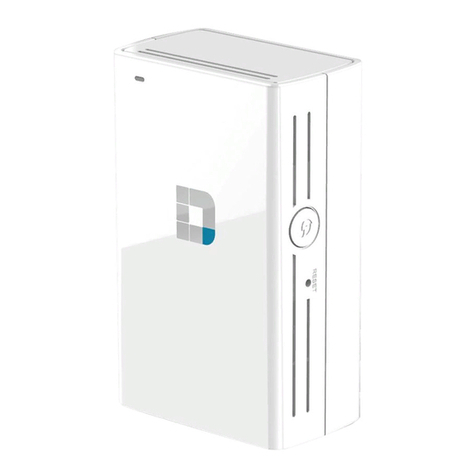
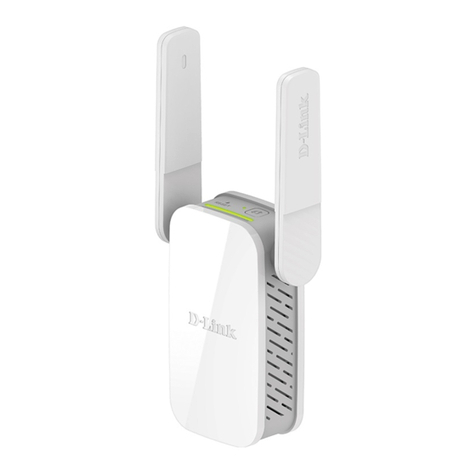
D-Link DAP-1620 User manual

Quick Installation Guide
DAP-1620
AC1300 MU-MIMO Wi-Fi Range Extender

DAP-1620 Quick Installation Guide
BEFORE YOU BEGI
Delivery Package
•Extender DAP-1620
•“Quick Installation Guide” (brochure).
If any of the ite s are issing, please contact your reseller.
The “User Manual” and “Quick Installation Guide” docu ents are available
on D-Link website (see www.dlink.ru).
!Using a power supply with different parameters than those
indicated on the device will cause damage and void the warranty
for this product.
2

DAP-1620 Quick Installation Guide
Default Settings
IP address of device 192.168.0.50
Username (login) admin
Password admin
ame of wireless network
(SSID)
2.4GHz dlink-XXXX1
5GHz dlink-XXXX-5GHz2
etwork key (PSK)
see the field Password
on the back panel of the
device
1 See the field Wi-Fi ame (SSID) 2.4GHz on the back panel of the device.
2 See the field Wi-Fi ame (SSID) 5GHz on the back panel of the device.
3

DAP-1620 Quick Installation Guide
System Requirements and Equipment
•A router enabled to access the Internet.
•A co puter with any operating syste that supports a web browser.
•A web browser to access the web-based interface of the extender:
◦Apple Safari 8 and later
◦Google Chro e 48 and later
◦Microsoft Internet Explorer 10 and later
◦Microsoft Edge 20.10240 and later
◦Mozilla Firefox 44 and later
◦Opera 35 and later.
•A NIC (Ethernet or Wi-Fi adapter) to connect to the extender.
•An 802.11a, b, g, n, or ac Wi-Fi adapter to create a wireless network.
4

DAP-1620 Quick Installation Guide
CO ECTI G TO PC
PC with Ethernet Adapter
1. Сonnect an Ethernet cable between the LAN port of the extender and the
Ethernet port of your PC.
2. Plug the device into an electrical outlet or power strip.
Now you need to configure an IP address for the Ethernet adapter of your PC.
5

DAP-1620 Quick Installation Guide
Configuring IP Address in S Windows 7
1. Click the Start button and proceed to the Control Panel window.
2. Select the etwork and Sharing Center section. (If the Control Panel
has the category view (the Category value is selected fro the View by
drop-down list in the top right corner of the window), choose the View
network status and tasks line under the etwork and Internet
section.)
3. In the enu located on the left part of the window, select the Change
adapter settings line.
4. In the opened window, right-click the relevant Local Area Connection
icon and select the Properties line in the enu displayed.
5. In the Local Area Connection Properties window, on the
etworking tab, select the Internet Protocol Version 4 (TCP/IPv4)
line. Click the Properties button.
6

DAP-1620 Quick Installation Guide
6. Select the Use the following IP address radio button and enter the
value 192.168.0.51 in the IP address field. The Subnet mask
field will be filled in auto atically. Click the OK button.
7. Click the OK button in the connection properties window.
Now you can connect to the web-based interface of DAP-1620 for configuring
all needed para eters. To gain access to an external network (to the Internet),
you also need to specify the default gateway and the addresses of DNS servers.
7

DAP-1620 Quick Installation Guide
Configuring IP Address in S Windows 10
1. Click the Start button and proceed to the Settings window.
2. Select the etwork & Internet section.
3. In the Change your network settings section, select the Change
adapter options line.
4. In the opened window, right-click the relevant Local Area Connection
icon and select the Properties line in the enu displayed.
5. In the Local Area Connection Properties window, on the
etworking tab, select the Internet Protocol Version 4 (TCP/IPv4)
line. Click the Properties button.
8

DAP-1620 Quick Installation Guide
6. Select the Use the following IP address radio button and enter the
value 192.168.0.51 in the IP address field. The Subnet mask
field will be filled in auto atically. Click the OK button.
7. Click the Close button in the connection properties window.
Now you can connect to the web-based interface of DAP-1620 for configuring
all needed para eters. To gain access to an external network (to the Internet),
you also need to specify the default gateway and the addresses of DNS servers.
9

DAP-1620 Quick Installation Guide
PC with Wi-Fi Adapter
1. Plug the device into an electrical outlet or power strip.
2. Make sure that the Wi-Fi adapter of your PC is on. As a rule, odern
notebooks with built-in wireless NICs are equipped with a button or
switch that turns on/off the wireless adapter (refer to your PC docu ents).
If your PC is equipped with a pluggable wireless NIC, install the software
provided with your Wi-Fi adapter.
Now you should configure your Wi-Fi adapter.
10

DAP-1620 Quick Installation Guide
Configuring Wi-Fi Adapter in S Windows 7
1. Click the Start button and proceed to the Control Panel window.
2. Select the etwork and Sharing Center section. (If the Control Panel
has the category view (the Category value is selected fro the View by
drop-down list in the top right corner of the window), choose the View
network status and tasks line under the etwork and Internet
section.)
3. In the enu located on the left part of the window, select the Change
adapter settings line.
4. In the opened window, right-click the relevant Wireless etwork
Connection icon. Make sure that your Wi-Fi adapter is on, then select
the Properties line in the enu displayed.
5. In the Wireless etwork Connection Properties window, on the
etworking tab, select the Internet Protocol Version 4 (TCP/IPv4)
line. Click the Properties button.
11

DAP-1620 Quick Installation Guide
6. Select the Use the following IP address radio button and enter the
value 192.168.0.51 in the IP address field. The Subnet mask
field will be filled in auto atically. Click the OK button.
7. Click the OK button in the connection properties window.
8. To open the list of available wireless networks, select the icon of the
wireless network connection and click the Connect To button or left-
click the network icon in the notification area located on the right side of
the taskbar.
12

DAP-1620 Quick Installation Guide
9. In the opened window, in the list of available wireless networks, select the
wireless network dlink-XXXX3 (for operating in the 2.4GHz band) or
dlink-XXXX-5GHz4 (for operating in the 5GHz band) and click the
Connect button.
10. In the opened window, enter the network key (see the field Password on
the back panel of the device) in the Security key field and click the OK
button.
11. Wait for about 20-30 seconds. After the connection is established, the
network icon will be displayed as the signal level scale.
Now you can connect to the web-based interface of DAP-1620 for configuring
all needed para eters. To gain access to an external network (to the Internet),
you also need to specify the default gateway and the addresses of DNS servers.
!
If you perfor initial configuration of the extender via Wi-Fi
connection, note that i ediately after changing the wireless default
settings of the extender you will need to reconfigure the wireless
connection using the newly specified settings.
3 See the field Wi-Fi ame (SSID) 2.4GHz on the back panel of the device.
4 See the field Wi-Fi ame (SSID) 5GHz on the back panel of the device.
13

DAP-1620 Quick Installation Guide
Configuring Wi-Fi Adapter in S Windows 10
1. Click the Start button and proceed to the Settings window.
2. Select the etwork & Internet section.
3. In the Change your network settings section, select the Change
adapter options line.
4. In the opened window, right-click the relevant Wireless etwork
Connection icon. Make sure that your Wi-Fi adapter is on, then select
the Properties line in the enu displayed.
5. In the Wireless etwork Connection Properties window, on the
etworking tab, select the Internet Protocol Version 4 (TCP/IPv4)
line. Click the Properties button.
6. Select the Use the following IP address radio button and enter the
value 192.168.0.51 in the IP address field. The Subnet mask
field will be filled in auto atically. Click the OK button.
7. Click the Close button in the connection properties window.
14

DAP-1620 Quick Installation Guide
8. To open the list of available wireless networks, select the icon of the
wireless network connection and click the Connect To button or left-
click the network icon in the notification area located on the right side of
the taskbar.
9. In the opened window, in the list of available wireless networks, select the
wireless network dlink-XXXX5 (for operating in the 2.4GHz band) or
dlink-XXXX-5GHz6 (for operating in the 5GHz band) and click the
Connect button.
10. In the opened window, enter the network key (see the field Password on
the back panel of the device) in the Security key field and click the
ext button.
11. Allow or forbid your PC to be discoverable by other devices on this
network (Yes / o).
5 See the field Wi-Fi ame (SSID) 2.4GHz on the back panel of the device.
6 See the field Wi-Fi ame (SSID) 5GHz on the back panel of the device.
15

DAP-1620 Quick Installation Guide
12. Wait for about 20-30 seconds. After the connection is established, the
network icon will be displayed as a dot with curved lines indicating the
signal level.
Now you can connect to the web-based interface of DAP-1620 for configuring
all needed para eters. To gain access to an external network (to the Internet),
you also need to specify the default gateway and the addresses of DNS servers.
!
If you perfor initial configuration of the extender via Wi-Fi
connection, note that i ediately after changing the wireless default
settings of the extender you will need to reconfigure the wireless
connection using the newly specified settings.
16

DAP-1620 Quick Installation Guide
CO FIGURI G EXTE DER
Connecting to Web-based Interface
Start a web browser. In the address bar of the web browser, enter the IP
address of the extender (by default, the following IP address is specified:
192.168.0.50). Press the Enter key.
!
If the error “ The page cannot be displayed ” (or “ Unable to display the
page ”/“ Could not connect to remote server ”) occurs upon connecting to
the web-based interface of the extender , ake sure that you have
properly connected the extender to your co puter.
If the device has not been configured previously or the default settings have
been restored, after access to the web-based interface the Initial Configuration
Wizard opens (see the Initial Configuration Wizard section, page 20).
17

DAP-1620 Quick Installation Guide
If you configured the device previously, after access to the web-based interface
the login page opens. Enter the userna e (admin) in the Username field
and the password you specified in the Password field, then click the LOGI
button.
In order not to log out, ove the Stay signed in switch to the right. After
closing the web browser or rebooting the device, you need to enter the
userna e and the password again.
If you enter a wrong password several ti es, the web-based interface will be
blocked for a while. Please wait for one inute and reenter the password you
specified.
18

DAP-1620 Quick Installation Guide
The Summary page displays general infor ation on the extender and its
software.
The web-based interface of the extender is ultilingual. You can select the
needed language upon the initial configuration of the web-based interface of
the extender or in the System / Configuration section of the enu.
Other settings of the extender are available in the enu in the left part of the
page. Go to the relevant section and select the needed page or run the wizard
in the Initial Configuration section.
19

DAP-1620 Quick Installation Guide
Initial Configuration Wizard
In order to start the Initial Configuration Wizard anually, go to the Initial
Configuration section.
Click the OK button and wait until the factory default settings are restored.
If you perfor initial configuration of the extender via Wi-Fi connection,
please ake sure that you are connected to the wireless network of DAP-1620
(see the WLAN na e (SSID) in the Default Settings section, page 3) and click
the EXT button. Then click the START button.
If the device has not been configured previously or the default settings have
been restored, the Initial Configuration Wizard starts auto atically upon
access to the web-based interface or upon opening a web site on the Internet.
20
Other manuals for DAP-1620
10
Table of contents
Other D-Link Extender manuals

D-Link
D-Link DAP-1325 User manual

D-Link
D-Link DAP-1320 User manual

D-Link
D-Link DHP-W311AV User manual

D-Link
D-Link N300 DAP-1320 User manual

D-Link
D-Link AirPlus DWL-800AP+ User manual

D-Link
D-Link DAP-1530 User manual

D-Link
D-Link DHP-W220AV User manual

D-Link
D-Link DAP-1320 Manual

D-Link
D-Link DAP-1325 User manual

D-Link
D-Link DAP-1325 User manual

D-Link
D-Link DAP-1650 User manual

D-Link
D-Link DHP-W306AV User manual

D-Link
D-Link DAP-1325 User manual

D-Link
D-Link DAP-X1870 User manual

D-Link
D-Link DAP-1520 User manual

D-Link
D-Link DAP-1320 User manual

D-Link
D-Link DHP-W310 User manual

D-Link
D-Link DAP-1620 User manual

D-Link
D-Link Covr User manual
D-Link
D-Link DAP-1720 User manual