manuals.online logo
Brands
  1. Home
  2. •
  3. Brands
  4. •
  5. D-Link
  6. •
  7. Network Router
  8. •
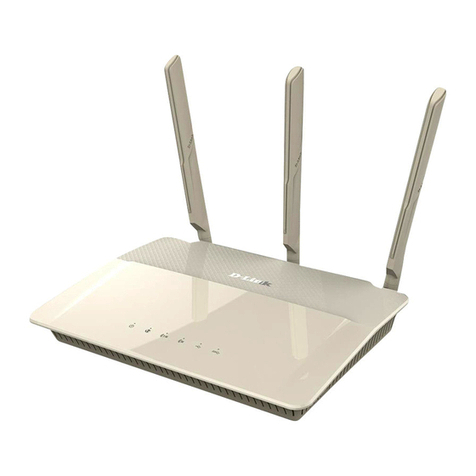
  9. D-Link DIR-860L User manual

D-Link DIR-860L User manual

Other manuals for DIR-860L

8

Other D-Link Network Router manuals

D-Link DSL-G604T User manual

D-Link

D-Link DSL-G604T User manual

D-Link DIR-878 User manual

D-Link

D-Link DIR-878 User manual

D-Link DSL-504 User manual

D-Link

D-Link DSL-504 User manual

D-Link DIR-827 User manual

D-Link

D-Link DIR-827 User manual

D-Link xStack DES-3200 Series User manual

D-Link

D-Link xStack DES-3200 Series User manual

D-Link DI-804V User manual

D-Link

D-Link DI-804V User manual

D-Link DVG-5008S User manual

D-Link

D-Link DVG-5008S User manual

D-Link DIR-860L User manual

D-Link

D-Link DIR-860L User manual

D-Link DES-1228/ME User manual

D-Link

D-Link DES-1228/ME User manual

D-Link DSL-6740B User manual

D-Link

D-Link DSL-6740B User manual

D-Link DIR-890L User manual

D-Link

D-Link DIR-890L User manual

D-Link DWP-1010KT User manual

D-Link

D-Link DWP-1010KT User manual

D-Link DSL-524T User manual

D-Link

D-Link DSL-524T User manual

D-Link DVG-5402G User manual

D-Link

D-Link DVG-5402G User manual

D-Link DSL-560I User manual

D-Link

D-Link DSL-560I User manual

D-Link xStack DES-3800 Series User manual

D-Link

D-Link xStack DES-3800 Series User manual

D-Link DSL-526B User manual

D-Link

D-Link DSL-526B User manual

D-Link DIR-1260 User manual

D-Link

D-Link DIR-1260 User manual

D-Link DIR-X4860 User manual

D-Link

D-Link DIR-X4860 User manual

D-Link DIR-880L User manual

D-Link

D-Link DIR-880L User manual

D-Link COVR DKT-883 User manual

D-Link

D-Link COVR DKT-883 User manual

D-Link DSL-504G User manual

D-Link

D-Link DSL-504G User manual

D-Link DSL-G604T User manual

D-Link

D-Link DSL-G604T User manual

D-Link DIR-822-US User manual

D-Link

D-Link DIR-822-US User manual

Popular Network Router manuals by other brands

TRENDnet TEW-435BRM - 54MBPS 802.11G Adsl Firewall M Quick installation guide

TRENDnet

TRENDnet TEW-435BRM - 54MBPS 802.11G Adsl Firewall M Quick installation guide

Siemens SIMOTICS CONNECT 400 manual

Siemens

Siemens SIMOTICS CONNECT 400 manual

Alfa Network ADS-R02 Specifications

Alfa Network

Alfa Network ADS-R02 Specifications

Barracuda Networks Link Balancer quick start guide

Barracuda Networks

Barracuda Networks Link Balancer quick start guide

ZyXEL Communications ES-2024PWR Support notes

ZyXEL Communications

ZyXEL Communications ES-2024PWR Support notes

HPE FlexNetwork 5510 HI Series Openflow configuration guide

HPE

HPE FlexNetwork 5510 HI Series Openflow configuration guide

Allied Telesis AT-AR236E quick start guide

Allied Telesis

Allied Telesis AT-AR236E quick start guide

ADTRAN NetVanta 3458-PoE quick start

ADTRAN

ADTRAN NetVanta 3458-PoE quick start

C&H Technologies EM405-8 manual

C&H Technologies

C&H Technologies EM405-8 manual

Huawei WiFi Mesh 3 Product description

Huawei

Huawei WiFi Mesh 3 Product description

Addonics Technologies ISC8P2G-S Quick install guide

Addonics Technologies

Addonics Technologies ISC8P2G-S Quick install guide

Atel W02 Arch+ Faqs

Atel

Atel W02 Arch+ Faqs

Allnet ALL0333AU user guide

Allnet

Allnet ALL0333AU user guide

Sercomm Genesis OC3505D Quick installation guide

Sercomm

Sercomm Genesis OC3505D Quick installation guide

Billion BIPAC 5102 Series user manual

Billion

Billion BIPAC 5102 Series user manual

TP-Link TD-8817 QIG

TP-Link

TP-Link TD-8817 QIG

Motorola MR1900 user guide

Motorola

Motorola MR1900 user guide

Cisco SOHO Series Regulatory compliance and safety information

Cisco

Cisco SOHO Series Regulatory compliance and safety information

manuals.online logo
manuals.online logoBrands
  • About & Mission
  • Contact us
  • Privacy Policy
  • Terms and Conditions

Copyright 2025 Manuals.Online. All Rights Reserved.

Installation
Quick Install Guide
Package Contents
DIR-860L Extreme Range Wireless
Dual Band Gigabit Router
12
If you have an existing router, turn it o and remove all
connected cables.
3
Disconnect all Ethernet cables from your
computer and modem.
4
Using an Ethernet cable, connect your modem to the
yellow port labeled Internet on the back of your router.
Power LED - A solid green light indicates a
proper connection to the power supply. The
light will blink green during the WPS process.
The light will blink orange during boot up.
Internet LED - A solid light indicates
connection on the Internet port. If the LED
is orange, the connection is good but the
router cannot connect to the Internet. If
the light is green, the router is properly
connected to the Internet.
DIR-860L
LEDs (from top to bottom)
Turn o or unplug your cable or DSL
broadband modem.
Extreme Range Wireless
Dual Band Gigabit Router
Existing Router
Modem Computer
12V
2A
USB
WPS
1
2
LAN
3
4
INTERNET
POWER
INTERNET
12V
2A
USB
WPS
1
2
LAN
3
4
INTERNET
POWER
INTERNET
12V
2A
USB
WPS
1
2
LAN
3
4
INTERNET
POWER
INTERNET
12V
2A
USB
WPS
1
2
LAN
3
4
INTERNET
POWER
INTERNET
5
Plug in and turn on your modem.
INTERNET
6
Connect the power adapter to your router and plug it into an
outlet. Wait for the Power light to turn green (may take up to
45 seconds). Ensure the Power button is in the ON position.
12V
2A
USB
WPS
1
2
LAN
3
4
INTERNET
POWER
INTERNET
For a wired connection: Using an Ethernet cable,
connect your computer to the port labeled 1 on
the back of your router.
Open a web browser (e.g., Internet Explorer,
Chrome, Firefox, or Safari) and enter http://
dlinkrouter.local. /. You can also enter the IP
address of the router (http://192.168.0.1).
The router will try to automatically detect your internet connection.
If it is unable to do so, you will have to select your internet connection
type from this list. If you use DSL for internet (through the phone
line), select Username/Password Connection (PPPoE). If you use
cable for internet, select DHCP Connection (Dynamic IP Address).
For other internet connections, contact your ISP for details. Click
Next to continue.
When the Welcome screen appears,
click Next to start the setup wizard.
If you chose PPPoE, enter the User Name and Password
provided to you by your ISP to connect to the internet.
Click Next to continue.
7
8109
12V
2A
USB
WPS
1
2
LAN
3
4
INTERNET
POWER
INTERNET
INTERNET
Modem
Ethernet Cable
Wi-Fi Conguration Card
Power Adapter
Note:
Please go to support.dlink.ca/DIR-860L to
download the latest rmware and user manual.
Important: For the quick setup wizard to work properly, you must have a working Internet connection.
For a wireless connection: On your computer, tablet, or
smartphone, nd the wireless network that is shown on
your router information card (ex: dlink-a8fa). Then, enter
the Wi-Fi password on your card (ex: akbdj19368).
http://192.168.0.1
5V-- - 3A
12 LAN3 4I NTERNET RESET
D-Link Router
Information Card
SSID:
Password:
Router
Computer
Modem
RouterComputerModem
Router
Computer
Modem
Router
Computer
Modem
Router
Computer
Laptop
Modem
Installation
11 12 13 14
15 16 17
19 20
18
You can choose your own names (SSIDs) and
passwords for your 2.4GHz and 5GHz wireless
networks, or you can choose to keep the defaults.
Click Next to continue.
Wait for the router to save your settings.
Enter your mydlink account and password that you created on
the previous screen as verication, and click Login.
Select your time zone. Click Next to continue.
Enter your information to create a mydlink account,
click Next.
Enter a password for accessing the web interface of your router. It is
recommended that you use a secure password with a mix of letters and
numbers. Click Next to continue.
(Optional) If you want to use the app-enabled features of this router
you will need to have a mydlink account. If you do not have a mydlink
account, select No and click Next. If you do, select Yes, click Next, and
enter your mydlink account information on the next screen. If you do
not wish to create a mydlink account at this time, click Skip, and skip the
remaining steps.
You will see this screen when your device has been successfully added to your
mydlink account.
Review the summary of your settings and click Save to continue.
After conrming your email address using the email that is sent to
you from mydlink, click Login. If you did not receive a conrmation
email, check your junk mail or spam lters.
Cannot connect to wireless signal
• Ensure the correct wireless password is being entered
• Ensure that you are in range of the router
• Upgrade the drivers on wireless adapter
• Upgrade the router’s rmware to latest version
Wireless instability
• Check for surrounding interference sources (Cordless phones, microwaves...). If possible move the router to a new
location where there is less interference
• Change Wireless Channel. Visit http://suport.dlink.ca/DIR-860L and read the FAQ titled “How do I change the wireless
channel on my DIR Series Router?”
• Upgrade rmware to latest version
QR Codes for smartphones and tablets
mydlink™ lite for Android™
Technical Support
mydlink™ lite for iOS®
©2013 D-Link Corporation/D-Link Systems, Inc. All rights reserved. D-Link and the D-Link logo are registered trademarks of D-Link Corporation or its subsidiaries in the United States and/or other countries. Other trademarks or registered
trademarks are the property of their respective owners. Maximum wireless signal rate derived from draft IEEE Standard 802.11ac specications. Actual data throughput will vary. Network conditions and environmental factors, including
volume of network trac, building materials and construction, and network overhead, lower actual data throughput rate. Environmental conditions will adversely aect wireless signal range. Product specications, size and shape are
subject to change without notice, and actual product appearance may dier from that depicted on the package. Visit dlink.ca (Canada) for more details. iPhone, iPad, and iPod touch are registered trademarks of Apple Inc.
Version 1.0 (June 20, 2013) 6DIR860LQC01G
U.S. and Canadian customers can contact D-Link technical support through our web site. You can nd software updates and user
documentation on the D-Link website as well as frequently asked questions and answers to technical issues.
Before you contact technical support, please have the following ready:
• Model number of the product (e.g. DIR-860L)
• Hardware Revision (located on the label on the bottom of the product (e.g. rev A1)
• Serial Number (s/n number located on the label on the bottom of the product)
Canada:
http://support.dlink.ca
Technical Support
Troubleshooting