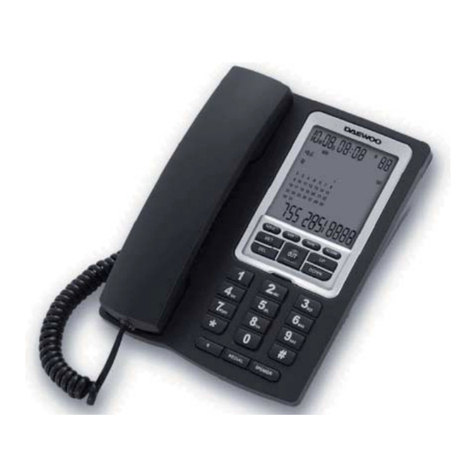
Daewoo DTC-150 User manual


2
INTRODUCCIÓN
Gracias por adquirir nuestro nuevo teléfono con identificación de llamadas. Para sacarle el máximo rendimiento,
lea detenidamente este manual de Instrucciones antes de utilizar el producto. Le ayudará a familiarizarse con
él.
INSTRUCCIONES DE SEGURIDAD
Antes de utilizar el teléfono, siga estas sencillas recomendaciones de seguridad para reducir el riesgo de
incendios, descargas eléctricas o daños físicos:
1. Lea atentamente y cumpla todas las advertencias e instrucciones.
3. Desenchufe el producto de la toma de corriente antes de limpiarlo. No utilice limpiadores líquidos ni en
aerosol, sino un trapo húmedo.
4. No sitúe este producto sobre una superficie inestable. Podría caerse y ocasionar importantes daños en su
mecanismo.
5. No sobrecargue los enchufes ni los alargadores. Podría haber riesgo de incendio o de descargas eléctricas.
6. No introduzca objetos a través de sus ranuras. Podrían entrar en contacto con puntos de alta tensión o
cortocircuitar sus piezas, con el consiguiente riesgo de incendio o de descarga eléctrica. No derrame nunca
líquidos sobre el dispositivo.
7. Evite utilizar esta unidad cuando haya tormenta. Muévala o desconéctela. Puede haber un riesgo aislado de
descarga eléctrica a causa de los rayos.
8. No abra ni repare nunca la unidad aunque ésta presente algún problema. La garantía quedaría anulada.
CARACTERÍSTICAS
¾Pantalla LCD
¾Compatible con FSK/DTMF. Hora auto ajustable por FSK.
¾Almacena 38 números entrantes y 5 salientes a los que puede volver a llamar, consultar o borrar.
¾Puede establecer un código PABX de 2 dígitos.
¾Se puede establecer un código de área local de 5 dígitos.
¾5 niveles de contraste para el LCD.
¾Música en espera.
¾2 modos de marcado: Pulse (pulsos) y Tone (tonos).
¾Selector de volumen de llamada (alto/bajo).
¾Función de rellamada.
¾Retro iluminación del LCD.
¾Indicador LED de llamadas entrantes.
¾Montaje de pared y sobremesa.

3
DESCRIPCIÓN

4
INSTRUCCIONES DE USO
PASOS PREVIOS
Introduzca 3 pilas AAAen el compartimiento correspondiente respetando la polaridad. El LCD mostrará el año,
el mes, el día y la hora.
Inserte un extremo del cable de red en el conector de la base y el otro extremo en el intercambiador.
Conecte el auricular y la base con el cable en espiral.
RECIBIR LLAMADAS
1. Al recibir una llamada, el teléfono sonará y el LCD mostrará el número de secuencia de la llamada, la fecha,
la hora, el número entrante y el icono NEW.
2. Si ese número ya ha llamado dos o más veces y no ha sido visualizado, el LCD mostrará el icono REP.
3. El icono OUT aparece cuando se consulta el número saliente.
Cuando la memoria de entrada esté llena, el último número reemplazará siempre al más antiguo.
AVISO: para visualizar el número de teléfono entrante, entre otros datos, debe estar suscrito al servicio
de identificación de llamadas de su compañía telefónica local.
Desde el auricular:
1. Levante el auricular y hable.
2. Cuando termine, vuelva a colocar el auricular en la base.
AVISO
Por lo general, la red de telecomunicación da paso al mensaje entrante entre el primer y segundo tono. Por
favor, espere hasta entonces para contestar.
REALIZAR UNA LLAMADA
Desde el auricular
1. Levante el auricular.
2. Cuando escuche el tono de llamada, marque el número deseado. El LCD le indicará la duración de la
conversación a los 6 segundos.
3. Cuando termine, vuelva a colocar el auricular en la base.
Función de rellamada
Cuando marque un número y la línea esté ocupada, pulse [REDIAL] para volver a marcar el mismo número.
CONSULTAR, RELLAMAR Y BORRAR UNA LLAMADA ENTRANTE
El teléfono puede almacenar 38 llamadas entrantes. Las siguientes llamadas irán sustituyendo a las más
antiguas. Cuando se reciba una llamada FSK o DTMF, la unidad lo detectará automáticamente y el LCD
mostrará el número de teléfono, la fecha y hora de la llamada.
Si es una llamada repetida, el LCD mostrará “REP”.
Si es un número oculto, el LCD mostrará “… p…”.
Si aparece un mensaje de error, el LCD mostrará “… E…”.

5
Si la llamada procede de una zona sin servicio de identificación de llamadas, el LCD mostrará “… o…”.
La fecha y hora se actualizarán a través de la señal de identificación de llamadas FSK. El año no variará. La
señal DTMF de identificación de llamadas no cambiará la fecha ni la hora. Sólo refleja el número entrante.
Consultar llamadas entrantes
Con el auricular colgado o descolgado, pulse [▲] o [▼] para consultar las llamadas entrantes. El LCD
mostrará …END… cuando visualice todos los registros.
AVISO: mantenga pulsado [▲]o [▼] durante 3 segundos para revisar rápidamente las llamadas entrantes.
Rellamar a un número entrante
Rellamar a un número de área local: el código de área local se detecta automáticamente. Vaya al número
deseado y pulse la tecla [REDIAL] para volver a marcar el número que aparece en el LCD. Después, levante el
auricular para hablar. Si la línea está ocupada, pulse [REDIAL] para volver a marcar el mismo número.
Rellamadas de larga distancia
Si el LCD muestra un número de larga distancia, pulse [REDIAL] dos veces. La unidad añadirá
automáticamente “0” y marcará el número que aparece en el LCD. Después, levante el auricular para hablar. Si
la línea está ocupada, pulse [REDIAL] para volver a marcar el mismo número.
Borrar una llamada entrante
1. Vaya al número entrante que desea borrar.
2. Pulse [DEL] para borrar el número. El LCD mostrará el número siguiente.
AVISO: pulse [DEL] durante 3 segundos para borrar todos los mensajes entrantes.
CONSULTAR, RELLAMAR Y BORRAR UNA LLAMADA SALIENTE
Se pueden almacenar los mensajes salientes, números de secuencia y duraciones de 5 llamadas. Las
siguientes llamadas irán sustituyendo a las más antiguas. Puede consultar, rellamar y borrar los números
salientes. Cuando consulte una llamada saliente, el LCD no mostrará la fecha y hora, sino la duración de la
conversación.
Consultar una llamada saliente
1. Con el auricular colgado o descolgado.
2. Pulse [OUT]. El LCD mostrará el último número marcado.
3. Pulse [OUT] varias veces. El LCD mostrará …END… cuando visualice todos los registros.
Volver a marcar un número saliente
1. Con el auricular colgado o descolgado.
2. Pulse la tecla [OUT] para ver el número deseado.
3. Pulse la tecla [REDIAL]. Se marcará el número automáticamente. Después, levante el auricular y hable. Si
la línea está ocupada, pulse [REDIAL] para volver a marcar el mismo número.
Borrar una llamada saliente
1. Vaya al número saliente que desea borrar.
2. Pulse la tecla [DEL] para borrar el número. El LCD mostrará el número siguiente.
AVISO
Pulse [DEL] durante 3 segundos para borrar todas las llamadas salientes.

6
MENÚ DE CONFIGURACIÓN
FECHA Y HORA
1. Cuelgue el auricular y pulse [SET]. En el LCD aparecerá SET 1 DATE.
2. Pulse [SET]. Los dos últimos dígitos del año parpadearán.
3. Pulse [▲]o [▼] para editar el año. Pulse [SET] para confirmar. Repita el mismo proceso para configurar el
mes, día, hora y minutos.
La unidad los almacenará a los 12 segundos.
AVISO
Valores: Mes: 1-12 Día: 1-31 Hora: 00-23 Minutos: 00-59
CÓDIGO DE ÁREA LOCAL
1. Cuelgue el auricular, pulse [SET] y después [▲]. En el LCD aparecerá SET 2 CODE.
2. Pulse [SET] de nuevo. El LCD mostrará CODE- - - - -.
3. Pulse [▲]o [▼]para introducir el primer dígito del código.
4. Pulse [SET] para confirmar e introducir el segundo dígito. Repita el mismo proceso para los últimos 4
dígitos.
5. La unidad los almacenará a los 12 segundos.
AVISO: si el código de área local sólo tiene 4 dígitos, puede dejar el último vacío.
Después de introducir el código de área local, la unidad lo detectará automáticamente si el número entrante
comienza de la misma forma.
CÓDIGO PABX
1. Cuelgue el auricular y pulse [SET].
2. Pulse [▲]dos veces. En el LCD aparecerá SET 3 PCODE.
3. Pulse [SET] para confirmar. El LCD mostrará PCODE--.
4. El primer “-” parpadeará.
5. Pulse [▲]o [▼] para introducir el primer código. Pulse [SET] para confirmar e introduzca el siguiente.
6. La unidad los almacenará a los 12 segundos.
AVISO
Si el código PABX sólo tiene un dígito, deje el segundo vacío.
Una vez configurado, cuando se vuelva a marca un número entrante de más de 6 dígitos, la unidad añadirá
automáticamente el PABX y hará una pausa de 1 segundo.
MODO DE MARCADO
1 Cuelgue el auricular y pulse [SET].
2 Pulse [▲] cuatro veces. En el LCD aparecerá SET 5 P-T.
3 Pulse [SET] para confirmar. El LCD mostrará TONE.
4 Pulse [▲]o [▼] para seleccionar PULSE o TONE.
5 Pulse [SET] para confirmar.
6 La unidad lo almacenará a los 12 segundos.

7
TRANSFERENCIA DE LLAMADAS
Para transferir una llamada a otro número de teléfono durante una conversación, pulse Ry marque el número
deseado. Cuando oiga el tono de llamada cuelgue el auricular para terminar la transferencia.
MÚSICA EN ESPERA
Cuando esté hablando por el auricular, pulse [HOLD] para entrar en el modo en espera. Se activará la música.
En el modo en espera:
pulse la tecla [HOLD] para desactivar el modo en espera y continuar hablando.
VOLUMEN DEL TIMBRE
Puede seleccionar dos niveles de volumen para el timbre moviendo el interruptor RING a HI (volumen alto) o
LO (volumen bajo).
CONTRASTE DEL LCD
Descuelgue el auricular y pulse [BRI] repetidamente para ajustar el contraste. Hay 5 niveles.
FUNCIÓN DE LUZ TRASERA DEL LCD
La luz trasera se enciende al recibir una llamada, marcar, pulsar alguna tecla o en el modo MÚSICA EN
ESPERA. Se apaga si el teléfono está inactivo durante 6 segundos.
Aviso: sin pilas, la función de luz trasera del LCD no estará disponible.
MONTAJE DE PARED
Puede utilizarse como teléfono de sobremesa y también instalarse en la pared.
Si desea colocarlo en la pared, quite la pestaña del auricular situada en la parte trasera de la base con un
alicate e introdúzcala en el hueco debajo de la tecla redonda de colgar/descolgar. De esta forma, el auricular no
podrá caerse de la base cuando lo instale en la pared.
ADVERTENCIA
Desconecte la línea telefónica cuando instale o cambie las pilas.
MANTENIMIENTO
La unidad debe estar en un lugar seco y limpio para evitar que su mecanismo interno se estropee.
Límpielo con un trapo húmedo. No utilice limpiadores líquidos o en aerosol.
Si la unidad presenta algún problema, no la desmonte. Mándela al centro de atención al cliente más cercano o
contacte con nuestro servicio de postventa.

8
RESOLUCIÓN DE PROBLEMAS
? No se oye
+ Compruebe la línea y que el auricular está conectado a la base.
? Sólo recibe llamadas
+ Compruebe el interruptor P/T (colóquelo en la posición adecuada).
? Pilas con óxido o filtraciones
+ Sustitúyalas por otras.
? Ruido
+ Compruebe si el cable de teléfono está roto (sustitúyalo por otro).
+ Compruebe si el conector está húmedo u oxidado (cámbielo).
? Cuando alguien llama, suena una vez y se corta. La función de marcado está disponible.
+ Compruebe si el conector está en un entorno húmedo.
Compruebe si está utilizando demasiados alargadores a la vez o si éstos no son de buena calidad
(cámbielos).
? El LCD está oscuro
+ Compruebe si el contraste del LCD está configurado adecuadamente o si queda poca pila (ajuste el contraste
del LCD y si sigue oscuro, cambie las pilas).
? Fallan la mayoría de funciones
+ Compruebe si queda poca pila (cámbielas).
Si el nivel de pila es normal (quite las pilas, desenchufe la línea y reinstálelo todo a los 10 minutos).
NOTA: Debido al desarrollo constante de nuestros productos, todas las funciones y
especificaciones están sujetas a cambios sin previo aviso.
DECLARACIÓN DE CONFORMIDAD
Por medio de la presente Flamagas SA declara que el modelo DTC-150 cumple los requisitos y
objetivos de protección básicos de:
•La Directiva 1999/5/CE de la CE sobre ER+ETT
•Para ver la declaración de conformidad completa del equipo visite la página:
www.electronicaflamagas.com

9
Garantía
Este aparato tiene una garantía de 2 años desde la fecha de adquisición contra todo fallo de
fabricación. Esta garantía no cubre las pilas.
El incumplimiento de las instrucciones o precauciones de uso contenidas en este manual
implican la pérdida automática de la garantía.
Para que esta garantía tenga validez, es necesario presentar el ticket o factura de compra
original.
Importador exclusivo Flamagas S.A www.electronicaflamagas.com

1
USER GUIDE FOR
MODEL: DTC-150

2
INTRODUCTION
Thank you for purchasing our newest Caller ID phone. This manual is designed to familiarize you with this
phone. To get maximum use from your new phone, we suggest that you read this Instruction Manual carefully
before operating it.
SAFETY INSTRUCTION
When using your telephone equipment, the following basic safety precautions should always be followed to
reduce the risk of fire, electric shock and injury to persons:
1. Read and understand all instructions
2. Follow all warnings and instructions.
3. Unplug the product from the wall outlet before cleaning. Do not use liquid cleaners or aerosol cleaners. Use
damp cloth for cleaning.
4. Do not place this product on an unstable cart, stand or table. The product may fall, causing serious damage
to the product.
5. Do not overload wall outlets and extension cords as this can result in the risk of fire or electric shock.
6. Never push objects of any kind into this product through cabinet slots as they may touch dangerous voltage
points or short out parts that could result in a risk of fire or electric shock. Never spill liquid of any kind on the
product.
7. Avoid using this unit during an electrical storm, move or disconnect the unit, there may be a remote risk of
electronic shock from lightning and thunder.
8.Unauthorized persons cannot open or service even if there is a defect with the unit. This will void the
warranty, please send to service center for repair.
FEATURES
¾FSK/DTMF system compatible, FSK auto-adjust real time
¾Records 38 incoming and 5 outgoing numbers which can be reviewed, called back and deleted
¾2-digit PABX code can be set
¾5-digit local area code can be set and auto-filter local area code
¾5 levels LCD contrast adjustable
¾Music on hold
¾Pulse and Tone dialing mode selectable
¾Ring volume HI/LO switch able
¾Redial function
¾LCD backlight function
¾Incoming ringing LED indicator
¾Desk/wall mountable

3
LOCATIONDESCRIPTION

4
OPERATING INSTRUCION
GETTINGSTARTED
Input 3 AAA batteries into the batteries compartment according to the correct polarity. LCD will display year,
month, date and time.
Insert one end of the line cord to the line jack of the base and the other end to the exchanger.
Connect the handset and the unit with coiled line.
RECEIVINGCALLS
1. When a call comes, the telephone rings, and LCD displays the seq. number of the call, the date, time,
incoming number and NEW icon.
2. If the number has come twice or more and has not been checked, LCD displays REP icon.
3. The OUT is displayed when reviewing the outgoing number.
When incoming memory is full, the latest incoming number is always replacing the oldest number.
NOTE: For the phone to display incoming number and other information, you must have an active
Caller ID subscription with your local telephone exchange company.
From the handset
1. Pick up the handset and talk to the other end
2. After finished, return the handset to the base.
NOTE
Generally telecom transmits the incoming message between the first ring and the second ring. So please
answer the phone after the second ring.
MAKINGACALL
From the Handset
1. Pick up the handset;
2. When hearing the dialing tone, dial the desired number. The LCD will auto-time the conversation after 6
seconds;
3. After finished, return the handset to the base.
Redialing function
When dialing out a number but the line is busy, press [REDIAL] key, the number will be dialed out again.
REVIEWING, CALLING BACK AND DELETING INCOMING CALL
The phone can record 38 Incoming calls. Over 38 incoming calls, the earliest one will be replaced, When
receiving a FSK or DTMF phone call, the unit will auto-detect and LCD displays the phone number together
with the calling date & time, and a serial number.
For repeat incoming call, LCD displays “REP”.
A secret number comes, LCD displays “…p…”
For error incoming message, LCD displays “…E…”

5
If incoming call is from an area without Call ID service, LCD displays “…o…”
The current date and time will be updated by the FSK Caller ID signal while the year setting remains
unchanged. DTMF Caller ID signal will not change the date and time setting as it only contains the caller’s
number.
Reviewing Incoming Call
In on-hook or off-hook state, press [▲] or [▼] key to review the incoming calls, LCD displays …END… when
all records are checked.
NOTE: Press and hold [▲]or [▼] key for 3 seconds, you can quickly check incoming calls.
Calling Back Incoming Call
Calling back the local area call: The unit can auto-filter local area code. Review the desired number and press
[REDIAL] key to dial back the number displayed on LCD, then pick up the handset to conversation. If the line
is busy, press [REDIAL] key to dial out the number repeatedly
Calling back the long distance call:
If LCD displays a number which is long distance call, press [REDIAL] key two times, the unit will auto-add “0”
and dial out the number displayed on LCD, then pick up the handset to conversation. If the line is busy, press
[REDIAL] key to dial out the number repeatedly.
Deleting Incoming Call
1. Review the desired incoming number
2. Press [DEL] key to delete the number, then LCD displays the next number.
NOTE: Press [DEL] key for 3 seconds, all the incoming message will be erased.
REVIEWING, CALLING BACK AND DELETING OUTGOING CALL
The phone can record 5 outgoing messages, sequence number and conversation time. You may review, call
back and delete outgoing calls. If over 5 outgoing calls, the earliest one will be replaced. When you review
outgoing call, LCD will not display real date and time, but display the conversation time.
Reviewing outgoing Call
1. In on-hook or off-hook state
2. Press [OUT] key, LCD displays the last dialed number.
3. Press [OUT] key continuously, LCD displays …END… when all records are checked.
Dial back outgoing Call
1. In on-hook state or off-hook state.
2. Press [OUT] key to check the desired number.
3. Press [REDIAL] key, the number will be dialed out automatically, then pick up the handset to conversation.
If the line is busy, press [REDIAL] key to dial out the number repeatedly.
Deleting outgoing Call
1. Review the desired outgoing number
2. Press [DEL] key to erase the number, and LCD displays the next number.
NOTE
Press [DEL] key for 3 seconds, all the outgoing calls will be erased.

6
SETTINGMENU
SETTING DATE AND TIME
1. In on-hook state, press [SET] key, LCD displays SET 1 DATE
2. Press [SET] key, the last two digits of year flash.
3. Press [▲]or [▼] key to edit the year, Press [SET] key to confirm, by using the same method to set the
month, date, hour and minute.
Unit will save and quit after 12 seconds.
NOTE
Scope: Month: 1-12 Date: 1-31 Hour:00-23 Minute:00-59
SETTING LOCAL AREA CODE
1. At on-hook state, press [SET] key and then press [▲]key, LCD will display SET 2 CODE
2. Press [SET] key again, LCD displays CODE- - - - -
3. Press [▲]or [▼] key to set the first digit of local area code;
4. Press [SET] key to confirm and enter the second digit setting, by using the same method to set the last 4
digits.
5. Unit will save and quit after 12 seconds.
NOTE: If the local area code only 4 digits, the last digit can be left as “-”.
After set the local area code, unit will auto-filter the area code if the incoming call number with the first several
bits as same as the local area code.
SETTING PABX CODE
1. At on hook state, press [SET] key
2. Press [▲]key twice, LCD displays SET 3 PCODE.
3. Press [SET] to confirm, LCD displays PCODE--
4. The first “-“ flashes and indicates to set the first code.
5. Press [▲]or [▼] key to set the first code, Press [SET] key to confirm to enter the next one.
6. Unit will save and quit after 12 seconds.
NOTE
If only one digit of PABX code, left the second digit as “-“.
If set PABX code, when dialing back incoming call, and if the incoming number is more than 6 digits, unit will
auto-add PABX ahead the number and pause 1 second.
SETTING AUTO IP (this function is invalid)
SETTING DIALING MODE
1 At on hook state, press [SET] key
2 Press [▲]key four times, LCD displays SET 5 P-T
3 Press [SET] to confirm, LCD displays TONE
4 Press [▲]or [▼]key to select PULSE or TONE
5 Press [SET] to confirm.

7
6 Unit will save and quit after 12 seconds.
CALL TRANSFER FUNCTION
To transfer a call during a conversation to another phone number, press Rkey and dial the desired destination
number. When you hear tone signal return the handset to the base to finish the call transfer.
HOLD MUSIC FUNCTION
When talking over handset, press [HOLD] key to enter the hold mode and the hold music is sent out. In hold
mode:
Press [HOLD] key to release hold mode and continue to talk over handset.
SETTINGRINGINGVOLUME
There are two levels of ringing volume High or Low for selection. Slide the RING switch to HI or LO for
selection.
SETTINGTHELCDCONTRAST
In off-hook state, press [BRI] key continually to adjust the LCD contrast, total 5 levels.
LCDBACKLIGHTFUNCTION
The backlight is turned on when receiving an incoming call, dialing, pressing any key or in MUSIC HOLD mode.
It will fade off if the telephone is left idle for 6 seconds.
Note: If batteries are not loaded, then no LCD backlight function.
WALLMOUNTABLE
The phone can be used for desktop, and it can also be used as wall-mounted.
When use it as wall-mounted, please take out the handset tab from base bottom using a plier and then insert it
into the socket under hook switch. Now the handset can’t drop down from the base when the phone is
mounted on wall.
NOTES
Please unplug telephone line when install or replace batteries.
MAINTENANCE
The unit must be placed in a dry and clean place to avoid the damage of the inner parts.
Use a damp cloth for cleaning. Do not use liquid cleaners or aerosol cleaners.
If the unit has troubleshooting, do not disassemble this product. Please send it to your local customer service
center or contact after service center of our company.

8
TROUBLESHOOTING
? No voice
+ Check if the handset is on the phone or line is broken.
? Receive only
+ Check if P/T switch is properly set (Set the switch to proper position.)
? Battery rust or leak
+ Replace the batteries.
? Noise
+ Check if the circuit is broken (Change the circuit)
+ Check if the connector is moist or rust (Change the connector)
? Ring once then disconnect when receive a call. Dialing function is available
+ Check if connector is in a moist environment.
Check if too many extensions are used together or the quality of extension is not good enough (Chang the
bad extension)
? LCD becomes dim
+ Check if LCD contrast is properly set or battery is in low-battery state (Adjust LCD contrast, if the LCD is
still dim, replace the battery.)
? Most of the functions failed
+ Check if the battery is in low-battery state (Change the battery.)
Battery is in normal state (Remove the battery, Unplug the lines and reinstall after 10 minutes)
DECLARATION OF CONFORMITY
Flamagas, S.A. declares telephone DTC-150 complies with the essential protective
requirements and objectives of:
• EC RE TTE Directive 99/5/EC
To check the entirely declaration of conformity of this model, visit www.electronicaflamagas.com.
WARRANTY
This device has 2 years warranty from the buying date against all manufactured defective
problems. Batteries are not related to this warranty..
The non-fulfilment of the instructions or cautions use in this manual implies automatically a
cancellation of the warranty.
It is necessary to show the buying invoice to validate this warranty.
Exclusive importer Flamagas S.A., www.electronicaflamagas.com

1
MANUAL DO UTILIZADOR
MODELO: DTC-150

2
INTRODUÇÃO
Muito obrigado por adquirir o nosso novíssimo telefone com identificação da chamada. Este manual foi
concebido para ajudá-lo a familiarizar-se com este telefone. Para tirar o máximo partido do seu novo telefone,
sugerimos que leia atentamente este Manual de Instruções antes de o utilizar.
INSTRUÇÕES DE SEGURANÇA
Quando utilizar o seu equipamento telefónico, deverá respeitar sempre as seguintes precauções básicas de
segurança, a fim de minimizar o risco de incêndio, choque eléctrico ou de produção de lesões:
1. Leia e compreenda todas as instruções
2. Respeite todas as advertências e instruções.
3. Desligue o aparelho da tomada antes de o limpar. Não utilize produtos de limpeza líquidos ou com aerossóis.
Limpe com um pano húmido.
4. Não coloque este aparelho num carrinho, num suporte ou numa mesa instáveis, pois poderá cair e
danificar-se.
5. Não sobrecarregue as tomadas e extensões, já que daí poderá resultar risco de incêndio ou choque
eléctrico.
6. Nunca introduza qualquer tipo de objectos neste aparelho, através das ranhuras da caixa, pois poderá atingir
zonas perigosas com tensão ou provocar um curto-circuito nos componentes, daí podendo resultar risco de
incêndio ou choque eléctrico. Nunca derrame nenhum tipo de líquido sobre o produto.
7. Evite utilizar, deslocar ou desligar esta unidade durante uma tempestade, pois poderá existir um risco remoto
de choque eléctrico causado pela trovoada.
8. A unidade não deve ser aberta ou reparada por pessoas não autorizadas, sob pena de anulação da garantia;
em caso de avaria, envie o aparelho para o centro de assistência para reparação.
CARACTERÍSTICAS
¾Compatível com FSK/DTMF, ajustamento automático a FSK em tempo real
¾Regista 38 chamadas recebidas e 5 chamadas efectuadas que podem ser consultadas, devolvidas e
apagadas
¾Definição de códigos de 2 dígitos de ligação à central telefónica
¾Definição de indicativos locais de 5 dígitos; filtro automático do indicativo local
¾Visor LCD com 5 níveis de contraste
¾Colocação em espera com música
¾Pode ser seleccionado o modo de marcação por impulsos e ou por tons
¾Selecção de volume HI/LO (alto/baixo) do toque de chamada
¾Função de remarcação
¾Função de luz de fundo do visor LCD
¾Indicador LED do toque de chamada
¾Telefone de secretária ou de fixação na parede

3
LOCALIZAÇÃODASTECLAS
Table of contents
Languages:
Other Daewoo Telephone manuals

Daewoo
Daewoo DTD 5000 User manual

Daewoo
Daewoo DTC-370 User manual

Daewoo
Daewoo DTD-7000 User manual

Daewoo
Daewoo Sky link S42 User manual

Daewoo
Daewoo DTD-1100 User manual

Daewoo
Daewoo DTC-400 User manual

Daewoo
Daewoo DTC-215 User manual

Daewoo
Daewoo DTC-410 User manual

Daewoo
Daewoo DTC-115 User manual

Daewoo
Daewoo DTC-700 User manual