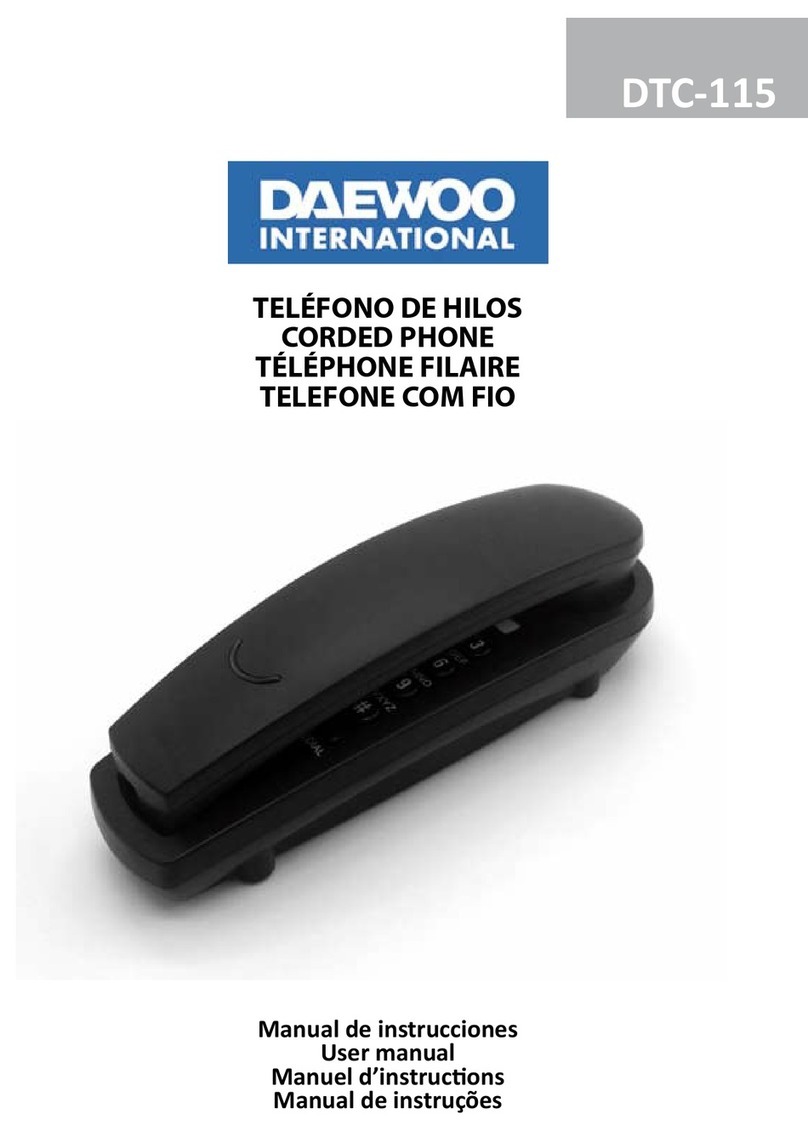
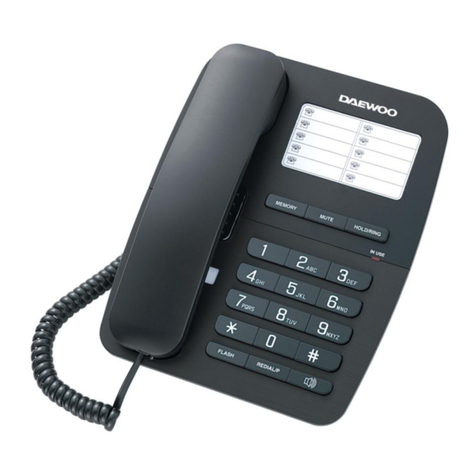
Daewoo DTC-400 User manual

MANUAL DE INSTRUCCIONES
DTC-400
TELÉFONO DE HILOS

ESP
2
INTRODUCCIÓN
Gracias por adquirir nuestro nuevo teléfono con función de identicación de
llamadas. En este manual encontrará información que le ayudará a familiarizarse con
el teléfono.
Para obtener un rendimiento óptimo del teléfono, le recomendamos que lea este
manual de instrucciones atentamente antes de utilizar el teléfono por primera vez.
INSTRUCCIONES DE SEGURIDAD
Cuando utilice este teléfono, asegúrese de tomar siempre las precauciones de
seguridad básicas que se describen a continuación para evitar el riesgo de incendios,
descargas eléctricas y daños a las personas.
1. Lea atentamente y cumpla todas las advertencias e instrucciones.
2. Desenchufe el teléfono de la toma de corriente de la pared antes de limpiarlo. No
utilice productos de limpieza líquidos ni aerosoles. Límpielo con un trapo húmedo.
3. No coloque el teléfono encima de supercies inestables ya que podría caer y sufrir
daños irreparables.
4. No sobrecargue las tomas de corriente ni los alargos ya que podría provocar un
incendio o una descarga eléctrica.
5. No introduzca objetos extraños de ningún tipo dentro del dispositivo a través
de las ranuras de la cubierta ya que podrían tocar puntos de voltaje peligrosos o
cortocircuitar componentes, lo que podría ocasionar un incendio o una descarga
eléctrica. No derrame líquidos de ningún tipo encima del teléfono.
6. No mueva ni desconecte el teléfono durante tormentas con aparato eléctrico ya
que existe el riesgo de sufrir una descarga eléctrica.
7. Si el teléfono presenta problemas, envíelo al servicio de asistencia técnica. No
intente repararlo usted mismo.
8. Siempre use baterías nuevas del tipo y tamaño especicados. Quite las baterías
viejas o descargadas y deseche de acuerdo con sus regulaciones locales.
CARACTERÍSTICAS
• FSK/DTMF/ETSI compatible con detección automática
• Pantalla LCD de 12 dígitos con calendario
• Memorias para 99 números entrantes y 18 números salientes
• 16 tipos de tonos de llamada para seleccionar
• 3 tipos de melodías de espera para seleccionar
• Función de no molestar
• Función de transferencia de llamadas
• Función de llamada codicada para conexión automática del auricular
• Función de prellamada y edición
• Función de rellamada y rellamada automática
• Función de bloqueo de 3 posiciones y 5 alarmas
• 16 niveles de contraste para la pantalla LCD
• Conguración del código PABX
• Compatibilidad con el modo de marcación por tonos o pulsos
• 3 niveles de volumen para el modo de manos libres
• 8 niveles de selección del volumen del timbre
• Función de retroiluminación de la pantalla LCD

ESP
3
• Tecnología a prueba de descargas eléctricas
• Función de marcación y escucha en modo de manos libres
• Indicador LED de uso
• Función baby call (llamada de emergencia para niños)
DESCRIPCIÓN DE LA UBICACIÓN DE LOS COMPONENTES
1 Pantalla LCD
2 Melodía
3 Alarma
4 Arriba
5 Abajo
6 Num. Salliente
7 Teclado Numérico
8 Manos Libres
9 Rellamada Automática
10 En espera
11 Configurar/Confirmar
12 Eliminar
13 Transferencia de Llamadas
14 Rellamada
15 Bloqueo
16 Ext
17 Línea

ESP
4
INSTALACIÓN
1. El dispositivo funciona con 3 pilas de tamaño AA de 1,5 V. Abra la cubierta del
compartimiento para pilas e introduzca las pilas según la polaridad indicada y, a
continuación, cierre la cubierta (se recomienda utilizar pilas alcalinas). Después de
introducir las pilas, debería aparecer la hora en la pantalla LCD del teléfono.
2. Introduzca un extremo del cable telefónico en la toma de línea de la base del
teléfono y el otro extremo en la toma telefónica de la pared.
3. Conecte el auricular y la base con un cable en espiral.
4. Seleccione el modo de marcación correcto según las indicaciones de su compañía
telefónica.
5. Solicite el servicio de identicación de llamadas a su compañía telefónica.
RECEPCIÓN DE UNA LLAMADA
1. Al recibir una llamada, el teléfono suena y la pantalla LCD muestra el número de
secuencia de la llamada, la fecha, la hora, el número de teléfono entrante y el icono
NEW.
2. Si vuelve a recibir una llamada del mismo número y la llamada anterior no se ha
visualizado, la pantalla LCD muestra el icono REP. Cuando la memoria de llamadas
entrantes está llena, el último número entrante sustituye al más antiguo de la
memoria.
NOTA: Para que el teléfono muestre el número entrante y otra información en la pantalla,
debe solicitar el servicio de identicación de llamadas a su compañía telefónica.
Desde el auricular
1. Descuelgue el auricular y hable con la otra persona.
2. Cuando haya terminado, vuelva a colocar el auricular en la base.
Uso del altavoz
1. Cuando esté hablando por el auricular, pulse el botón SPEAKER y vuelva a colocar
el auricular en la base.
2. Cuando haya terminado, pulse el botón SPEAKER otra vez.
Desde el altavoz
1. Cuando suene el teléfono, pulse el botón SPEAKER y hable con la persona que
llama. Para que la otra persona le pueda oír claramente, hable a una distancia máxima
de 32 cm del altavoz.
2. Cuando haya terminado, pulse el botón SPEAKER otra vez.
REALIZACIÓN DE UNA LLAMADA
Desde el auricular
1. Descuelgue el auricular.
2. Cuando oiga la señal de línea, marque el número que desee.
3. El teléfono empezará a medir el tiempo de la conversación al cabo de 6 segundos.
4. Cuando haya terminado, vuelva a colocar el auricular en la base.

ESP
5
Desde el altavoz
1. Pulse el botón SPEAKER.
2. Cuando oiga la señal de línea, marque el número que desee.
3. El teléfono empezará a medir el tiempo de la conversación al cabo de 6 segundos.
4. Cuando haya terminado, pulse el botón SPEAKER otra vez.
Función de prellamada
1. Con el auricular en la base, marque el número que desee.
2. Si se equivoca de número, utilice el botón DEL para modicarlo.
3. Pulse el botón SPEAKER o descuelgue el auricular y el número se marcará
automáticamente.
Rellamada
1. Descuelgue el auricular o pulse el botón SPEAKER.
2. Pulse el botón REDIAL para volver a llamar al último número marcado.
Rellamada automática
1. Pulse el botón SPEAKER, marque un número y, a continuación, oirá una señal de
línea.
2.Pulseel botónARD yelúltimonúmeromarcadosevolveráamarcarautomáticamente
cada 9 o 10 segundos hasta que se oiga la señal de línea.
3. El teléfono volverá a marcar el mismo número automáticamente 32 veces. Al
recibir una llamada entrante cuando se utiliza la función de rellamada automática,
descuelgue el auricular o pulse el botón SPEAKER para responder. La función de
rellamada automática se desactivará
VISUALIZACIÓN, RELLAMADA Y BORRADO DE NÚMEROS ENTRANTES
Visualización
Con el auricular colgado, pulse el botón UP o DOWN para desplazarse y visualizar los
números.
Borrado
Cuando aparezca el número que desea borrar, pulse el botón DEL para borrarlo.
Mantenga pulsado el botón DEL durante 3 segundos para borrar todos los números
entrantes.
Rellamada
1. Vaya al número al que desea llamar, pulse el botón SPEAKER o descuelgue el
auricular y el número se marcará.
2. Pulse el botón REDIAL y en la pantalla LCD aparecerá PICK UP, pulse el botón
SPEAKER o descuelgue el auricular y el número se marcará.
3. Mantenga pulsado el botón REDIAL hasta que PICK UPP parpadee y, a continuación,
pulse el botón SPEAKER o descuelgue el auricular y el número se marcará. Si se
establece el código de larga distancia, el teléfono añadirá este código delante del
número automáticamente y, a continuación, volverá a marcarlo. Si se establece

ESP
6
el código PABX, el teléfono detectará y añadirá el código delante del número
automáticamente cuando vuelva a marcar el número. Primero marcará el código PABX
y, tras una pausa de 2 segundos, marcará el número.
CÓMO EVITAR EL AJUSTE AUTOMÁTICO DE LA HORA DE LOS MENSAJES FSK EN
TIEMPO REAL (OPCIONAL SEGÚN OPERADOR TELEFÓNICO)
Al recibir un mensaje FSK, el teléfono ajusta automáticamente la hora en tiempo real.
Puede evitar que la hora se ajuste automáticamente de la forma siguiente:
1. Con el auricular colgado, mantenga pulsado el botón ALARM durante 3 segundos
hasta que la pantalla LCD muestre DATE OFF.
2. Vuelva a pulsar el botón ALARM hasta que la pantalla LCD muestre DATE ON.
3. Pulse el botón SET para salir.
NOTA: DATE OFF no permite ajustar automáticamente la hora en tiempo real.
VISUALIZACIÓN, RELLAMADA Y BORRADO DE NÚMEROS SALIENTES
Visualización
Con el auricular colgado, pulse el botón OUT y, a continuación, vuelva a pulsar el
botón OUT para visualizar los números salientes uno por uno.
Rellamada
1. Con el auricular colgado, pulse el botón OUT para visualizar el número que desee
y, a continuación, pulse el botón SPEAKER o descuelgue el auricular y el número se
marcará.
2. Pulse el botón REDIAL y en la pantalla LCD aparecerá PICK UP, pulse el botón
SPEAKER o descuelgue el auricular y el número se marcará.
Borrado
1. Con el auricular colgado, pulse el botón OUT para desplazarse hasta el número que
desea borrar.
2. Pulse el botón DEL para borrarlo.
3. Mantenga pulsado el botón DEL durante 3 segundos. De esta manera, se borrarán
todos los números.
MENÚ DE CONFIGURACIÓN
Conguración de la fecha y la hora
1. Con el auricular colgado, pulse el botón SET y el valor del año parpadeará.
2. Pulse el botón UP o DOWN para modicar el año.
3. Pulse el botón SET para conrmar el valor introducido y pasar al siguiente parámetro
de mes.
4. Repita los mismos pasos para congurar el mes.
5. Repita los pasos anteriores para congurar la fecha y la hora.
Conguración del código de área local y el código de larga distancia
1. Tras congurar la fecha y la hora, pulse el botón SET. En la pantalla LCD aparecerá

ESP
7
CODE 0----- y el código de larga distancia “0” parpadeará.
2. Pulse el botón UP o DOWN para cambiar el código del 0 al 9 o para dejarlo en
blanco.
3. Pulse el botón SET para conrmar el valor introducido y pasar al siguiente
parámetro de código.
4. Repita los pasos anteriores para congurar el resto de códigos.
Ajuste del contraste de la pantalla LCD
1. Tras congurar el código de área local, pulse el botón SET y en la pantalla LCD
aparecerá LCD 08.
2. Pulse el botón UP o DOWN para ajustar el contraste de la pantalla LCD. Se pueden
seleccionar hasta un total de 16 niveles.
3. Pulse el botón SET para conrmar la selección y salir.
4. Con el auricular colgado, pulse el botón Rpara acceder directamente al parámetro
de contraste de la pantalla LCD y, a continuación, pulse el botón FLASH varias veces
para ajustar el contraste de la pantalla LCD.
Conguración de la alarma
1. Con el auricular colgado, pulse el botón ALARM una vez y en la pantalla LCD
aparecerá 12-00 AL1.
2. Pulse el botón UP o DOWN para seleccionar ON (Activar) u OFF (Desactivar).
Cuando la alarma se haya activado, aparecerá el icono “ALM” en la pantalla LCD. 3.
Pulse el botón SET y el valor“12” empezará a parpadear.
4. Pulse el botón UP o DOWN para congurar la hora de la alarma y pulse SET para
conrmar y acceder al parámetro de conguración de los minutos.
5. Pulse el botón UP o DOWN para congurar los minutos de la alarma y pulse SET
para conrmar y pasar al siguiente parámetro de grupo de alarma.
6. Repita los pasos anteriores para congurar alarmas adicionales.
NOTA: Los primeros 3 grupos de alarma se repetirán periódicamente cada día mientras
que los 2 últimos grupos de alarma se activarán sólo una vez.
CONFIGURACIÓN DEL CÓDIGO SECRETOY DEL MONITOR REMOTO
Conguración
1. Con el auricular colgado, mantenga pulsado el botón RING durante 3 segundos
hasta que la pantalla LCD muestre Pin ----.
2. Introduzca un PIN de 4 dígitos con los botones numéricos.
3. Pulse DEL para modicar el código secreto y pulse SET para conrmarlo.
4. Cuando el último dígito del código secreto sea #, el teléfono activará la función
de monitor remoto.
5. Desactive el tono de llamada. Consulte la sección “CONFIGURACIÓN DEL TONO
DE LLAMADA”.
Uso
1. Código secreto: Cuando una persona llame a este teléfono, oirá el tono de
llamada habitual (cuando reciba la señal de línea) tres o cuatro veces. Sin embargo,
el teléfono no sonará. La persona que llama oirá un sonido “di” corto, que signica
que la persona que llama debe introducir el código secreto. Si introduce el código

ESP
8
correcto, el teléfono empezará a sonar. Pulse el botón SPEAKER o descuelgue el
auricular para hablar con la persona que llama.
2. Monitor remoto: Si el último dígito del código secreto es #, el teléfono pasará
a modo de manos libres automáticamente cuando la persona que llama haya
introducido el código secreto correcto.
3. Si la persona que llama introduce un código incorrecto, tendrá que volver a
llamar e introducir el código secreto correcto.
NOTA: Esta función resulta útil sólo cuando el timbre del teléfono está desactivado. La
persona que llama debe conocer el código secreto para poder llamar.
R TRANSFERENCIA DE LLAMADAS
Para transferir una llamada en curso a otro número de teléfono, marque la tecla Ry
a continuación marque el número de destino. Espero tono y coloque el auricular en
la base para nalizar la transferencia de la llamada.
FUNCION BABYCALL (LLAMADA DE EMERGENCIA PARA NIÑOS)
Con el auricular colgado, mantenga pulsado el botón REDIAL durante 3 segundos
para acceder a la función de llamada de emergencia (BABYCALL). En la pantalla LCD
aparecerá BABYCALL OFF, pulse el botón REDIAL para activarla y luego presione
SET para conrmar. En la pantalla aparecerá NO CODE (o el número de emergencia
prejado, presione el botón DEL para cancelarlo/borrarlo), inserte el número de
emergencia (babycall) usando el teclado numérico y presione el botón SET para
conrmarlo. Después de congurar la llamada de emergencia (babycall) presione
cualquier botón excepto el botón REDIAL o descuelgue el auricular o presione el
botón de manos libres y el terminal marcará el número de emergencia 32 veces
automáticamente.
Cuando la función de llamada de emergencia o baby call está activada, usted puede
seguir contestando las llamadas entrantes descolgando el auricular.
CONFIGURACIÓN DEL TONO DE LLAMADA Y AJUSTE DEL VOLUMEN DE
LLAMADA
Existen 16 tipos de tonos de llamada para seleccionar:
1. Con el auricular colgado, pulse el botón RING y en la pantalla LCD aparecerá ring
02 db8.
2. Pulse RING para seleccionar el tono que desee o para desactivarlo.
3. Pulse el botón UP o DOWN para seleccionar el volumen del tono.
4. Pulse SET para conrmar la selección y salir.
NOTA: El nivel del volumen puede ir de 1 db (mínimo) a 8 db (máximo). Cuando
desactive el tono, pasará a modo de “no molestar”. Cuando el teléfono se encuentre en
este modo, no sonará cuando reciba una llamada entrante.
AJUSTE DEL VOLUMEN EN MODO DE MANOS LIBRES
En modo de manos libres, pulse el botón UP o DOWN para ajustar el volumen de
ESP
9
manos libres. La pantalla mostrará un total de 3 niveles de volumen.
SELECCIÓN DEL MODO DE MARCACIÓN POR TONOS O PULSOS
1. Con el auricular colgado, mantenga pulsado el botón * durante 3 segundos hasta
que la pantalla LCD muestre Ppara establecer la marcación por pulsos.
2. Pulse el botón SPEAKER dos veces y mantenga pulsado el botón * durante 3
segundos más hasta que la pantalla LCD muestre Tpara establecer la marcación
por tonos.
CONFIGURACIÓN DEL CÓDIGO PABX
1. Con el auricular colgado, mantenga pulsado el botón DEL durante 3 segundos
para congurar el código PABX hasta que la pantalla LCD muestre SET PCODE - y el
campo“-” parpadee.
2. Pulse el botón UP o DOWN para congurar el código PABX del 0 al 9 o para dejarlo
en blanco.
3. Si decide dejarlo en blanco“-”, no se congurará ningún código PABX.
4. Pulse el botón SET para conrmar la selección y salir.
MELODÍA DE ESPERA
Selección de melodía de espera
Existen 3 tipos de melodía de espera para seleccionar.
1. Con el auricular descolgado o en modo de manos libres, pulse el botón HOLD.
2. Pulse el botón OUT para seleccionar la melodía de espera que desee. Se
reproducirá la melodía que ha seleccionado.
3. Pulse el botón UP o DOWN para seleccionar uno de los 4 niveles de volumen de
la melodía de espera.
4. Pulse el botón HOLD para salir.
Cuando hable por el auricular, pulse el botón HOLD para activar el modo de
espera e iniciar la reproducción de la melodía de espera.
1. Pulse el botón HOLD para desactivar el modo de espera y continuar hablando
por el auricular.
2. Si cuelga el auricular, accederá al modo de espera en manos libres.
Cuando hable en modo de manos libres, pulse el botón HOLD para activar el
modo de espera e iniciar la reproducción de la melodía de espera.
1. Descuelgue el auricular para hablar por el auricular.
2. Pulse el botón SPEAKER para salir del modo de espera y hablar en modo de
manos libres.
DETECCIÓN DE BATERÍA BAJA
Cuando el voltaje es inferior a 3,9 V, aparece el icono en la pantalla LCD para
recordar al usuario que debe cambiar las pilas.

ESP
10
FUNCIÓN DE RETROILUMINACIÓN DE LA PANTALLA LCD
La luz de la pantalla se enciende al recibir una llamada entrante, marcar un número,
pulsar cualquier botón o en modo de melodía de espera. Se apagará si el teléfono
se deja en reposo durante 10 segundos.
NOTA: Si las pilas no están cargadas, la pantalla LCD no se iluminará.
FUNCIÓN DE PAUSA
Si marca un número desde una centralita PABX, pulse el número PABX (normalmente
“0”o “9”), el botón ALARM y el número al que desea llamar. Cuando vuelva a llamar,
no tendrá que volver a marcar el número PABX ni pulsar el botón ALARM; sólo
tendrá que pulsar el botón REDIAL.
BLOQUEO
Gire la llave hasta la posición de color amarillo para bloquear todos los números
salientes. Gire la llave hasta la posición de color verde para bloquear todos los
números que empiecen por “0”. Gire la llave hasta la posición de color rojo para
poder marcar todos los números.
NOTAS
Desenchufe el cable telefónico cuando vaya a colocar o cambiar las pilas.
SOLUCIÓN DE PROBLEMAS
- No hay sonido
Compruebe que el auricular esté conectado al teléfono y que la línea no esté
cortada.
- Sólo se pueden recibir llamadas
Compruebe que el modo de marcación por tonos o pulsos esté congurado
correctamente. Compruebe si el dispositivo está bloqueado. Si lo está, utilice la llave
para desbloquearlo.
- Las pilas se han oxidado o derramado
Elimine el óxido o limpie el derrame.
- Se oye ruido
Compruebe si hay un cortocircuito. Si es necesario, cambie el circuito.
Compruebe si el conector está húmedo u oxidado. Si lo está, cambie el conector.
- Suena una vez pero se desconecta al recibir una llamada. La función de
marcación sigue estando disponible.
Compruebe si el conector se encuentra en un entorno húmedo.
Compruebe si se utilizan demasiados alargos a la vez o si el alargo no se encuentra
en buen estado. Cambie el alargo defectuoso.
- La pantalla LCD está oscura
Compruebe que el contraste de la pantalla LCD esté congurado correctamente
y que las pilas no se hayan agotado. Ajuste el contraste de la pantalla LCD. Si la
pantalla sigue estando oscura, sustituya las pilas.

ESP
11
- No suena
Compruebe si el timbre está desactivado. Si lo está, actívelo.
- La mayoría de funciones fallan
Compruebe que las pilas estén sucientemente cargadas. Si es necesario, cambie
las pilas.
Si las pilas están bien, extráigalas y desconecte todos los cables. Vuelva a colocar las
pilas y conectar los cables al cabo de 10 minutos.
NOTA: Debido al desarrollo constante de nuestros productos, todas las funciones y
especicaciones están sujetas a cambios sin previo aviso.
DECLARACIÓN DE CONFORMIDAD
Por medio de la presente Flamagas S.A. declara que el producto DTC-400 cumple los
requisitos y objetivos de protección básicos de la directiva 1999/5/CE sobre equipos
radioelectricos y equipos terminales de telecomunicacion.
Para obtener una copia completa de la declaración de conformidad visite la
dirección:
www.electronicaamagas.com
GARANTÍA
Este aparato tiene una garantía de 2 años desde la fecha de adquisición contra todo
fallo de fabricación. El incumplimiento de las instrucciones o precauciones de uso
contenidas en este manual implican la pérdida automática de la garantía.
Para que esta garantía tenga validez, es necesario presentar el ticket o factura de
compra original. Importador exclusivo Flamagas S.A.
SERVICIO TÉCNICO
Para cualquier tipo de consulta sobre este producto o reparaciones de producto en
garantía no dude en ponerse en contacto con nuestro servicio técnico.
TECNOLEC, S.L.
Tel 93 340 87 53
email: [email protected]
(Para productos adquiridos en España)

USER MANUAL
DTC-400
CORDED PHONE

ENG
13
INTRODUCTION
hank you for purchasing our newest Caller ID phone. This manual is designed to
familiarize you with this phone.
To get the maximum use from your new phone, we suggest that you read this
instruction manual carefully before using.
SAFETY INSTRUCTION
When using your telephone equipment, the following basic safety precautions
should always be followed to reduce the risk of re, electric shock and injury to
persons:
1. Read, understand and follow all warnings and instructions
2. Unplug the product from the wall outlet before cleaning. Do not use liquid
cleaners or aerosol cleaners. Use a soft damp cloth for cleaning.
3. Do not place this product on unstable surfaces. The product may drop, causing
serious damage to the product.
4. Do not overload wall outlets and extension cords as this can result in re or
electric shock.
5. Never push foreign objects of any kind into this product through cabinet slots as
they may aect dangerous voltage points or short circuit parts that could result in
re or electric shock. Never spill liquid of any kind on the product.
6. Avoid moving or disconnecting this unit during a heavy storm, as there may be a
remote risk of electric shock from lightning and thunder.
7. Unprofessional person cannot open telephone even meets troubles, please send
to service center.
FEATURES
• FSK/DTMF/ETSI compatible with auto-detection.
• 12-digit LCD display with calendar
• 99 incoming, 18 outgoing number memories
• 16 kinds of ringing tone for selection
• 3 kinds of hold music for selection
• Do Not Disturb function
• Secret code function in Do Not Disturb state to avoid missing important calls
• Pre-dial and edit function
• Redial and auto-redial function
• 3-step lock function and 5 sets of alarm clock
• 16 levels of LCD contrast
• Set PABX code
• Pulse/Tone dialing mode compatible
• 3 levels of hands free volume for selection
• Ringing volume 8 steps selection
• LCD Backlight function
• Thunder-proof design
• Handsfree dialing and speaking function
• In use LED indicator
• Baby call function

ENG
14
LOCATION DESCRIPTION
1. LCD
2. Ring
3. Alarm
4. Up
5. Down
6. Out
7. Numerical key
8. Speaker
9 . ARD
10. Hold
11. Set
12. Del
13. R
14. Redial
15. Lock
16. Ext
17. Line

ENG
15
GETTING STARTED
1. The unit requires 3 X 1.5V AA batteries. Open the battery compartment cover and
insert the batteries in the right polarity, then close the cover (Proposal using alkali
battery). There should be time display on the liquid crystal screen after the batteries
are inserted.
2. Insert one end of the line cord to the line jack of the base and the other end to
the telephone wall outlet.
3. Connect the handset and the unit with coiled line.
4. Setting the dialing mode to correct mode according to the directions from your
local telecom.
5. Apply for the caller ID from your local telecom oce.
RECEIVING A CALL
1. When a call comes, the telephone rings, and LCD displays the seq. number of the
call, the date, time, incoming number and the NEW icon.
2. If the same number is received again, and the previous call has not been reviewed,
the LCD displays REP icon. When the incoming memory is full, the latest incoming
number replaces the oldest number in the memory
NOTE: For the phone to display incoming number and other information, you must
have an active Caller ID subscription with your local telephone exchange company
From handset
1. Pick up the handset and talk to the other party.
2. When nished, return the handset to the base.
From handset
1. When using the handset, press SPEAKER key and return the handset to the base.
2. When nished, press SPEAKER key again.
From speakerphone
1. When the telephone rings, press SPEAKER key and talk to the caller. For the other
party to hear your voice clearly, speak into the speaker from a distance of 32 cm or
less.
2. When nished, press SPEAKER key again.
MAKING A CALL
From handset
1. Pick up the handset.
2. When you hear the dial tone, dial the desired number.
3. The unit will start to time the conversation after 6 seconds.
4. When nished, return the handset to the base.
From Speakerphone
1. Press SPEAKER key.

ENG
16
2. When you hear the dial tone, dial the desired number.
3. The unit will start to time the conversation after 6 seconds.
4. When nished, press SPEAKER key again.
Pre-dialing function
1. When the handset is on the base, dial the desired number.
2. If there are mistakes, use the DEL key to edit.
3. Press SPEAKER key or pick up the handset and the number will be dialed
automatically.
Redial
1. Pick up the handset or press SPEAKER key,
2. Press REDIAL key, the last dialed number will be dialed again
Auto-redial (this function just for your selection)
1. Press SPEAKER key, dial a number, and you hear an engaged tone.
2. Press ARD key and the last dialed number will be redialed automatically at every
9-10 seconds until the line is through.
3. The phone will redial the same number automatically for 32 times.
When there is an incoming call while using auto-redial, pick up the handset or press
SPEAKER key to answer the call. The auto redial function will be terminated.
REVIEWING, CALLING BACK AND DELETING INCOMING NUMBERS
Reviewing
In on-hook state, press UP or DOWN key to scroll and review the numbers.
Deleting
When the desired number is shown, press DEL key, the number is deleted. Press and
hold DEL key for 3 seconds, all the incoming numbers are deleted.
Calling back
1. Scroll to the desired number, press SPEAKER key or pick up the handset, and the
number is dialed out, or
2. Press REDIAL key, LCD displays PICK UP, press SPEAKER key or pick up the
handset, the number is dialed out. Or
3. Press and hold REDIAL key till PICK UP ashing, press SPEAKER key or pick up the
handset, the number is dialed out. If the long distance code is set, the telephone will
add the long distance code ahead the number automatically and then dial back. If
the PABX code is set, the telephone will detect and add the code before the number
automatically when dialing back the number. It will dial the PABX code rst and
then after a 2 second pause and then dial the number.
REVENTING FSK MESSAGE TO AUTO-ADJUST REAL TIME
When a FSK message comes, the unit adjusts real time automatically, you can
prevent real time auto adjustment as follows:

ENG
17
1. In on-hook state, press and hold ALARM key for 3 seconds, LCD displays DATE
OFF,
2. Press ALARM key again, LCD displays DATE ON,
3. Press SET key to quit.
NOTE: DATE OFF: Does not allow real time auto adjustment
EVIEWING, CALLING BACK AND DELETING OUTGOING NUMBER
Reviewing
In on-hook state, press OUT key, then repeat to press OUT to review outgoing
numbers one by one.
Calling back
1. In on-hook state, press OUT key to review the desired number, then press
SPEAKER key or pick up the handset, and the number is dialed out, or
2. Press REDIAL key, LCD displays PICK UP, press SPEAKER key or pick up the
handset, the number is dialed out.
Deleting
1. In on-hook state, press OUT key to scroll to the desired number.
2. Press DEL key and the number is deleted, or
3. Press and hold DEL key for 3 seconds. All numbers will be deleted.
SETTING MENU
Setting date & time
1. In on-hook state, press SET key, the value for the year ashes.
2. Press UP or DOWN key to edit the year.
3. Press SET key to conrm and enter the next value month setting.
4. Repeat the year setting step to set the month.
5. Repeat the above steps for date and time setting.
Setting Local Area Code and Long Distance Code
1. After setting up the date and time, press SET key. LCD displays CODE 0----- and
the long distance code “0” ashes,
2. Press UP or DOWN key to edit the ashing code from 0 to 9 or -.
3. Press SET key to conrm and enter the next ashing code setting.
4. Repeat the above steps for the rest code setting.
Adjusting LCD Contrast
1. After setting up the local area code, press SET key, LCD displays LCD 08.
2. Press UP or DOWN key to adjust the LCD contrast, total 16 levels can be selected.
3. Press SET key to conrm and exit.
At on-hook state, press Rkey to enter LCD contrast setting directly, then press Rkey
continuously to adjust the LCD contrast.

ENG
18
Setting Alarm Clock
1. In on-hook state, press ALARM key once, LCD displays 12-00 AL1,
2. Press UP or DOWN key to select ON or OFF. LCD displays “ALM” icon when the
alarm is set to ON.
3. Press SET key, value “12” starts to ash.
4. Press UP or DOWN key to set the alarm hour and press SET key to conrm and
enter alarm minute setting.
5. Press UP or DOWN key to edit alarm minute and press SET key to conrm and go
to next group alarm clock setting.
6. Repeat the above steps to set additional alarms.
NOTE: The rst 3 groups alarm clock will be repeated periodically every day while the
last 2 group alarm clock is eected one time.
SECRET CODE SETTING AND REMOTE MONITOR FUNCTION
Setting
1. In on-hook state, press and hold RING key for 3 seconds, LCD displays Pin ----.
2. Input a 4-digit of PIN using the numeric keys.
3. Press DEL to edit the secret code, press SET to conrm.
4. When the last digit of the secret code is #, the telephone will activate remote
monitor function.
5. Set the ringer to OFF. (Please refer to section “SETTING RINGING TONE”).
Usage
1. Secret code: When caller call this telephone, he/she will hear the usual ringing
tone (when the line gets through) three times or four times. However, the
telephone unit will not ring. The caller will hear a short “di” sound, which means
that the caller need to key in the secret code. Once the caller keys in the correct
code, the telephone unit will ring. Press SPEAKER key or pick up the handset to have
the conversation with the caller.
2. Remote monitor: If the last digit of the secret code is #, after the caller keys in the
correct secret code, the telephone unit will go into handsfree mode automatically.
3. If the caller keys in the wrong code, he/she will have to call again and key in the
correct secret code PIN.
NOTE: This function is useful only when the telephone ringing is set to OFF. The caller
must know the secret code in order to dial through the line.
R CALL TRANSFER FUNCTION
To transfer a call during a conversation to another phone number, press Rkey and
dial the desired destination number. When you here tone signal return the handset
to the base to nish the call transfer.
BABYCALL FUNCTION
At on-hook state, press and hold REDIAL key for 3 seconds to come into baby call
function setting. LCD displays BABYCALL OFF, press REDIAL key to set it ON, press

ENG
19
SET key. LCD displays NO CODE (or the preset baby call number, press DEL key to
cancel), input baby call number using numerical key and press SET key to conrm.
After set baby call function to ON state, press any key except REDIAL key or pick
up handset or press SPEAKER key will dial the baby call number automatically 32
times. When baby call function is ON state, you can still answer the incoming call or
parallel call by handset
NOTE: If you don’t use the function, enter baby call function setting as per above
operation and select BABYCALL OFF, press SET key to conrm.
SETTING RINGING TONE AND ADJUST RINGING VOLUM
There are 16 kinds of ringing tones for selection:
1. In on-hook state, press RING key, LCD displays ring 02 db8.
2. Press RING to select the desired ringing or set ring OFF
3. Press UP or DOWN key to set ringing volume
4. Press SET to conrm and exit.
NOTE: The volume ranges from 1db-8db, with 8db being the loudest. Ring OFF is “Do
Not Disturb” mode. If the phone is set to this mode, the telephone will not ring when
there is an incoming call.
ADJUST HANDSFREE VOLUME
In handsfree mode, press UP or DOWN to adjust the handsfree volume, LCD displays
the volume level and there is a total of 3 levels.
SELECTING PULSE OR TONE DIALING MODE
1. In on-hook state, press and hold * key for 3 seconds, LCD displays P, then dialing
mode is set as Pulse.
2. Press SPEAKER key twice and hold * key for 3 seconds again, LCD displays T, then
dialing mode is set as Tone.
SETTING PABX CODE
1. In on-hook state, press and hold DELkey 3 seconds to set PABX code, LCD displays
SET PCODE - and the “-” ashes.
2. Press UP or DOWN key to set PABX code from 0 to 9 or -.
3. If choose “-”, it means no PABX code has been set.
4. Press SET key to conrm and quit.
HOLD ON MUSIC
Hold music selection
There are 3 kinds of hold music for selection
1. At o-hook or hands free state, press HOLD key
2. Press OUT key to select the desired hold music. It plays the music at same time.
3. Press UP or DOWN key to select the 4 steps volume of hold music.
4. Press HOLD key to quit.

ENG
20
When talking over handset, press HOLD key to enter the hold mode and the hold
music is sent out. In hold mode:
1. Press HOLD key to release hold mode and continue to talk over handset, or
2. Hang up handset, it enters hands-free hold mode.
When talking at hands-free mode, press HOLD key to enter the hold mode and
the hold music is sent out. In hold mode:
1. Pick up handset to talk over handset, or
2. Press SPEAKER key to quit hold mode and talk at hands-free mode.
LOW BATTERY DETECTING
When the voltage is lower than 3.9 v, LCD displays icon to remind the user to
replace the batteries.
LCD BACKLIGHT FUNCTION
The backlight is turned on when receiving an incoming call, dialing, pressing any key
or in MUSIC HOLD mode. It will fade o if the telephone is left idle for 10 seconds.
NOTE: If batteries are not loaded, there will be no LCD backlight function.
PAUSE FUNCTION
If dial a number from PABX extension, press PABX number (normally “0” or “9”) +
ALARM+ desired number. When redial, need not dial PABX number and ALARM key,
just press REDIAL key.
LOCK
Turn the key to yellow point, all numbers are locked except emergency numbers.
Turn the key to green point, all numbers starting with “0” are locked Turn the key to
red point, all numbers are allowed to be dialed out.
NOTES
Please unplug telephone line and power (if any) when installing / replacing
batteries.
TROUBLESHOOTING
- No voice
Check if the handset is on the phone or if the line has terminated.
- Receive only Check if P/T mode is properly set.
Check if the unit is locked (use the key to unlock it)
- Rusty batteries or leakage
Remove the rust or wipe away the leakage.
Table of contents
Languages:
Other Daewoo Telephone manuals

Daewoo
Daewoo DTC-700 User manual

Daewoo
Daewoo DTC-240 User manual

Daewoo
Daewoo DTC-370 User manual

Daewoo
Daewoo DTC-410 User manual

Daewoo
Daewoo Sky link S42 User manual

Daewoo
Daewoo DTC-215 User manual

Daewoo
Daewoo DTD-1100 User manual

Daewoo
Daewoo DTD-7000 User manual

Daewoo
Daewoo DTD 5000 User manual

Daewoo
Daewoo DTC-150 User manual