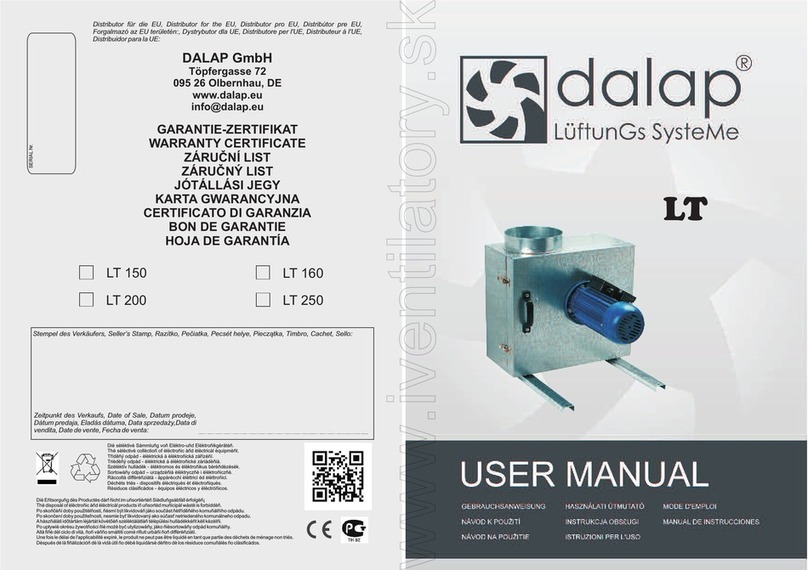
dalap T-FAN User manual

T-FAN
GARANTIE-ZERTIFIKAT
WARRANTY CERTIFICATE
ZÁRUÈNÍ LIST
ZÁRUÈNÝ LIST
JÓTÁLLÁSI JEGY
KARTA GWARANCYJNA
CERTIFICATO DI GARANZIA
BON DE GARANTIE
HOJA DE GARANTÍA
Distributor für die EU Distributor pro EU
Forgalmazó az EU területén:, Dystrybutor dla UE, Distributore per l'UE, Distributeur à l'UE,
Distribuidor para la UE:
DALAP GmbH
Töpfergasse 72
095 26 Olbernhau, DE
www.dalap.eu
info@dalap.eu
, Distributor for the EU, , Distribútor pre EU,
Zeitpunkt des Verkaufs, Date of Sale, Datum prodeje,
Dátum predaja, Eladás dátuma, Data sprzeda¿y,Data di
vendita, Date de vente, Fecha de venta:
Die selektive Sammlung von Elektro-und Elektronikgeräten.
The selective collection of electronic and electrical equipment.
Tøídìný odpad - elektrická a elektronická zaøízení.
Triedený odpad - elektrické a elektronické zariadenia.
Szelektív hulladék - elektromos és elektronikus berendezések.
Sortowany odpad – urz¹dzenia elektryczne i elektroniczne.
Raccolta differenziata - apparecchi elettrici ed elettronici.
Déchets triés - dispositifs électriques et électroniques.
Residuos clasificados - equipos eléctricos y electrónicos.
Die Entsorgung des Productes darf nicht im unsortierten Siedlungsabfall erfolgen!
The disposal of electronic and electrical products in unsorted municipal waste is forbidden.
Po skonèení doby použitelnosti, nesmí být likvidován jako souèást netøídìného komunálního odpadu.
Po skonèení doby použite¾nosti, nesmie by likvidovaný ako súèas netriedeného komunálneho odpadu.
Ahasználati idõtartam lejártát követõen szelektálatlan települési hulladékként kell kezelni.
Po up³ywie okresu ¿ywotnoœci nie mo¿e byæ utylizowany, jako niesortowany odpad komunalny.
Alla fine del ciclo di vita, non vanno smaltiti come rifiuti urbani non differenziati.
Une fois le délai de l'applicabilité expiré, le produit ne peut pas être liquidé en tant que partie des déchets de ménage non triés.
Después de la finalización de la vida útil no debe liquidarse dentro de los residuos comunales no clasificados.
SERIAL Nr.
T-FAN 40


DE
Vor Inbetriebnahme des Gerätes lesen Sie bitte die Bedienungsanleitung, auch wenn Sie mit dem Betrieb solcher
Geräte bereits vertraut sind. Verwenden sie das Gerät nur so, wie es in der Bedienungsanleitung beschrieben wird.
Heben Sie dieAnleitung für den weiteren Gebrauch auf.
Der Tischlüfter T-fan beeindruckt durch sein gelungenes und modernes Design. Der Hochgeschwindigkeitslüfter,
welcher einen höheren Wirkungsgrad bietet als andere Standlüfter, wurde konstruiert, um eine gute Luftzirkulation
im Raum zu gewährleisten.
ZUSAMMENSTELLUNG DES LÜFTERS
Nehmen Sie den Lüfter aus der Verpackung und stellen Sie fest, ob alle Teile, welche im Kapitel
BESCHREIBUNG DES VENTILATORS erwähnt werden, vorhanden sind.
Fügen Sie die äußere Stange (O13) senkrecht zum Ständer (O14). Befestigen Sie die Schraube (014) am
unteren Teil des Ständers (O15) damit die Stange an den Ständer befestigt werden kann. Mit Hilfe der
Sperrschraube (O16) befestigen Sie die Schraube (O15).
Auf dem Halter des Motors (O9) ist eine Schraube (O11) zur Regelung des Neigungsgrades des Lüfters.
Diesen muss man vor der Verbindung des Motors (O9) mit der inneren Stange (O13) mit Hilfe der Verbinder-
Schraub entfernen. Den Regler (O11) stecken sie danach wieder auf. Die Verbindung des Halters und des
Rohres muss fest sein.
Aus dem Frontteil des Motors entfernen Sie die Fixierungsschrauben, danach befestigen Sie das hintere
Schutzgitter (O6) am Motor (O9) und ziehen die Schrauben (O5) nach. Den hinteren Teil des Schutzgitters
(O6) stellen Sie in die richtige Position – mit dem Griff nach oben.
Auf dem Rahmen des Frontschutzgitters (O1) befinden sich Schutzklammern, Haken und eine Öffnung.
Lösen Sie die Klammern wobei der Haken bei der Installation oben sein sollte. Legen sie das Frontgitter (O1)
an das hintere Gitterteil (O6) an, so dass der Haken ins hintere Gitter eingreift. Durch das zuklappen der
Klemmen schließen Sie beide Gitterrahmen aneinander. Den Verschluss sichern Sie mit einer Schraube ab.
Schließen Sie den Lüfter an das Stromnetz an.
1.Drehzahlregelung ind ausschalten de lüfters
Durch Drehen des Reglers (O8) auf Position 1 stellen Sie die niedrige Drehzahl ein. Um die Drehzahl zu
erhöhen drehen Sie den Regler zur Position 2 oder 3 für mittlere oder hohe Drehzahl. Um den Lüfter
auszuschalten drehen Sie den Regler zur Position 0.
2.Ein-uns ausschalten der oszillation
Wenn der Lüfter im Betrieb ist, aktivieren Sie durch Drücken des Schalters (O8) nach unten die Oszillation
des Motors (O9), der sich dann horizontal drehen wird. Durch das Ziehen des Schalters (O8) nach oben
deaktivieren Sie die Oszillation.
WARTUNG UND REINIGUNG
1. Vor der Montage, Demontage und Reinigung trennen Sie den Lüfter vom Stromnetz.
2. Die Oberfläche reinigen Sie mit einem sauberen, trockenen Wischtuch. Im Falle einer größeren
Verunreinigung benutzen sie ein feuchtes Wischtuch mit Seifenlösung. Trocknen sie dann alle Teile ab.
Verhindern sie Eindringen von Wasser in den Motor.
3. Verwenden Sie keine aggressiven Reinigungsmittel, Lösemittel oder Bürsten die die Oberfläche beschädigen
können.
Lagern Sie den Lüfter auf einer sauberen, trockenen Stelle außer der Reichweite von Kindern.
WARNUNGEN
1. Das Gerät sollte von Personen (inkl. Kinder) mit beschränkten physischen, sensorischen oder mentalen
Fähigkeiten oder mit Mangel an Kenntnis und Erfahrungen, nicht ohne Aufsicht durch eine Person, die für
deren Sicherheit verantwortlich ist betrieben werden.
2. Achten Sie auf Kinder, wenn sie das Gerät in deren Nähe betreiben.
?
?
?
?
?
BEDIENUNG DES VENTILATORS
3

SICHERHEITSVORKEHRUNGEN
1. Vor dem Anschluss des Gerätes an das Stromnetz vergewissern Sie sich, dass die technischen Daten auf
dem Typenschild mit der Spannung der Steckdose übereinstimmen.
2. Das Produkt ist ausschließlich für den Einsatz im Haushalt, im Büro und in ähnlichen Räumen gedacht. Der
Lüfter ist nicht für den Einsatz im Außenbereich oder zur Nutzung in einer feuchten oder staubigen
Umgebung bestimmt.
3. Stellen Sie das Gerät nicht in die Nähe von Feuer oder Wärmequellen.
4. Schützen Sie das Gerät vor direktem Kontakt mit Wasser oder anderen Flüssigkeiten. Das Gerät muss
immer auf geradem, trockenem und stabilem Boden stehen.
5. Versichern Sie genügend Platz für eine freie Luftzirkulation, um einen korrekten Betrieb zu gewährleisten.
Decken Sie die Öffnungen des Lüfters niemals zu.
6. Wenn sie das Gerät nicht verwenden oder eine Reinigung planen, schalten Sie das Gerät aus und ziehen Sie
den Stecker aus der Steckdose.
7. Es wird nicht empfohlen, den Lüfter unbeobachtet angeschlossen zu lassen. Das Einspeisekabel darf nicht
mit heißen oder scharfen Gegenständen in Berührung kommen.
8. Verwenden Sie das Gerät nicht wenn das Einspeisekabel beschädigt ist. Alle Reparaturen inkl. des
Austausches des Einspeisekabels sollten Sie einem Fachservice anvertrauen.
9. Verwenden Sie den Lüfter nur gemäß den Anweisungen in dieser Bedienungsanleitung. Der Hersteller
übernimmt keine Haftung für Schäden, die durch falsche Anwendung des Gerätes entstehen.
Before using this appliance, please get acquainted with the instructions for its use, even if you are already familiar
with the use of this type of product. Use the appliance only as described in this Manual. Retain the Manual for further
reference.
The T-FAN tablel fan is a state-of-the-art product with a very good design. This high-speed fan, providing greater
efficiency than plastic fans, is designed to ensure air circulation in the entire room.
ASSEMBLY OF THE FAN
?Remove the fan from the packaging and check that you have all the components pictured in the chapter
DESCRIPTION OF THE FAN.
?Put the outer rod (O13) perpendicularly to the base (O14). Place the weight into the bottom part of the base
(O14) and put the screw (O15) into its centre, so that the rod can be fixed to the base. Fasten the screw
(O16) using the key (O15).
?The motor unit holder (O9) is equipped with a screw (O11) for adjusting the fan inclination angle. The screw
must be removed before connecting the motor (O9) with the inner rod (O13) by means of the connecting
screw. Then place the regulating screw (O11) back. The connection between the holder and the rod must be
tight to prevent the motor unit from falling to the ground.
?Remove the fixing screws (O5) from the front part of the motor, then put the rear grille (O6) on the motor
(O10) and tighten the screws (O5). Set the rear part of the protective grille (O6) to the correct position with
the handle upwards.
?Loosen the stop screw (O3) on the fan blades (O2). Fasten the blades (O2) to the motor shaft (O7) and push
them towards the motor unit (O9). Make sure that the screw (O3) fits correctly into the groove on the motor
shaft (O7), then tighten it.
?The frame of the front protective grille (O1) contains securing clips, a hook and a hole for the screw. Unlock
the clips;the hook should be located in the upper part of the front grille at the installation. Put the front grille
(O1) on the rear grille (O6) so that the hook fits on the rear part of the grille (06). Snap the clips to fasten the
rims to each other. Secure the connection using the supplied screw. If you have properly followed the
instructions during the assembly of the fan, the hole for the screw will be located in the bottom part of the
grille.
OPERATION OF THE FAN
Connect the fan to the mains socket.
1.Setting the speed and switching the fan off
To set a low fan speed, turn the switch (O8) to position 1. To increase the speed, set the switch to position 2
or 3 for medium or high speed, respectively. To switch the fan off, turn the switch to position 0.
2.Switching the oscillation on/off
When the fan is operating, you can press the switch (O8) downwards to switch on the motor oscillation (O9)
- then the fan will turn horizontally. After pulling the switch (O8) upwards, the oscillation will stop.
DE
EN
4
FR
CONDITIONS DE GARANTIE
La garantie concerne une réparation gratuite, éventuellement le remplacement du produit dans un délai de 24 mois
depuis le jour d'achat. La réclamation doit être résolue dans un délai de 30 jours depuis la livraison du produit
réclamé au vendeur ou au fabricant.
La garantie ne couvre pas les défauts ci-dessous produits en conséquence de :
endommagement mécanique, pollution,
transformation,
modifications de construction,
activités liées à la protection et au nettoyage de l'appareil,
des accidents,
catastrophes naturelles, chimiques et des influences atmosphériques,
stockage non approprié,
réparations non autorisées et manipulations incompétentes de l'appareil,
installation incorrecte de l'appareil.
Les droits de garantie sont rejetés dans les cas décrits et dans les cas similaires.
Le branchement au réseau électrique doit être réalisé par un électricien compétent ! Avant toute maintenance, le
ventilateur doit être isolé du réseau électrique ! Le dispositif électrique doit être branché au commutateur avec une
distance entre les contacts de tous les pôles supérieure à 3 mm. Le ventilateur doit être mis à la terre ! Il faut éviter
un flux rétroactif de gaz de la cheminée ouverte dans la chambre. Le ventilateur ne devrait pas être utilisé dans les
chambres démontrant une humidité élevée et en tant que ventilateur évitant une explosion. Le fabricant se réserve
le droit de faire des modifications de construction découlant du progrès technique.
DALAP GmbH garantit un fonctionnement efficace de l'appareil conformément aux conditions techniques du débit,
définies dans le présent mode d'emploi. La garantie couvre des défauts d de construction et de matériel e l'appareil.
La garantie suivante est valable sur le territoire de l'Union européenne.
Le client a le droit a une réparation gratuite, éventuellement. au remplacement de l'appareil défectueux, en éliminant
autres défauts de l'appareil. La notion "réparation" ne comprend pas des activités décrites au mode (maintenance,
nettoyage) que le client a l'obligation de réaliser lui-meme.
Les décisions sur les droits de garantie prises par le fabricant DALAP GmbH sont considérées comme finales.
ATTENTION !
•
•
•
•
•
•
•
•
•
CONDICIONES DE GARANTÍA
La garantía no cubre los defectos indicados a continuación, producidos a consecuencia de:
•
• transformaciones,
• cambios en el diseno de construcción,
• operaciones relacionadas con la protección y limpieza del equipo,
• accidentes,
• desastres naturales, los agentes químicos y atmosféricos,
• almacenamiento inadecuado,
• reparaciones irregulares y no autorizadas y el manejo inadecuado del equipo,
• instalación inadecuadadel equipo.
En estos y otros casos similares, no se admiten los derechos de garantía.
El cliente tiene derecho a la reparación gratuita, o al reemplazo del equipo defectuoso, y a la eliminación de otras
fallas del equipo. El término "reparación" no incluye las operaciones especificadas en el manual (mantenimiento,
limpieza), que el cliente debe realizar por su cuenta.
Las decisiones acerca de los derechos de garantía realizados por el productor DALAP GmbH se consideran
definitivas.
¡ATENCIÓN!
DALAP GmbH garantiza un funcionamiento efectivo del equipo de acuerdo con las condiciones técnicas de flujo,
especificadas en este manual. La garantía cubre los defectos de construcción y de material del equipo. La siguiente
garantía es aplicable en todo el territorio de la Unión Europea.
La garantía cubre la reparación gratuita, o el recambio del producto dentro de un plazo de 24 meses, a partir de la
fecha de compra. Las reclamaciones deben ser solucionadas en un plazo de 30 días, contados a partir del día de la
recepción del producto reclamado por el vendedor o el productor.
¡La conexión a la red eléctrica debe ser realizada sólo por un electricista cualificado! ¡El ventilador debe estar
desconectado de la red eléctrica, antes de darle mantenimiento! El equipo eléctrico debe estar conectado a un
interruptor que tenga una distancia de más de 3 mm entre los contactos de todos los polos. ¡El ventilador debe estar
conectado a tierra! Es necesario impedir el reflujo de gas en la habitación desde la chimenea abierta. El ventilador
no debería utilizarse en habitaciones con una elevada humedad y como ventilador antiexplosivo. El productor se
reserva el derecho de realizar cambios de construcción que resulten de los avances del desarrollo técnico.
danos mecánicos, la contaminación,
ES
21
PL
WARUNKI GWARANCJI
urz¹dzenia. Poni¿sza
gwarancja obowi¹zuje na terytorium Unii Europejskiej.
Gwarancja dotyczy bezp³atnej naprawy lub wymiany wyrobu w terminie 24 miesiêcy od dnia zakupienia.
Reklamacja musi zostaæ dokonana w terminie 30 dni od dnia dorêczenia reklamowanego wyrobu
sprzedawcy lub producentowi.
Gwarancja nie dotyczy podanych poni¿ej wad powsta³ych w wyniku:
uszkodzenia mechanicznego, zanieczyszczenia,
transformacji,
zmian konstrukcyjnych,
czynnoœci zwi¹zanych z ochron¹ i czyszczeniem urz¹dzenia,
wypadków,
klêsk ¿ywio³owych, dzia³ania czynników chemicznych i atmosferycznych,
nieprawid³owego sk³adowania,
nieuprawnionych i nieautoryzowanych napraw i nieprawid³owej manipulacji z urz¹dzeniem,
nieprawid³owej instalacji urz¹dzenia.
W tych i podobnych przypadkach reklamacja nie bêdzie uznana.
Klient ma prawo do bezp³atnej naprawy, ew. wymiany wadliwego urz¹dzenia przez usuniêcie
pozosta³ych wad urz¹dzenia, termin „naprawa” nie obejmuje czynnoœci podanych w podrêczniku
(utrzymanie, czyszczenie), które klient jest obowi¹zany wykonywaæ sam.
Decyzje o warunkach gwarancji podjête przez producenta DALAP GmbH uwa¿a siê za ostateczne.
DALAP GmbH gwarantuje efektywne funkcjonowanie urz¹dzenia zgodnie z warunkami technicznymi przep³ywu
podanymi w niniejszej instrukcji. Gwarancja dotyczy wad konstrukcyjnych i materia³owych
UWAGA!
Pod³¹czenie do sieci elektrycznej musi przeprowadzaæ wykwalifikowany elektryk! Przed rozpoczêciem konserwacji
wentylator musi zostaæ od³¹czony od sieci elektrycznej! Urz¹dzenie elektryczne musi zostaæ pod³¹czone do w³¹cznika,
który ma odleg³oœæ miêdzy stykami wszystkich zacisków ponad 3 mm. Wentylator musi byæ uziemiony! Trzeba
zastosowaæ œrodki zapobiegaj¹ce odwrotnemu przep³ywowi powietrza do pomieszczenia z otwartego komina.
Wentylator nie powinien byæ u¿ywany w pomieszczeniach z wy¿sz¹ wilgotnoœci¹ i jako wentylator
przeciwwybuchowy. Producent zastrzega sobie prawo do zmian konstrukcyjnych wynikaj¹cych z postêpu
technicznego.
•
•
•
•
•
•
•
•
•
CONDIZIONI DI GARANZIA
La garanzia non si applica per i seguenti difetti sorti a causa di:
Il cliente ha diritto ad una riparazione gratuita o alla sostituzione dell'apparecchio difettoso e alla riparazione degli
altri difetti dell'apparecchio; il termine "riparazione" non comprende le attività elencate nel manuale (manutenzione,
pulizia), che il cliente è tenuto ad effettuare da solo.
Le decisioni in merito alle rivendicazioni di garanzia del produttore DALAP GmbH sono da intendersi definitive.
ATTENZIONE!
DALAP GmbH garantisce il funzionamento effettivo dell'apparecchio in conformità con le condizioni tecniche di
flusso indicate nelle presenti istruzioni. La garanzia si applica ai difetti strutturali e dei materiali dell'apparecchio. La
seguente garanzia vale sul territorio dell'Unione Europea.
La garanzia si applica alle riparazioni gratuite o alla sostituzione dei prodotto, per un periodo di 24 mesi dalla data di
acquisto. I reclami devono essere evasi entro 30 giorni dalla data di recapito del prodotto reclamato al venditore o al
produttore.
danneggiamento meccanico, contaminazione,
trasformazione,
modifiche strutturali,
attivita connesse alla protezione e alla pulizia dell'apparecchio,
incidenti,
catastrofi naturali, impatti chimici e atmosferici,
stoccaggio errato,
riparazioni ingiustificate e non autorizzate e manipolazione non professional dell'apparechio,
installazione errata dell'apparecchio.
In questi e in altri simili casi la garanzia decade.
La connessione alla rete elettrica deve essere eseguita da un elettricista professionista! Prima della manutenzione,
il ventilatore deve essere scollegato dalla rete elettrica! L'apparecchio elettrico deve essere collegato ad un
interruttore che abbia una distanza fra i contatti di tutti i poli di oltre 3 mm. Il ventilatore deve essere messo a terra!
È necessario impedire il riflusso del gas nel locale attraverso la canna fumaria aperta. Il ventilatore non dovrebbe
essere utilizzato in locali con umidità eccessiva o come ventilatore anti-esplosione. Il produttore si riserva il diritto di
apportare modifiche strutturali in base al progresso tecnico.
•
•
•
•
•
•
•
•
•
IT
20
CLEANING AND MAINTENANCE
1. Before assembly, disassembly and cleaning, always switch the fan off and disconnect it from the power
supply.
2. Wipe the surface with a clean dry cloth. In case of heavier dirt, use a damp cloth and soapy solution. Then
dry all the parts thoroughly. Prevent water and other liquids from entering the motor housing.
3. Do not use aggressive cleaners, solvents, or wire brushes, which could damage the surface.
If you are not going to use the fan for an extended period of time, store it in a clean dry place out of the reach of
children.
CAUTION
1. The appliance should not be used by anyone (including children) with limited physical, sensory, or mental
abilities or with a lack of knowledge and experience, unless they are under supervision or have been
instructed in using the appliance by a person responsible for their safety.
2. Take special care when using the fan in the presence of children.
SAFETY INSTRUCTIONS
1. Before connecting the appliance to the mains, make sure that the technical specifications on its label match
the voltage of the mains socket.
2. The product is designed exclusively for use in households, offices and similar areas. Do not use the fan
outdoors or in moist or dusty environments.
3. Do not place the appliance close to fires or heat emitting devices.
4. Protect the device from direct contact with water and other liquids. Always place it on a flat, dry and stable
surface.
5. Place the fan out of the reach of other objects so as to allow for the free air circulation needed for its proper
operation. Do not cover the holes of the fan.
6. If you are not using the appliance or plan to clean it, always switch it off and disconnect it from the mains.
7. Do not unplug the appliance from the mains by pulling the power cord. We do not recommend leaving the
fan unattended with the power cord plugged into the socket. The power cord must not come into contact with
hot parts or be run over sharp edges.
8. Never use the appliance if the power cord is damaged. All repairs including replacement of the power cord
shall be performed by a specialized service company. Do not dismantle the protective covers of the
equipment, otherwise, there is a risk of electric shock.
9. Use the fan only in accordance with the instructions set out in this Manual. The Manufacturer bears no
responsibility for any damage caused by improper use of this equipment.
Pøed použitím spotøebièe se prosím seznamte s návodem k jeho obsluze, a to i v pøípadì, že jste již obeznámeni s
používáním výrobkù podobného typu. Spotøebiè používejte pouze tak, jak je popsáno v tomto návodu. Návod
uschovejte pro pøípad další potøeby.
Stojanový ventilátor S-FAN je moderní a designovì velmi povedený. Vysokorychlostní ventilátor, poskytující vyšší
úèinnost než plastové ventilátory, je navržen tak, aby zajistil cirkulaci vzduchu v celé místnosti.
SESTAVENÍ VENTILÁTORU
?Ventilátor vyjmìte z obalového materiálu a ovìøte, zda máte k dispozici všechny souèásti vyobrazené v
kapitole POPIS VENTILÁTORU.
Pøiložte tyè (O13) kolmo k podstavci (O14). Do spodní èásti podstavce (O14) umístìte šroub (O15), aby
mohla být k podstavci pøipevnìna . Pomocí zarážkového šroubu (O16) šroub (O15) upevnìte.
?Na držáku motorové jednotky (O9) je umístìn šroub (O11) na úpravu úhlu sklonu ventilátoru. Ten je potøeba
sejmout pøed spojením motoru (O9) s tyèí (O13) pomocí spojovacího šroubu (O15). Regulátor (O11) poté
umístìte zpìt. Spojení držáku a tyèe musí být pevné, aby nedošlo k pádu motorové jednotky na zem.
?Z pøední èásti motoru sundejte fixaèní šrouby (O5), poté pøiložte zadní møížku (O6) k motoru (O10) a
dotáhnìte šrouby (O5). Zadní èást ochranné møížky (O6) nastavte do správné pozice držadlem nahoru.
Na lopatkách ventilátoru (O2) uvolnìte zarážkový šroub (O3). Lopatky (O2) upevnìte na høídel motoru (O7) a
zatlaète je smìrem k motorové jednotce (O9). Dbejte na to, aby šroub (O3) správnì zapadl do drážky na
høídeli motoru (O7), teprve pak jej dotáhnìte.
?
tyè
?
?Na rámu pøední ochranné møížky (O1) se nachází zajišovací svorky, háèek a otvor pro šroubek. Svorky
odjistìte, pøièemž pøední møížka by mìla mít pøi instalaci háèek umístìn v horní èásti. Pøední møížku (O1)
pøiložte k zadní møížce (O6) tak, aby háèek zapadl na zadní èást møížky (06). Zaklopením svorek pøipevnìte
obvodové obruèe k sobì. Spojení zajistìte dodaným šroubkem. Pokud jste pøi sestavování ventilátoru
postupovali dle návodu, je otvor pro šroubek umístìn ve spodní èasti møížky.
EN
CZ
5

SK
ZÁRUÈNÉ PODMIENKY
POZOR!
DALAP GmbH garantuje efektívnu prevádzku zariadení v súlade s technickými podmienkami prietoku, uvedenými v
tomto návode. Záruka sa vzahuje na konštrukèné a materiálové chyby zariadení. Nasledujúca záruka platí na
území Európskej únie.
Záruka sa vzahuje na bezplatnú opravu, popr. výmenu výrobku, v lehote 24 mesiacov odo dòa nákupu. Reklamácia
musí by vybavená v lehote 30 dní odo dòa doruèenia reklamovaného výrobku predajcovi alebo výrobcovi.
Nasledujúca záruka nevyluèuje, neobmedzuje, ani nijako nepopiera zákonné práva kupujúceho.
Záruka sa nevzahuje na nižšie uvedené vady vzniknuté v dôsledku:
•Mechanického poškodenia, zneèistenia,
•transformácie,
•Konštrukèných zmien,
•Èinností spojených s ochranou a èistením zariadení,
•Nehôd,
•Prírodných katastrof, chemických a atmosférických vplyvov,
•Nesprávneho skladovania,
•Neoprávnených a neautorizovaných opráv a neodbornej manipulácie so zariadením,
•Nesprávnej inštalácie zariadenia.
V týchto a podobných prípadoch sa záruèné nároky zamietajú.
Zákazník má právo na bezplatnú opravu, popr. výmenu chybného zariadenia, odstránením ostatných vád zariadení,
termín "oprava" nezahàòa èinnosti uvedené v manuáli (údržba, èistenie), ktoré je zákazník povinný vykonáva sám.
Rozhodnutie o záruèných nárokoch urobené výrobcom DALAP GmbH sa považujú za koneèné.
Pripojenie na elektrickú sie musí by vykonávané odborne spôsobylou osobou - elektrikárom! Pred údržbou musí
by ventilátor odpojený od elektrickej siete! Elektrické zariadenie musí by pripojené na spínaè, ktorý má vzdialenos
medzi kontaktmi
všetkých pólov viac ako 3 mm. Ventilátor musí by uzemnený! Je potrebné zabráni spätnému toku plynu do
miestnosti z otvoreného komína. Ventilátor by nemal by používaný v miestnostiach s vyššou vlhkosou a ako proti
výbušný ventilátor.
Výrobca si vyhradzuje právo vykonáva konštrukèné zmeny, vyplývajúce z technického pokroku.
JÓTÁLLÁSI FELTÉTELEK
•
• átalakítás,
• szerkezeti módosítások,
• a berendezés ápolásával és tisztításával kapcsolatos tevékenységek,
• balesetek,
• természeti katasztrófák, vegyi és atmoszférikus hatások,
• helytelen tárolás,
• hozzá nem értõ és jogosulatlan személyek általi javítások, valamint a berendezés szakszerûtlen kezelése,
• a berendezés helytelen telepítése.
Az ilyen és ezekhez hasonló esetekben a jótállási igények elutasításra kerülnek.
Az ügyfél jogosult a díjmentes javításra és szükség esetén a hibás berendezés cseréjére, a berendezés többi
hibájának elhárításával együtt; a „javítás” fogalma nem foglalja magában a kézikönyvben felsorolt tevékenységeket
(karbantartás, tisztítás), amelyeket az ügyfél köteles maga elvégezni.
A DALAP GmbH döntése a jótállási igényekrõl véglegesnek minõsül.
A DALAP GmbH szavatolja a berendezés hatékony üzemelését az útmutatóban megadott áramlási mûszaki
feltételeknek megfelelõen. A jótállás a berendezés szerkezeti vagy anyaghibáira vonatkozik. Az alábbi jótállás az
Európai Unió területén érvényes.
A jótállás a termék díjmentes javítására, illetõleg cseréjére vonatkozik, a vásárlás napjától számított 24
hónapig. A reklamációt a reklamált termék eladó vagy gyártó számára történõ kézbesítésének napjától
számított 30 napon belül el kell intézni.
A jótállás nem vonatkozik az alábbi hibákra, amelyek a következõ okok miatt
keletkeztek:
FIGYELEM!
Az elektromos hálózatra való bekötést kizárólag szakképzett villanyszerelõ végezheti el! A karbantartási munkálatok
elõtt a ventilátort le kell választani az elektromos hálózatról! Az elektromos berendezést olyan kapcsolóhoz kell
csatlakoztatni, amely valamennyi pólus érintkezõitõl legalább 3 mm távolságra van. A ventilátort földelni kell! Meg
kell akadályozni, hogy a füst visszajuthasson a helyiségbe a nyitott kéménybõl. A ventilátort nem szabad magas
páratartalmú helyiségekben használni, sem pedig robbanásgátló ventilátorként használni. A gyártó fenntartja
magának a jogot arra, hogy a mûszaki fejlõdésnek megfelelõen szerkezeti módosításokat hajtson végre a terméken.
mechanikai sérülés, szennyezõdés,
HU
19
OBSLUHAVENTILÁTORU
Ventilátor pøipojte k zásuvce el. napìtí.
1.Nastavení rychlosti a vypnutí ventilátoru
Otoèením spínaèe (O8) do polohy 1 nastavíte nízkou rychlost ventilátoru. Pro zvýšení rychlosti nastavte
spínaè do polohy 2 nebo 3 pro støední èi vysokou rychlost. Pro vypnutí ventilátoru otoète spínaè do polohy 0.
2.Zapnutí a vypnutí oscilace
Pokud je ventilátor v provozu, stlaèením spínaèe (O8) smìrem dolù zapnete oscilaci motoru (O9), bude se
tak horizontálnì otáèet. Vytažením spínaèe (O8) smìrem nahoru oscilaci vypnete.
ÈIŠTÌNÍ A ÚDRŽBA
1. Pøed montáží, demontáží a èištìním vždy vypnìte a odpojte ventilátor od zdroje napájení.
2. Povrch otøete èistou, suchou utìrku. V pøípadì vìtšího zneèištìní použijte navlhèený hadøík s mýdlovým
roztokem. Všechny èásti pak øádnì vysušte. Zabraòte vniku vody èi jiných tekutin do krytu motoru.
3. K èištìní nepoužívejte agresivní èisticí prostøedky, rozpouštìdla nebo drátìné kartáèe, které mohou poškodit
povrch.
Pokud ventilátor nebudete delší dobu používat, uschovejte jej na èistém, suchém místì mimo dosah dìtí.
UPOZORNÌNÍ
1. Spotøebiè by nemìly používat osoby (vèetnì dìtí) s omezenými fyzickými, senzorickými nebo mentálními
schopnostmi nebo s nedostatkem znalostí a zkušeností, pokud nejsou pod dohledem, pøípadnì pokud
nebyly pouèeny o použití osobou odpovìdnou za jejich bezpeènost.
2. Dbejte zvýšené pozornosti, pokud používáte ventilátor v blízkosti dìtí.
BEZPEÈNOSTNÍ POKYNY
1. Pøed pøipojením spotøebièe k síové zásuvce se ujistìte, že se technické údaje uvedené na štítku spotøebièe
shodují s elektrickým napìtím zásuvky.
2. Výrobek je urèen výhradnì pro použití v domácnostech, kanceláøích a podobných prostorech. Nepoužívejte
ventilátor venku nebo ve vlhkém a prašném prostøedí.
3. Spotøebiè neumísujte v blízkosti ohnì nebo pøístrojù, které jsou zdrojem tepla.
4. Chraòte pøístroj pøed pøímým kontaktem s vodou a jinými tekutinami. Vždy jej umístìte na rovný, suchý a
stabilní povrch.
5. Ventilátor umístìte mimo dosah ostatních pøedmìtù tak, aby byla zajištìna volná cirkulace vzduchu
potøebná k jeho správné èinnosti. Otvory ventilátoru nikdy nezakrývejte.
6. Pokud pøístroj nepoužíváte nebo plánujete èištìní, spotøebiè vždy vypnìte a odpojte ze síové zásuvky.
7. Neodpojujte spotøebiè ze síové zásuvky tahem za síový kabel. Doporuèujeme nenechávat ventilátor se
zasunutým pøívodním kabelem v zásuvce bez dozoru. Pøívodní kabel se nesmí dotýkat horkých èástí ani
vést pøes ostré hrany.
8. Nikdy pøístroj nepoužívejte, pokud je pøívodní kabel poškozen. Veškeré opravy vèetnì výmìny napájecího
pøívodu svìøte odbornému servisu. Nedemontujte ochranné kryty zaøízení, hrozí nebezpeèí úrazu
elektrickým proudem.
9. Používejte ventilátor pouze v souladu s pokyny uvedenými v tomto návodu. Výrobce neodpovídá za škody
zpùsobené nesprávným použitím tohoto zaøízení.
CZ
6

EN
GUARANTEE
DALAP GmbH assures the efficient operation of the device in accordance with tha technical-exploitation conditions
attached hereto. The guarantee covers constructional and material defects of devices. The following guarantee is
valid at the territory of the European Union.
The guarantee covers free reparation within 24 months from the date of a purchase.
The following guarantee does not exclude, limit, nor suspend the powers of a buyer.
Exclusions:
The guarantee does not cover defects arising as a result of:
?mechanical forces,dirt,
?transformations,
?constructional changes,
?activities connected with conservation and cleaning of the devices,
?accidents,
?natural disasters, chemical and atmospherical factors,
?improper storing,
?unauthorized reparation,
?improper installation of the device.
Guarantee claims shall be refused thereat.
The realization of a client´s rights shall happen by the reparation or free replacement of the defective device,
removal of other defects of the device, the term „reparation” does not cover the activities provided in the manual
(conservation, cleaning), that the user is bound to on his own.
The complaint shall be considered within 30 days from the day the product is delivered to the producer or the seller.
Decisions made by DALAP GmbH connected with the guarantee claims are considered final.
CAUTION!
Connecting with the electric network should be carried out by professional electrician with SEP qualifications! Before
the conservation, a fan should be disconnected from the electric network! The electrical installation should have a
switch with the distance between contacts of all the poles less then 3 mm. The complete grounding system of a fan
is required. The inverse flow of gases to the room from open chimney hole or other devices with an open fire have to
be avoided, fans should not be used in rooms having increased humidity and as anti-explosion fans. The producer
reserves the right to introduce constructional changes, arising of the technical progress.
ZÁRUÈN?PODM?NKY
DALAP GmbH garantuje efektivní provoz zaøízení v souladu s technickými podmínkami prùtoku, uvedenými v tomto
návodu. Záruka se vztahuje na konstrukèní a materiálové vady zaøízení. Následující záruka platí na území Evropské
unie.
Záruka se vztahuje na bezplatnou opravu, popø. výmìnu výrobku, ve lhùtì 24 mìsícù ode dne nákupu. Reklamace musí
být vyøízena ve lhùtì 30 dní ode dne doruèení reklamovaného výrobku prodejci nebo výrobci. Následující záruka
nevyluèuje, neomezuje, ani nijak nepopírá zákonná práva kupujícího.
Záruka se nevztahuje na níže uvedené vady, vzniklé v dùsledku:
?mechanického poškození, zneèištìní,
?transformace,
?konstrukèních zmìn,
?èinností spojených s ochranou a èištìním zaøízení,
?nehod,
?pøírodních katastrof, chemických a atmosférických vlivù,
?nesprávného skladování,
?neoprávnìných a neautorizovaných oprav a neodborné manipulace se zaøízením,
?nesprávné instalace zaøízení.
V tìchto a obdobných pøípadech se záruèní nároky zamítají.
Zákazník má právo na bezplatnou opravu, popø. výmìnu vadného zaøízení, odstranìním ostatních vad zaøízení, termín
"oprava" nezahrnuje èinnosti uvedené v manuálu (údržba, èištìní),které je zákazník povinen provádìt sám.
Rozhodnutí o záruèních nárocích uèinìná výrobcem DALAP GmbH se považují za koneèné.
POZOR!
Pøipojení na elektrickou sí musí být provádìna odborným elektrikáøem! Pøed údržbou musí být ventilátor odpojen od
elektrické sítì! Elektrické zaøízení musí být pøipojeno na spínaè, který má vzdálenost mezi kontakty všech pólù více než
3 mm. Ventilátor musí být uzemnìn! Je tøeba zabránit zpìtnému toku plynu do místnosti z otevøeného komínu. Ventilátor
by nemìl být používán v místnostech s vyšší vlhkostí a jako protivýbušný ventilátor. Výrobce si vyhrazuje právo
provádìt konstrukèní zmìny, vyplývající z technického pokroku.
CZ
18
Pred použitím spotrebièa sa prosím zoznámte s návodom na jeho obsluhu, a to aj v prípade, že ste už oboznámení s
používaním výrobkov podobného typu. Spotrebiè používajte iba tak, ako je popísané v tomto návode. Návod uschovajte
pre prípad ïalšej potreby.
Stolný ventilátor T-FAN je moderný a dizajnovo ve¾mi vydarený. Vysokorýchlostný ventilátor, poskytujúce vyššiu
úèinnos ako plastové ventilátory, je navrhnutý tak, aby zabezpeèil cirkuláciu vzduchu v celej miestnosti.
ZOSTAVENIE VENTILÁTORA
?Ventilátor vyberte z obalového materiálu a overte, èi máte k dispozícii všetky súèasti zobrazenej v kapitole
POPIS VENTILÁTORA.
Priložte tyè (O13) kolmo k podstavcu (O14). Do spodnej èasti podstavca (O14) umiestnite skrutku (O15), aby
mohla by k podstavcu pripevnená . Pomocou zarážkovej skrutky (O16) skrutku (O15) upevnite.
?Na držiaku motorovej jednotky (O9) je umiestnená skrutka (O11) na úpravu uhla sklonu ventilátora. Ten je
potrebné sòa pred spojením motora (O9) s vnútornou tyèou (O13) pomocou spojovacieho skrutky. Regulátor
(O11) potom umiestnite spä. Spojenie držiaka a tyèe musí by pevné, aby nedošlo k pádu motorovej
jednotky na zem.
?Z prednej èasti motora odoberte fixaèné skrutky (O5), potom priložte zadný mriežku (O6) k motoru (O9) a
dotiahnite skrutky (O5). Zadná èas ochrannej mriežky (O6) nastavte do správnej pozície držadlom hore.
?Na lopatkách ventilátora (O2) uvo¾nite zarážkovú skrutku (O3). Lopatky (O2) upevnite na hriade¾ motora (O7)
a zatlaète ich smerom k motorovej jednotke (O9). Dbajte na to, aby skrutka (O3) správne zapadla do drážky
na hriadeli motora (O7), až potom ho dotiahnite.
?Na ráme prednej ochrannej mriežky (O1) sa nachádza zaisovacie svorky, háèik a otvor pre skrutku. Svorky
odistite, prièom predná mriežka by mala ma pri inštalácii háèik umiestnený v hornej èasti. Prednú mriežku
(O1) priložte k zadnej mriežke (O6) tak, aby háèik zapadol na zadnú èas mriežky (06). Zaklopením svoriek
pripevnite obvodové obruèe k sebe. Spojenie zaistite dodaným skrutkou. Ak ste pri zostavovaní ventilátora
postupovali pod¾a návodu, je otvor pre skrutku umiestnený v spodnej èasti mriežky.
OBSLUHA VENTILÁTORA
Ventilátor pripojte k zásuvke el. napätia.
1. Nastavenie rýchlosti a vypnutie ventilátora
Otoèením spínaèa (O8) do polohy 1 nastavíte nízku rýchlos ventilátora. Pre zvýšenie rýchlosti nastavte
spínaè do polohy 2 alebo 3 pre strednú èi vysokú rýchlos. Pre vypnutie ventilátora otoète spínaè do polohy
0.
2. Zapnutie a vypnutie oscilácie
Pokia¾ je ventilátor v prevádzke, stlaèením spínaèa (O8) smerom nadol zapnete osciláciu motora (O9), bude
sa tak horizontálne otáèa. Vytiahnutím spínaèa (O8) smerom nahor osciláciu vypnete.
ÈISTENIE A ÚDRŽBA
1. Pred montážou, demontážou a èistením vždy vypnite a odpojte ventilátor od zdroja napájania.
2. Povrch utrite èistou, suchou utierku. V prípade väèšieho zneèistenia použite navlhèenú handrièku s
mydlovým roztokom. Všetky èasti potom riadne vysušte. Zabráòte vniknutiu vody èi iných tekutín do krytu
motora.
3. Na èistenie nepoužívajte agresívne èistiace prostriedky, rozpúšadlá alebo drôtené kefy, ktoré môžu poškodi
povrch.
Ak ventilátor nebudete dlhší èas používa, uschovajte ho na èistom, suchom mieste mimo dosahu detí.
UPOZORNENIE
1. Spotrebiè by nemali používa osoby (vrátane detí) s obmedzenými fyzickými, senzorickými alebo
mentálnymi schopnosami alebo s nedostatkom znalostí a skúseností, pokia¾ nie sú pod doh¾adom,
prípadne pokia¾ neboli pouèené o použití osobou zodpovednou za ich bezpeènos.
2. Dbajte na zvýšenú pozornos, ak používate ventilátor v blízkosti detí.
?
tyè
SK
7

DE
GARANTIE
Die Dalap GmbH übernimmt die Garantie für den einwandfreien Betrieb des Gerätes bei zweckgemäßem
Gebrauch in Übereinstimmung mit den aktuellen technischen Bestimmungen. Die Garantie umfasst alle Mängel,
welche auf Konstruktions- oder Materialfehler des gekauften Gerätes zurückzuführen sind.Die folgende
Garantieerklärung gilt für das Gebiet der Europäischen Union.
Die Garantie umfasst kostenlosen Ersatz innerhalb von 24 Monaten ab dem Zeitpunkt des Erwerbs.
Die gesetzlich gültigen Rechte des Käufers werden nicht ausgeschlossen oder gemindert.
Ausschluss
Die Garantie gilt nicht für Mängel, die infolge von:
?Mechanischer Krafteinwirkung, Schmutz,
?Transformationen,
?Baulichen Veränderungen,
?Schäden durch Wartung oder Reinigung des Gerätes,
?Unfälle,
?Naturkatastrophen, chemische und atmosphärische Faktoren,
?unsachgemäße Lagerung,
?unerlaubte Wiedergutmachung
?unsachgemäße Installation des Gerätes.
In diesen Fällen werden die Gewährleistungsansprüche verweigert.
Der Begriff “Wiedergutmachung“ bezieht sich ausschließlich auf die Erfüllung der Käuferrechte in Bezug auf Reparatur,
kostenlosen Ersatz des defekten Gerätes und die Beseitigung von Mängeln, nicht jedoch auf Schäden, welche durch
nicht durchgeführte Wartung oder Reinigung des Gerätes (wie im Handbuch beschrieben) entstehen, da dies in der
Verantwortung des Käufers liegt.
Reklamationen sind innerhalb von 30 Tagen ab Erhalt der Ware beim Hersteller oder Verkäufer des Produktes
anzuzeigen.
Diese Garantievereinbarung erfolgt auf Grundlage der allgemeinen Geschäftsbedingungen der Dalap GmbH und gilt
als bindend.
Vorsicht!
Das Anschließen an das Stromnetz sollte von einem professionellen Elektriker mit SEP Qualifikation durchgeführt
werden! Vor der Wartung oder Reinigung des Gerätes muss dieses vom Stromnetz getrennt werden! Bei der Installation
sollte auf einen Abstand zwischen den Kontakten von höchstens 3mm zu den Polen im Schalter geachtet werden. Eine
komplette Erdung des Gerätes ist nicht erforderlich. Das Hereinströmen von Gasen in den Raum aus Kaminöffnungen
oder anderen Feuerstellen ist zu vermeiden. Die Ventilatoren dürfen nicht in Räumen mit erhöhter Feuchtigkeit oder als
Geräte zum Explosionsschutz verwendet werden. Der Hersteller behält sich das Recht baulicher und Technischer
Veränderungen im Rahmen von konstruktiven Erneuerungen vor.
17
BEZPEÈNOSTNÉ POKYNY
1. Pred pripojením spotrebièa k sieovej zásuvke sa uistite, že sa technické údaje uvedené na štítku spotrebièa
zhodujú s elektrickým napätím zásuvky.
2. Výrobok je urèený výhradne pre použitie v domácnostiach, kanceláriách a podobných priestoroch.
Nepoužívajte ventilátor vonku alebo vo vlhkom a prašnom prostredí.
3. Spotrebiè neumiestòujte v blízkosti ohòa alebo prístrojov, ktoré sú zdrojom tepla.
4. Chráòte prístroj pred priamym kontaktom s vodou a inými tekutinami. Vždy ho umiestnite na rovný, suchý a
stabilný povrch.
5. Ventilátor umiestnite mimo dosahu ostatných predmetov tak, aby bola zaistená vo¾ná cirkulácia vzduchu
potrebná na jeho správnu èinnos. Otvory ventilátora nikdy nezakrývajte.
6. Ak prístroj nepoužívate alebo plánujete èistenie, spotrebiè vždy vypnite a odpojte zo sieovej zásuvky.
7. Neodpájajte spotrebiè zo sieovej zásuvky ahom za sieový kábel. Odporúèame nenecháva ventilátor so
zasunutým prívodným káblom v zásuvke bez dozoru. Prívodný kábel sa nesmie dotýka horúcich èastí ani
vies cez ostré hrany.
8. Nikdy prístroj nepoužívajte, pokia¾ je prívodný kábel poškodený. Všetky opravy vrátane výmeny napájacieho
prívodu zverte odbornému servisu. Nedemontujte ochranné kryty zariadenia, hrozí nebezpeèenstvo úrazu
elektrickým prúdom.
9. Používajte ventilátor iba v súlade s pokynmi uvedenými v tomto návode. Výrobca nezodpovedá za škody
spôsobené nesprávnym použitím tohto zariadenia
A készülék használata elõtt kérjük, olvassa el a használati útmutatót, abban az esetben is, ha már ismeri a hasonló
termékek használatát. A készülék csak az útmutatóban leírtak alapján használható. A használati útmutatót õrizze
meg az esetleges késõbbi felhasználás érdekében.
A T-FAN asztali ventilátor megjelenése modern és dizájnos. Ez a nagy sebességû ventilátor, nagyobb teljesítményt
biztosít, mint a mûanyag ventilátorok, és kialakításának köszönhetõen biztosítja a légkeringést az egész
helyiségben.
A VENTILÁTOR ÖSSZEÁLLÍTÁSA
?A ventilátort vegye ki a csomagolásból, és gyõzõdjön meg róla, hogy minden alkatrész megvan, ami A
VENTILÁTOR LEÍRÁSÁBAN szerepel.
?Ferdén helyezze rá a külsõ rudat (O13) a talapzathoz (O14). A talapzat alsó részébe helyezzük bele a súlyt
(O14), majd a közepébe tegyük bele a csavart (O16), hogy hozzáerõsítsük a rudat a talapzathoz. A
fedõcsavar segítségével (O16) rögzítsük a talapzat csavart (O15).
?A motort tartó egységen (O9) található egy csavar (O11), mely a dõlésszög állítására szolgál. Ezt kell
eltávolítani ahhoz, hogy a motort (O9) és a belsõ rudat (O13) össze lehessen kapcsolni a toldó csavarral.
Ezután a dõlés állítót (O11) helyezze vissza. A tartót és a rúdat szorosan kell összekapcsolni, hogy a motor
ne essen a földre.
?A motor elülsõ részébõl vegye ki a biztosító csavarokat (O5), ezután helyezze a hátsó rácsot (O6) a motorra
(O9), és húzza be a csavarokat (O5). A rács hátsó részét (O6) helyezze a megfelelõ pozícióba, azaz
fogantyúval felfelé.
?A lapátokon (O2) lévõ csavart (O3) lazítsa meg. A lapátokat helyezze a tengelyre (O7), és nyomja a motor
felé (O9). Figyeljen arra, hogy a csavar (O3) belepasszoljon a tengelyen (O7) lévõ barázdába.
?Az elülsõ rács (O1) szélén találhatóak biztosító kapcsok, kampók és nyílás a csavarnak. A kapcsokat
biztosítsa ki, a telepítésnél a kampónak fent kell lennie. A rács elülsõ részét (O1) helyezze a hátsó (O6)
részhez úgy, hogy a kampó bele tudjon akadni. A kapcsok behajlításával összeszorítja a két karimát. A
csatlakozást erõsítse meg a csavarral. Ha az utasítások szerint járt el, akkor a csavarnak lévõ hely a rács
alján lesz.
A VENTILÁTOR HASZNÁLATA
A ventilátort helyezze áram alá
1.A ventilátor sebességének állítása és kikapcsolása
A kapcsoló (O8) 1-es pozícióba forgatásával az alacsony sebességet tudja beállítani. A sebesség
emeléséhez forgassa a 2-es ill. a 3-as fokozatra. Kikapcsolni a 0-val jelölt pozícióra forgatással lehet.
2.Az oszcilláció ki-/bekapcsolása
Ha a ventilátor be van kapcsolva, akkor a kapcsoló (O8) lefelé nyomásával lehet bekapcsolni a motor (O9)
oszcillációját, így vízszintes forgásba kezd. A kapcsoló (O8) felfelé húzásával megállítja az oszcillációt.
SK
HU
8

1. Front-Schutzgitter
Front protective grille
Pøední ochranná møížka
2. Schaufeln des Lüfters
Fan blades
Lopatky ventilátoru
3. Sperrschraube
Stop screw
Zarážkový šroub
4. Schraube (Halter der Schaufeln)
Screw holding the blades
Šroub držící lopatky
5. Fixierschrauben
Fixing screw
Fixaèní šroub
6. Hinteres Schutzgitter
Rear protective grille
Zadní ochranná møížka
7. Motorwelle
Motor shaft
Motorová høídel
8. Oszillationsschalter
Switch to switch on/off the oscillation
Spínaè pro zapnutí a vypnutí oscilace
9. Motor
Motor
Motor
10.Einspeisekabel
Power supply cord
Napájecí kabel
Verbinder-Schraube
Connecting screw
Spojovací šroub
11.Regler – zur Regelung des
Neigungsgrades des Lüfters
Regulating screw for adjusting angle the
inclination
Regulátor – šroub na úpravu úhlu sklonu
12.Schraube zur Höheneistellung
Screw for adjusting the height
Šroub pro nastavení výšky
13.Rohr
Rod
Tyè
14.Sockel / Ständer
Base
Podstavec
15.
16.Sperrschraube
Stop screw
Zarážkový šroub
16
Beschreibung des ventilators / Description of the fan / Popis ventilátoru / Popis ventilátora /
A ventilátor leírásában / Opis wentylatora / Descrizione del ventilatore / Description du ventilateur /
Descripción del ventilador
TISZTÍTÁS ÉS KARBANTARTÁS
1. Szétszerelés valamint vízzel történõ tisztítás esetén mindig kapcsolja ki a ventilátort, és húzza ki a
konnektorból.
2. A felszínét tiszta, száraz törlõvel tisztítsa. Nagyobb szennyezõdés esetében használjon nedvesített
törlõkendõt szappanos oldattal. Ezután rendesen szárítsa ki az összes részét. Védje a motort a víztõl és más
folyadékoktól.
3. Ne használjon agresszív tisztítószert, oldószert vagy drótkefét, ami károsíthatja a felületet
Ha a ventilátor már nincs használatban, tárolja tiszta, száraz helyen, távol a gyerekektõl.
FIGYELMEZTETÉS
1. A terméket nem használhatják mozgáskorlátozott, rosszul látó, korlátozott értelmi képességû személyek,
felügyelet nélkül, ill. ha nem kaptak útmutatást felelõs személytõl.
2. Fokozott figyelemmel használja gyermek közelében.
BIZTONSÁGI UTASÍTÁSOK
1. A bekötés elõtt bizonyosodjon meg arról, hogy a terméken látható elektromos feszültség megegyezik a
használni kívánt hálózatéval.
2. A termék kizárólag háztartásban, irodában és hasonló területeken alkalmazható. Ne használja kültéren vagy
nedves ill. poros környezetben.
3. A terméket ne helyezze tûz vagy más hõforrás közelébe.
4. Védje a készüléket a víztõl ill. egyéb folyadéktól. Mindig egyenes, stabil és száraz felszínre helyezze.
5. A ventilátort olyan távolságra helyezze el más tárgyaktól, hogy biztosítva legyen a szabad légáramlás a
helyes mûködtetése érdekében. A termék nyílásait soha ne takarja le.
6. Amennyiben nem használja, vagy tisztítani szeretné, kapcsolja ki és húzza ki a konnektorból.
7. A készülék csatlakozóját ne a vezeték húzásával távolítsa el a konnektorból. Nem ajánljuk a ventilátort
feszültség alatt hagyni felügyelet nélkül. A vezeték nem érhet hozzá semmilyen forró, ill. éles tárgyhoz.
8. Soha ne használja a készüléket, ha a vezeték megsérült. Mindenféle javítást beleértve a vezeték cséréjét is
csak szakszervizben lehet elvégezni.
9. Használja a ventilátort ezen útmutató utasításai szerint. A gyártó nem felel a helytelen használatból
kifolyólag keletkezett károkért.
Przed pierwszym u¿yciem wentylatora prosimy zapoznaæ siê z instrukcj¹ obs³ugi, równie¿ w przypadku, gdy
u¿ywaliscie ju¿ Pañstwo produkt podobnego typu. Urz¹dzenie nale¿y wykorzystywaæ wy³acznie w sposób opisany
w niniejszej instrukcji. Instrukcjê nale¿y zachowaæ na wypadek koniecznoœci skorzystania z niej w póŸniejszym
terminie.
Wentylator sto³owy T-Fan to urz¹dzenie nowoczesne w swej konstrukcji i wyj¹tkowe w swojej stylistyce.
Szybkoobrotowy wentylator osi¹ga o wiele wy¿sz¹ wydajnoœæ ni¿ wentylatory plastikowe, jest skontruowany tak,
aby wywo³aæ cyrkulacjê powietrza w ca³ym pomieszczeniu.
MONTA¯ WENTYLATORA
?Nale¿y wypakowaæ wentylator z opakowania i sprawdziæ czy zawartoœc zestawu jest kompletna – spis czêœci
w rodziale OPIS WENTYLATORA
?Nale¿y ustawiæ dr¹¿ek (O13) prostopadle do podstawy (O14). Do dolnej czêœci podstawy zamontowaæ
obci¹¿nik a do jego œrodka (O14) nale¿y wsun¹æ œrubê (O15), która przymocuje dr¹¿ek do podstawy. Przy
pomocy œruby zabezpiczej¹cej (O16) nale¿y zablokowaæ œrubê mocuj¹c¹ (O15)
?Na uchwycie silnika (O9) jest umieszczona œruba reguluj¹ca k¹t nachylenia wentylatora (O11). Nale¿y j¹
zdemontowaæ przed po³¹czeniem silnika (O9) i dr¹¿ka teleskopowego (O15) przy pomocy œruby ³¹cz¹cej.
Nastêpnie nale¿y umieœciæ regulator k¹ta nachylenia (O11) we w³aœciwym miejscu. Po³¹czenie uchwytu i
dr¹¿ka musi byæ stabilne i mocne, tak aby nie dosz³o do upadku silnika na ziemiê.
?Z przedniej czêœci silnika nale¿y wykrêciæ œrubê monta¿ow¹ (O5), nastêpnie zamotowaæ tyln¹ siatkê
zabezpieczaj¹ca (O6) do silnika (O9). Tyln¹ czêœæ siatki ochronnej (O6) nale¿y ustawiæ w poprawnej pozycji-
uchwytem do góry.
?Na ³opatkach wentylatora (O2) nale¿y zwolniæ œrubê zabezpieczaj¹c¹ (O3). £opatki umieœciæ na wale silnika
(O7) i przesun¹æ w kierunku silnika (O7). PóŸniej nale¿y je do docisn¹æ.
?Na ramce przedniej siatki ochronnej (O1) znajduj¹ siê klipsy zabezpieczaj¹ce, haczyk oraz otwór na œrubkê.
Klipsy nale¿y odbezpieczyæ, zwracaj¹c uwagê na umieszczenie siatki w taki sposób, aby haczyk znajdowa³
sie w górnej czêœci siatki. Przedni¹ siatkê (O1) nale¿y przy³o¿yæ do sitki tylnej (O6) tak, aby haczyk zaczepi³
o tyln¹ czêœæ siatki (O6). Klipsem zabezpieczaj¹cym docisn¹æ ramy do siebie. Dodatkowo po³¹czenie nale¿y
wzmocniæ za pomoc¹ za³¹czonej œrubki. O ile monta¿ wentylatora by³ przeprowadzony zgodnie z instrukcj¹,
otwór na œrubkê znajduje sie w dolnej czêœci siatki.
HU
9
PL

INSTRUCCIONES DE SEGURIDAD
1. Antes de conectar el dispositivo a la red, asegúrese de que los datos técnicos indicados en la etiqueta del
dispositivo corresponden a la tensión eléctrica del enchufe.
2. El producto está destinado exclusivamente al uso doméstico, en oficinas y espacios semejantes. No use el
ventilador fuera de casa y/o en un ambiente húmedo y polvoriento.
3. No coloque el dispositivo cerca del fuego o dispositivos que sean fuente del calor.
4. Proteja el dispositivo contra el contacto directo con agua y otros líquidos. Colóquelo en una superficie
plana, seca y estable.
5. Ponga el ventilador fuera del alcance de otros objetos y asegure la circulación libre del aire necesaria para
su correcto funcionamiento. No tape nunca los agujeros del ventilador.
6. Si no va a utilizar el aparato o planea su limpieza, apáguelo siempre y desenchúfelo.
7. No desenchufe nunca el dispositivo tirando del cable de red. Recomendamos no dejar el ventilador con el
cable de alimentación enchufado sin vigilancia. El cable de alimentación no puede tocar zonas muy
calientes ni estar en contacto con bordes agudos.
8. No utilice nunca el dispositivo si el cable de alimentación esté dañado. Encargue a un taller de reparación
especializado todas las reparaciones, incluido el cambio del cable de alimentación. No desmonte las tapas
de protección del dispositivo, debido al peligro de lesiones por corriente eléctrica.
9. Utilice el ventilador únicamente siguiendo las instrucciones mencionadas en el presente manual. El
fabricante no se hace responsable de los daños causados por un uso incorrecto del dispositivo.
ES
15
OBS£UGAWENTYLATORA
Wentylator nale¿y pod³¹czyæ do gniazdka elektrycznego.
1.Ustawienie predkoœci i wy³¹czanie wentylatora
Obrót w³¹cznika (O8) do pozycji 1 ustawi najni¿sz¹ predkoœæ wentylatora. Aby zwiêkszyæ prêdkoœæ nalezy
ustawiæ w³¹cznik w pozycji 2 lub 3 dla œredniej lub najwy¿szej prêdkoœci. Wy³¹czenie wentylatora nastêpuje
poprzez ustawienie w³acznika w pozycji 0.
2.W³¹czanie i wy³¹czanie ruchu oscylacyjnego
W czasie pracy wentylatora nacisniêcie w³¹cznika (O8) powoduje uruchomienie osylacji horyzontalnej
urz¹dzenia. Poci¹gniêcie wy³¹cznika (O8) ku górze powoduje wstrzymanie oscylacji.
CZYSZCZENIE I KONSERWACJA
1. Przed monta¿em, demonta¿em i czyszczeniem nale¿y wy³¹czyæ wentylator i od³¹czyæ do od Ÿród³a
zasilania.
2. Powierzchnie nale¿y przetrzec czyst¹, such¹ œciereczk¹. W wypadku wiêkszego zanieszczyszczenia m¿zna
wykorzystaæ wilgotn¹ szmatkê z roztworem myd³a. Wszystkie czêœci nale¿y starannie wysuszyæ. Nale¿y
ochraniaæ silnik przed wnikniêciem do wewn¹trz wody lub innych cieczy.
3. Do czyszczenia nie nalezy wykorzystywaæ agresywnych œrodków czyszcz¹cych, rozpuszczalników czy
drucianych myjek, które moga uszkodziæ powierzchniê.
Jeœli wentylator nie bêdzie u¿ytkowany przez d³u¿szy czas zaleca siê umieszczenie go w czystym i suchym miejscu
poza dostêpem dzieci.
OSTRZE¯ENIE
1. Urz¹dzenie nie powinno byæ u¿ywane bez nazdoru przez osoby (równie¿ dzieci) z ograniczonymi
mo¿liwoœciami fizycznymi, sensorycznymi lub umys³owymi, lub te z niedostateczn¹ wiedz¹ i
doœwiadczeniem, wyj¹tkowo - gdy zosta³y poinstruowane przez osoby odpowiedzialne za ich
bezpiczeczñstwo.
2. Nale¿y zachowaæ szczególna ostro¿noœæ jeœli wentylator jest u¿ywany w pobli¿u dzieci.
INSTRUKCJE BEZPIECZEÑSTWA
1. Przed pod³¹czeniem urz¹dzenia do Ÿród³a zasilania nale¹y siê upewniæ, ¿e warunki techniczne podane na
tabliczce znamionowej s¹ zgodne z napiêciem elektryczym w gniazdku.
2. Produkt jest przeznaczony do wykorzystania domowego, w biurach i temu podobnych pomieszczeniach. Nie
nale¿y u¿ywaæ wentylatora na zewnêtrz a tak¿e w pomieszczeniach o du¿ej wilgotnoœci lub zapyleniu.
3. Urz¹dzenia nie nale¿y umieszczaæ blisko okna lub Ÿróde³ ciep³a.
4. Nale¿y chroniæ urz¹dzenie przed bezpoœrednim kontaktem z wod¹ oraz innymi cieczami. Zawsze nale¿y
umieszczaæ urz¹dzenie na równej, suchej i stabilnej podstawie.
5. Wentylator nale¿y umiesciæ w pewnym oddaleniu od innych przemiotów, aby by³a zapewnione swobosna
cyrkulacja powietrza niezbêdna do jego poprawnego dzia³ania. W ¿adnym wypadku nie wolno przykrywaæ
wentylatora.
6. Jeœli urz¹dzenie nie pracuje lub planowane jest jego czyszczenie, bezwglêdnie nale¿y od³¹czyæ je od Ÿród³a
zasilania.
7. Zabronione jest wyci¹ganie wtyczki z kontaktu poprzez poci¹ganie za przewód zasilaj¹cy. Nie zaleca siê
pozostawiania bez nadzoru wentylatora z wtyczk¹ w³¹czon¹ do kontaktu. Kabel zasilaj¹cy nalezy chroniæ
przez kontaktem z gor¹cymi lub ostrymi przedmiotami.
8. Zabronione jest u¿ytkowanie urzadzenia gdy kabel zasilaj¹cy jest uszkodzony. Wszelkie naprawy, w³¹czaj¹c
wymianê kabla zasilaj¹cego, powinny byc przeprowadzone przez odpowiedni serwis. Zabroniony jest
demonta¿ ochronnych elementów- istnieje niebezpieczeñstwo pora¿enia pr¹dem elektrycznym.
9. Wentylator winien byæ wykorzystany zgodnie z zaleceniami niniejszej instrukcji. Producent nie odpowiada ze
szkody wywo³ane nieodpowiednim u¿ytkowaniem tego urz¹dzenia.
PL
10

Le rogamos que antes de usar el dispositivo se familiarice con el manual de uso, aun si ya conoce el uso de productos
similares. Utilice el dispositivo únicamente de la manera descrita en el presente manual. Guarde el manual para un caso
de necesidad.
El ventilador de mesa T-FAN es moderno y con un excelente diseño. El ventilador de alta velocidad, de mayor eficacia
que los ventiladores de plástico, ha sido diseñado para asegurar la circulación del aire en toda la habitación.
ENSAMBLAJE DEL VENTILADOR
?Extraiga el ventilador del embalaje y compruebe que contiene todos los componentes ilustrados en el
capítulo DESCRIPCIÓN DEL VENTILADOR.
?Ponga la barra exterior (O13) perpendicularmente a la base (O14). En la parte inferior de la base (O14)
coloque el peso y en su centro inserte el tornillo (O15) para que la barra quede fija a la base. Fije el tornillo
(O16) utilizando el tornillo de bloqueo (O15).
?En el soporte de la unidad de motor (O9) está ubicado el tornillo (O11) para el ajuste del ángulo de inclinación
del ventilador. Este se debe quitar antes de unir el motor (O9) con la barra interior (O15) utilizando el tornillo
de unión. Luego vuelva a poner el regulador (O11) en su sitio original. La unión del soporte y la barra debe
ser firme para que la unidad de motor no caiga al suelo.
?Quite los tornillos de fijación (O5) de la parte delantera del motor, luego ponga la rejilla trasera (O6) al motor
(O9) y apriete los tornillos (O5). Ajuste la parte trasera de la rejilla de protección (O6) a la posición correcta,
con la agarradera hacia arriba.
?Afloje el tornillo de bloqueo (O3) en las paletas del ventilador (O2). Fije las paletas (O2) en el eje del motor
(O7) y apriételas hacia la unidad de motor (O9). Asegúrese de que el tornillo (O3) entre correctamente en la
ranura en el eje del motor (O7), no lo apriete hasta que entre.
?En el marco de la rejilla de protección delantera (O1) se encuentran las bridas de seguridad, un gancho y un
agujero para el tornillo. Desbloquee las bridas, coloque la rejilla delantera con el gancho ubicado en su parte
superior, durante la instalación. Una la rejilla delantera (O1) con la trasera (O6) de manera que el gancho
entre en la parte trasera de la rejilla (06). Fije los cinchos circunferenciales unos a otros cerrando las bridas.
Asegure la unión con el tornillo suministrado. En el caso de que usted haya procedido de acuerdo con el
manual para ensamblar el ventilador, el agujero para el tornillo está ubicado en la parte inferior de la rejilla.
MANEJO DEL VENTILADOR
Conecte el ventilador al enchufe de la tensión eléctrica.
1.Ajuste de la velocidad y apagado del ventilador
Girando el conmutador (O8) a la posición 1 se ajusta la velocidad baja del ventilador. Para aumentar la
velocidad, ajuste el conmutador a la posición 2 o 3 para la velocidad media o alta. Para apagar el ventilador,
gire el conmutador a la posición 0.
2.Activación y desactivación de la oscilación
Si el ventilador está en marcha, pulse el interruptor (O9) hacia abajo, para activar la oscilación del motor
(O10), de esta manera girará horizontalmente. Para desactivar la oscilación, suba el interruptor (O8).
LIMPIEZA Y MANTENIMIENTO
1. Antes del montaje, desmontaje y limpieza, desconecte siempre el ventilador de la red de alimentación.
2. Limpie la superficie con un trapo limpio y seco. En caso de una mayor suciedad, utilice un trapo mojado con
solución jabonosa. Luego seque debidamente todas las partes. Evite la penetración del agua u otros
líquidos en la tapa del motor.
3. No utilice para la limpieza detergentes agresivos, disolventes ni cepillos de alambre que puedan dañar la
superficie.
Si no va a utilizar el ventilador durante un tiempo largo, colóquelo en un lugar limpio, seco, fuera del alcance de los
niños.
ADVERTENCIAS
1. No deberían usar el dispositivo personas (incluyendo niños) con capacidades físicas, sensoriales o
mentales reducidas y/o con falta de conocimientos y experiencias sin vigilancia, o no hayan sido instruidas
sobre su uso por una persona responsable de su seguridad en su caso.
2. Preste especial atención al utilizar el ventilador en las proximidades de los niños.
ES
14
Prima di utilizzare l'apparecchio, si prega di leggere queste istruzioni per l'uso, anche nel caso in cui si abbia già
familiarità con l'uso di prodotti di tipo analogo. Utilizzare l'apparecchio solo come descritto nel presente manuale.
Conservare queste istruzioni per eventuale uso futuro.
Il Ventilatore da tavolo T-FAN è moderno e dal design accattivante. Questo ventilatore ad alta velocità, che fornisce
una maggiore efficienza rispetto ai ventilatori in plastica, è stato progettato per garantire la circolazione dell'aria in
tutta la stanza.
MONTAGGIO DEL VENTILATORE
?Rimuovere il ventilatore dall'imballaggio e verificare di disporre di tutte le parti riportate nel capitolo
DESCRIZIONE DEL VENTILATORE.
?Collocare l'asta esterna (O13) perpendicolarmente al piedistallo (O14). Sul fondo del piedistallo (O14)
collocare il piombino e inserire la vite (O15) al centro, in modo da fissare l'asta al piedistallo. Fissare la vite
(O16) con l'ausilio della vite di arresto (O15).
?Sul supporto del gruppo motore (O9) si trova una vite (O11) per regolare l'angolo di inclinazione del
ventilatore. Essa va rimossa prima di collegare il motore (O9) all'asta interna (O15) utilizzando il raccordo a
vite. Ricollocare al suo posto il regolatore (O11). La connessione tra il supporto e l'asta deve essere stabile
per evitare la caduta del gruppo motore a terra.
?Rimuovere le viti di fissaggio (O5) dalla parte anteriore del motore, quindi collocare la griglia posteriore (O6)
sul motore (O9) e serrare le viti (O5). Collocare la parte posteriore della griglia protettiva (O6) nella posizione
corretta con l'impugnatura rivolta verso l'alto.
?Allentare la vite di arresto (O3) sulle pale del ventilatore (O2). Fissare le pale (O2) all'albero motore (O7) e
spingerle verso il gruppo motore (O9). Assicurarsi che la vite (O3) entri correttamente nella scanalatura
sull'albero motore (O7), quindi stringerla.
?Sul telaio della griglia di protezione anteriore (O1) si trovano i morsetti di blocco, un gancio e un foro per la
vite. Sbloccare i morsetti, tenendo presente che, durante l'installazione, il gancio della griglia anteriore
dovrebbe trovarsi nella parte superiore. Collocare la griglia anteriore (O1) sulla griglia posteriore (O6), in
modo che il gancio si agganci alla parte posteriore della griglia (O6). Ribaltando i morsetti si fissano gli anelli
perimetrali. Il collegamento si esegue con la vite in dotazione. Se il montaggio del ventilatore è stato eseguito
secondo le istruzioni, il foro per la vite si troverà nella parte inferiore della griglia.
FUNZIONAMENTO DEL VENTILATORE
Collegare il ventilatore alla presa elettrica.
1.Impostazione della velocità e spegnimento del ventilatore
Ruotando l'interruttore (O8) in posizione 1 si imposta la velocità minima del ventilatore. Per aumentare la
velocità, è necessario impostare l'interruttore sulla posizione 2 o 3 (media/alta velocità). Per spegnere il
ventilatore, ruotare l'interruttore in posizione 0.
2.Accendimento e spegnimento dell'oscillazione
Se il ventilatore è in funzione, premendo l'interruttore (O8) verso il basso si accende l'oscillazione del motore
(O9), quindi il ventilatore ruoterà orizzontalmente. Tirando l'interruttore (O8) verso l'alto l'oscillazione si
spegne.
PULIZIA E MANUTENZIONE
1. Prima del montaggio, dello smontaggio e della pulizia spegnere sempre e staccare il ventilatore dalla fonte
di alimentazione.
2. Pulire la superficie con un panno pulito e asciutto. In caso di sporco più ostinato, utilizzare un panno umido
con una soluzione di sapone. Successivamente, asciugare con cura tutte le parti. Evitare la penetrazione di
acqua o di altri liquidi nell'alloggiamento del motore.
3. Non utilizzare detergenti aggressivi, solventi o spazzole metalliche per la pulizia, perché possono
danneggiare la superficie.
Se non si utilizza il ventilatore per un lungo periodo, conservarlo in un ambiente pulito, asciutto e fuori dalla portata
dei bambini.
IT
11

ATTENZIONE
1. L'apparecchio non deve essere utilizzato da persone (inclusi bambini) con ridotte capacità fisiche, sensoriali o
mentali, o mancanza di esperienza e conoscenza, a meno che esse vengano sorvegliate o istruite sull'uso da
una persona responsabile della loro sicurezza.
2. Prestare particolare attenzione se si utilizza il ventilatore vicino a bambini.
ISTRUZIONI DI SICUREZZA
1. Prima di collegare l'apparecchio alla presa di corrente, assicurarsi che i dati tecnici indicati sull'etichetta
dell'apparecchio corrispondano alla tensione elettrica della presa.
2. Il prodotto è destinato esclusivamente all'uso in abitazioni, uffici e spazi simili. Non utilizzare il ventilatore
all'aperto o in ambiente umido e polveroso.
3. Non collocare l'apparecchio vicino al fuoco o ad apparecchiature che sono fonti di calore.
4. Proteggere l'apparecchio dal contatto diretto con acqua e altri liquidi. Collocarlo sempre su una superficie
piana, asciutta e stabile.
5. Collocare il ventilatore lontano da altri oggetti, per garantire una sufficiente circolazione d'aria necessaria per
il corretto funzionamento. Non coprire mai i fori del ventilatore.
6. Se l'apparecchio non è in uso o ne è prevista la pulizia, spegnere sempre e scollegare l'apparecchio dalla
presa di alimentazione.
7. Non scollegare l'apparecchio dalla presa tirando il cavo di alimentazione. Si consiglia di non lasciare
incustodito il ventilatore con il cavo di alimentazione inserito nella presa. Il cavo di alimentazione non deve
toccare parti calde o essere collocato su spigoli vivi.
8. Non utilizzare mai l'apparecchio se il cavo di alimentazione è danneggiato. Tutte le riparazioni, compresa la
sostituzione del cavo di alimentazione, vanno effettuate da personale qualificato. Non rimuovere le coperture
protettive dell'apparecchio, sussiste il pericolo di scosse elettriche.
9. Utilizzare il ventilatore solo in conformità con le istruzioni riportate in questo manuale. Il produttore non è
responsabile per danni causati da un uso improprio di questo apparecchio.
Avant utilisation de l'appareil, veuillez prendre connaissance de son mode d'emploi, et ce même au cas où vous
avez déjà pris connaissance de l'utilisation des produits de type similaire. Utilisez l'appareil uniquement comme
décrit dans le présent mode d'emploi. Gardez-le si vous en avez besoin ultérieurement.
Le ventilateur de table T-FAN est un produit moderne àdesign attrayant. Ce ventilateur à grande vitesse, procurant
une plus grande efficacité que les ventilateurs en plastique, est conçu pour garantir une circulation de l'air dans
toute la pièce.
ASSEMBLAGE DU VENTILATEUR
?Enlevez le ventilateur du matériau d'emballage et vérifiez si vous disposez de toutes les composantes
indiquées au chapitre DESCRIPTION DU VENTILATEUR.
?Posez la barre extérieure (O13) perpendiculairement au socle (O14). Placez le poids (O14) dans la partie
basse du socle et insérez la vis (O15) au centre de celui-ci, afin que la barre puisse être fixée au socle. A
l'aide de la vis de butée (O16), fixez la vis (O15).
?Sur le support de l'unité moteur (O9) est placée une vis (O11) pour ajuster l'angle d'inclinaison du
ventilateur. Celle-ci doit être enlevée avant le raccordement du moteur (O9) et de la barre interne (O13) à
l'aide de la vis de raccordement. Ensuite, remettez le régulateur (O11). Le support et la barre doivent être
solidement liés pour que l'unité moteur ne puisse pas tomber par terre.
?Enlevez les vis de fixation (O5) de la partie avant du moteur, puis joignez la grille arrière (O6) au moteur
(O9) et resserrez les vis (O5). Réglez la partie arrière de la grille (O6) dans la bonne position avec la
poignée en haut.
?Desserrez la vis de butée (O3) sur les ailes du ventilateur (O2). Fixez les ailes (O2) sur l'arbre du moteur
(O7) et enfoncez-les en direction de l'unité moteur (O9). Veillez à ce que la vis (O3) tombe bien dans la
rainure sur l'arbre du moteur (O7), ce n'est qu'une fois après que vous la resserrez.
?Sur le cadre de la grille de protection avant (O1) se trouvent des attaches de blocage, un crochet et un
orifice pour une petite vis. Débloquez les attaches, le crochet de la grille avant devrait être placé dans la
partie supérieure lors de l'installation. Placez la grille avant (O1) sur la grille arrière (O6) de façon à ce que
le crochet tombe sur la partie arrière de la grille (06). En basculant les attaches, fixez les cerceaux
périphériques l'un à l'autre. Bloquez l'assemblage par la petite vis fournie. Si lors de l'assemblage, vous
avez procédé selon le mode d'emploi du ventilateur, l'orifice pour la petite vis est placé dans la partie arrière
de la grille.
IT
12
FR
UTILISATION DU VENTILATEUR
Raccordez le ventilateur à la prise de tension électrique.
1.Réglage de la vitesse et arrêt du ventilateur
Par rotation du commutateur (O8) en position 1, vous réglez la vitesse basse du ventilateur. Pour une
augmentation de la vitesse, réglez le commutateur en position 2 ou 3 pour une vitesse moyenne ou élevée. Pour
l'extinction du ventilateur, faites tourner le commutateur en position 0.
2.Allumage et extinction de l'oscillation
Si le ventilateur est en service, en pressant le commutateur (O8) vers le bas, vous allumez l'oscillation du moteur
(O9), il tournera ainsi de manière horizontale. En tirant le commutateur (O8) vers le haut, vous éteignez
l'oscillation.
NETTOYAGE ET ENTRETIEN
1. Avant le montage, le démontage et le nettoyage, éteignez toujours et débranchez le ventilateur de la source
d'alimentation.
2. Essuyez la surface avec un chiffon propre et sec. En cas d'encrassement important, utilisez un chiffon
humidifié avec une solution savonneuse. Puis séchez soigneusement toutes les parties. Empêchez la
pénétration d'eau ou d'autres liquides dans le capot du moteur.
3. Pour nettoyage, n'utilisez pas de nettoyants agressifs, de dissolvants ou des brosses métalliques pouvant
endommager la surface.
Si vous n'utilisez pas le ventilateur pendant une période prolongée, gardez-le dans un endroit propre, sec et hors de
portée des enfants.
AVERTISSEMENT
1. L'appareil ne devrait pas être utilisé par des personnes (y compris des enfants) avec des capacités
physiques, sensorielles ou mentales limitées ou avec un manque de connaissances et d'expériences, si
elles ne sont pas sous surveillance, éventuellement si elles n'ont pas été informées de son utilisation par la
personne responsable de leur sécurité.
2. Consacrez une attention accrue si vous utilisez le ventilateur à proximité d'enfants.
INSTRUCTIONS DE SECURITE
1. Avant le branchement de l'appareil à la prise secteur, assurez-vous que les données techniques indiquées
sur la plaque de l'appareil sont conformes à la tension électrique de la prise.
2. Le produit est exclusivement destiné à une utilisation dans les foyers, bureaux et espaces similaires.
N'utilisez pas le ventilateur dehors ou dans un environnement humide et poussiéreux.
3. N'installez pas l'appareil à proximité du feu ou des appareils qui sont une source de chaleur.
4. Protégez l'appareil contre le contact direct avec de l'eau et des autres liquides. Placez-le toujours sur une
surface plane, sèche et stable.
5. Installez le ventilateur hors de portée des autres objets, de façon à ce que l'air puisse circuler librement afin
d'assurer sa bonne marche. Ne couvrez jamais les orifices du ventilateur.
6. Si vous n'utilisez pas l'appareil ou prévoyez un nettoyage, éteignez toujours l'appareil et débranchez-le de
la prise secteur.
7. Ne débranchez pas l'appareil de la prise secteur en tirant sur le câble. Nous recommandons de ne pas
laisser le ventilateur avec le câble d'alimentation inséré dans la prise sans contrôle. Le câble d'alimentation
ne doit pas toucher les parties chaudes ni être mené à travers des bords saillants.
8. N'utilisez jamais l'appareil si le câble d'alimentation est endommagé. Confiez toutes les réparations, y
compris le remplacement de l'arrivée d'alimentation, à un service spécialisé. Ne démontez pas les caches
de protection de l'équipement, il existe un risque de choc par courant électrique.
9. Utilisez le ventilateur uniquement en toute conformité aux instructions indiquées dans le présent mode
d'emploi. Le fabricant ne répond pas des dommages entraînés par une mauvaise utilisation de cet
équipement.
FR
13
Table of contents
Other dalap Fan manuals
Popular Fan manuals by other brands

Ellington
Ellington WOD52ABZ5X installation guide

Olimpia splendid
Olimpia splendid Bi2 AR Instructions for mounting and use

Vortice
Vortice VORT PIV QUADRO Instruction booklet

emmeti
emmeti Silence Installation and use manual

aireRyder
aireRyder F0049 manual

enervent
enervent greenair Plaza eco EC Planning, installation and operational instructions manual

Daikin
Daikin MicroTech Operation and maintenance

Progress Lighting
Progress Lighting AirPro P2540 installation manual

Ebmpapst
Ebmpapst W3G500-KM03-M1 operating instructions

Panasonic
Panasonic FY-E15PM1 operation instruction

kuzco lighting
kuzco lighting CORONADO CF90955 instruction sheet

wolter
wolter RH operating instructions