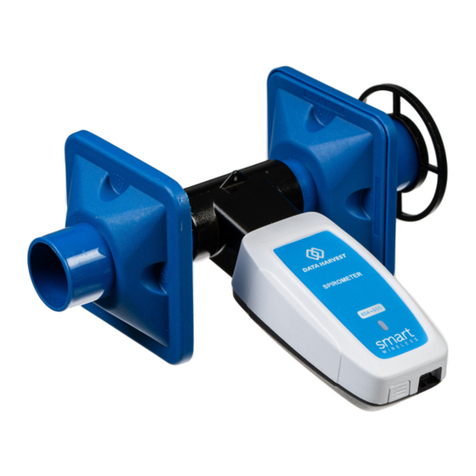
Data Harvest Smart Wireless 1110PK User manual

Smart Wireless pH Sensor
pH Sensor Pack (Bluetooth)
(Product No. 1110PK)
DS156 No 2
Data Harvest Group Ltd.1 Eden Court, Leighton Buzzard, Beds, LU7 4FY
Tel: 01525 373666, Fax: 01525 851638
e-mail: sales@data-harvest.co.uk or support@data-harvest.co.uk
www.data-harvest.co.uk
Data Harvest. Freely photocopiable for use within the purchasers establishment
pH Glass Electrode (BNC)
(Product No. 2253)
pH Adaptor (Bluetooth)
(Product No. 1110)

pH Adaptor & Electrode
2
Contents
Introduction..........................................................................................................................................2
The Smart Wireless pH adaptor ...........................................................................................................3
The pH electrode (BNC)........................................................................................................................3
Connecting the Smart Wireless pH sensor to a computer ...................................................................4
Electrode preparation ..........................................................................................................................5
Measurement procedure .....................................................................................................................5
Electrode storage .................................................................................................................................5
Practical information ............................................................................................................................6
To set the range....................................................................................................................................7
The sensor ranges.................................................................................................................................7
pH range..........................................................................................................................................7
±1000 mV........................................................................................................................................7
Specifications........................................................................................................................................9
Batteries..........................................................................................................................................9
Updating the Firmware ......................................................................................................................10
Hard Reset ..........................................................................................................................................10
Electrode maintenance ......................................................................................................................10
Theory of pH measurement ...............................................................................................................11
Trouble shooting ................................................................................................................................12
Investigations .....................................................................................................................................12
Neutralisation of a strong base (sodium hydroxide) by a strong acid (hydrochloric acid) ...........13
How to create a mV to pH calibration graph ................................................................................14
Buffers ................................................................................................................................................16
Limited warranty ................................................................................................................................16
Introduction
The Smart Wireless pH sensor is both USB ad Bluetooth compatible and can wirelessly connect to
mobile devices such tablets and mobile phones as well as desktop or laptop computers giving
students the ability to run experiments independently without being tethered to a traditional data
logger. See the EasySense2 user manual system requirements for further details.
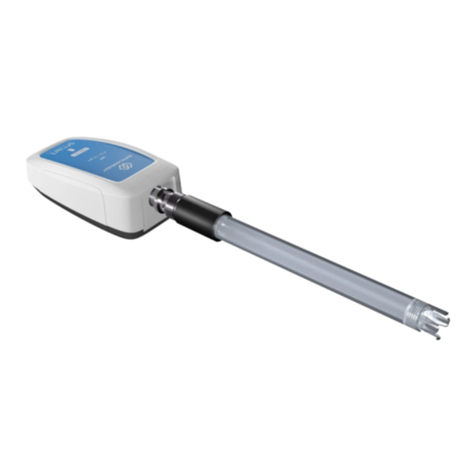
The Smart Wireless pH sensor consists of a combination of the Smart Wireless pH adaptor (Product
No. 1110) and a general-purpose pH electrode (Product No. 2253). The pH adaptor is supplied with
a mini USB lead (1 m standard A to standard mini B).
The Smart Wireless pH sensor (Product No. 1110PK)
The Smart Wireless pH Adaptor
(Product No. 1110)
The BNC pH Electrode
(Product No. 2253)

pH Adaptor & Electrode
3
The Smart Wireless pH adaptor
Charge the pH adaptor fully before first use
Use the USB lead supplied to connect the pH adaptor either direct to a USB port on your computer* or to a USB
mains charger that outputs 5 V at 500 mA or more. A full charge can take up to 4 hours.
*Or a powered USB hub. Your computer should be turned on and not in sleep or standby mode; or the battery may drain
instead of charge.
Status Light
Indicates
No light
Sensor is Off. Short press the On/Off switch
Blue flashing
Sensor On and Bluetooth advertising
White flashing
Charging via USB mains charger or USB port
Green flashing
Communication with the EasySense2 software (via USB or Bluetooth)
has been established.
Orange flashing
Recording data
To switch the pH sensor off: Press and hold down the On/Off switch for about 2 seconds until the white
light is lit solidly then release.
If not communicating with the EasySense2 software the sensor will puts itself to sleep after a period of
about one hour of inactivity (blue LED flashing).
The pH electrode (BNC)
This is a general-purpose plastic bodied, single junction gel filled glass electrode, which is non-refillable.
IMPORTANT: Maintain the level of the storage solution, the pH sensitive glass membrane must be kept wet.
BNC connector
(female)
Unique ID number
Status light
On/Off switch
USB input
Please note: Store the electrode tip in a 1:1 solution of pH 4 buffer and 3.5 to 4 mol dm-3 KCl, see page 5
Reference Electrolyte
Porous liquid junction
pH sensitive glass
membrane
Reference Element
(silver/silver chloride
type)
Plastic
protective skirt
Internal glass
reference solution
BNC connector (male)

pH Adaptor & Electrode
4
Connecting the Smart Wireless pH sensor to a computer
Bluetooth users: Do NOT pair devices (if paired the sensor will not be available to the EasySense2
software). Computers or devices will need to support Bluetooth Low Energy (BLE), for further information
refer to the instructions provided for the EasySense2 software.
Install the EasySense2 software, if it is not already on your computer. For details of how to install and
operate this app, please refer to the instructions provided for the EasySense2 software.
If connecting via USB:
This sensor can be used like a traditional data logger connected via USB.
Step 1: Connect the pH sensor to the computer’s USB port using the USB cable supplied. The
computer will automatically detect a new device and install the drivers. The status light on the pH
sensor will flash white to show its charging.
Step 2: Open the EasySense2 app.
Lab Setup will open showing the Smart pH sensor as
connected (Devices icon green).
The status light on the pH adaptor will flash green to
indicate a connection is established.
If connecting via Bluetooth:
Step 1: Short press the switch to turn the pH adaptor
on (blue LED will flash).
Step 2: Open the EasySense2 app.
Step 3: Lab Setup will open, select the red Devices
icon.
Step 4: Select to connect to the pH sensor (the list will show the ID number printed on the sensor).
The Devices icon will alter to green and the status
light on the pH adaptor will flash green to indicate a
connection has been established.
Click or tap on to close the box.
When you have finished use of the pH sensor select
Devices and Disconnect.
To add another data logger or smart wireless sensor
Only one USB device can be connected at the same time and it will be added automatically.
For Bluetooth or Wi-Fi devices select the Devices icon (top left of screen) then the Connect button
for the device from the list of those available.
ID number
Connect

pH Adaptor & Electrode
5
Troubleshooting
If the sensor loses Bluetooth connection and will not reconnect try
1. Closing and reopening the EasySense2 software.
2. Close the EasySense2 software. Switch the sensor Off and then On again (To switch off: Press and
hold down the On/Off switch for about 2 seconds until the white light is lit solidly then release.
To switch back on: Press the On/Off switch (blue LED will flash). Reopen the EasySense2
software.
3. If you are using a Bluetooth Smart USB Adaptor unplug the adaptor, plug back in again and try to
reconnect.
4. Hard reset the sensor and then try to reconnect.
Electrode preparation
1. With the electrode vertical, unscrew the storage bottle’s plastic cap before
removing the electrode from the storage solution.
2. Wash the glass membrane and liquid junction area (the lower section of the
electrode) thoroughly with de-ionised or distilled water to remove any salt
deposits from the exterior of the electrode.
3. Hold the electrode up to the light and check that the bulb at the tip of the
electrode (glass membrane) is full of electrolyte. If air bubbles are present
they can be removed by shaking the electrode firmly in a downward motion
(like a clinical thermometer).
4. Screw on the clear plastic protective skirt if it’s not already attached.
5. Connect the pH electrode to the pH adaptor (line the pins up to the slots, push
in and twist the electrodes BNC connector until it locks into place).
Note: To disconnect, twist the BNC connector in the opposite direction and pull.
Measurement procedure
1. Connect the pH sensor.
2. Rinse the electrode thoroughly in distilled water before use.
3. Place the pH electrode in the sample to be tested, ensure the bulb is fully submerged.
4. Allow the electrode sufficient time to stabilise and then start taking readings.
5. Rinse the electrode between each measurement with either:
a portion of the next sample or
deionised or distilled water
6. Dab or pat gently any excess water from the body of the electrode using a paper towel before
placing in the next sample.
Electrode storage
Maintain the level of pH electrode storage solution, the pH sensitive membrane must be kept wet.
Store the electrode in equal volumes of pH 4.0 buffer and 3.5 - 4 mol dm-3 Potassium Chloride (KCl)
solutions (1:1 v/v).
Recipe: Add 29 g of KCl to 100 cm3of distilled water. Add 100 cm3of a pH 4 buffer solution.
Unscrew the
cap before
removing the
electrode
Never store the electrode in deionised or distilled water - this will cause migration of the electrode’s
fill solution.

pH Adaptor & Electrode
6
Practical information
This general purpose electrode is non-refillable
Keep the pH sensitive membrane wet at all times. For the ion exchange process to occur properly,
the glass needs to be hydrated. Check and maintain the level of storage solution.
If the electrode should inadvertently become dry, place in the storage solution for several hours in
an attempt to recondition the glass.
Care should be taken to avoid handling the pH sensitive glass membrane. Any damage to the
surface, such as abrasion, may cause inaccuracies and result in a slow response time.
Stirring of a sample will achieve a faster electrode response, but the glass membrane tip is very thin
and requires care to prevent accidental damage. Broken glass bulbs are not covered by warranty.
Some magnetic stirrers can generate sufficient heat to change the temperature of the test
solution. If this is the case place a piece of insulation material such as polystyrene under the
beaker.
The working temperature of the pH electrode is 0 to 80˚C. The operating range of the adaptor is
0 to 40˚C and 0 to 95% RH (non-condensing). Do not subject to extreme heat or cold.
The pH adaptor is not waterproof. It may be cleaned using a damp cloth. Do not immerse in
water or detergent
Do not place the pH adaptor in an environment in which high humidity levels are possible as this
may result in damage or malfunction
If the sensor has been left in the cold, let it warm to near room temperature before waking it
from sleep.
Do not expose to direct sunlight for extended periods of time.
pH electrodes have a finite lifespan due to their inherent properties. How long a pH electrode will
last will depend on how it is cared for and the solutions it is used to measure. Even if the
electrode is not used, it will still age.
Always use freshly prepared pH buffers. When not in use, pH buffers should be stored in sealed
containers. High pH buffers are less stable as they tend to absorb atmospheric CO2 which lowers
their pH. During calibration only open the bottle of buffer to pour it into a beaker. Never leave the
bottle open.
Buffers and sample solution should be at the same temperature when measuring pH. The
resistance of glass electrodes partially depends on temperature. The lower the temperature, the
higher the resistance. It will take more time for the reading to stabilise if temperatures are cold.
To allow the pH adaptor to be used with any suitable pH electrodes with a BNC connector,
automatic temperature compensation has not been built in.
This sensor can also be used with alternative probes, such as Ion Selective Electrodes (ISE) and the
Oxidation Reduction Potent (ORP) Probes using the mV range.
Conditions to avoid:
Never store the electrode in deionised or distilled water, as this will cause the migration of the
electrode’s fill solution.
To maximise electrode life, avoid pH/ temperature extremes whenever possible. High temperature,
strong acids or caustics (greater than 1.0 mol dm-3) shorten electrode life. If used at high
temperatures, the electrodes life is drastically reduced. The higher the range of temperature, the
shorter the life of the electrode e.g. typical electrode life when used at ambient temperature is 1 –3
years, if used at 80˚C this will be reduced to less than 4 months.
Never expose to temperatures below -12˚C, freezing will damage the electrode.

pH Adaptor & Electrode
7
Coatings on the glass or junction surfaces e.g. proteins, will prevent proper operation (see
maintenance on page 9). Avoid frequent or prolonged periods of use in these solutions.
To set the range
The stored calibration for the sensor is the pH range, which is suitable for most experiments. It is also
possible for the user to adjust the calibration constants of an electrode –this will be stored in the
connected Adaptor as the User pH range, see page 8.
To alter the range in the EasySense2 software:
1) Either select the Devices icon or the Setup icon (bottom left of screen), line 1: Sensors
and select the edit symbol.
2)
The range setting will be retained until changed by the user.
The sensor ranges
pH range
This range is the pre-set default calibration that is suitable for most investigations. The calibration is
set for operation at a temperature of 25˚C.
±1000 mV
This range gives the reading in mV and can be used in experiments on calibrating a pH sensor using
buffer solutions of known pH values. See page 14.
An ideal would be that the potential is zero mV when the pH is 7 but in a real pH system this is rarely
so, it is normally between -20 mV and +20 mV.
This range can also be used with ion-selective electrodes (ISE) and oxidation reduction probe (ORP).
All ISE’s work in the same manner as a pH electrode, in fact the pH electrode is really an H+ ISE. Ions
have either a positive charge or a negative charge. The ISE measures the electrical energy created by
the presence of the charged particles. An Ion Selective membrane controls the flow of the ions to the
electrode; it is this membrane that makes the electrode particular to an ionic species. The production
Tap or click the down arrow and select the
wanted range from the list.
Current range
highlighted
Edit symbol

pH Adaptor & Electrode
8
(3)
(4)
(5)
of a calibration curve is required to convert the mV reading to ppm or Log ion concentration reading.
Refer to the manufacturer’s guide for the ion-selective electrodes (ISE) and oxidation reduction
probes (ORP) for details of dilutions for calibration and mV slope values.
User calibration
If required the calibration constants of a pH electrode can be adjusted. The settings for an electrode
will be stored in the Adaptor as the User pH calibration.
Note: Mark the pH electrode and adaptor combination so they are used as a pair.
Standardised buffer solutions are used to adjust the sensor reading at either two or three points in
its range. A slope adjustment is made using these points and will affect the whole range, between
and beyond these points. The accuracy of the user calibration will depend upon the number of
calibration points used and their spacing. Ideally the buffer solutions used should encompass the
expected pH range and be as close as possible to the pH of the samples being measured.
A User calibration is best used when the:
experiment requires a very accurate calibration
electrode has aged to the point where its glass membrane has changed resistance
samples to be measured are at a lower or higher temperature than 25˚C. The buffer solutions
used to set values must be at the same temperature as the samples in the experiment. Buffers
values are temperature sensitive, enter a pH value for the buffer at that temperature.
Values of pH buffers a various temperatures:
Temperature ˚C
pH 4.0 buffer
pH 7.0 buffer
pH 10.0 buffer*
0˚
4.00
7.11
10.32
10˚
4.00
7.06
10.18
20˚
4.00
7.01
10.06
30˚
4.02
6.98
9.97
40˚
4.04
6.97
9.89
50˚
4.06
6.97
9.83
*Please note that high pH buffers are less stable as they tend to absorb atmospheric CO2 which
lowers their pH. Only open the bottle of buffer to pour into a beaker, never leave the bottle open.
How to calibrate
1. Change the sensor’s range to User Cal.
2. Select the Calibrate button.
3. If only two samples of buffers are being used
select the down symbol for Calibration
Type, then Two point from the list.
4. Type in the value of all the buffers being used
to set points into the appropriate boxes.
5. Rinse the electrode in distilled water. Wipe off
the excess and suspend the electrode in the value
one buffer, stir and select Calibrate.
6. After the 20 second count rinse the electrode in
distilled water, wipe off excess, suspend in the
value two buffer, stir and select Next.
(1)
(2)

pH Adaptor & Electrode
9
7. After the next count down rinse the electrode in distilled water, wipe off excess and suspend in
the value 3 buffer, stir and select Next.
8. After the next count a message will say ‘Your sensor has been calibrated ……’ Select Finish.
Note: Mark the pH electrode and adaptor combination so they are used as a pair.
Specifications
pH Adaptor
Sensor ranges: 3
Connectivity: USB or Bluetooth
Fastest logging speed: 50 samples per second [20 ms]
Firmware upgradeable
USB communication to PC: Full speed compliant
Power specifications: 5 V at 500 mA
Battery: rechargeable internal lithium-ion 3.7 V, 1300 mAh
Operating range: 0 - 40˚C and 0 to 95% RH (non-condensing)
Memory: Last log, up to 10,000 samples
Weight of pH adaptor only: approx. 85 g
External dimensions of pH adaptor only: approx. height 33 mm x width 50 mm x length 103 mm
Bluetooth
Bluetooth 4.2 low energy radio, single mode compliant
Transmit (TX) power: 0 dBm
Receiver (RX) sensitivity: - 90 dBm
Usable transmission range: up to 10 m in open air
Frequency Range: 2.402 to 2.480 GHz operation
pH Electrode
Range 1: pH, 0.00 to 14.00 pH. Resolution: 0.01 pH
Range 2: ±1000 mV, Resolution: 1 mV
Range 3: User pH, 0.00 to 14.00 pH. Resolution: 0.01 pH
E0±20 mV (25˚C)
Slope (pH 4.00 –6.86) >95%
Electrode Diameter: 12 to 13 mm
Electrode working temperature: 0 to 80˚C
Batteries
The Smart Wireless pH sensor is fitted with a rechargeable lithium-ion battery. Whenever the pH
sensor is connected to the USB port on the computer or to a USB mains charger (output 5 V at 500
mA or more), it will automatically re-charge the battery (LED status flashing white).
The adaptor will stay awake for 60 mins when Bluetooth advertising (LED status flashing blue).
Once connected to the EasySense2 software (LED status flashing green) the adaptor will stay awake until
the battery loses charge.
To switch Off: Press and hold down the On/Off switch for about 2 seconds until the white light is lit
solidly then release.

pH Adaptor & Electrode
10
Lithium-ion batteries are ‘memory-free’ and prefer a partial rather than a full discharge. Constant partial
discharges with frequent recharges will not cause any harm. Frequent full discharges should be avoided
whenever possible. Ideally the sensor should be stored at about 40% or more charge.
The speed at which a lithium-ion battery will age is governed by both its storage temperature
(preferably less than 40˚C) and state-of-charge. Eventually the battery will no longer deliver the
stored energy and will need to be replaced. A fully charged battery that loses its charge quickly will
demonstrate the need for replacement. When this happens, contact Data Harvest.
Updating the Firmware
Occasionally Data Harvest may release updated firmware which will contain improvements or new
features. Updates will be made available from the product specific page on the Data Harvest website.
Hard Reset
If the Smart Wireless pH sensor fails to respond to the computer carry out a hard reset.
If necessary attach the pH sensor to power.
Press and hold down the On/Off button for at least 8 seconds until the status LED gives a flash of
blue light then release.
If the sensor still fails to respond contact Product Support at Data Harvest.
Please provide details of:
The computer platform it is being used with and the EasySense2 software’s version number.
A description of the problem being encountered
If possible, telephone from a location where you can operate the sensor with the computer.
Electrode maintenance
The glass bulb can become coated with any compound that has an affinity for glass. After any
cleaning procedure, soak the electrode in its storage solution for at least 30 minutes before use.
General cleaning procedure: - Soak the electrode in 0.1 mol dm-3 Hydrochloric acid (HCl) for between
10 to 30 minutes. Rinse thoroughly with distilled water. Soak in its storage solution for at least 2
hours before use.
The pores of the reference junction may become clogged, if so heat to 50˚C in 3 to 4 mol dm-3
Potassium Chloride (KCl) or pH 4 buffer solution for 1 hour, then allow to cool to room temperature
in the same solution. Rinse with distilled water and soak in its storage solution for at least 30 minutes
before use.
Inorganic coatings: - Soak in either 0.1 mol dm-3 Tetrasodium E.D.T.A acid solution or 1% Decon 90
solution for 1 –2 hours.
Press and hold down
the On/Off button for
at least 8 seconds
Release when LED gives a
flash of BLUE light

pH Adaptor & Electrode
11
Oil, Grease: - Carefully wash the electrode under warm tap water using a non-filming dish washing
detergent or stain removing pre wash pre-treatment. Do not use automatic or electric dish washing
detergents. On overnight soak may be needed if build-up is heavy. Rinse thoroughly with fresh tap
water followed by a three rinses of distilled water. Soak the electrode in its storage solution for at
least 30 minutes before use.
Protein & Fatty Materials: - Either gently wipe the bulb with a tissue soaked in propanol or soak in
1% pepsin in 0.1 mol dm-3 hydrochloric acid (HCl) for at least 10 minutes or soak the pH electrode in
contact lens enzymatic cleaner solution overnight. Rinse thoroughly with distilled.
Highly resistant deposits: - Clean with H2O2or sodium hyperchlorite.
Bacterial cultures: - Chemically sterilize with ethylene oxide, soak a cloth to wipe the entire body.
CAUTION - Do not use strong solvents such as halogenated hydrocarbons, petroleum ether, etc. for
cleaning.
Theory of pH measurement
pH is a unit of measure which describes the degree of acidity or alkalinity of a solution and is usually
written as:
pH = -log [H+]
Where ‘p’ is the mathematical symbol of the negative logarithm and [H+] is the concentration of
Hydrogen ions.
pH levels generally range from 0 to 14. A pH value of 7 is described as neutral - the point at which the
activities of hydrogen and hydroxide in solution are equal. When the pH value is less than 7, the
activity of hydrogen ion is greater than that of the hydroxide ion and the solution is described as
acidic. Conversely, as the hydroxide ion activity is increased the solution becomes alkaline (or basic)
and the pH value is greater than 7.
The pH electrode is actually a combination of a two half-cells (electrodes) within a single body
Internal pH Half Cell, the measuring electrode, whose voltage varies proportionately to the
hydrogen activity of the solution, and a
Reference Cell, the reference electrode, which provides a stable and constant reference voltage
and completes the electrical circuit.
The pH Half Cell consists of a thin membrane of hydrogen ion sensitive glass blown on the end of a
high resistance glass tube. Within this tube is an internal reference system, which remains constant.
The Reference cell uses a similar system, but without using a hydrogen sensitive glass. It is housed
concentrically between the outer body of the electrode and the glass half-cell. It is comprised of a
reference element (silver/silver chloride) and an electrolyte solution that seeps through a porous
liquid junction (a small filter) to make the necessary electrical connection with the sample (the
external liquid).
The pH adaptor measures the difference between the pH Half-cell and the Reference cell in millivolts
DC. This millivolt reading is displayed in pH units.
The electrode signal varies with the pH according to the Nernst Equation:
E = Eº + 2.303 RT · log [H+]
nF
Where:
E = Measured electrode potential
Eº = Standard potential of the system (constant)
R = gas law constant (8.314 J mol-1 K-1)

pH Adaptor & Electrode
12
T = absolute temperature in ˚K (˚C + 273)
F = Faraday constant (96,485.33 C mol-1)
n = valence factor (n = 1 in the case of hydrogen)
At 25˚C the theoretical slope is 2.303 x 8.314 x (25 + 273.15) = 5,708.995 = 59.1695 mV/ per pH unit.
96,485.33 96,485.33
Temperature can affect the pH value in three ways:
1. The pH of the sample can change due to the hydrogen ion activity in the solution being
temperature dependent. This factor is usually ignored because accurate pH measurement will be
desired at that particular temperature.
2. Temperature will affect the glass membranes impedance.
3. Changes in temperature of a solution will vary the millivolt output of the electrode in accordance
with the Nernst equation. Whether or not temperature compensation is needed will depend on
the level of accuracy required.
Trouble shooting
Wild readings, check for air bubbles in the electrode tip.
Response time and stability are affected by the condition of the electrodes glass membrane and
reference solution. Restoration to acceptable levels can often be accomplished by cleaning the
electrode’s glass surface.
Sluggish response, erratic readings, or a reading that will not change can indicate electrode demise.
If the sensors are being used in a solution that has a high conductance e.g. seawater take readings
from the sensors individually. (Place one sensor in the solution, take a reading, and remove from the
solution. Place the other sensor in the solution, take a reading and remove).
Investigations
Acid - base titration
Monitoring photosynthesis
Respiration
Fermentation
Activity of enzyme
Studies of household acids & bases
Monitoring pH change during chemical reaction

pH Adaptor & Electrode
13
Neutralisation of a strong base (sodium hydroxide) by a strong acid
(hydrochloric acid)
This experiment uses the pH sensor to monitor the pH as 0.1 mol dm-3 hydrochloric acid is added to a
beaker containing 0.1 mol dm-3 sodium hydroxide.
1. Assemble the apparatus as shown.
2. Carefully fill the burette with 0.1 mol dm-3 hydrochloric acid. Place a beaker under the reservoir
and open the stopcock to allow a small amount of HCl to pass through. Pour the HCl from the
beaker back into the burette.
3. Add 25 cm3* of 0.1 mol dm-3 sodium hydroxide to the beaker and make sure the end of the pH
electrode is covered.
*Note: The volume of alkali may need to be increased, the solution should cover the bulb end of the pH
electrode. Do not remove the electrodes protective skirt - the end is made from permeable glass, which is
fragile and easily damaged
4. Place a magnetic stir bar in the beaker and turn on the stirrer. Check the stir bar rotates freely
and does not make contact with the electrode.
5. Open EasySense2 and select the Smart pH sensor
as the device and the Titration template from Lab
Setup.
Note: Lab Setup can be accessed on opening or via File -
> New Lab.
6. Tap or click below the X axis and select Volume.
7. Tap or click on Start to begin.
8. Tap or click on Take Sample to record the first pH
value with no acid added.
Sodium hydroxide
0.5 to 2% (Solutions 0.05 to 0.5 mol dm-3)
Xi; R36/38
Wear pvc gloves and eye protection.
Sodium hydroxide solution is dangerous to eyes
Refer to Hazard Sheets for First Aid Measures
0.1 M HCl in burette
0.1 M NaOH
Magnetic stirrer
pH electrode

pH Adaptor & Electrode
14
9. Type 0 into the ‘enter value’ box and close.
Note: Enter the TOTAL volume of acid added so far.
10. Turn the tap on the burette to add a measured amount e.g. 2 cm3. Let the solutions mix and
take a sample. Enter the volume of acid added e.g. 2.
11. Vary the amount of acid added as required.
12. Tap or click on the Stop icon to finish recording.
In this titration 2 cm3was added for the first 6 readings then the amount of acid added was reduced
to 1 cm, then after 19 cm3(closer to the expected end-point) it was reduced to 0.5 cm3
How to create a mV to pH calibration graph
Buffers. You will need a minimum of two buffers, preferably three or more e.g. 4, 7 and 10.
If you are only using two then its best if one is a ‘neutral’ buffer with a pH of 7, and the second is near
to the expected pH of the samples you will be testing. For example buffers with a higher pH (10) are
best for measuring bases, whereas buffers with a low pH (4) are best for measuring acidic samples.
Once you have chosen your buffers allow them all to reach the same temperature. Pour your buffers
into individual beakers for calibration. Check the temperature of the room and label the value of each
buffer with its pH value at that temperature.
For example: Values of pH buffers a various temperatures:
Temperature ˚C
pH 4.0 buffer
pH 7.0 buffer
pH 10.0 buffer
10˚
4.00
7.05
10.10
20˚
4.00
7.00
10.00
25˚
4.01
6.99
9.945
30˚
4.01
6.98
9.90
Close

pH Adaptor & Electrode
15
Connect the pH sensor to the computer, open the EasySense2 software and check the range of
the pH sensor is set to ±1000 mV.
In Setup check the mode is Continuous, select a
Numeric chart and Start logging.
Rinse the electrode with distilled water. Dab or
pat gently any excess water from the body of the
electrode using a paper towel.
Place the pH electrode in the beaker of the first
buffer solution, allow the reading to stabilise and
write down the mV reading and the pH value of the
buffer in a results table.
Rinse the electrode with distilled water. Dab or pat gently any excess water from the body of the
electrode using a paper towel.
Place the pH electrode in the beaker of the second buffer solution, allow the reading to stabilise
and write down the mV reading and the pH value of the buffer.
Repeat for all buffers supplied.
Draw a graph with the pH buffer value on the X axis (from 0 to 14) vs. mV reading on the Y axis.
Draw a best fit line.
This graph can be used to find the pH value for the mV reading from the sensor.
For example we used 9 different buffers:
pH of buffers
2
2.93
4.01
4.95
6.0
6.99
7.97
8.97
9.95
mV reading
287
222
163
105
47
-10
-67
-123
-175
-500
-400
-300
-200
-100
0
100
200
300
400
500
0 2 4 6 8 10 12 14
mV
pH
e.g. a 300 mV reading = a pH of 12
e.g. a 200 mV reading = a pH of 3.3

pH Adaptor & Electrode
16
To calculate the pH electrode slope percentage
The ratio of the measured potentials to the difference of pH gives the slope of the straight line.
E2–E1
pH2 –pH1
For example: pH buffer pH 4 and pH 7 are used. For buffer pH 4 the potential is 163 mV and in buffer
pH 7 its -10 mV.
163 –(-10) 173
7 –4 3
At 25˚C the theoretical slope is 59.17 mV/ per pH unit. To calculate the pH electrode slope percentage
divide the mV potential being generated per pH unit by the theoretical number and multiply by 100
58 x 100 = 98% slope
59.17
Generally a slope between 90 to 105% is acceptable.
Buffers
Buffers are solutions that have constant pH values and the ability to resist changes in that pH value.
To make up your own solutions:
pH
Add
of
to
of
4.0
2 cm3
0.1 mol dm-3 HCl
1000 cm3
0.1 mol dm-3 potassium hydrogen phthalate
7.0
582 cm3
0.1 mol dm-3 NaOH
1000 cm3
0.1 mol dm-3 potassium dihydrogen phosphate
10.0
214 cm3
0.1 mol dm-3 NaOH
1000 cm3
0.05 mol dm-3 sodium bicarbonate
Limited warranty
For information about the terms of the product warranty, see the Data Harvest website at:
https://data-harvest.co.uk/warranty.
Damage to the pH sensitive glass bulb is not covered by warranty.
FCC Details
This device complies with Part 15 of the FCC Rules. Operation is subject to the following two
conditions: (1) this device may not cause harmful interference, and (2) this device must accept any
interference received, including interference that may cause undesired operation.
Note: Data Harvest products are designed for educational use and are not intended for use in
industrial, medical or commercial applications.
WEEE (Waste Electrical and Electronic Equipment) Legislation
Data Harvest Group Ltd is fully compliant with WEEE legislation and is pleased to
provide a disposal service for any of our products when their life expires. Simply return
them to us clearly identified as ‘life expired’ and we will dispose of them for you.
[mV/pH]
58 [mV/pH]
=
=
Slope S =
Slope S =
Other manuals for Smart Wireless 1110PK
1
This manual suits for next models
2
Table of contents
Other Data Harvest Accessories manuals
