DCS DishDrawer DD124 Series User manual

DRAWER STYLE DISHWASHER
MODELS:
DD224 Series Models
DD124 Series Models
USE & CARE GUIDE


INSTALLATION CHECKLIST
Your installer MUST have completed and checked the following:
The DishDrawer®is square and level.
The DishDrawer®is fastened securely to the cabinetry.
Ensure moisture protection tape has been applied and the cabinet is sealed according
to the DishDrawer®Installation Instructions.
The DishDrawer®opens and closes freely. The DishDrawer® must be free to close
completely with no resistance from cabinetry.
For the integrated models, check the 5/16” air gap has been achieved in the correct
place.
The power supply is connected and switched on.
The inlet water hose is connected and turned on. There should be no leaks.
The drain hose(s) are connected and there are no leaks. There must be no kinks, or
obstructions in the drain hose(s).
The spray arm is in the center and can freely rotate.
The rinse program has been run.
The water level will be below the stainless steel filter plate at the end of the wash
program. It is normal to find some water in the drain filter area.
Set the water softener to the correct water hardness for your area (DD224-H, DD124-H
models only).
Important!
The installer is responsible for the DishDrawer® installation. Incorrect installation is
not covered by warranty.

IMPORTANT SAFETY INFORMATION
SAVE THESE INSTRUCTIONS
WARNING!
For your safety, follow basic precautions when using your DishDrawer®, including
the following:
Please read all instructions before operating the DishDrawer®.
The information in this manual must be followed to minimize the risk of fire or
explosion or to prevent property damage, personal injury or loss of life.
Use the DishDrawer®only for its intended function as described in this Use & Care.
Use only detergents or rinse agent recommended for use in a domestic Dishwasher
and keep them out of reach of children. Check that the detergent dispenser is empty
after the completion of each wash program.
When loading items to be washed locate sharp items so that they are not likely to
damage the lid seal and load sharp knives with the handles up to reduce the risk of
cut type injuries.
Do not touch the heater plate during or immediately after use.
Do not operate your DishDrawer®unless all the enclosure panels are properly in place.
Do not tamper with the controls.
Do not abuse, sit on, stand in or on the drawer or dish rack of the DishDrawer®.
The cup racks are designed to support cups, glasses and kitchen utensils. When the
cup racks are in the DishDrawer®do not lean on or use the cup racks to support your
body weight.
To reduce the risk of injury, do not allow children to play in or on the DishDrawer®.
Under certain conditions hydrogen gas may be produced in a hot water heater system
that has not been used for two weeks or more. HYDROGEN GAS IS EXPLOSIVE. If the
hot water system has not been used for such a period, before using the dishwasher,
turn on all hot water taps and let the water flow from each for several minutes.This
will release any accumulated hydrogen gas. As gas is flammable, do not smoke or use
an open flame during this time.
Remove the door to the washing compartment when removing an old dishwasher
from service or discarding it.
Dishwasher detergents are alkaline.They can be dangerous if swallowed. Avoid
contact with skin and eyes, keep children and infirm person(s) away from the
dishwasher when the drawer is opened.

INSTALLATION
This DishDrawer®must be installed and located in accordance with the Installation
Instructions before it is used. If you did not receive Installation Instruction sheets with
your DishDrawer®, you can order them by calling your Authorized Service Agent.
Installation and service must be performed by a qualified technician.
If the power supply cord is damaged, it must be replaced by a dealer or Authorized
Service Center or a similar qualified trades person in order to avoid a hazard.
Ensure the DishDrawer®is secured to adjacent cabinetry using the brackets provided.
Failure to do so may result in an unstable product, which may cause damage or injury.
Do not operate this appliance if it is damaged, malfunctioning, partially disassembled
or has missing or broken parts, including a damaged power supply cord or plug.
Do not store or use petrol, or other flammable vapors and liquids in the vicinity of the
DishDrawer®.
Connect to a properly rated, protected and sized power supply circuit to avoid
electrical overload.
Make sure that the power supply cord is located so that it will not be stepped on,
tripped over or otherwise subject to damage or stress.
Do not install or store the DishDrawer®where it will be exposed to temperatures
below freezing or exposed to weather.
Do not use an extension cord or a portable electrical outlet device (e.g. multi socket
outlet box) to connect the DishDrawer®to the power supply.
MAINTENANCE
Do not repair or replace any part of the appliance or attempt any servicing unless
specifically recommended in this Use & Care. We recommend that you call an
Authorized Service Agent.
Keep the floor around your appliance clean and dry to reduce the possibility of
slipping.
Keep the area around/underneath your appliance free from the accumulation of
combustible materials, such as lint, paper, rags and chemicals.
When cleaning the underside of the filter plate, care must be taken on the sharp outer
edge to avoid the risk of cut type injuries.

OPERATIONAL
Important!
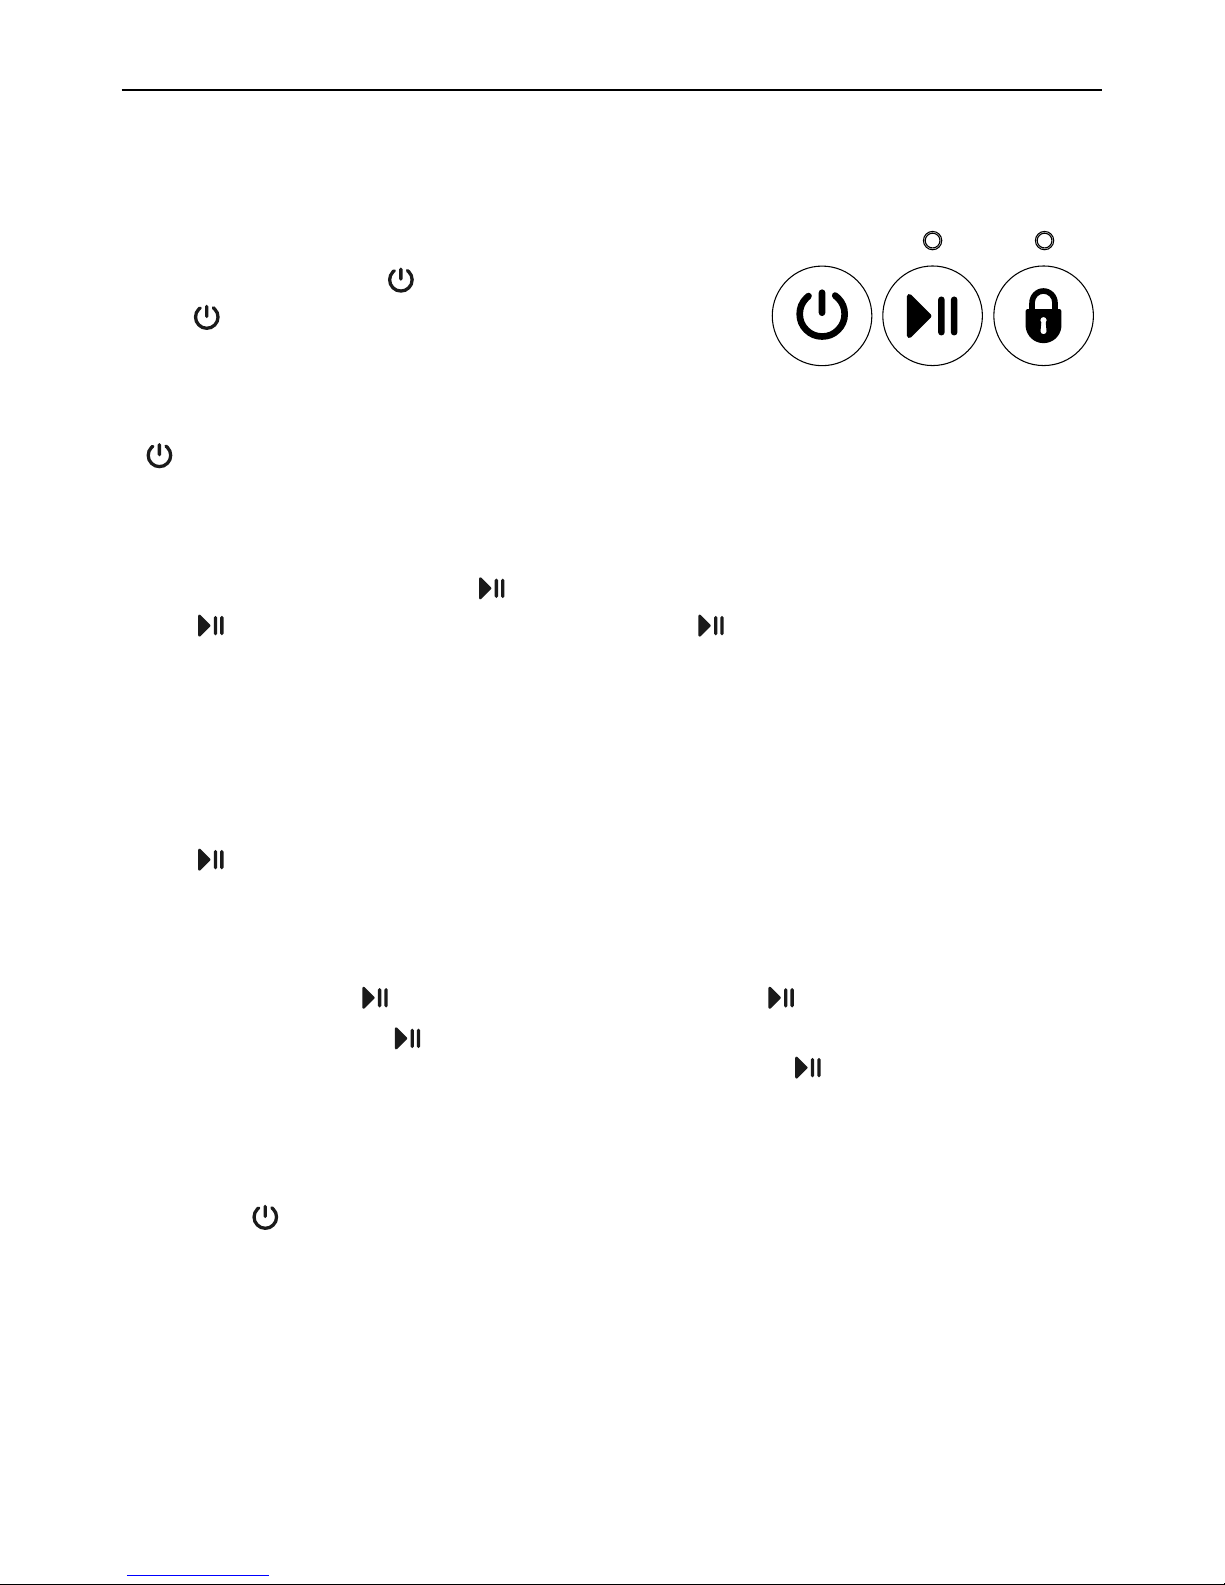
Under no circumstances should you open the drawer whilst the DishDrawer®is in
operation.
Always press the button to pause and wait until you hear the three additional
beeps before opening the drawer.
The DishDrawer®must be used with the motor assembly, filter plate, drain filter and
spray arm in place.
When disconnecting the appliance pull the plug rather than the power supply cord or
junction of cord to avoid damage.
Take care when loading the DishDrawer®not to load dishware items so it prevents
the lid from properly sealing with the drawer. Items should be placed so they do not
protrude above and/or forced into the drawer, otherwise a service call may result.
Household appliances are not intended to be played with by children. Children or
persons with a disability which limits their ability to use the appliance, should have a
responsible person instruct them in its use.The instructor should be satisfied that they
can then use the appliance without danger to themselves or their surroundings.
Close supervision is necessary if this appliance is used by or near children. Do not
allow children to play inside, on or with this appliance or any discarded appliance.
If a Dishwasher cleaner is used, we would strongly recommend a wash program
with detergent should be run immediately afterward, to prevent any damage to the
DishDrawer®.
The DishDrawer®is designed for washing normal household utensils. Items that
are contaminated by petrol, paint, steel or iron debris, corrosive, acidic or alkaline
chemicals are not to be washed in the DishDrawer®.
If the DishDrawer®is not being used for long periods of time, turn the electricity and
water supply to the DishDrawer®off.
Do not pour detergent or rinse agent into the salt reservoir. The detergent or rinse
agent will destroy the water softener.
Important!
This Use & Care should be retained with the appliance for future reference. Should
the appliance be sold or transferred to another owner, always ensure that the
Use & Care is left with the appliance in order that the new owner can become
familiar with the appliance and the relevant warnings.

DISHDRAWER® USE & CARE
DishDrawer®Single DD124 Series
CONTENTS
Installation checklist
Important safety information
Controls 2
Operation 4
Wash program chart 5
Caring for your dinnerware 6
Dishwasher standards test 7
Accessories 8
Loading 10
Detergent dispenser 12
Water softener 14
Rinse agent dispenser 16
Option adjustment 17
User maintenance instructions 19
Trouble shooting 22
Fault codes 25
Limited warranty 26
This Use & Care explains how to
operate and maintain your new
appliance properly and safely. Please
read the whole guide carefully before
starting to use your appliance.
Your product may differ slightly from
the diagrams in this book.
DishDrawer®Double DD224 Series

2
CONTROLS
If you have a double DishDrawer®, each
drawer has its own controls and can run
independently of the other.
POWER BUTTON
The button turns the DishDrawer® on or
off. Opening the drawer will automatically
turn the DishDrawer® on for 30 seconds. To
end a wash program in mid cycle, press the
button. Any water in the DishDrawer®
will be pumped out.
START/PAUSE BUTTON
The button starts a wash program. Press the button to pause or restart the
DishDrawer® during a wash program. When paused, wait for three beeps before
opening the drawer. Forcing the drawer open while in mid cycle may cause damage
or injury.
DELAY START
The button also sets the Delay Start feature which can delay the start of a wash
program from 1 to 12 hours. This feature also satisfies Shabbat requirements if the
Auto Power option is disabled (see Option Adjustment).
To activate Delay Start
1Press and hold the button until the light above the button turns purple.
2Continue holding the button down until the desired delay time has been reached.
The DishDrawer® will emit audible ‘beeps’ as you hold the button down, each
beep indicates another hour delay.
3The DishDrawer® will start once the delay time has elapsed and the drawer is closed.
To cancel Delay Start
Press the button.
Control buttons

3
LOCK BUTTON OPTIONAL
The button activates/deactivates the Keylock or the Childlock functions.
Keylock
The Keylock feature disables all the buttons on the DishDrawer®.
To activate, press and hold the button until you hear one beep (3 seconds). The
light above the button is lit when Keylock is activated.
To cancel the Keylock feature, press and hold the button until the light above the
button disappears.
Childlock
The Childlock feature locks the drawer and disables all the buttons.
To activate, press and hold the button until you hear two beeps (5 seconds). The
light above the button is lit when Childlock is activated.
To cancel the Childlock feature, press and hold the button until the light above
the button disappears.
WASH PROGRAM SELECTOR
Press the button to select a wash program. The DishDrawer® will remember the
last program used.
ECO BUTTON OPTIONAL
Press the button if you would like the wash program to use less energy and time.
The red ECO light will indicate the feature is on. If your dishes are heavily soiled or
you require enhanced dry performance, we do not recommend ECO programs.
POWER FAILURE
If the DishDrawer® is operating and a power failure occurs, it will stop. The
DishDrawer® may be unable to be opened during this time. When the power supply is
resumed, the DishDrawer® will restart in the same part of the wash program.

4
1Load Dishes
Remove all food scraps and load the
dishes.
2Add Detergent
3Check Rinse Agent
4Press the Button
5Select a Wash Program
6Check
Ensure there is nothing obstructing the
spray arm. The drain filter must be level
with the filter plate.
7Start
Close the drawer and press the
button.
8Finish
The DishDrawer® will beep six times to
indicate the end of the wash program.
At the end of the wash program the
drying fan will continue to run for a
set time or until the drawer is opened.
The fan assists with drying and uses
negligible amounts of energy. It is
normal for some water to remain in the
drain filter area after the wash program
is complete.
5
7
4
1
3
2
6
OPERATION

5
WASH PROGRAM CHART
Standard Wash Program - when to use
Heavy
Heavily soiled
pots, pans and
dishes.
Normal
Dishes with
normal soils
for optimum
wash and dry
performance.
Fast
Lightly soiled
dishes.
Delicate
Lightly soiled and
heat sensitive
crockery.
Rinse
Prevents odors
and soils drying
on dishes.
pre wash 1 pre wash 1 pre wash pre wash
pre wash 2 pre wash 2
main wash
150oF
main wash
145oF
main wash
130oF
main wash
120oF
post rinse 1 post rinse post rinse post rinse
post rinse 2
final rinse
163oF
final rinse
140oF
final rinse
120oF
final rinse
130oF
drying phase drying phase drying phase
Eco Wash Program - when to use
Heavy
Heavily soiled
everyday dishes.
Normal
Normal soiled
dishes for
optimum energy
use.
Fast
Lightly soiled, non
greasy dishes.
Delicate
Lightly soiled, non
greasy and heat
sensitive crockery.
pre wash 1 pre wash pre wash
pre wash 2
main wash
150oF
main wash
130oF
main wash
115oF
main wash
115oF
post rinse 1 post rinse post rinse post rinse
post rinse 2
final rinse
150oF
final rinse
130oF
final rinse
115oF
final rinse
120oF
drying phase drying phase drying phase
note
Wash times can vary depending on the incoming water temperature, ambient
conditions, type of dish load and whether the drawer has been opened during the
wash.

6
CARING FOR YOUR DINNERWARE
The combination of high temperatures and dishwasher detergent may cause
damage to some items if they are washed in the DishDrawer®. Remember, if in any
doubt about any aspect concerning items washed in the DishDrawer®, follow the
instructions from the manufacturer of the items, or wash the item by hand.
Cutlery & Silverware
All cutlery and silverware should be
rinsed immediately after use to prevent
tarnishing caused by some foods. The
Rinse wash program is useful for this.
Silver items should not come into
contact with stainless steel, for example
other cutlery. Mixing these items can
cause staining. Remove silver cutlery
from the DishDrawer® and hand dry
it immediately after the program has
finished.
Aluminum
Aluminium can be dulled by dishwasher
detergent. The degree of change
depends on the quality of the product.
Other Metals
Iron and cast iron objects can rust and
stain other items. Copper, pewter and
brass tend to stain.
Woodware
Wooden items are generally sensitive
to heat and water. Regular use in the
dishwasher may cause deterioration
over time. If in doubt, wash by hand.
Glassware
Most everyday glassware is dishwasher
safe. Crystal, very fine and antique
glassware may etch i.e. become opaque.
You may prefer to wash these items by
hand.
Plastic
Some plastic may change shape or color
with hot water. Check manufacturer’s
instructions about washing plastic
items. Washable plastic items should be
weighed down so they do not flip over
and fill with water or fall through the
basket during the wash.
Decorated Items
Most modern china patterns are
Dishwasher safe. Antique items, those
with a pattern painted over the glaze,
gold rims or hand painted china may be
more sensitive to machine washing. If in
doubt wash these items by hand.
Glued Items
Certain adhesives are softened or
dissolved in machine washing. If in
doubt, wash glued items by hand.
VACATION TIME
If the DishDrawer® is not going to be used for some time, we recommend you
ensure the baskets are empty. Leave the inside of the DishDrawer® clean. Leave the
drawers ajar to allow air to circulate. Turn off both the power and water supply to the
DishDrawer®.

7
DISHWASHER STANDARDS TEST
The DishDrawer®s are tested to various standards for both wash and dry performance.
The following are loading pattern diagrams, detergent and rinse agent quantities
used for the DishDrawer®.
Detergent Quantities 5g (pre wash) per drawer
10g (main wash) per drawer
Rinse Agent Setting 4
Water Softener Setting
(for DD224-H and DD124-H models only)
Adjust the water softener to match
the water hardness. Refer to the water
softener and option adjustment section.
Recommended Loading Pattern
top drawer bottom drawer

8
ACCESSORIES
The inserts and racks can be added or removed to suit your individual needs. If you
have the double DishDrawer® model, some of the accessories are interchangeable
between the two drawers. For example you can combine the two Mega Racks into
one drawer and wash all cups and glasses, leaving the other drawer for plates and
larger items.
a. Basket
The basket holds some of the
accessories in place and keeps dishes
away from the spray arm.
b. Drain Filter Access Panel
The drain filter access panel is designed
to snap onto the basket over the
drain filter. This prevents objects from
touching the base of the DishDrawer®
and stopping the rotation of the spray
arm, while still giving access to the
drain filter.
c. Mega Rack
The Mega rack is designed to hold
glasses, cups and small plates.
d. Plate Insert
The plate insert supports plates and
bowls.
HOW TO INSTALL THE MEGA
RACK
To install the Mega rack, place the
outer legs of the rack on top of the
basket, and clip the Mega rack to
the side of the basket. When the
Mega rack is correctly installed it
should not feel loose in the basket.
a
b
c
d

9
CUP RACKS
Cups, glasses and kitchen utensils can be placed on
the left and right hand side of the cup racks.
For best performance ensure there are no large
items below, blocking the wash water from
reaching the cup racks.
Wine glasses can be supported on the cup racks if
used in conjunction with the Mega Rack.
There are stops on the cup rack to prevent cups
from touching the DishDrawer® wall. This will
maximize the dry and wash performance.
CUTLERY BASKET
Cutlery, small kitchen utensils and some plastic lids
are best placed into the cutlery basket.
For best wash performance, we recommend loading
cutlery with handles pointing down and sharp
utensils with their handles facing up, to reduce the
risk of injury.
Mix spoons, knives and forks within each section,
to stop cutlery nesting together and to ensure the
water circulates freely.
Keep stainless steel from touching silver cutlery to
avoid staining.
Use the oval slots (spoon rack) for spoons and
teaspoons.
Small items, like plastic lids, can be placed under
the spoon rack, this will prevent them from being
displaced by wash water and falling to the bottom,
where they may stop the spray arm rotation.

10
LOADING
Wash water for the DishDrawer® comes from the spray arm which is situated inside
the base of the drawer. The spray arm rotates, providing wash water to all areas of
the wash compartment so care needs to be taken when loading dishes to ensure
there is enough space and room for the water to reach all areas, particularly the cup
racks. If there are any items blocking the spray arm path or the wash water, then the
performance will be ineffective.
How to load your DishDrawer®
Note
The basket and its inserts are not designed to be lifted out of the DishDrawer® while
loaded with dishes.
Standard load Heavy load

11
HOW NOT TO LOAD YOUR DISHDRAWER®
figure 1 - overcrowding:
Overcrowded and wash water will not
reach some of the dinnerware.
Cups, glasses and bowls must have
their openings facing downwards.
figure 2 - nesting:
figure 3 - item placement: figures 4 & 5 - item placement:
The plates are nesting together and
wash water may not get through.
Ensure cutlery are not nesting or stuck
together. They need to be evenly spread
out.
Ensure dishware items are not forced
into or protrude out of the drawer as
it may prevent the lid from properly
sealing which could result in a service
call.
Locate sharp items safely to prevent
injuring the user and damaging the lid
assembly.
Check the bottom of the cutlery
basket to ensure sharp or pointed
items have not come through as they
may stop spray arm rotation.
Ensure cutlery has not fallen through
the basket and stopped the spray arm
from rotating.
The large bowl is blocking wash water
reaching the cup racks.
Large utensils should be on cup racks so
they do not become dislodged and stop
the spray arm from rotating.
Sharp or pointed items must be placed
horizontally or with sharp edges/points
facing downward to avoid risk of injury.

12
DETERGENT DISPENSER
Important!
Only use powdered detergent recommended
for domestic automatic dishwashers in the
detergent dispenser.
Never sprinkle or pour detergent directly
onto any item in the DishDrawer®.
Tablets and liquid detergents are not suitable
to be used in the DishDrawer®.
Hand washing liquids, soap, laundry
detergents or disinfectants will damage the
DishDrawer®.
FILLING THE DETERGENT DISPENSER
1Press the latch down and the door will open.
2Pour in detergent. No detergent is needed
for the Rinse program.
3After filling the compartment(s), close
the dispenser door until it clicks shut. The
detergent will automatically be released into
the DishDrawer® during the wash program.
aPre Wash Compartment,
10g capacity
bMain Wash Compartment,
30g capacity
cDetergent Dispenser Latch
dRinse agent Indicator Light
eRinse agent Plug
open detergent dispenser
closed detergent dispenser
ab
ed
c
a,b
WARNING!
Dishwasher detergents are strongly alkaline and can be dangerous if swallowed.
Avoid contact with skin and eyes.
Keep children and infirm persons away from the DishDrawer® when the drawer is
open.
Check that the detergent receptacle is empty after completion of the wash cycle.
Failure to do so could result in poisoning.

13
DETERGENT QUANTITIES
The detergent quantities recommended below are for individual drawers.
Water type Wash program Detergent quantities
prewash
(teaspoons)
main wash
(teaspoons)
Hard (>150ppm or >9gpg) All* 2 6
Medium (100-150ppm or 6-9gpg) All* 2 4
Soft (<100ppm or <6gpg) Heavy
Normal
Delicate
Fast
1
1
3
2
1
1
*No detergent is required in the pre wash compartment for the fast wash program.
Soft water situations
If you live in an area of naturally
soft water or your household water
is softened, avoid using too much
detergent in your DishDrawer®. An
excess amount of detergent is very
aggressive on glassware and may cause
irreversible etching.
Etching is a chemical deterioration
that occurs on the surface of
glassware when it is subjected to high
temperatures, too much detergent
and/or soft water situations. Etching
is caused by a combination of very hot
water, which causes the detergent to
become very aggressive, but because
the water is soft, there are no water
hardness mineral ions for the detergent
to bind to, so it extracts mineral ions
directly from the glass.
Etching looks like rainbow colored
film, as the glass is subjected to further
washing the surface will eventually
appear opaque. This type of etching is
irreversible.
To prevent further etching from
occurring on glassware use less
detergent (follow the recommended
detergent quantities in the Use & Care
for soft water situations), and ensure
the dishwasher is not overloaded, so
water can reach all the dishes during
the wash.
Hard water situations
If you live in a hard water situation,
we recommend the installation
of a household water softener to
improve the water quality, detergent
effectiveness and prevent the build up
of calcium deposits on dishes and in
the DishDrawer®.
Certain brands of dishwasher
detergent contain varying quantities of
phosphates, which help soften water.
We suggest you use a detergent with
high phosphate content to improve the
wash. The detergent compartments
need to be completely FULL and rinse
agent is used with its setting fixed at 5.
We recommend the use of a dishwasher
cleaner/descaler whenever you notice
a build up of calcium deposits in your
DishDrawer®.
After you have used the dishwasher
cleaner/descaler you must run another
wash program with detergent to
prevent damage to the DishDrawer®.

14
WATER SOFTENER DD224H, DD124H MODELS ONLY
SETTING UP THE WATER SOFTENER
Using hard water (above 100ppm) for dishwashing can be detrimental to the
performance of your DishDrawer®. Glasses will become opaque and dishes will
become spotted or covered in a white film.
DETERMINE THE WATER HARDNESS IN YOUR LOCAL AREA
Your local water company will be able to provide you with information. Identify the
setting you require for your DishDrawer® from the water hardness table below. For
example, if your water hardness is 500ppm, then the water softener setting on your
DishDrawer® should be four. Refer to Option Adjustments section to adjust the water
softener so that the setting corresponds to your water hardness.
DishDrawer® setting Grains Per Gallon (gpg) Parts Per Million (ppm)
0 0 - 6 0 - 100
1 6 - 14 100 - 250
2 14 - 20 250 - 350
3 20 - 26 350 - 450
4 26 - 32 450 - 550
5 32 - 36 550 - 625
Note
If your water hardness is above 625ppm, we highly recommend you completely fill the
detergent compartment for all programs except Rinse and the rinse agent setting be
at 5. If your water hardness is above 625ppm, the performance of your DishDrawer®
will decline.
You may hear some unusual noises when the water softener is in operation, this is
normal.
HOW TO FILL THE SALT RESERVOIR
1Open the DishDrawer®.
2Unscrew the salt reservoir plug by turning
counter-clockwise.
3Place the salt into the salt container and pour
the contents into the salt reservoir. The salt
reservoir can hold just over one pound of
salt.
This manual suits for next models
5
Table of contents
Other DCS Dishwasher manuals

DCS
DCS DishDrawer DS224 Series User manual

DCS
DCS DishDrawer DD24DUT7 User manual

DCS
DCS DD24SUT User manual

DCS
DCS DishDrawer DD124P5 User manual

DCS
DCS DishDrawer DD24 series User manual

DCS
DCS DD24SUT7 User manual

DCS
DCS DishDrawer DD124P5 User manual

DCS
DCS DW-24SS Technical manual

DCS
DCS DishDrawer DD24DUT7 User manual

DCS
DCS DishDrawer DD124P5 User manual