DeGuard DKEB01-SS User manual
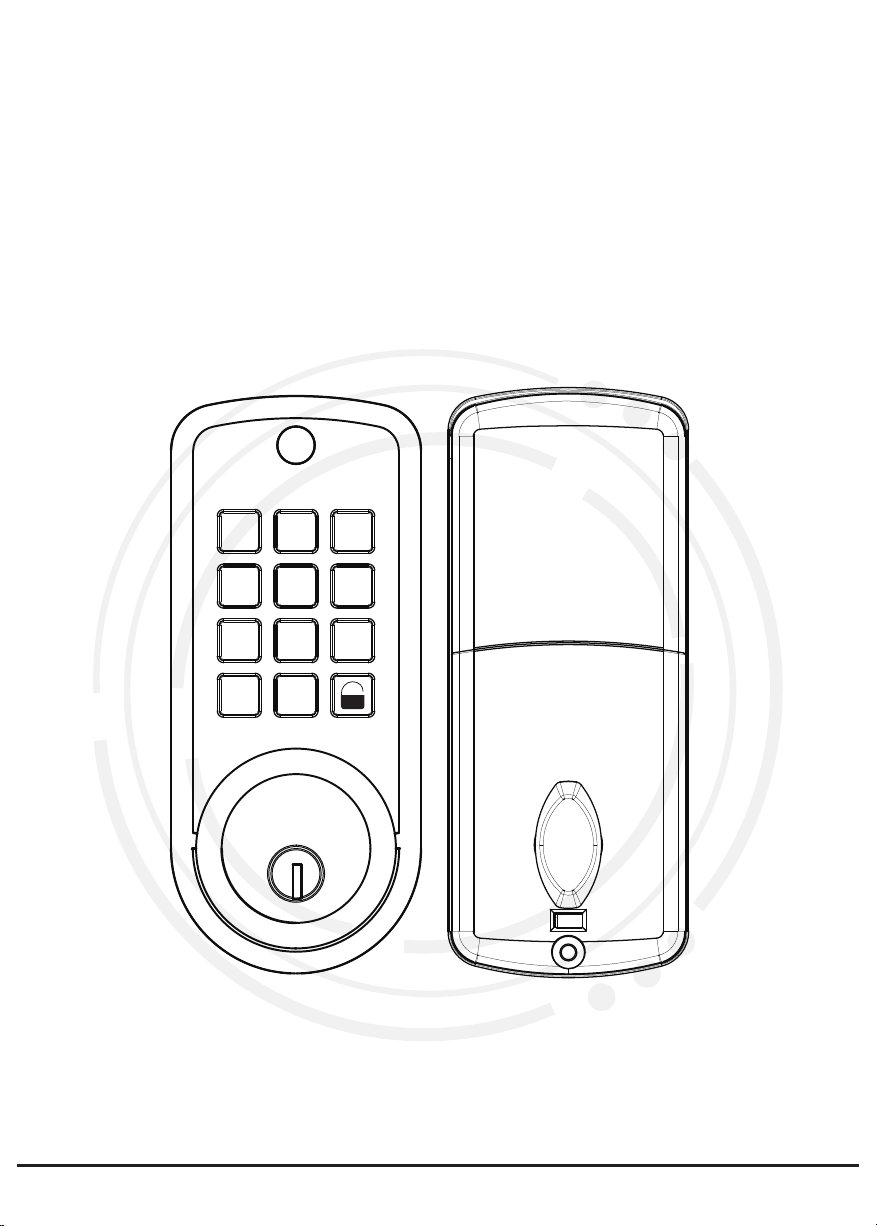
USER MANUALUSER MANUAL
Thank you for purchasing our products.
Please read this instruction carefully before use and strictly follow the instructions.
123
456
789
C 0

1. Check door thickness and Door Frame. Installation Template
2. Check door open direction.
Door frame≧110mm
Door thickness: 38-48mm
Left open Right open
Door Preparation
Packing List
01
A
1 Piece 1 Piece 1 Piece 1 Piece
1 Piece
1 Piece
2 Piece
G H I J K
L
B C D E
F
25mm 4 Piece
40mm
1 Piece
30mm
3 Piece
22mm
1 Piece
10mm
2 Piece
68 m m
58 m m
60 m m
54 m m
10 m m
25 m m
27 m m

① Drill holes according to the installation template.
Installation Diagram
Installation Instructions
L
K
J
A
B
I
C
DE
G
H
F
A) Check the required backset (60mm or 70mm).
B) Align the template along the vertical center line
of the deadbolt(D) at the desired height, and tape it
to the door.
C) Mark the holes first, then start drilling.
02
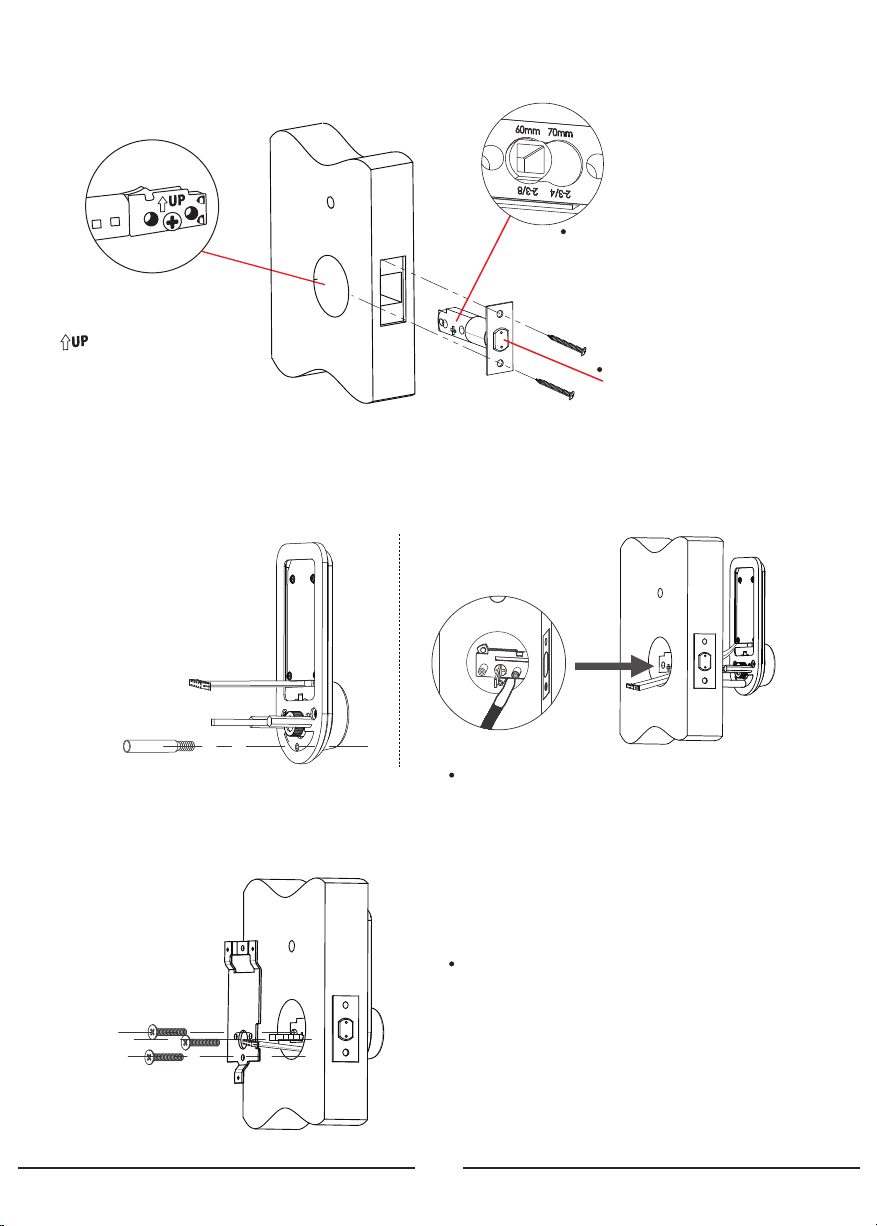
② Install the latch (D) with screws (E) on the door.
③ Install outdoor unit(A) on the door. Inserting Piece F before installation.
④ Install mounting plate (B) with screws (G) on the door.
B
G
A
F
Note: Cable goes underneath deadbolt.
Note: The cable goes through the notch
on the lower right part of the mounting
plate at first.
E
D
Note: The deadbolt has TWO
backset options: 60mm or 70mm,
please adjust it by yourself.
Note: DO NOT Push the
latch out before installation.
Before inserting the latch
into the hole, check that the
mark is facing upwards.
03

⑤ Install indoor unit(C) with screws(I、H) on the door.
⑥ Install 4 pieces AA Alkaline batteries. ⑦ Mark and drill hole for strike.
J
Testing the lock by rotating the knob on unit C and using mechanical key(J)
C
I
H
123
456
789
C 0
E
58 m m
25 m m
27 m m
K L
04
Note:Put the lock spindle VERTICALLY into the
hole connected to the knob at the indoor unit of
the lock, that means the rotating part of the knob
should also be turned to VERTICAL position.
L R
If it is a left hand door, please turn the switch to L.
If it is a right hand door, please turn the switch to R.

The information presented serves only as a reference.
1. This lock is equipped with mechanical keys for manual unlocking. Remove mechanical
keys from the package and keep them in a safe place and always have access to them.
2. To power on the lock, four alkaline AA batteries(not included) are required. Non-alka-
line and rechargeable batteries ARE NOT RECOMMENDED.
3. The operation of setting lock has a stand-by time limit of 20 seconds. Without any
activity, this lock will shut after 20 seconds.
4. This lock is not designed to be exposed to direct sunlight or rain. It is not waterproof IP
rated. Do not install it in places with high temperatures, excess humidity, direct sunlight,
constant splashing of water or near equipment that generate heat.
5. If using the Lock with the # key or Auto-Lock features, make sure to have your passcode
or mechanical key with you to prevent locking yourself out.
6. Low battery warning: If battery voltage is lower than 4.8V, the lock beeps and LED flash-
es red for 5 seconds. Replace all four batteries with new ones immediately.
7. Do not use or store the product in places where there are leaks or splashes.
8. Do not use solvents or other corrosive chemicals to clean the exterior of the system.
9. This device is not intended for use by persons (including children) whose physical,
sensory or mental abilities are different or reduced, or lack experience or knowledge.
10. Children should be supervised to ensure they do not use the device as a toy.
11. Avoid falling product, as it could be damaged.
12. Do not attempt to remove electronic parts or product mechanisms as it may cause a
malfunction and void the warranty.
Automatic Deadbolt Door Lock
This Smart Auto Door Lock can lock and unlock automatically. Instead of spending
minutes searching your key from your bag, aiming at the key hole, turning round the
cylinder and other never too less effort, the only thing you need to do is to input your
door lock password, then the lock unlocks itself for you to enter your sweet home. It will
lock itself also with a time span set.
Product Profile
Notes
05
IMPORTANT: The lock comes with a factory preset Programming Code (123456) and
a User Code (123).
Please change programming code and user code as soon as possible after installation to
ensure security.
WARM TIPS: Press to lock when you leave home.
NOTE:
1. After setting new user code, the factory preset user code 123 will be invalid.
2. Code numbers can be any combination of 4-12 digits.
3. Before you enter your password, you can input some random numbers to prevent the
password from being seen.
Keypad Locked: After 4 failed pin code attempts, the keypad will shut down for 3
minutes before being able to attempt the pin again. Mechanical key can be used to
unlock in this state.
All specifications are subject to change without notice. All rights reserved.
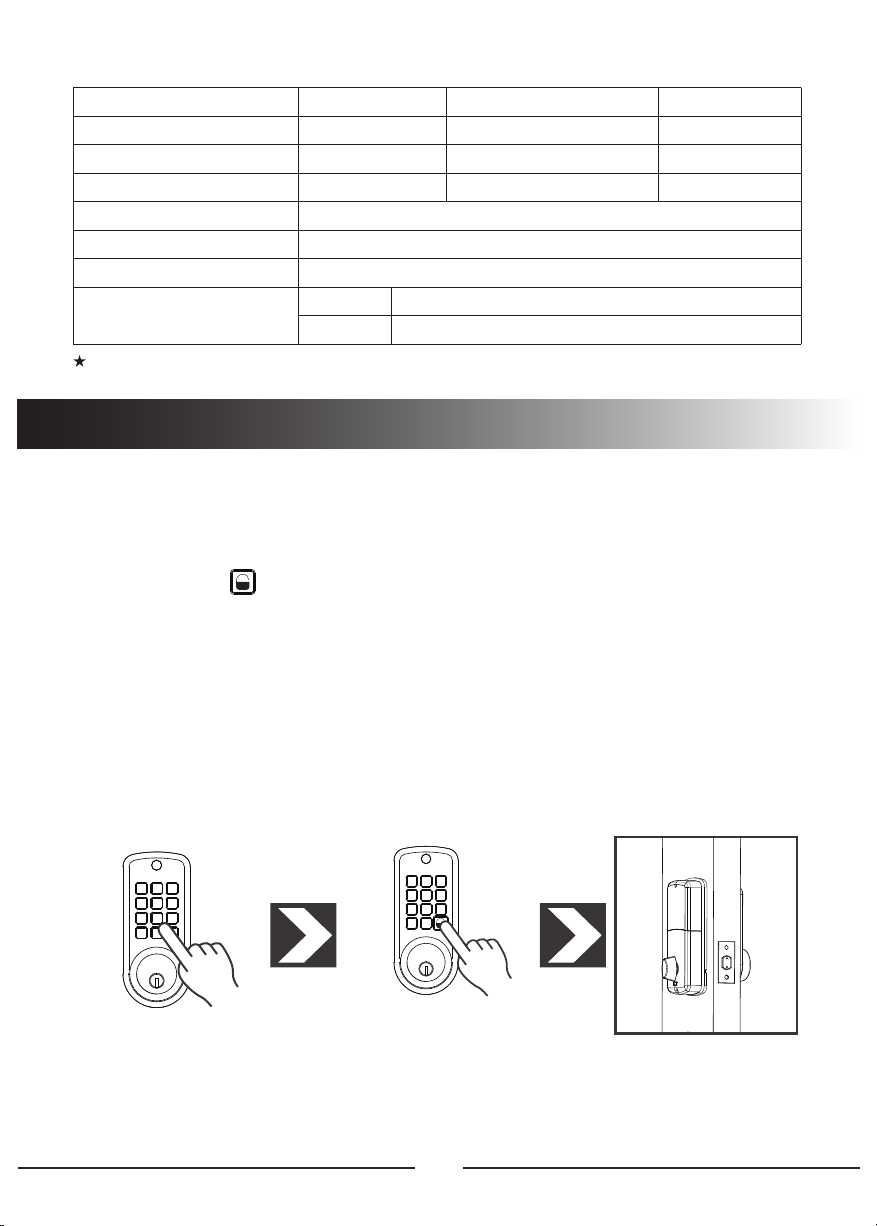
Specifications
Material
Door thickness
Woring Temperature
Working Power Consumtion
Power Supply
Unlocking Methods
User Capacity
Zinc Alloy
38mm-48mm
-20°C~70°C
<200mA
6V (4pcs AA Alkaline Batteries not included)
Passcode 、Mechanical Key
10 code users
Front
Back
S110M
4~12 digits
20%~80%RH
<30uA
Model NO.
Code Length
Working Humidity
Static Power Consumption
60(W) x 137(H) x 25(D) mm
65(W) x 155(H) x 30(D) mm
Product Dimension
123
456
789
C 0
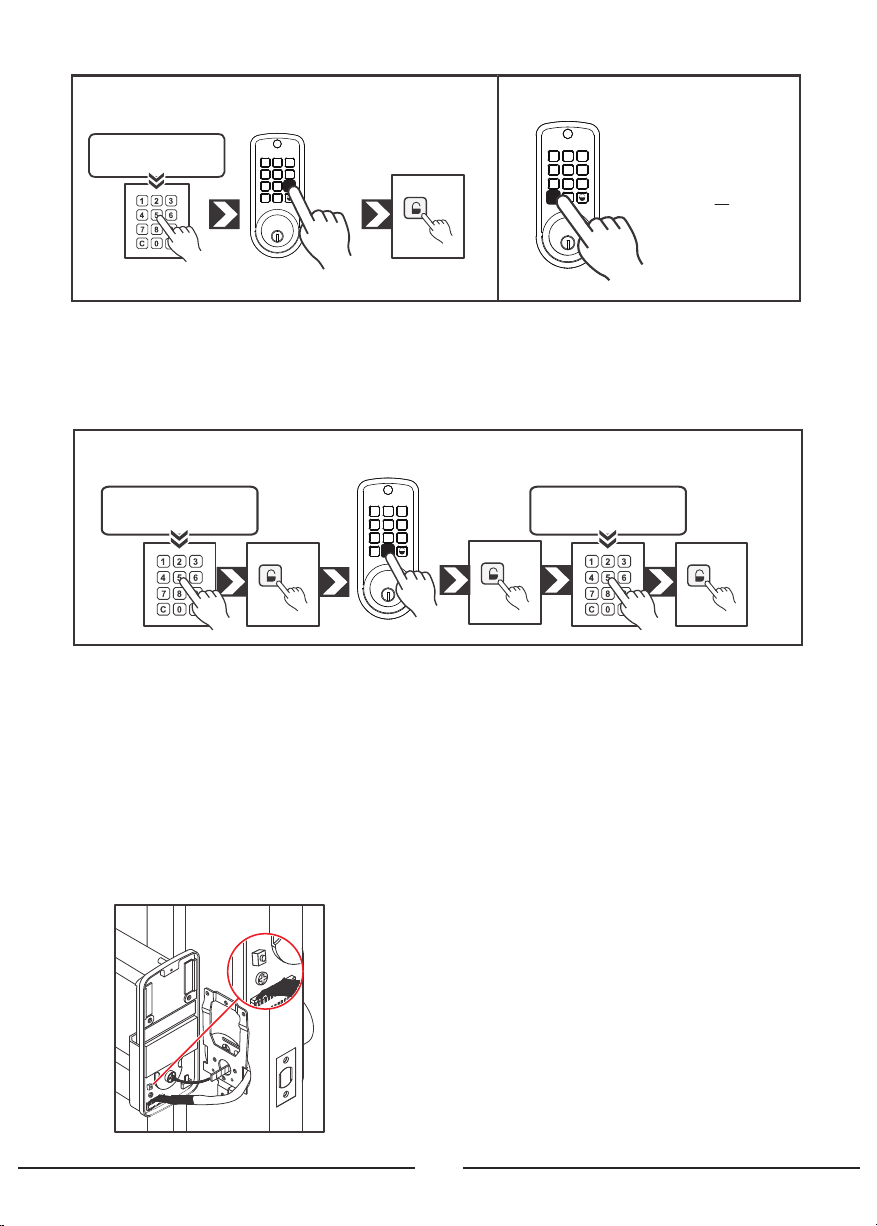
Operation Instructions
1.UNLOCK
Enter a valid user code
123
456
789
C 0
If the entered code is wrong, a "beep"will be emitted and the LED will light on red.
Press the lock key to open
the bolt
06

Privacy Lock out Mode:
If you press this button for over 2 seconds and activate the privacy lock out mode(key-
pad can still input pin code but can't unlock the lock),people won't be able to get in
from outside with pin code.
If you want to deactivate it, just turn the knob once from inside door, people from
outside will be able to get in with pin code.
There is also a black color button under the knob of back panel, which is a privacy lock
out mode, which essentially is a "do not disturb" mode,this will make the lock no longer
accept pin codes except for mechanical key.
Note: Once the programming has started, if you do not press any key for 20 seconds, the
process will be canceled.
2.LOCK
123
456
789
C 0
Press the lock key and it will automatically close the lock.
3. PROGRAMMING
3.1. Create a new user code
2 3
4 5 6
789
C 0
1
Enter a new
code
Repeat the
code
Note:You can configure up to 10 user codes of 4-12 characters each one.
Enter the
programming code
07
Press the “1” key

3.2. Delete existing user code
Enter the code that
you want delete
1 3
4 5 6
7 8 9
C 0
2
Enter the
programming code
1 2
456
789
C 0
3
3.3. Delete all user codes
Enter the
programming code
3.4. Change the programming code
Enter the new
programming code
Enter the
programming code
Repeat the
code
1 2 3
5 6
7 8 9
C 0
4
3.5. Activate automatic closing In a range of 10 to 999 seconds,
enter the delay time for the door
lock automatically close.
123
456
7 9
C 0
8
08
Enter the
programming code
Enter the
programming code
Press the “2” key
Press the “3” key
Press the “4” key
Press the “8” key
If you forget your programming code, you can reset the lock by the following steps:
Initialize by removing battery: Remove one battery (any one of the four batteries) , keep
pressing the black color privacy lock out mode button under the knob at the back panel
and do not loose your hand, then put the removed one battery back, and wait until you
hear 4 "Beep" sound, then the lock has been reset successfully (the "privacy lock out
mode button kept pressing" operation must maintain after you put the removed one
battery back, this period will take about 10 seconds).
To return the door lock to the factory default values and codes, choose one of the follow-
ing methods:
4. RESET
4.1. Virtual reset
Enter the
programming code
Enter the
programming code
3.6. Cancel automatic closing
123
456
7 8
C 0
9
Note:You can cancel
any of the processes by
pressing the c key.
Note: After resetting, all codes will be deleted
and the lock will revert to factory default state,
of which the lock programming code will be
back to 123456 and user code be back to 123.
123
456
789
0
C
123
456
789
C0
4.2. Physical reset
Press the RESET button on back panel
09
Enter the
programming code
Press the “9” key
Press the “0” key
This manual suits for next models
1
Table of contents
Other DeGuard Lock manuals


Popular Lock manuals by other brands


Sargent and Greenleaf
Sargent and Greenleaf 6860 Installation and operating instructions

Schlage
Schlage SENSE installation instructions

SDC
SDC 1490A installation instructions

INSAFE
INSAFE Matrix 3 User instructions

ABH
ABH 6000 Series installation instructions

Safety 1st
Safety 1st OutSmart HS361 user guide

eGeeTouch
eGeeTouch GT1000 quick start guide

Simons Voss Technologies
Simons Voss Technologies SmartStick AX quick guide

Schlage
Schlage AD-200-CY user guide

AAT
AAT KDA-BOLT150 installation manual

Kayoba
Kayoba 944-094 User instructions

Gianni Industries
Gianni Industries Mortise Series Installation instruction