manuals.online logo
Brands
  1. Home
  2. •
  3. Brands
  4. •
  5. DeLonghi
  6. •
  7. Heater
  8. •
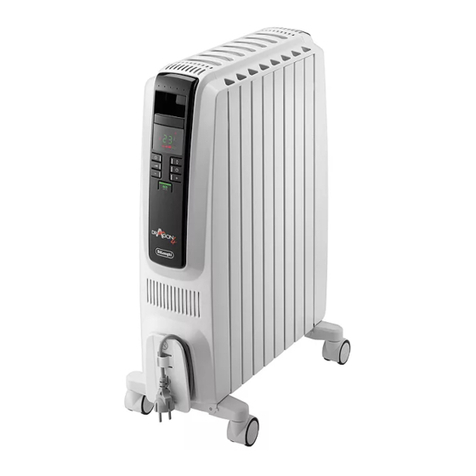
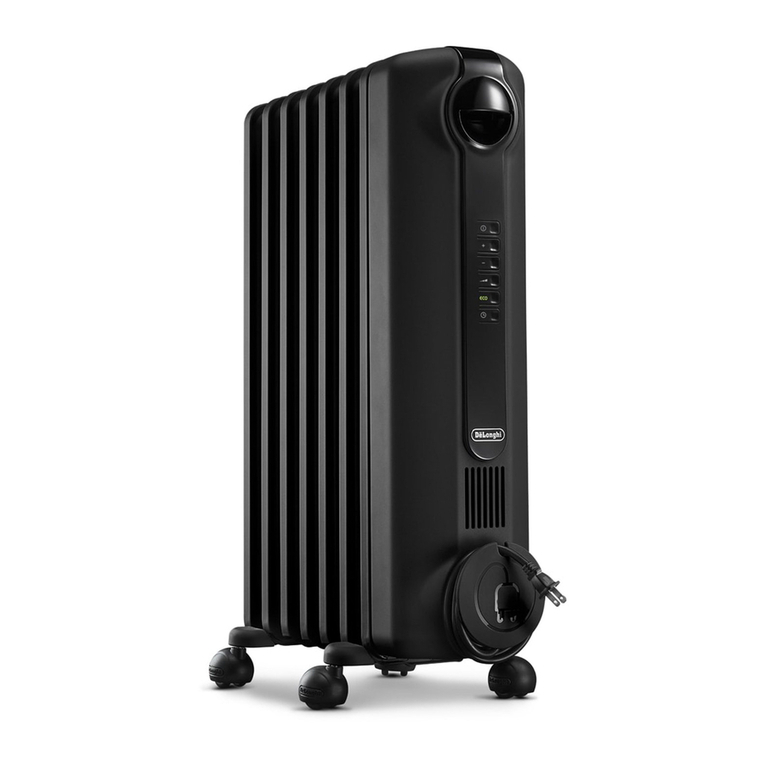
  9. DeLonghi Dragon4 TRD41025B User manual

DeLonghi Dragon4 TRD41025B User manual

This manual suits for next models

1

Other DeLonghi Heater manuals

DeLonghi HVY1030 User manual

DeLonghi

DeLonghi HVY1030 User manual

DeLonghi TRRSE Series User manual

DeLonghi

DeLonghi TRRSE Series User manual

DeLonghi DCH5090EL User manual

DeLonghi

DeLonghi DCH5090EL User manual

DeLonghi HCX9115ECA User manual

DeLonghi

DeLonghi HCX9115ECA User manual

DeLonghi Electric oil filled radiator User manual

DeLonghi

DeLonghi Electric oil filled radiator User manual

DeLonghi HCM2030 User manual

DeLonghi

DeLonghi HCM2030 User manual

DeLonghi HCA User manual

DeLonghi

DeLonghi HCA User manual

DeLonghi TRR0715 User manual

DeLonghi

DeLonghi TRR0715 User manual

DeLonghi KH39015CMCA User manual

DeLonghi

DeLonghi KH39015CMCA User manual

DeLonghi DCH6031 User manual

DeLonghi

DeLonghi DCH6031 User manual

DeLonghi HSX4315E User manual

DeLonghi

DeLonghi HSX4315E User manual

DeLonghi TRD4 User manual

DeLonghi

DeLonghi TRD4 User manual

DeLonghi HWB Series User manual

DeLonghi

DeLonghi HWB Series User manual

DeLonghi HCM2030 User manual

DeLonghi

DeLonghi HCM2030 User manual

DeLonghi TCH Series User manual

DeLonghi

DeLonghi TCH Series User manual

DeLonghi DRAGON 4 User manual

DeLonghi

DeLonghi DRAGON 4 User manual

DeLonghi PALACE Installation and operation manual

DeLonghi

DeLonghi PALACE Installation and operation manual

DeLonghi TRD Series User manual

DeLonghi

DeLonghi TRD Series User manual

DeLonghi Dragon4 Pro User manual

DeLonghi

DeLonghi Dragon4 Pro User manual

DeLonghi DRAGON 4 User manual

DeLonghi

DeLonghi DRAGON 4 User manual

DeLonghi DCH7092ER User manual

DeLonghi

DeLonghi DCH7092ER User manual

DeLonghi HOR KH770715CB User manual

DeLonghi

DeLonghi HOR KH770715CB User manual

DeLonghi HOR KH590715 User manual

DeLonghi

DeLonghi HOR KH590715 User manual

DeLonghi Heater User manual

DeLonghi

DeLonghi Heater User manual

Popular Heater manuals by other brands

Porter-Cable PCXH80KT Operating instructions and owner's manual

Porter-Cable

Porter-Cable PCXH80KT Operating instructions and owner's manual

Dyna-Glo RA18LPDG user manual

Dyna-Glo

Dyna-Glo RA18LPDG user manual

Dimplex PLX050E instruction manual

Dimplex

Dimplex PLX050E instruction manual

EOS Herkules XL S120 installation instructions

EOS

EOS Herkules XL S120 installation instructions

Trebs Comfortheat 99209 manual

Trebs

Trebs Comfortheat 99209 manual

Biddle STYLE2 Series Installation operation & maintenance

Biddle

Biddle STYLE2 Series Installation operation & maintenance

Vermont Castings Non-Catalytic Convection Heater 2477CE Installation and operating manual

Vermont Castings

Vermont Castings Non-Catalytic Convection Heater 2477CE Installation and operating manual

Fagor RA-1505 Instructions for use

Fagor

Fagor RA-1505 Instructions for use

THERMAL FLOW Delta 175 Operating instructions manual

THERMAL FLOW

THERMAL FLOW Delta 175 Operating instructions manual

GET G2CH instructions

GET

GET G2CH instructions

ApenGroup PK Series User, installation, and maintenance manual

ApenGroup

ApenGroup PK Series User, installation, and maintenance manual

oventrop Regucor Series quick start guide

oventrop

oventrop Regucor Series quick start guide

Blaze King CLARITY CL2118.IPI.1 Operation & installation manual

Blaze King

Blaze King CLARITY CL2118.IPI.1 Operation & installation manual

ELMEKO ML 150 Installation and operating manual

ELMEKO

ELMEKO ML 150 Installation and operating manual

BN Thermic 830T instructions

BN Thermic

BN Thermic 830T instructions

KING K Series Installation, operation & maintenance instructions

KING

KING K Series Installation, operation & maintenance instructions

Empire Comfort Systems RH-50-5 Installation instructions and owner's manual

Empire Comfort Systems

Empire Comfort Systems RH-50-5 Installation instructions and owner's manual

Well Straler RC-16B user guide

Well Straler

Well Straler RC-16B user guide

manuals.online logo
manuals.online logoBrands
  • About & Mission
  • Contact us
  • Privacy Policy
  • Terms and Conditions

Copyright 2025 Manuals.Online. All Rights Reserved.

7
IMPORTANT WARNINGS
Safety warnings
Important!
Failure to observe the warning could result in injury or
damage to the appliance.
- This appliance can be used by children
aged from 8 years and above and
persons with reduced physical, sensory
or mental capabilities or lack of
experience and knowledge if they have
been given supervision or instruction
concerning use of the appliance in a
safe way and understand the hazards
involved. Children shall not play with
the appliance. Cleaning and user
maintenance shall not be made by
children without supervision.
- Children of less than 3 years should
be kept away unless continuously
supervised.
- Children aged from 3 years and less
than 8 years shall only switch on/
o the appliance provided that it
has been placed or installed in its
intended normal operating position
and they have been given supervision
or instruction concerning use of
the appliance in a safe way and
understand the hazards involved.
Children aged from 3 years and
less than 8 years shall not plug in,
regulate and clean the appliance or
perform user maintenance. CAUTION
— Some parts of this product
can become very hot and cause
burns. Particular attention has
to be given where children and
vulnerable people are present.
- WARNING: In order to avoid
overheating, never under
any circumstances cover the
appliances during operation, as this
would lead to dangerous overheating.
- The body of this radiator is lled with
a precise quantity of special oil, so that
repairs requiring the opening of the
oil body must only be made by the
service agent. Any oil leakage must be
reported to the Customer Experience,
see enclosed guarantee for details.
- The appliance must not be located
immediately below a xed socket-
outlet.
- Do not use the heater in the vicinity of
bathtubs, wash basins, showers, sinks
and swimming pools.
- Ifthepowercablehasbeendamaged,it
must be replaced by the manufacturer
or the technical service centre or by a
qualied person so as to avoid all risks.
- ATTENTION: in order to avoid any
danger caused by an accidental
resetting of the safety system, this
appliance must not be powered
through an external timer.
Danger of burns!!
Failure to observe the warning could result in burns or scalds.
- The use of an extension lead is not recommended, as
overheating of the extension lead may occur during the
operation of the heater.
Please note:
This symbol indicates recommendations and important
information for the user.
- Never use the heater to dry laundry.
- Never place the power cable on top of the heater while
it is hot.
- We recommend that you not place the heater in a
8
draught, because strong draughts of air may adversely
aect the equipment’s operational eciency.
- Only use the heater in an upright position.
- The heater must be positioned at least 50cm from
furniture or other objects.
- The rst time you use the appliance, operate it of at
least 15 minutes with the thermostat at maximum to
eliminate the “new” smell. A little smoke due to the
protective substances applied to the heating element
before transport may be given o.
- Do not obstruct the hot air outlet grilles or the air intake
grille on the bottom of the appliance.
- Position the appliance so that the plug and the outlet
can be easily reached even after installation.
- Do not use the appliance in rooms less than 4 m2in area.
- The appliance is tted with a safety device which will
switch o it in case of accidental overheating. To reset,
please contact Customer Experience, see enclosed
guarantee.
Disposing of the appliance
The appliance must not be disposed of with hou-
sehold waste, but taken to an authorised waste se-
paration and recycling centre.
DESCRIPTION
A Thermostat
B Power selector
C/D/E Power indicator lights (MIN, MED, MAX)
F Cord holder
G Wheel
USE
Fitting the wheels
Turn the radiator upside down on a rug or soft surface to
prevent damaging the paint nish. Fully unfold the wheels
by turning them outwards (Fig. 1). Turn the radiator back to
its upright position.
Caution
Always operate the heater in upright position only (wheels
on the bottom, controls on top).
Any other position could create a hazardous situation.
Location
The heater should not be placed immediately below a power
outlet. Do not use this radiator in rooms with a oor area of
less than 4 m2(43 sq. ft. ).
Connection
- Before using the appliance check that your supply
voltage is the same of that shown on the rating label
of the unit and that the power socket and power supply
line correspond to the load specied.
- Check also the current capacity of your fuses. CONNECT
YOUR HEATER TO EARTH PROVIDED SOCKET ONLY.
Keep loose clothing or bedding, furniture and ammable
material away from the heater's wall outlet.
Turning on
Insert the plug into an electrical outlet, rotate the thermostat
dial to maximum and turn the unit on as follows using the
power selector:
- Turn the power selector to position MIN to select
minimum output (the min light will be on).
- Turn the power selector to position MED to select
medium output (the min/med lights will be on).
- Turn the power selector to position MAX to select
maximum output (the lights will be on).
Adjusting the thermostat
When the room has reached the desired temperature, turn
the thermostat dial slowly in an anti-clockwise direction until
you hear a "click" and not beyond it.
The thermostat will then adjust the set temperature
automatically and keep it constant. If your unit is a three-
output version, in intermediate seasons or on days when
temperatures are not particularly cold, select minimum
output to optimize savings and consumption.
Antifreeze function
Turn the thermostat dial to the position and the power
selector to position MAX.
The appliance will maintain a minimum room temperature
of approximately 5°C, thus preventing freezing while
conserving energy. In models that come with a timer, teeth
must be set in the inward position.
Reminder
To completely shut the appliance o, turn the power selector
to the "0" position and then unplug the appliance from the
outlet.
9
UNITS WITH TIMER
How to use the timer
To program heating, proceed as follows:
- Look at the time on your clock or watch. If it is 10 p.m.,
turn the numbered timer disk clockwise until the
number 22 (10 p.m.) on the disk coincides with the
pointer s(3) on the timer. Set the periods of time
when you want the appliance to work by pushing the
teeth (1) inward. Each tooth (1) corresponds to a period
of 15 minutes. This will leave visible sectors which
correspond to the periods of operation (2). When set,
the radiator will operate automatically each day during
the times programmed (important: the radiator must
always be plugged into the socket).
- To change the programming, move the teeth back into
the initial position and set the new periods of operation.
- If you want to make the appliance operate without
programming, push all the teeth inward. In this case, to
turn the appliance o completely, as well as turning the
dial to the o position, you must also unplug it from the
power outlet to avoid continued operation of the timer.
IMPORTANT: DO NOT ROTATE CLOCK DIAL COUNTER-
CLOCKWISE.
The timer is like an electric clock, and will only work when
plugged into a power supply. When unplugged, the timer
stops and must be later re-set.
SAFETY DEVICE
A safety device switches the heater o in the event of
overheating. To restart the heater, call the nearest De'Longhi
Customer Service.
MAINTENANCE AND SERVICE
Always unplug the heater from the power outlet and allow
the radiator to cool. Wipe radiator with a soft damp cloth;
do not use detergents or abrasives. Should the radiator not
be in use over a certain length of time, wind the cord around
the holder and store it in a dry place.This appliance has been
built to last for many years of trouble-free service. In case
of malfunction or doubt, do not try to repair the heater by
yourself: this might increase the risk of re and electric shock.
Call your nearest De'Longhi Customer Service (see attached
list of Service Centers).
TECHNICAL CHARACTERISTICS
Power supply See rating plate
Absorbed power “
TROUBLESHOOTING
PROBLEM CAUSE SOLUTION
The appliance doesn't work - Be sure it is plugged in and that the
electrical outlet is working.
- Check for any obstruction.
- The temperature may be set too low.
- Plug into the power outlet.
- Remove the obstruction and let the
appliance cool down. If the appliance
doesn't work please contact the nearest
De'Longhi Customer Service.
- Set the temperature to a higher position.