manuals.online logo
Brands
  1. Home
  2. •
  3. Brands
  4. •
  5. DeLonghi
  6. •
  7. Heater
  8. •
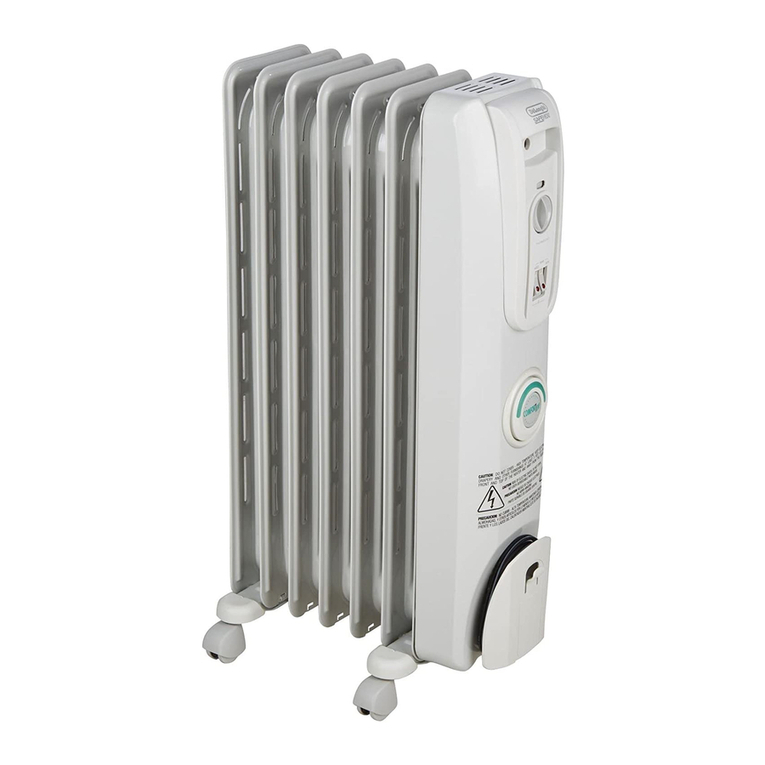
  9. DeLonghi HVA1120 User manual

DeLonghi HVA1120 User manual

This manual suits for next models

1

Other DeLonghi Heater manuals

DeLonghi HCX3120FS User manual

DeLonghi

DeLonghi HCX3120FS User manual

DeLonghi TRD40615EBK User manual

DeLonghi

DeLonghi TRD40615EBK User manual

DeLonghi DCH1030 User manual

DeLonghi

DeLonghi DCH1030 User manual

DeLonghi DCH 4590 ER User manual

DeLonghi

DeLonghi DCH 4590 ER User manual

DeLonghi KH39015CMCA User manual

DeLonghi

DeLonghi KH39015CMCA User manual

DeLonghi HVY1030 User manual

DeLonghi

DeLonghi HVY1030 User manual

DeLonghi HWB Series User manual

DeLonghi

DeLonghi HWB Series User manual

DeLonghi CERAMIC FAN HEATER User manual

DeLonghi

DeLonghi CERAMIC FAN HEATER User manual

DeLonghi HFX60V15CA User manual

DeLonghi

DeLonghi HFX60V15CA User manual

DeLonghi KH390715CB-6A User manual

DeLonghi

DeLonghi KH390715CB-6A User manual

DeLonghi HCX Series User manual

DeLonghi

DeLonghi HCX Series User manual

DeLonghi OIL FILLED RADIATORS User manual

DeLonghi

DeLonghi OIL FILLED RADIATORS User manual

DeLonghi HSX Series User manual

DeLonghi

DeLonghi HSX Series User manual

DeLonghi HCM2030 User manual

DeLonghi

DeLonghi HCM2030 User manual

DeLonghi TCH7592ER User manual

DeLonghi

DeLonghi TCH7592ER User manual

DeLonghi HCX9115ECA User manual

DeLonghi

DeLonghi HCX9115ECA User manual

DeLonghi Dragon4 Pro Specification sheet

DeLonghi

DeLonghi Dragon4 Pro Specification sheet

DeLonghi DL2401TF User manual

DeLonghi

DeLonghi DL2401TF User manual

DeLonghi FAN HEATER User manual

DeLonghi

DeLonghi FAN HEATER User manual

DeLonghi HOR KH590715 User manual

DeLonghi

DeLonghi HOR KH590715 User manual

DeLonghi CERAMIC FAN HEATER User manual

DeLonghi

DeLonghi CERAMIC FAN HEATER User manual

DeLonghi HTF 3031 Troubleshooting guide

DeLonghi

DeLonghi HTF 3031 Troubleshooting guide

DeLonghi ELECTRIC HEATING CONVECTOR User manual

DeLonghi

DeLonghi ELECTRIC HEATING CONVECTOR User manual

DeLonghi HFX10 Series User manual

DeLonghi

DeLonghi HFX10 Series User manual

Popular Heater manuals by other brands

Porter-Cable PCXH80KT Operating instructions and owner's manual

Porter-Cable

Porter-Cable PCXH80KT Operating instructions and owner's manual

Dyna-Glo RA18LPDG user manual

Dyna-Glo

Dyna-Glo RA18LPDG user manual

Dimplex PLX050E instruction manual

Dimplex

Dimplex PLX050E instruction manual

EOS Herkules XL S120 installation instructions

EOS

EOS Herkules XL S120 installation instructions

Trebs Comfortheat 99209 manual

Trebs

Trebs Comfortheat 99209 manual

Biddle STYLE2 Series Installation operation & maintenance

Biddle

Biddle STYLE2 Series Installation operation & maintenance

Vermont Castings Non-Catalytic Convection Heater 2477CE Installation and operating manual

Vermont Castings

Vermont Castings Non-Catalytic Convection Heater 2477CE Installation and operating manual

Fagor RA-1505 Instructions for use

Fagor

Fagor RA-1505 Instructions for use

THERMAL FLOW Delta 175 Operating instructions manual

THERMAL FLOW

THERMAL FLOW Delta 175 Operating instructions manual

GET G2CH instructions

GET

GET G2CH instructions

ApenGroup PK Series User, installation, and maintenance manual

ApenGroup

ApenGroup PK Series User, installation, and maintenance manual

oventrop Regucor Series quick start guide

oventrop

oventrop Regucor Series quick start guide

Blaze King CLARITY CL2118.IPI.1 Operation & installation manual

Blaze King

Blaze King CLARITY CL2118.IPI.1 Operation & installation manual

ELMEKO ML 150 Installation and operating manual

ELMEKO

ELMEKO ML 150 Installation and operating manual

BN Thermic 830T instructions

BN Thermic

BN Thermic 830T instructions

KING K Series Installation, operation & maintenance instructions

KING

KING K Series Installation, operation & maintenance instructions

Empire Comfort Systems RH-50-5 Installation instructions and owner's manual

Empire Comfort Systems

Empire Comfort Systems RH-50-5 Installation instructions and owner's manual

Well Straler RC-16B user guide

Well Straler

Well Straler RC-16B user guide

manuals.online logo
manuals.online logoBrands
  • About & Mission
  • Contact us
  • Privacy Policy
  • Terms and Conditions

Copyright 2025 Manuals.Online. All Rights Reserved.

67
IMPORTANT SAFEGUARDS
Danger!
Failure to observe the warning may result in life threatening
injury by electric shock.
- The appliance must not be placed imme-
diately under a xed power socket.
- Do not use the appliance near showers,
bathtubs, sinks, swimming pools, etc.
- If the power cable is damaged, it must be
replaced by the manufacturer, an autho-
rised service centre or a qualied electri-
cian in order to eliminate all risk.
Important!
Failure to observe the warning could result in injury or damage
to the appliance.
-This appliance can be used by children
aged from 8 years and above and per-
sons with reduced physical, sensory or
mental capabilities or lack of experience
and knowledge if they have been given
supervision or instruction concerning use
of the appliance in a safe way and under-
stand the hazards involved. Children shall
not play with the appliance. Cleaning
and user maintenance shall not be made
by children without supervision.
- Children of less than 3 years should be
kept away unless continuously supervi-
sed.
- Children aged from 3 years and less than
8 years shall only switch on/o the ap-
pliance provided that it has been placed
or installed in its intended normal ope-
rating position and they have been given
supervision or instruction concerning use
of the appliance in a safe way and un-
derstand the hazards involved. Children
aged from 3 years and less than 8 years
shall not plug in, regulate and clean the
appliance or perform user maintenance.
CAUTION — Some parts of this pro-
duct can become very hot and cause
burns. Particular attention has to be
given where children and vulnera-
ble people are present.
- ATTENTION: To avoid the safety system
resetting accidentally, this appliance
must not be powered through an exter-
nal on/o device such as a timer, or con-
nected to a circuit which is turned o and
on regularly by the energy supplier.
Danger of burns!!
Failure to observe the warning could result in burns or scalds.
- WARNING: To avoid overheating,
never under any circumstances
cover the appliance during ope-
ration as this would lead to a dangerous
rise in temperature.
Please note:
This symbol indicates recommendations and important
information for the user.
- Always use the appliance in an upright position.
- The use of extension leads is not recommended.
However if they cannot be avoided, follow the instructions
accompanying the extension lead and never exceed the po-
wer limit marked on the extension.
- The heater must be positioned at least 50 cm from furniture
or other objects.
- Do not use the appliance in rooms with a oor area of less
than 4m2.
- Before putting the appliance away, make sure it is comple-
tely o and unplugged from the mains socket.
Do not store in dusty atmospheres.
- Do not rest anything on the appliance.
- Do not use the appliance to dry laundry. Do not obstruct the
air intake and outlet grilles (danger of overheating).
- Do not use the appliance near walls, furniture, curtains, etc.
- The device may emit an odour at rst use that is due to hea-
ting. Airing the room is recommended.
Safety functions
-Safety device: the appliance is tted with a safety device
which switches it o in the event of accidental overheating
(e.g. obstruction of air intake and outlet grilles, motor tur-
ning slowly or not at all). To reset, unplug the appliance
from the mains socket for a few minutes, remove the cause
of overheating then plug in again. If the appliance doesn’t
work please contact the De’Longhi Customer Service.
Disposing of the appliance
In compliance with European directive
2012/19
/EC,
the appliance must not be disposed of with household
waste, but taken to an authorised waste separation and
recycling centre.
7
DESCRIPTION
(pag. 3)
A Thermostat
B Function selector
C Pedal switch (certain models only)
D Swivelling base (certain models only)
E Switches (only in certain models)
USE
Electrical connection
- Before plugging into the mains, make sure the voltage of your
mains supply corresponds to the value V indicated on the ap-
pliance and that the socket and power line are appropriate for
the load required.
- THIS APPLIANCE COMPLIES WITH DIRECTIVE 2004/108/EC ON
ELECTROMAGNETIC COMPATIBILITY.
Installation
The appliance can be used in the portable conguration or, if pro-
vided with a base, it can be wall-mounted.
To mount on the wall, proceed as follows:
- If the appliance is installed in a room with bath or shower, re-
spect the “safety distances”shown in g. 1 and always install
away from taps, basins, showers, etc.
- Drill the holes in the wall according to the minimum distances in
g. 2 and the measurements in g. 3.
Hang the appliance on the wall and block in place with the
third screw at the bottom.
Installation in a bathroom must be performed by a qualied
electrician only in compliance with current legislation. Screws
and anchors are not included.
Functioning and use
MODELS WITH FUNCTION SELECTOR ANDTHERMOSTAT.
Make sure the appliance is o before plugging into the mains.
1. Plug into the mains.
2. Turn the thermostat dial to maximum.
3. Summer mode (fan only): turn the function selector to the
position.
4. Low power operation: turn the function selector to position
1.
5. Max power operation: turn the function selector to posi-
tion 2.
6. Switching o: turn the function selector to the“0”position.
Setting the thermostat
Position the thermostat on maximum.
When the room has reached the required temperature, turn the
thermostat dial slowly anticlockwise until you hear a click and the
fan goes o.
The thermostat will then keep room temperature at the selected
level automatically.
Frost prevention mode
With the function selector in position 2 and the thermostat dial in
position , the appliance maintains room temperature at about
5°C, preventing freezing with minimal energy consumption.
Models with thermostat only
To switch the appliance on turn the thermostat dial as far as it
will go to maximum position. To set refer to the paragraph“Set-
ting the thermostat”. To turn the appliance o completely, turn
the dial anticlockwise to minimum, then unplug from the mains
socket.
MODELS WITH SWITCH
- Heating at low power: press switch (the red zone can be
seen on the switch).
- Heating at maximum power: press both switches ;
(the red zone can be seen on the switch).
- Turning o: turn o both switches.
We recommend unplugging the power cord when the appliance
is not in use.
Please note:
the maximum power is only active when the
switch is pressed.
MODELS WITH SWIVELLING BASE ON/OFF PEDAL
SWITCH
A number of models have a swivelling base and ON/OFF pedal
switch.
The appliance can be manually oriented to an angle of 30° to the
right or left to direct the air ow in the preferred direction.
To turn the appliance on, set the thermostat dial and function
selector as described above, then press the pedal on the base.
To turn the appliance o, just press the pedal again.
Important: the appliance will come on only if you press the
pedal.
MAINTENANCE
- Always unplug from the mains socket before cleaning.
- Clean the air intake and outlet grilles regularly.
- Do not use abrasive products or solvents to clean the ap-
pliance.
TECHNICAL CHARACTERISTICS
Power supply See rating plate
Absorbed power “