Denjoy iFinder User manual
VER DY20130812RPIF-EN
1
Table of Contents
SECTION 1: GENERAL INTRODUCTION
SECTION 2: MAIN TECHNICAL INDEX
SECTION 3: COMPONENTS
SECTION 4: LCD SCREEN DISPLAY
SECTION 5: OPERATION
SECTION 6: SAFETY PRECAUTIONS
SECTION 7: TOUBLESHOOTING GUIDE
SECTION 8: MANTENANCE & SERVICE
SECTION 9: CLEANING AND DISINFECTION
SECTION 10: STORAGE AND SHIPPING CONDITIONS
SECTION 11: PACKING LIST
VER DY20130812RPIF-EN
2
SECTION 1: GENERAL INTRODUCTION
I. CONTACT INFORMATION
Apex Locator iFinder is manufactured by:
DENJOY DENTAL CO., LTD
Address: 4th Floor, A3 Building, Lugu International Industry Park,
No. 229 Tongzipo Road West, Changsha City, P. R. China 410205
Website: www.denjoy.cn
E-mail: denjoy@denjoy.cn
Manufacturing:
Company name: DENJOY DENTAL CO., LTD
Address: 4th Floor, A3 Building, Lugu International Industry Park,
No. 229 Tongzipo Road West, Changsha City, P. R. China 410205
Authorized European Representative:
Company name: SPETECHCULAR LTD
Address: 16, Quainton Close, Cambridge, CB5 8LR. UK
Please contact local sales distributor from whom you purchase this
unit for user’s record and further after-sale service.

VER DY20130812RPIF-EN
3
II. PRODUCT DESCRIPTION
Apex locator iFinder is our latest model with touch-screen LCD used
for determining the position of apex of root canal with the up-to-date
technology multi-frequency operation system.
Distinctive Features:
●High-precision Touch-Screen LCD
●Image save function with Micro-SD memory card (TF card 2G)
●It is equip with separate calibrator test instrument which can check
the operation of control part and spare parts of apex locator when
apex locator doesn't measure well.
●Touch-screen key and traditional button control both available
Other Features:
●4.3 inch large color screen with real-time graphic of root canals
●Foldable design to create more choices for view angle
●Up-to-date multi-frequency operating system
●Rechargeable, do not need prepare extra battery.
III. SYMBOL DESCRIPTIONS
The following symbols may appear in this manual, on the label, or on
it’s accessories. Some of the symbols represent standards and
compliances associated with the Apex Locator and its use.
VER DY20130812RPIF-EN
4
Caution: Consult accompanying documents
Authorized Representative in the European
Community
CE Mark: conforms to essential requirements of the
Medical Device Directive 93/42/EEC.
Date of manufacture.
Manufacturer
SN Specifies serial number
Type BF applied part
Direct current
Sterilizable up to the temperature specified at most
The device should not be used after the end of the
shown or the day
DISPOSAL: Do not dispose this product as unsorted
municipal waste. Collection of such waste
separately for special treatment is necessary.
alert indicator displayed on the LCD screen
VER DY20130812RPIF-EN
5
SECTION 2: MAIN TECHNICAL INDEX
1. Maximum valid values of amplitude
Valid values of amplitude between file holder and stainless
electrode hook is ≤130mV
2. AC Adapter:Input voltage:100-240V 50/60Hz 0.25A
Outputvoltage:5V 1A
Battery:3.7V 2200mAh
3. Display mode: 4.3 inch TFT 480*272 color screen
4. Dimensions: 132*120*31mm
5. Weight: about 500g
6. Classification: Internally powered equipment,
7. Degree of protection against electric shock
---Type BF applied part
8. Operation mode: Continuous
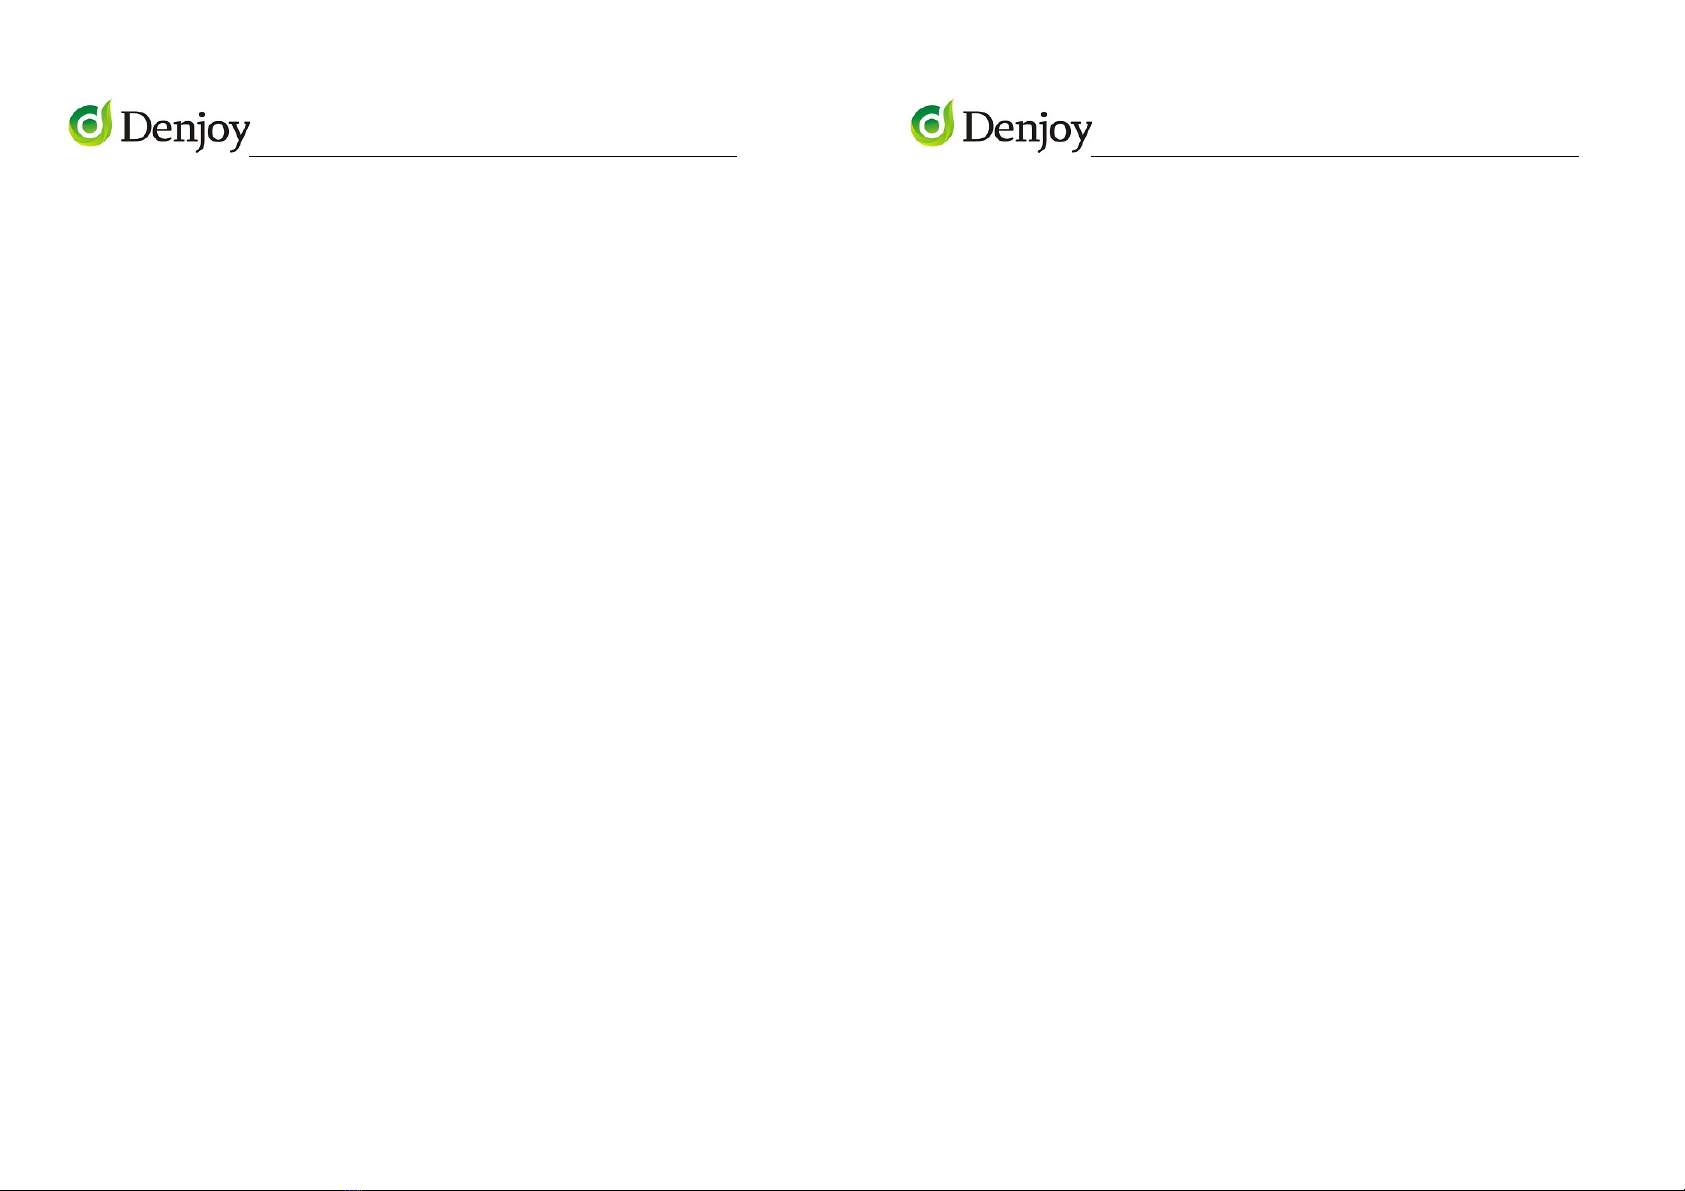
SECTION 3: COMPONENTS
VER DY20130812RPIF-EN
6
1.Poweron/off 2.TFcardsocket
3.Probewiresocket 4.ACadaptersocket
5.Modekey 6.Upkey
7.Downkey 8. Savekey
Main Accessories:
VER DY20130812RPIF-EN
7
SECTION 4: LCD SCREEN DISPLAY
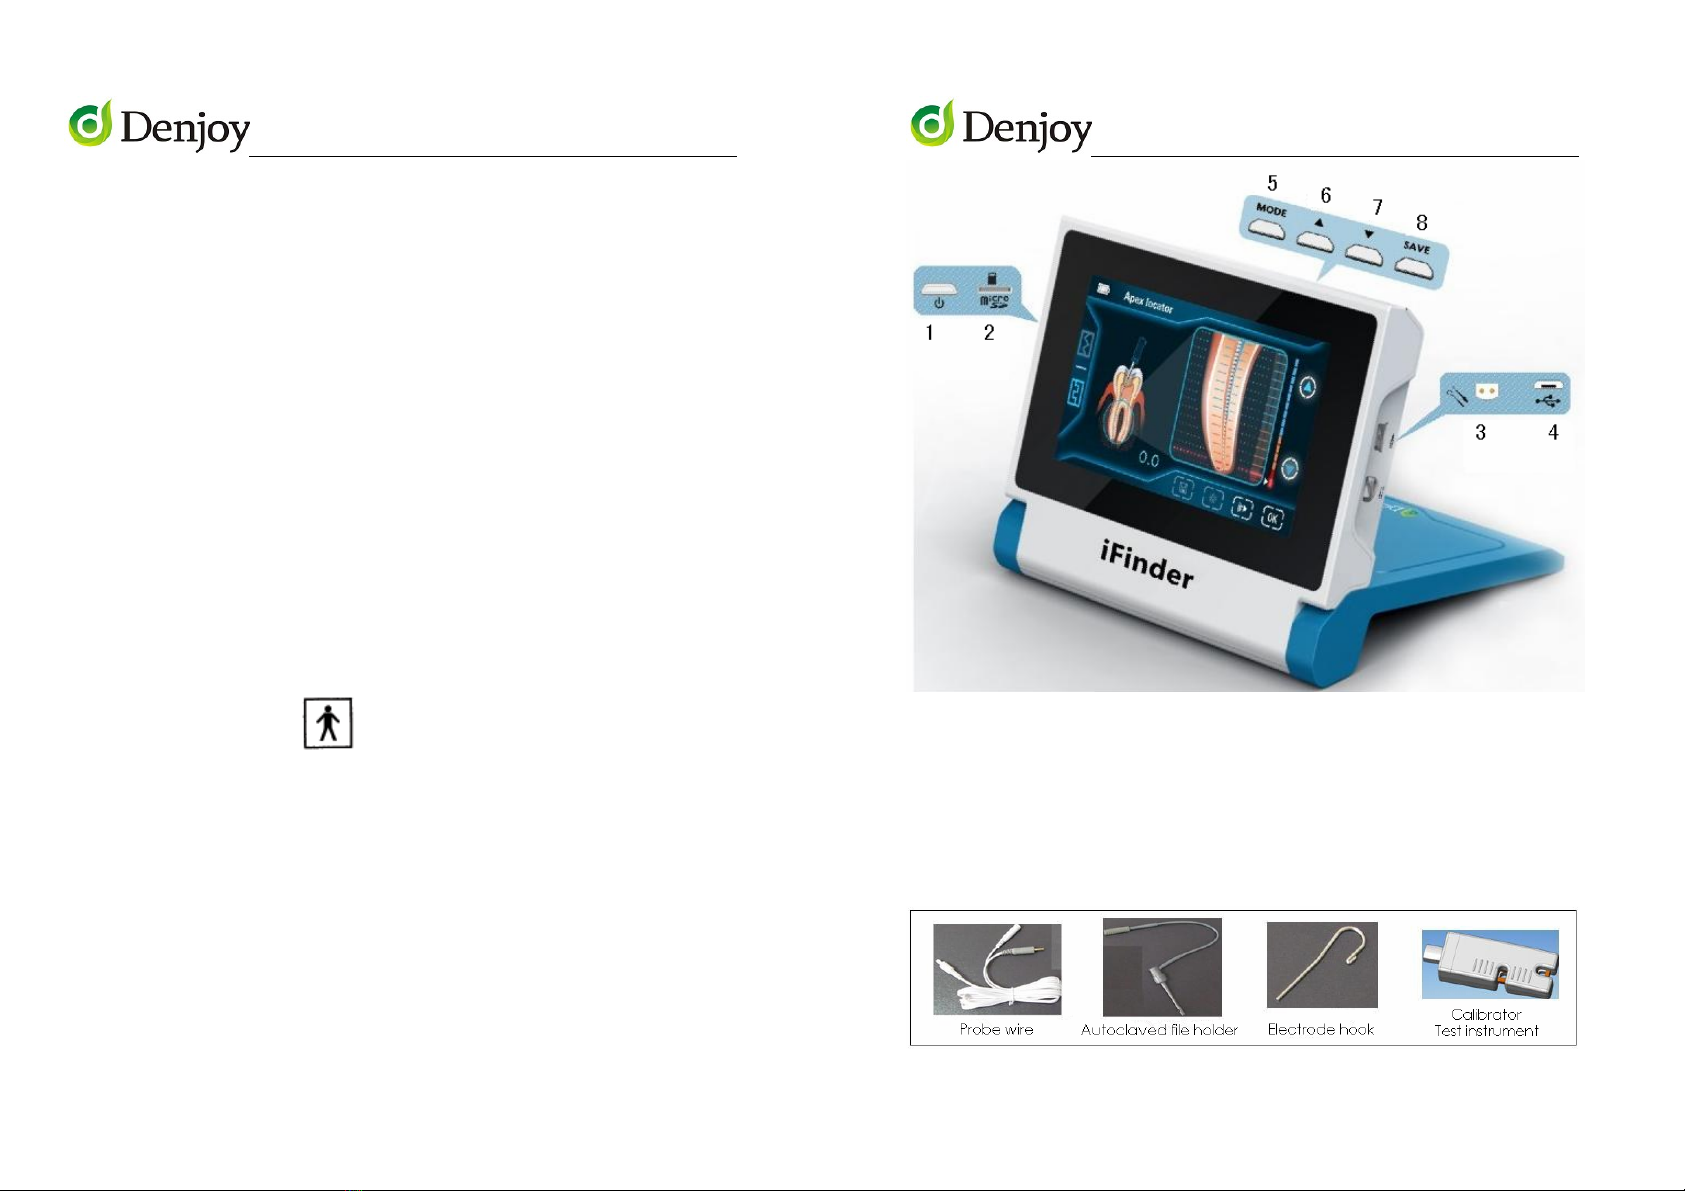
I. APEX LOCATOR INTERFACE
1.Batterysign 2.Maininterface
3. Self-calibration interface
4. Up key for length adjuster of apical constriction
5. Down key for length adjuster of apical constriction
6.Savekey 7.Brightnesscontrolkey
8.Soundadjuster 9.Enter(ConfirmationOK)key
10. Length between top of file and the apex of root canal
11. Scale displaying the magnified apex area
12. Apical Area Adjustment cursor
a, Save key
VER DY20130812RPIF-EN
8
On the Main Interface, after insert the TF card, touch save key, as
shown in Figure 1, it means save successfully. Otherwise, If no TF card
inserted or something wrong with TF card, as shown in Figure 2, it
means save unsuccessfully. Please note: no operation for 3 seconds, it
will automatically return to Main Interface.
Figure 1
Figure 2
VER DY20130812RPIF-EN
9
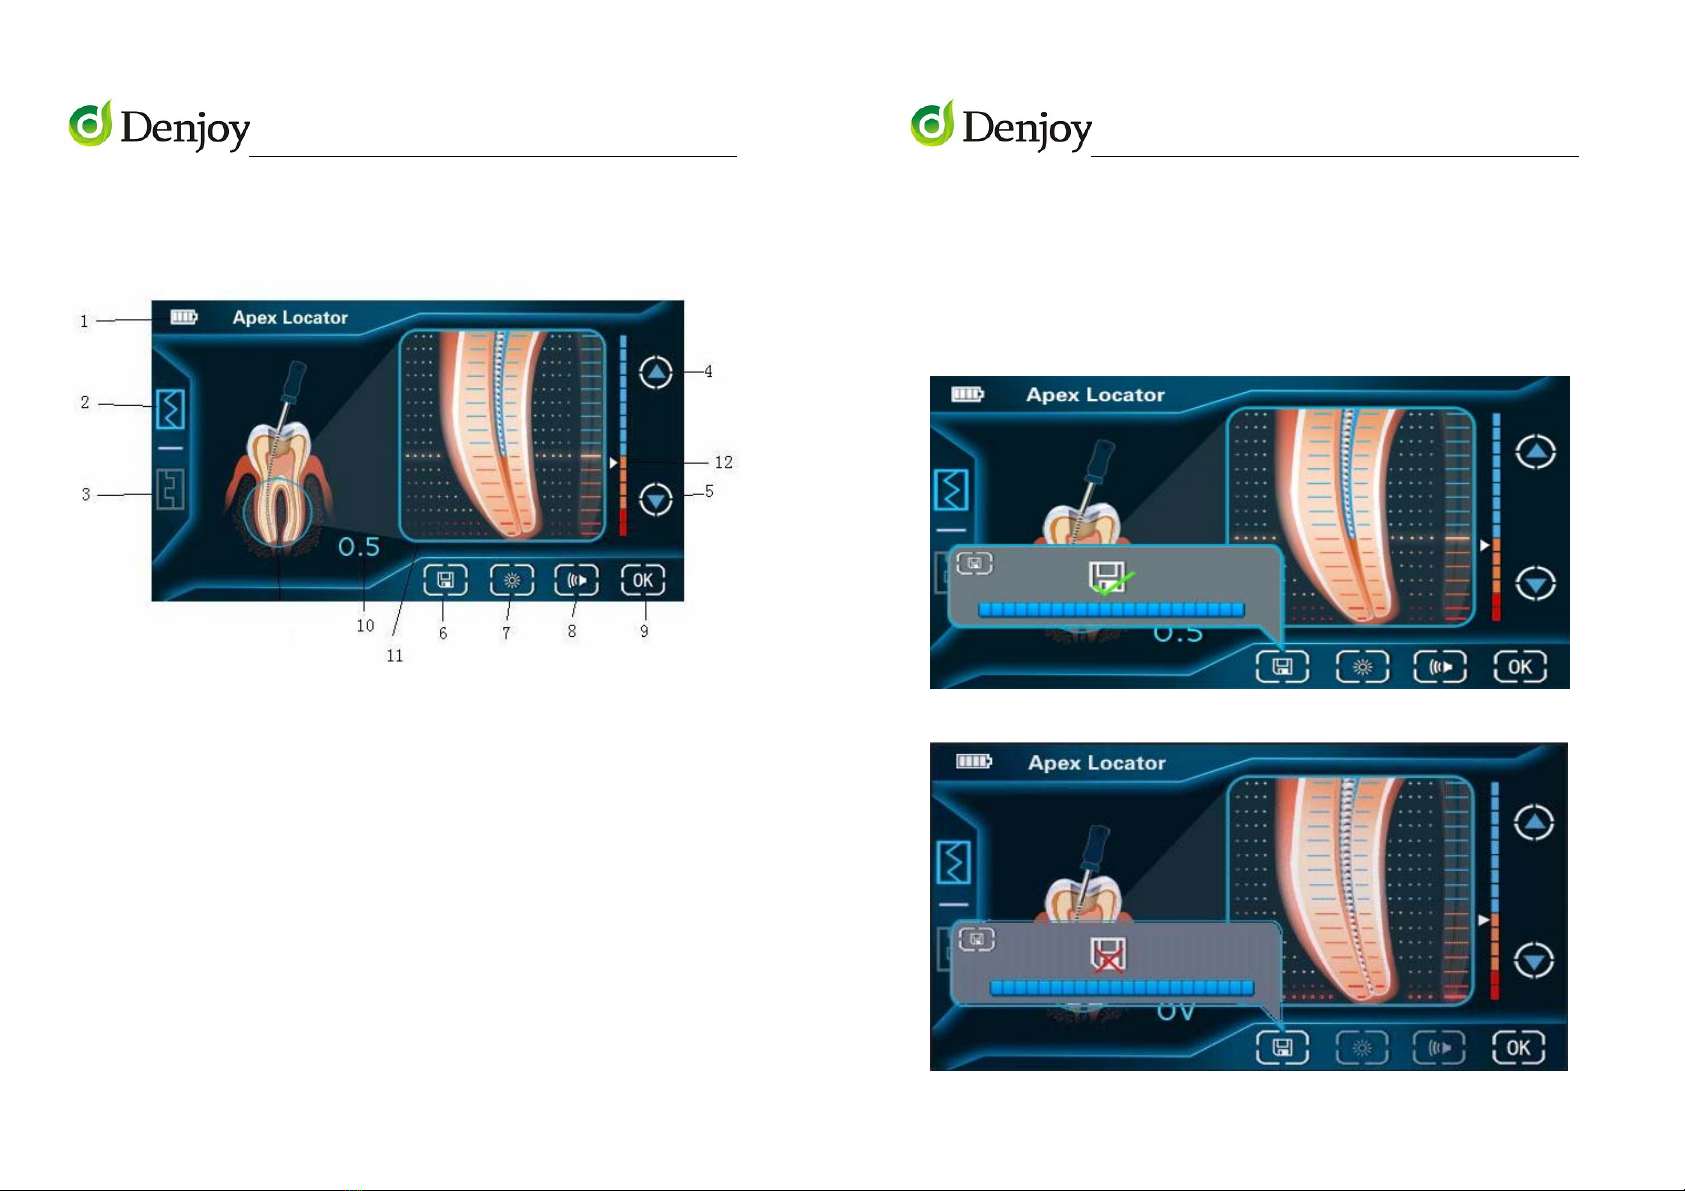
b, Brightness control key
On the Main Interface, user can adjust the 4 level brightness of the
screen by touching the brightness control ket. After adjustment, touch
the enter key, as shown in Figure 3, it means set successfully. Please
note, no operation for 10 seconds, it will automatically return to Main
Interface..
Figure 3
c, Sound adjuster
On the Main Interface, touch sound adjuster, user can select
required volume level, after adjustment, touch enter key, if as shown in
Figure 4, it means set up successfully.
Please note, no operation for 10 seconds, it will automatically return
to Main Interface.
VER DY20130812RPIF-EN
10
Figure 4
d, Up/Down key for length adjuster of apical constriction
On the Main Interface, user can touch up/down key for length
adjuster of apical constriction to adjust the apical area.
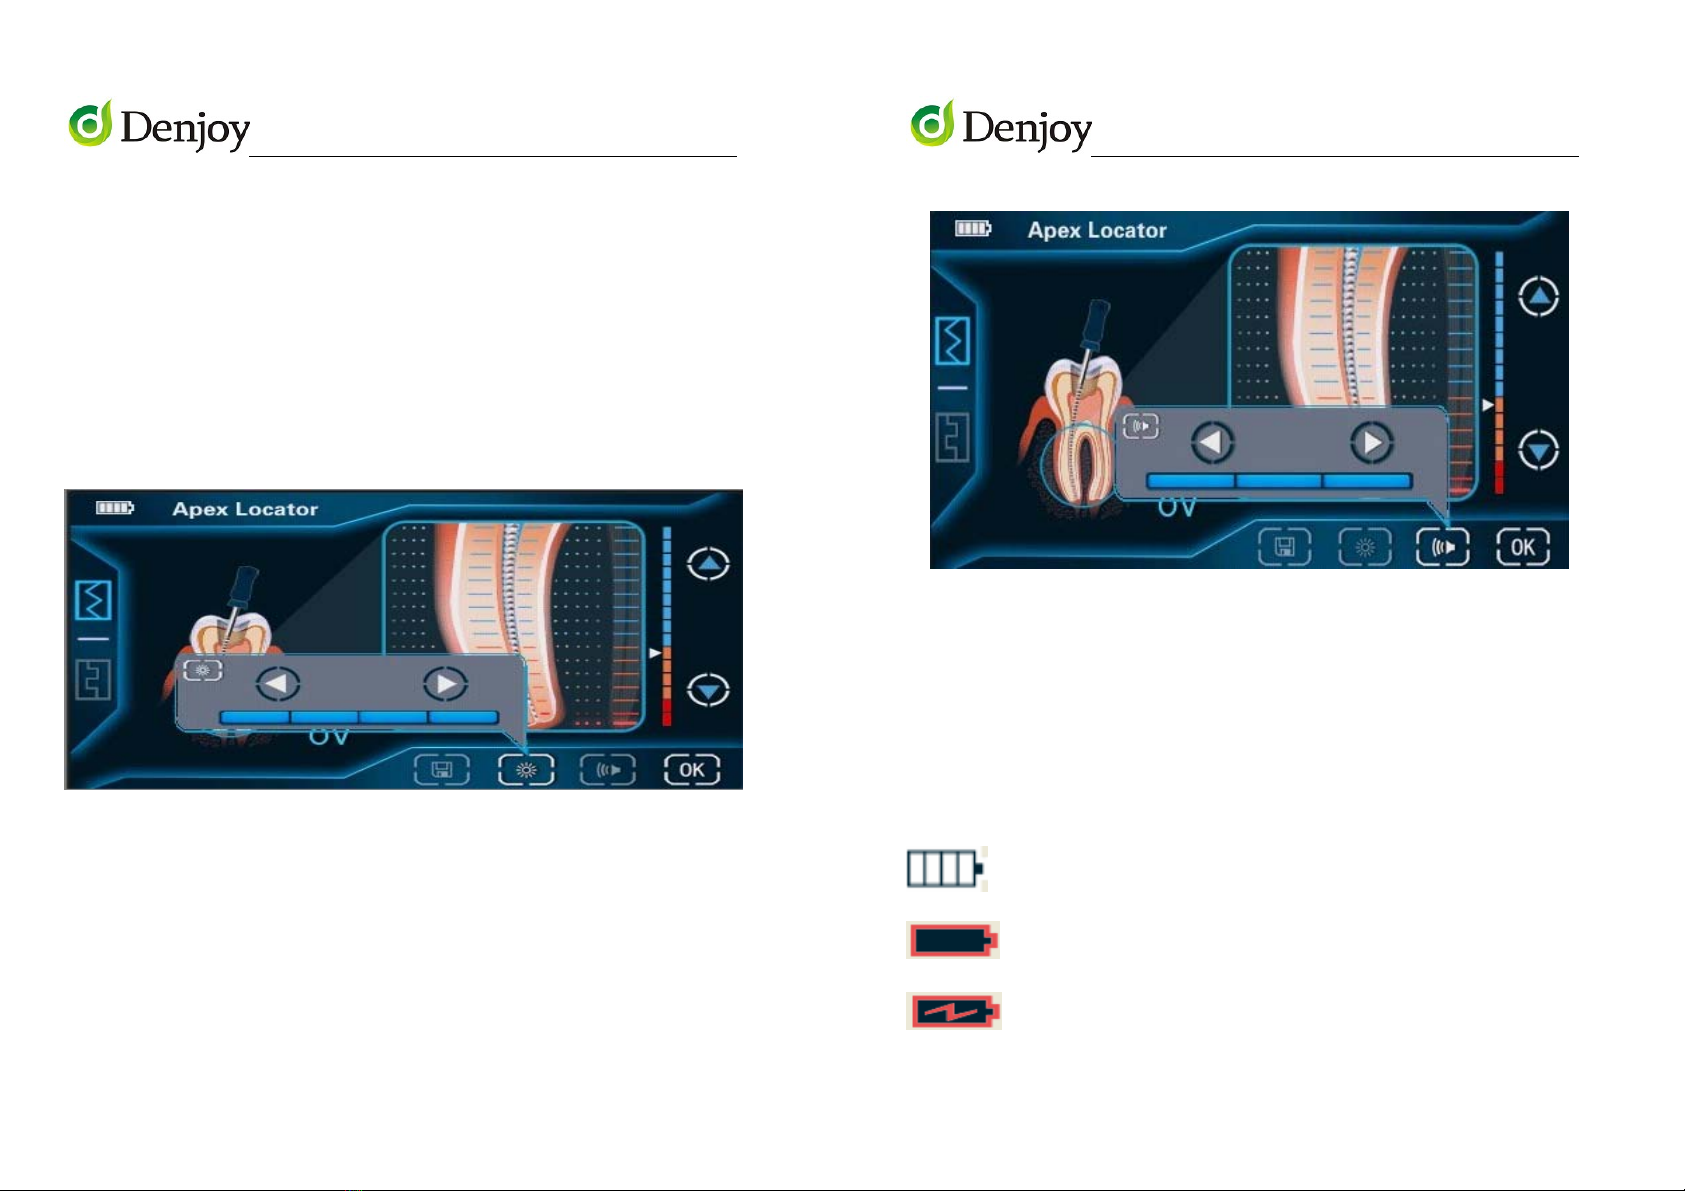
e, Battery sign
The symbol lies on the top left corner of the screen.
Full charge
When it is flashed, please charge immediately.
Battery is charging.
Other manuals for iFinder
1
Table of contents
Other Denjoy Medical Equipment manuals


Popular Medical Equipment manuals by other brands


Getinge
Getinge Arjohuntleigh Nimbus 3 Professional Instructions for use

Mettler Electronics
Mettler Electronics Sonicator 730 Maintenance manual

Pressalit Care
Pressalit Care R1100 Mounting instruction

Denas MS
Denas MS DENAS-T operating manual

bort medical
bort medical ActiveColor quick guide

AccuVein
AccuVein AV400 user manual


