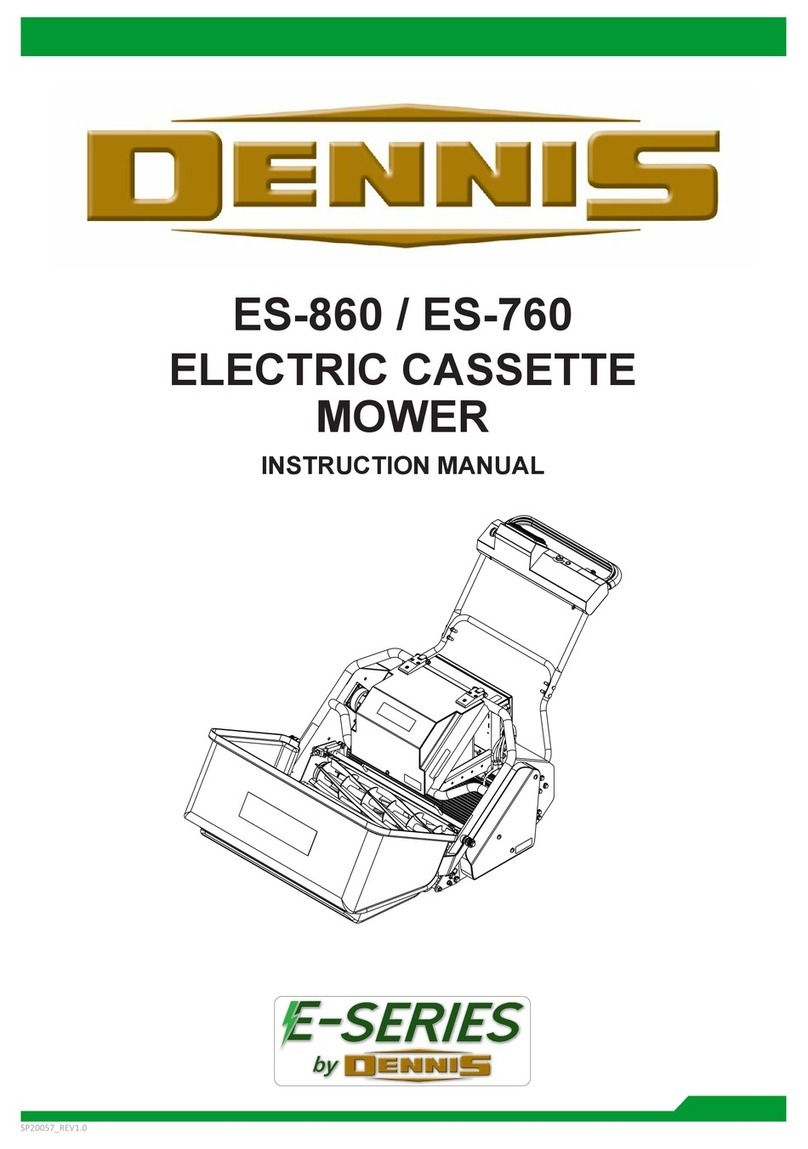
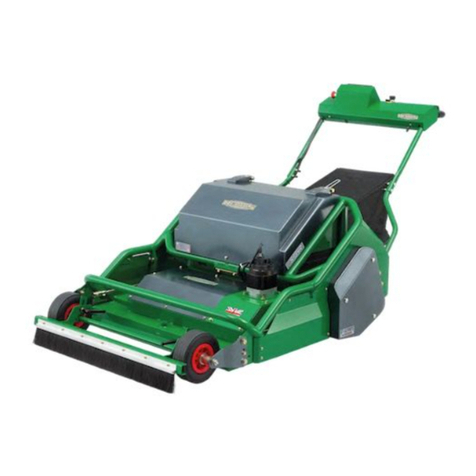
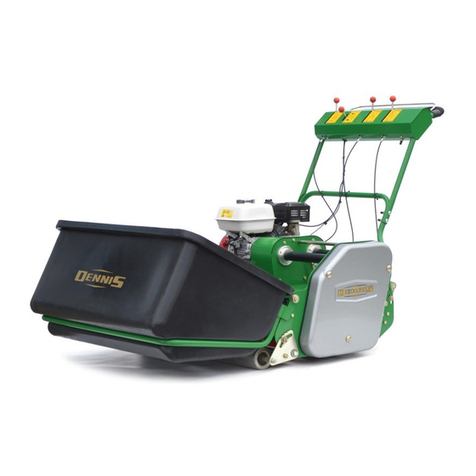
Dennis E-SERIES ES-860 User manual

SP20057_REV0.5
ES-860
ELECTRIC CASSETTE
MOWER
INSTRUCTION MANUAL

2
SP20057_REV0.5
CONTENT
1. CERTIFICATE OF CONFORMITY 3
2. SERIAL NUMBER 3
3. IMPORTANT SAFETY INSTRUCTIONS 4
4. INTRODUCTION 5
5. MACHINE DESCRIPTION 5
6. TECHNICAL DATA 6
7. CONTROLS 8
8. BASIC SCREEN CONTROLS 9
9. SCREEN MENU 10
10. WIRING 15
11. CHARGING 17
12. FREQUENTLY ASKED QUESTIONS 18
13. GENERAL ADJUSTMENTS 19
14. REMOVING THE CASSETTE UNIT 21
15. ROUTINE MAINTENANCE 22
16. GENERAL LUBRICATION 23
17. STORAGE 23
18. BATTERY CARE INFORMATION 24
19. CASSETTES AND THEIR USES 26
20. TROUBLE SHOOTING 28
21. ES-860 - PARTS BOOK 32
22. CHASSIS MAIN ASSEMBLY 33
23. ELECTRICAL 35
24. REAR ROLLER 36
25. ROLLER DRIVE 39
26. MECHANICAL PARKING BRAKE 40
27. CYLINDER DRIVE 41
28. FRONT ROLLER 42
29. HANDLE BARS 43
30. HANDLE CONSOLE 44
31. GRASS BOX CRADLE 46
32. GRASS BOX 47
33. GUARDS 48
34. DECALS 49
35. CUTTER CASSETTE 50
36. VERTICUTTER CASSETTE 52
37. SCARIFIER CASSETTE 54
38. BRUSH CASSETTE 56
39. SORREL ROLLER CASSETTE 58
40. SPRING TINE CASSETTE 60

3
SP20057_REV0.5
1. CERTIFICATE OF CONFORMITY
DENNIS ES-860 Cassette Machine powered by 48V AC motors
Manufacturer:- Howardson Ltd, Howardson Works, Kirk Langley, Derby, DE6 4NJ. UK
Owner of Technical Document:- Mr I.D. Howard, Howardson Ltd, Howardson Works, Kirk Langley, Derby, DE6 4NJ. UK
I the undersigned declare that these machines:-
2. SERIAL NUMBER
MAKE A NOTE OF THE SERIAL NUMBER OF YOUR MACHINE AND ALWAYS
QUOTE IT IN ANY COMMUNICATION WITH PERSONNEL AT DENNIS.
Model Cutting Width Power Measured Sound
Power Level
Guaranteed Sound
Power Level Serial Number
ES-860 34” (860mm) 48V AC motor (x2) 88 dB (Lwa) 91 dB (Lwa) See product ID
Tested at:- Howardson Works test site September 2020
Complies with the applicable requirements of:-
- Machine Directive 2006/42/EC
- Noise Directive 2000/14/ec (Annex VI Procedure 1)
Managing Director
Ian Howard
NOTE:-
MACHINE SERIAL NUMBER
NOTICE OF COPYRIGHTS AND PROPERTY RIGHTS
● Keepthisoperatingmanualcondential.
●Only make this operating manual accessible to authorized persons.
●Only pass this operating manual to third parties after obtaining written permission from DENNIS.
●All documents are protected under the Copyright Act. Passing on and reproducing documents, including excerpts, and exploiting
and sharing the contents of documents is prohibited unless expressly approved in writing.
●Violations are punishable and subject to compensation of damages. DENNIS reserves the right to exercise any and all industrial
property rights.
CHASSIS SERIAL NUMBER
BATTERY SERIAL NUMBER
MOTOR SERIAL NUMBERS
ROLLER MOTOR (with Gearbox) CYLINDER MOTOR

4
SP20057_REV0.5
NEVER
• Carry out adjustments whilst the machine is running.
• Allow any unauthorised person to handle machines, in any way, at any time.
• Open or attempt any work inside the electrical box. Opening the box will void the warranty.
• Replace any electrical components or motors with non OEM parts.
• Attempt to charge the machine from any non OEM charger.
• Operate mower if electrical wires are damaged or bare cable is exposed.
ALWAYS
• Read the operating instructions carefully and understand the controls before commencing work.
• Usesafetyguardsandmakesuretheyarecorrectlyttedinposition.Theyaresuppliedforyourprotection.
• Before starting work always visually check machine for damage or wear to parts.
• Look behind before starting to reverse and watch out for children or pedestrians.
• Respect powered machines. Always keep hands and feet clear of moving parts and remember that
brushesandrollerscancontinuetorotateevenafterthepowerunitisswitchedo.
• Switchothepoweranddisconnectthebatterybeforeservicingormakingrepairs.
• Never lift or carry a machine whilst any parts are moving.
CAUTION:- READ THE INSTRUCTIONS. We want you to obtain the best performance from this
machine.Ifyouhaveanydicultyincarryingoutthefollowinginstructionsplease
contact your local DENNIS dealer.
48V
3. IMPORTANT SAFETY INSTRUCTIONS
TRAINING
●Be familiar with the controls and the proper use of the equipment.
●Never allow children or people unfamiliar with these instructions to use the mower. Local regulations or
insurance may restrict the age of the operator.
●Never mow while people, especially children, or pets are near by.
●Keep in mind that the operator or user is responsible for accidents or hazards occurring to the other people or
their property.
PREPARATION
●Thoroughly inspect where the equipment is to be used and remove all stones, sticks, wire, bones and other
foreign objects.
● Beforeusingthemachinealwaysinspectthesafetydevices,includingtheemergencycut-oswitch,aswellas
checking the blades for excessive wear or damage. Replace if necessary.
●While mowing always wear substantial footwear and long trousers. Do not operate the mower barefoot or in
open sandals.
● Indry,dustyorwindyconditionsitmaybenecessarytoweareyeprotectiontoprotectyoureyesfromying
debris.
OPERATION
● Mowonlyindaylightorgoodarticiallight.
●Avoid operating the machine in wet grass where feasible.
●Always be sure of your footing on slopes.
●Walk. Never run.
●Walk across the face of slopes, never up and down.
●Exercise extreme care on slopes, especially when changing direction.
●Do not mow steep slopes.
●Use extreme caution when reversing or pulling the machine towards you.
●Stop the blades and tilt the mower back on the rear roller when crossing surfaces other than grass or when
transporting between areas to be mown.
●Never operate the mower with defective guards or shields or without safety devices, for example without the
deectorplateorgrassboxinplace.
●Do not put hands or feet near the under rotating parts. Keep clear of the discharge opening at all times.
●Never pick up or carry the mower while the motors are running.
5
SP20057_REV0.5
4. INTRODUCTION
This operating manual is an essential tool to ensure the proper and safe operation of the ES-860 Electric Cassette Mower. This
usermanualcontainsimportantinformationregardingthesafe,properandecientoperationoftheES-860.Adherencetothis
manual will help to avoid risk, lower repair costs and reduce downtimes while simultaneously increasing the service life of the
ES-860 itself. The operating manual must always be available, and every person tasked with working on or with the ES-860
must read and follow the instructions.
Inthecaseofanydiculty,oriffurtherinformationoradviceisrequired,ourServiceDepartmentisalwaysatyourcall.Inthe
interests of speed and accuracy of information please quote the serial numbers of the machine when making enquiries. For
the machine, this is to be found on a plate attached to the side of the chassis. We suggest you write the numbers on the front
page of this book.
5. MACHINE DESCRIPTION
Manufacturedwith34”(86cm)cuttingwidththismachineisrunbyapairof48Vhigheciencybrushlesspermanentmagnet
AC motors powered from an 111 Ah lithium ion battery.
The rear roller and cutter are controlled independently via belt drives operated from the display screen on the upper handle bar.
Amechanicalparkingbrakeisttedforaddedsafetywhenworkingaroundunevenground,whenappliedthisdisengagedrive
to both motors for added safety.
In the design of the machine, special attention has been given to the importance of easy service and maintenance with the
construction based on a sectional assembly system. These are the Electrical Drive system, the Rear Roller Unit and the Front
Roller Unit, each of which can be readily removed individually from the main Frame Chassis Unit.
The interchangeable cassette system allows a variety of cassettes to be used for varying applications. Dennis 860 cassette are
interchangeable between the ES-860 & G-860 (petrol machine).

6
SP20057_REV0.5
ES-860
DIMENSIONS
A- WIDTH (mm) 1110
B- LENGTH with Grass Box (mm) 1860
C- LENGTH without Grass Box (mm) 1340
D- HEIGHT (mm) 1100
WEIGHT with Cutting Cassette (Kg) 235
WEIGHT without Cassette (Kg) 195
Cutting Width 860mm / 34”
DRIVE SYSTEM
Roller Motor (W) 630
Roller Drive System Timing Belt
Cylinder Motor (W) 1200
Cylinder Drive System Multi V belt
ELECTRICAL SYSTEM
Battery Type Lithium Ion
System Voltage 48
Battery Capacity (Ah) 111
Self Discharge @ 25 °C < 2% per month
C
B
D
A
6. TECHNICAL DATA

7
SP20057_REV0.5
NUMBER PART NUMBER PART
1 Electrical Box 7 Belt Guards
2 Battery Cover 8 Mechanical Hand Brake
3 Roller Motor 9 Cutting Height Adjuster
4 Cylinder Motor 10 Cassette Retaining Bolt
5 Cassette 11 Grass Box
6 Bottom Blade Adjustment Knob 12 Handle Bar Adjusters
1
2
3
4
5
6
7
11
10
12
9
8
12
1
11
2
7
9
1413 1516 17
13
15
14 16
17
NUMBER PART NUMBER PART
13 Key Switch 16 Deadman’s Handle
14 Display Screen 17 Start Button
15 Emergency Stop
Or

8
SP20057_REV0.5
7. CONTROLS
FOR THE LOCATION OF CONTROLS AND COMPONENTS REF “MACHINE DESCRIPTION” & ‘TECHNICAL DATA’
PAGES. BE FAMILIAR WITH THE CONTROLS AND THE PROPER USE OF THE EQUIPMENT BEFORE STARTING.
KEY SWITCH & START BUTTON (ITEM 13 & 17)
This switch cuts power to the electrical components and can be used to do so at any time during the operation of the machine.
See basic operations page for more information
DEADMANS CONTROLS (ITEM 16)
This is an operator presence control. This must be depressed before the drive and cylinder motors will engage. Releasing the
handle during operation will cut power to both motors.
MECHANICAL PARKING BRAKE (ITEM 8)
This applies a mechanical brake to the rear roller. It is only to be engaged when the machine is stationary, it is NOT to stop the
machine. Push the lever forward to engage and pull back behind brake plate to disengage. The display will automatically display
PARK on the gear selection icon when the brake is engaged. The brake must be disengaged before the gear selection can be
changed by the operator.
THE MECHANICAL PARKING BRAKE MUST BE DISENGAGED TO ALLOW
THE MOWER DISPLAY TO BE SET TO DRIVE OR REVERSE.
NOTE:-
PUSHING THE MOWER WHEN NOT MOTOR DRIVEN SHOULD ALWAYS BE
DONE IN NEUTRAL TO AVOID DAMAGING THE INTERNAL MOTOR BRAKE.
NOTE:-
CONTROL SCREEN (ITEM 14)
Mower operations can be undertaken from the HOME screen. See (8) BASIC SCREEN OPERATIONS on the next page outline
mower controls from this screen. From the HOME screen, Drive start/stop, Drive speed, Cylinder start/stop, Reverse & Turning
Speed can be operated.
Other setting changes can be controlled through the MENU settings. These include Clip Rate, RPM, Password Protect, Speed
Defaults & many others. See (9) SCREEN MENUS.
To navigate back to the HOME screen from any other menu screen press the HOME screen icon (see below).
HOME SCREEN
(Return to HOME screen from menus)

9
SP20057_REV0.5
8. BASIC SCREEN CONTROLS
SP19027_REV2 - 11/02/2021
2.0KM/H
2.0KM/H
P
D
R
N
D
R
P
N
D
R
N
P
R
D
P
N
Cylinder START / STOP
When in DRIVE only
Roller START / STOP
When in DRIVE or REVERSE
Turning Speed
Turn ON / OFF
DRIVE - To operate mower
NEUTRAL - Free rolling
PARK - Mechanical parking brake is on
REVERSE - Roller direcon backwards
D
R
N
P
4.0
KM/H
2.0KM/H
5.5 KM
135 MIN
DENNIS NO.1
09:33
23 SEPT 2020
MENU
Increase / Decrease
Forward Speed
(0.1 increments)
Enter MENU BATTERY LEVEL
E-SERIES BASIC OPERATING
TIME - DATE
TRIP DISTANCE
TRIP TIME
SELECTED CLIP
RATE or RPM
RPM
KEY START
A) Release E-Stop
B)
C)
D)‘CLICK’
E)
ON
OFF
C) / D)A) B)
START BUTTON
‘CLICK’
3
sec
DEADMAN’S HANDLE MUST ALWAYS BE HELD TO OPERATE ROLLER
AND CYLINDER DRIVE.
NOTE:-

10
SP20057_REV0.5
9. SCREEN MENU
D
R
N
P
4.0
KM/H
2.0KM/H
5.5 KM
135 MIN
DENNIS NO.1
09:33
23 SEPT 2020
MENU
?ES-860
Version - SP27002_REV2.21
Serial No. - ES8600001
DENNIS NO.1 FACTORY
SETTINGS
ES-860
Serial No. - ES8600001
DENNIS NO.1
RPM
ES-860
Serial No. - ES8600001
DENNIS NO.1
D _ _
!
nd
22
JAN
UP
2020
Last Completed
24/10/2019
Last Completed
24/10/2019
Last Completed
24/10/2019
STANDARD ‘D150’
100 c/m - FACTORY SETTING
‘RATE B’
XXX c/m - ‘USER DEFINED DESCRIPTION’
‘RATE C’
XXX c/m - ‘USER DEFINED DESCRIPTION’
RBACK LAPPING IN
MONTHLY CHECKS
BATTERY INFO
DEFAULT SPEEDS
TRIP LOGS
EDIT CLIP RATES
HOME SCREEN MAIN MENU
EDIT MACHINE NAME
EDIT TIME / DATE
HOME SCREEN
LOCK / UNLOCK EDITING
MAIN MENU
EDIT PASSWORD CODE
DAILY CHECKS
MONTHLY CHECKS
HOME SCREEN
YEARLY CHECKS
MAIN MENU
SELECT DEFAULT
SELECT USER DEFINED
SELECT USER DEFINED
HOME SCREEN
HOME
SCREEN MAIN MENU
PAGE DOWN
HOME SCREEN
MAIN MENU
OPERATIONS SCREEN
MACHINE SETTINGS
3 MORE USER DEFINED
SELECTION OPTIONS
MAINTENANCE SCREEN
RATE SELECTION PAGE C
PAGE C
PAGE B
PAGE B PAGE A
PAGE A
DOWNLOAD LOG
(TO USB)
SCREEN BRIGHTNESS
ES-860
Serial No. - ES8600001
DENNIS NO.1
CYLINDER
FACTORY SETTINGS
INFORMATION SCREEN PAGE D
MANUAL INFORMATION
FREQUENTLY ASKED QUESTIONS
CONTACT INFORMATION
HOME SCREEN MAIN MENU
ES-860
ELECTRIC CASSETTE MOWER
EDIT RPM RATES
SORREL ROLLER
CYLINDER
BRUSH
CUTTER
HOME SCREEN MAIN MENU
CASSETTE SELECTION PAGE D
SORREL ROLLER CYLINDER
CUTTER
BRUSH
SP19024_REV2 - 11/02/2021

11
SP20057_REV0.5
D
R
N
P
4.0
KM/H
2.0KM/H
5.5 KM
135 MIN
DENNIS NO.1
09:33
23 SEPT 2020
MENU
ES-860
Serial No. - ES8600001
DENNIS NO.1
CYLINDER
HOME SCREEN
MAIN MENU
CYLINDER
START
DRIVE SELECT
SELECTION UP
SELECTION DOWN
MAIN MENU
BATTERY CHARGE
TRIP STATISTICS
(DISTANCE COVERED / TIME RUN)
& RATE SELECTED
BUTTON SELECTION
SCREEN INFO
BUTTON SELECTION
SCREEN INFO
SPEED UP (0.1)
SPEED DOWN (0.1)
OPERATING SCREEN FOR MOWER. ALWAYS AN OPTION ON OTHER SCREENS TO GET STRAIGHT BACK TO THIS SCREEN (TOP LEFT ICON).
MAIN MENU SCREEN. ALWAYS AN OPTION ON OTHER SCREENS TO GET STRAIGHT BACK TO THIS SCREEN (TOP RIGHT ICON).
TIME AND DATE
SET ON MACHINE
ROLLER START
ACTIVATE TURNING
SPEED
ROLLER SPEED
RETURN TO HOME
SCREEN
SELECT CLIP /
RPM RATE
OPERATIONS SCREEN
MACHINE MAINTENANCE SCREEN
MACHINE TYPE
MACHINE SERIAL NUMBER
MACHINE NAME - SET ON MACHINE
INFORMATION
PAGE A
MACHINE SETTINGS
DEPENDENT ON CASSETTE
SELECTED. SELECT BETWEEN
FACTORY SET OR USER
DEFINED RATES.
DRIVE / NEUTRAL / PARK / REVERSE
DEFAULT SPEEDS / TRIP LOGS /
EDIT CLIP RATE / BATTERY INFO
EDIT MACHINE NAME / EDIT
TIME & DATE / PASSWORD SET
DAILY / MONTHLY / YEARLY CHECKS.
BACKLAPPING CONTAINED IN ‘MONTHLY CHECKS’
MANUAL / FAQs / CONTACT
INFORMATION
MONTHLY CHECKS TO
BE COMPLETED
RPM
CLIP RATE (CYLINDER)
RPM RATE (BRUSH OR CUTTER)
FREE ROLLING (SORREL ROLLER)
ANNUAL CHECKS
TO BE COMPLETED
BY DEALER
CASSETTE TYPE
CYLINDER / CUTTER
BRUSH / SORREL ROLLER

12
SP20057_REV0.5
ES-860
Serial No. - ES8600001
DENNIS NO.1
RPM
ES-860
Serial No. - ES8600001
DENNIS NO.1
D _ _
!
OPERATIONS SCREEN
MACHINE SETTINGS
EDIT DEFAULT TURNING
AND FORWARD SPEED
EDIT CLIP RATES
BUTTON SELECTION
SCREEN INFO
BUTTON SELECTION
SCREEN INFO
BATTERY &
CHARGE INFO
RETURN TO HOME
SCREEN
PASSWORD EDIT
PASSWORD
RENAME MACHINE
MACHINE TYPE
MACHINE SERIAL NUMBER
MACHINE NAME - SET ON MACHINE
PAGE B
SET TIME & DATE
TURN PASSWORD ON / OFF
STOPS USERS EDITING
SETTINGS
CHANGE PASSWORD CODE
RETURN TO HOME
SCREEN
MACHINE TYPE
MACHINE SERIAL NUMBER
MACHINE NAME - SET ON MACHINE
RETURN TO MAIN
MENU SCREEN
VIEW AND RESET LOGS
EDIT 5 USER DEFINED RATES
EDIT CLIPS PER METRE /
NAME / ADD NOTES
WILL BECOME DEFAULT ON
HOME SCREEN
DISTANCE / TIME / CHARGE
RESETTABLE TRIP & LIFETIME
READOUTS
LAST FULL CHARGE /
TOTAL CHARGES ETC
SCREEN
BRIGHTNESS
DOWNLOAD LOG
DOWNLOAD TO USB STICK
EDIT RPM RATES
EDIT RPM RATES FOR BRUSHES
& CUTTERS

13
SP20057_REV0.5
rd
23
JAN
UP
2020
Last Completed
24/10/2019
Last Completed
24/10/2019
Last Completed
24/10/2019
STANDARD ‘D150’
100 c/m - FACTORY SETTING
‘RATE B’
XXX c/m - ‘USER DEFINED DESCRIPTION’
‘RATE C’
XXX c/m - ‘USER DEFINED DESCRIPTION’
MAINTENANCE SCREEN
RATE SELECTION
DAILY CHECKS
ANNUAL CHECKS
BUTTON SELECTION
SCREEN INFO
BUTTON SELECTION
SCREEN INFO
MAINTENANCE SCREEN. SELECT AND SIGN OFF DAILY / WEEKLY & YEARLY CHECKS. BACKLAPPING (REVERSE CYLINDER) IN
MONTHLY CHECKS.
SELECT YOUR CLIP RATE OR RPM DEPENDENT ON THE CASSETTE TYPE YOU HAVE SELECTED. WHEN CHOSEN IT WILL RETURN YOU TO
HOME SCREEN READY TO OPERATE. CLIP RATE MAINTAINED EVEN WHEN SPEED ALTERED. RPM WILL REMAIN CONSTANT.
RETURN TO HOME
SCREEN
PAGE DOWN
SELECT DEFAULT
CLIP RATE
PAGE C
SELECT USER
DEFINED CLIP RATE
RETURN TO HOME
SCREEN
RETURN TO MAIN
MENU SCREEN
MONTHLY CHECKS
SELECT USER DEFINED
CLIP RATE
LAST DATE COMPLETED.
ARE CHECKS UP TO DATE
CLICK ON BOTTON THIS
SIDE TO SEE EXPANDED
LOG LIST
GIVES LIST OF CHECKS.
LOG AS COMPLETE
ONCE DONE
GIVES LIST OF CHECKS.
LOG AS COMPLETE
ONCE DONE
GIVES LIST OF CHECKS. LOG AS
COMPLETE ONCE DONE
NEXT 3 USER
DEFINED SELECTIONS
LOCKED FOR EDITING
RPM

14
SP20057_REV0.5
SORREL ROLLER
CYLINDER
BRUSH
CUTTER
?
Machine type - ES-860
Program No. - SP27002_REV2.21
Serial No. - ES8600001
Machine Name - DENNIS NO.1 FACTORY
SETTINGS
INFORMATION SCREEN
MANUAL INFO
CONTACT INFO
BUTTON SELECTION
SCREEN INFO
INFORMATION SCREEN. VIEW SELECT MANUAL PAGES, FREQUENTLY ASKED QUESTIONS AND DENNIS CONTACT DETAILS.
PAGE D
RETURN TO HOME
SCREEN
RETURN TO MAIN
MENU SCREEN
FREQUENTLY ASKED
QUESTIONS
DENNIS CONTACT DETAILS
ADDRESS / PHONE / E-MAIL / WEB
FACTORY SETTINGS
(PASSWORD PROTECTED)
PULLEY RATIOS
REVERSE SPEED
OPERATING RANGES (SPEED / RPM / CLIP RATE)
FACTORY RESET
SWAP MACHINE TYPE OR CYLINDER BLADE NUMBER
SHOW / RESET USER PASSWORD
KEY MANUAL PAGES / INFO
RETURN TO HOME
SCREEN
CUTTER CASSETTE
CYLINDER CASSETTE
SORREL ROLLER
BRUSH CASSETTE
SORREL ROLLER
BRUSH
CUTTER
CYLINDER
CASSETTE SELECTION
RETURN TO MAIN
MENU SCREEN
CHOOSE NUMBER OF BLADES
ON NEXT SCREEN
THEN CHOOSE CLIP RATE
CHOOSE RPM ON NEXT SCREEN
BACK TO HOME SCREEN
CYLINDER MOTOR
DISENGAGED TO FREE ROLL
SELECT THE TYPE OF CASSETTE FITTED INTO
THE MACHINE.
MACHINE TYPE
SOFTWARE VERSION
MACHINE SERIAL NUMBER
MACHINE NAME - Set on machine

15
SP20057_REV0.5
10. WIRING
+
-
-
+
SP19031_REV1 - 04/02/2021
E-SERIES MACHINE WIRING
BMS CONTROLLER HARNESS
(SP12128)
NODE 1 BATTERY
(SP12126)
GEARBOXED
103 MOTOR -
ROLLER DRIVE
(SP15102)
106 MOTOR -
CYLINDER
DRIVE
(SP15104)
U
W
VU
W
V
U
V
W
U
V
W
GB
I
F
D
E
NL
ATTENTION:Refer to Manual
ATTENZIONE:Riferirsi al Manuale
ATTENTION:Se référer au Manuel
VORSICHT:Siehe Handbuch
ATENCIÓN:Referirse al Manual
OPGELET: Naar het Handboek
PARKING BRAKE
MICROSWITCH
HANDLE WIRING HARNESS
(SP12107)
ELECTRICAL BOX TOP
800253A
MOTOR WIRING HARNESS
(SP12106)
MOTOR WIRING HARNESS
(SP12106)
CONNECTED TO -
HANDLE CONTROLLER
HARNESS
(SP12108)
HYPERDRIVE - HYP-00-2890
-
+

16
SP20057_REV0.5
SP19031_REV1 - 04/02/2021
E-SERIES MACHINE WIRING
GB
I
F
D
E
NL
ATTENTION:Refer to Manual
ATTENZIONE:Riferirsi al Manuale
ATTENTION:Se référer au Manuel
VORSICHT:Siehe Handbuch
ATENCIÓN:Referirse al Manual
OPGELET: Naar het Handboek
PARKING BRAKE MICROSWITCH
HANDLE WIRING HARNESS
(SP12107)
ELECTRICAL BOX TOP
800253A
HANDLE CONTROLLER
HARNESS
(SP12108)
A
B
DC
DISPLAY PV450
(SP12099)
TOP
2
NC
1
E-STOP
RED / BLACK
ORANGE/BLUE
12V
CONVERTER
BC
C- BLUE,
BLACK
B- BLACK,
2x GRAY,
2xWHITE
ASOFTWARE
UPGRADE USB
DEADMAN’S
MICROSWITCH
HYPERDRIVE - HYP-00-2890
White / Blue
Posn 75
White / Red
Posn 30
Orange - NO
Orange/Blue - C
C NO NC

17
SP20057_REV0.5
11. CHARGING
Follow charging instruction shown below -
PLUG CHARGER (D153) INTO WALL/POWER SUPPLY. MAKE
SURE DISPLAY/LIGHTS ARE ILLUMINATED TO BE SURE
POWER IS LIVE TO CHARGER
SP19023_REV2 - 10/02/2021
OPEN CHARGING COVER ON ELECTRICAL BOX AND
CONNECT CHARGER INTO MOWER
SOLID GREEN LIGHT WHEN FULLY CHARGED. CHARGER
CAN BE REMOVED AND COVER CLOSED
(SAFE TO REMOVE CHARGER AT ANY TIME DURING CHARGE)
E-SERIES CHARGING INFO
KEY MACHINE TO ON POSITION, PUSH START BUTTON
(LISTEN FOR ‘CLICK’). DISPLAY SCREEN WILL SHOW THE
MACHINE IS IN CHARGE MODE
ON
OFF
0
1
CHARGER SOLID LARGE RED LIGHT TO INDICATE
CHARGING. (SCREEN WILL BE BLANK). DISPLAY ON
CHARGER CYCLING BETWEEN VOLTAGE, CURRENT, TIME &
AMP HOURS
V
t
A
Ah
100%
-
+
Hyperdrive Cell
START BUTTON

18
SP20057_REV0.5
12. FREQUENTLY ASKED QUESTIONS
SP19040_REV0 - 16/02/2021
E-SERIES FAQS
What do the ‘Main Menu’ icons mean?
CYLINDER
Default speeds / Info /
Edit Clip rates
Password / Time & Date /
Screen Brightness
Daily / Monthly / Annual
Contact / Manual / FAQs
Select from default and
How do I edit RPM & Clip Rates?
Increase
Decrease Save changes
Menu Clip / RPM
RPM
A
A
Edit display
name
Edit notes
How do I edit the default Forward & Turning speed?
Menu Turning Speeds
Turning Forward
Increase
Decrease Save changes
How do I backlap my cylinder?
JAN
Menu Maintenance Monthly
What is the default password?
Contact Dennis or your dealer if you have changed and forgoen
your password. They can talk you through reseng your password.
DEFAULT PASSWORD -
operator to use the machines.
How do I start my E-Series machine?
• Check E-Stop is released
• Key mower to ‘ON’
• Push and hold
• Listen for from the
electrical box
•
display screen to boot
ON
OFF
Why does ‘Daily Checks’ show on start up?
icon), which will log the date on the checks register.
been completed and
can be logged
View completed log list.
Available for DAILY, MONTHLY
& ANNUAL checks
The ‘Parking Brake’ icon won’t disengage?
N
N
Parking brake microswitch stuck
(image right)
Check hammer is disengaging.
FAQ secon also available within the ‘Informaon’ secon -> ‘FAQ’ on the mower display screen.
?

19
SP20057_REV0.5
13. GENERAL ADJUSTMENTS
SETTING FOR HEIGHT OF CUT
Always stop the engine before adjusting the height of cut. Failure to
do this may result in serious injury. The length of grass after cutting
and the depth of SCARIFICATION / DETHATCHING / BRUSHING,
depends on the setting of the front roller in relation to the main
frame of the machine.
To set:
●Slacken the clamp nuts on the front roller quadrants
(see image opposite) [19mm spanner] - Item 1
●Rotate the quadrants using the toothed gear [19mm
spanner], raising and lowering the machine. As a
guide, there are notches in the quadrant and holes
in the side plate. Align these on both sides to level
the machine. - Item 2
XX
XX
DO NOT ATTEMPT TO USE THE DETHATCHING CASSETTES OR BRUSH
CASSETTES ON TOO LOW A SETTING AS THIS WILL RESULT IN DAMAGE TO
THE BLADES AND BRUSHES.
DO NOT ATTEMPT TO SCARIFY ON TOO LOWER SETTING WHEN THE
GROUND CONDITIONS ARE DRY AS THIS COULD CAUSE THE BELT TO SLIP
AND WEAR AT AN INCREASED RATE.
NOTE:-
NOTE:-
XX
To check the height of cut and that the machine is level, the setting bar can be used (229524). Place the bar between the front
and rear rollers, resting the underside of the bolt head on the lip of the shear blade.
A ruler can be used to set the setting bar to the correct position. You are measuring the distance between the bar and the
underside of the button head screw. (‘XX’ in the image above)
Rememberheightofcutisaectedbymoistureofturf,weightofmachineandthethatchdensity.Dierentmakesofmachine
cutatdierentheightswhensettothesamepositionwiththesettingbar.Wesuggestyousetittoacoupleofmmaboveyour
planned height and then come down in height by trial.
Always check height of cut/operation with the setting bar provided. Check in two positions i.e. one at either end of the cassette.
Failure to do this could result in an uneven cut.
Item 1
Item 2

20
SP20057_REV0.5
SETTING THE CYLINDER
The Cylinder cassette can be set either in or out of the machine.
To remove the cassette see following page.
To set:
● Slacken2-olocknuts(Item1)[19mmspanner]
●Rotate nut (Item 2) anti-clockwise to bring the
blade towards the cylinder.
●Check the setting using thin paper along the
length of the cylinder.
●Adjust until it cuts across the whole length.
●When set, tighten the lock nut (Item 1)
●Recheck adjustment.
●DO NOT set the cylinder hard to the bottom
blade.
●This will cause excessive wear of both
components and increase power consumption.
HANDLEBAR ADJUSTMENT
The “Handle Bars” are adjustable to achieve the correct working
height for the operator.
To set:
● Slackeno6-onuts(Item1)¼”turn[17mm
spanner]
●Raise / lower the “Handle Bar” to the desired
position.
●When set, tighten the nuts (Item 1)
C
B
D
A
Item 1
Item 1 Item 2
Other Dennis Lawn Mower manuals

Dennis
Dennis E Series User manual

Dennis
Dennis ES-30 User manual

Dennis
Dennis FT 430 User manual

Dennis
Dennis Premier 30" User manual

Dennis
Dennis Razor Ultra 560 User manual

Dennis
Dennis G26D User manual

Dennis
Dennis E-SERIES ES-36 User manual

Dennis
Dennis Simplex User manual

Dennis
Dennis G680 User manual

Dennis
Dennis E Series User manual