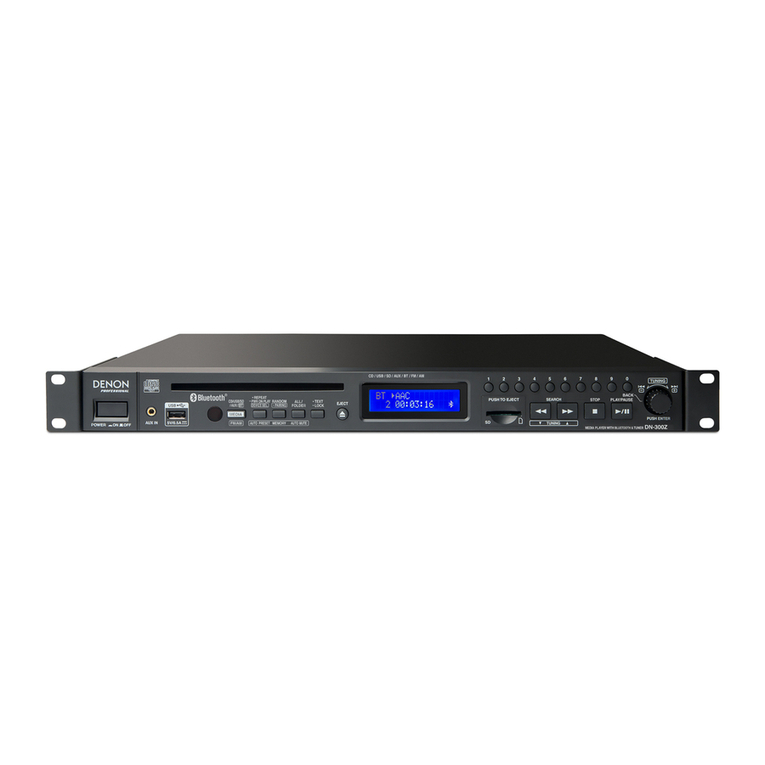
Denon Professional DN-300Z MK II User manual


3
User Guide (English)
Introduction
Box Contents
Support
DN-300Z
Power Cable
FM Indoor Antenna
A
M Loop Antenna
Bluetooth™ Antenna
Remote Control
User Guide
Safety and Warranty Manual
For the latest information about this product (system
requirements, compatibility information, etc.) and product
registration, visit denonpro.com.
Safety Instructions
Please also see the included Safety and Warranty Manual for more information.
Before turning the power on: Make sure all connections are secure and correct and that there are no problems
with the connection cables.
Power is supplied to some of the circuitry even when the unit is powered off. When
the unit will not be used for long periods of time, disconnect the power cable from
the power outlet.
Proper ventilation: If the unit is left in a room which is not properly ventilated or is full of smoke from
cigarettes, dust, etc. for long periods of time, the surface of the optical pickup may
get dirty, causing incorrect operation.
A
bout condensation: If there is a major difference in temperature between the inside of the unit and the
surroundings, condensation may form inside the unit, causing the unit not to
operate properly. If this happens, let the unit sit for an hour or two while powered
off, and wait until there is little difference in temperature before using the unit.
Cautions on using mobile
phones:
Using a mobile phone near this unit may cause noise. If this occurs, move the
mobile phone away from this unit when it is in use.
Moving the unit: Before moving the unit, turn off its power and disconnect the power cable from the
power outlet. Next, disconnect its connection cables from other devices before
moving it.
A
bout care: Wipe the cabinet and control panel clean with a soft cloth.
Follow the instructions when using a chemical cleaner.
Do not use benzene, paint thinner, insecticide, or other organic solvents to clean
the unit. These materials can cause material changes and discoloration.
Rackmount warnings:
(required rack specifications for
mounting the unit in a rack)
EIA standard 19-inch (48.3cm) rack
1U-size installation compatible rack
Rack that has a guide rail or shelf board that can support this device
Rack installation: This product will work normally when the player unit is
mounted within 10° off the vertical plane at the front
panel. If the unit is tilted excessively, the disc may not
load or unload properly. (See image.)
Unit
Maximum 10°

4
Features
Front Panel
13
67 9
2458
10 17
11 12 13 14 15 16 18
1. Power Button: Press this button to turn the unit on or off. Make sure the AC In is properly connected to a power
outlet. Do not turn the unit off during media playback—doing so could damage your media.
2. Aux In: Connect an optional device to this input using a 1/8” (3.5mm) TRS cable. See Operation > Playing
Audio from an External Device for more information.
3. USB Port: Connect a mass-storage-class USB device to this port. See Operation > Playing Audio Files for
more information.
4. Remote Sensor: Point the remote control at this sensor when operating it. See Remote Control > Operating
Range for more information.
5. CD Slot: Insert a CD into this slot. See See Operation > Playing Audio CDs or Playing Audio Files for more
information.
6. Media Button: Press this to enter Media Selection screen. See Operation > Selecting Media Playback Mode
for more information.
7. Repeat Button: In CD, USB, or SD Mode, press this button to switch between Repeat Playback modes: Repeat
One, Repeat All, and Repeat Off. See Operation > Playing Audio CDs or Playing Audio Files for more
information.
Auto Preset Button: In FM/AM Mode, press this button to automatically scan available radio stations and
register them to the preset memory. See Operation > Using the Radio for more information.
Device Select Button: In Bluetooth Mode, press this button to select a Bluetooth device from a list of devices
that have been previously paired to the unit. See Operation > Playing Audio from a Bluetooth Device for more
information.
Power-On Play Button: Press and hold this button to turn Power-On Play on or off. See Operation > Additional
Functions > Power-On Play for more information.
8. Play Mode Button: In CD Mode, press this button to cycle through Normal Play Mode, Single Play Mode, and
Random Play Mode. In USB or SD Mode, press this button to turn Random Play Mode on or off. See Operation
> Playing Audio CDs or Playing Audio Files for more information.
Memory Button: In FM/AM Mode, press this button to enter Preset Memory Registration Mode. After that, press
a number button (0–9) to register the current station to that preset memory number. Press and hold this button to
erase the station stored to the current preset memory number. See Operation > Using the Radio for more
information.
Pairing Button: In Bluetooth Mode, press and hold this button to let the unit pair to a nearby Bluetooth device.
See Operation > Playing Audio from a Bluetooth Device for more information.
9. All/Folder Button: In CD, USB, or SD Mode, press this button to switch between Folder View and All View. See
Operation > Playing Audio Files for more information.
Auto Mute Button: In FM/AM Mode, press this button to turn Auto Mute on or off. See Operation > Using the
Radio for more information.
10. Text Button: In CD, USB or SD Mode, press this button to switch the display between the file name and other
text information. See Operation > Playing Audio Files for more information.
Lock Button: Press and hold this button to turn Panel Lock on and off. See Operation > Additional Functions
> Panel Lock for more information.

5
11. Eject Button: Press this to eject the CD in the CD slot.
12. Display: This screen indicates the unit’s current operation. See Display for more information.
13. SD Card Slot: Insert an SD/SDHC card into this slot. See Operation > Playing Audio Files for more information.
14. Search Buttons: In CD, USB, or SD Mode, press and hold one of these buttons to rewind/fast-forward. Initially,
the track will rewind/fast-forward at 5times the normal playback speed. After holding the button for more than 1
second, the track will rewind/fast-forward at 30 times the normal playback speed.
In Bluetooth Mode with a device compatible with AVRCP, press and hold one of these buttons to rewind/fast-
forward.
Tuning Buttons: In FM/AM Mode, press one of these buttons to increase or decrease the frequency one step at
a time. Press and hold the button for more than 1 second to jump to the previous or next station with clear
reception.
15. Stop Button: Press this button to stop playback.
16. Play/Pause Button: Press this button to start, resume, or pause playback.
17. Number Buttons (0–9): In CD Mode, Press one of these buttons to directly select a track to play. If the track
number is two digits, press the buttons in succession (e.g., 1then 2for Track 12). See Operation > Playing
Audio CDs for more information.
In FM/AM Mode, press one of these buttons to directly select a station stored to preset number. If the preset
number is two digits, press the buttons in succession (e.g., 1then 2for Preset 12). See Operation > Using the
Radio for more information.
Back Button: When in CD, USB, or SD Mode and in Folder View, press the last 0 Number Button (labeled
Back) to move up one folder level. See Operation > Playing Audio Files for more information.
18. Jog Dial: Turn this dial to browse the options shown in the display (e.g., media types in the Media Selection
screen, files/folders in CD, USB, or SD Mode, etc.). Press this dial to confirm a selection.
In Bluetooth Mode with a device compatible with AVRCP, turn this dial to select tracks.
Display
1. Media Type: This is the currently selected media: CD, USB, SD, AUX,
BT, FM, or AM. See Operation > Selecting Media Playback Mode
for more information.
2. Playback Operation Icon: This shows various symbols to indicate the
current playback status:
Playing Rewinding
Paused Fast-Forwarding
Stopped
3. Information: This shows extra information about the media being played or the current station.
4. Track/File Number: This is the number of the track or file.
Preset Number: In FM/AM Mode, if the current station is registered to the preset memory, this is the preset
number. See Operation > Using the Radio for more information.
5. Panel Lock: When Panel Lock is on, a key symbol appears here. See Operation > Additional Functions >
Panel Lock for more information.
6. Time: In CD, USB, and SD Mode, this is how much time has elapsed or is remaining, shown as hh:mm:ss
(hours, minutes, and seconds). See Operation > Playing Audio CDs or Playing Audio Files for more
information.
Frequency: In FM/AM Mode, this displays the frequency of the current station. See Operation > Using the
Radio for more information.
123
4675
This manual suits for next models
2
Table of contents
Languages:
Other Denon Professional Media Player manuals

Denon Professional
Denon Professional DN-350UI User manual

Denon Professional
Denon Professional DN-300ZB User manual

Denon Professional
Denon Professional DN-500GB User manual

Denon Professional
Denon Professional DN-500CB User manual

Denon Professional
Denon Professional DN-300Z User manual

Denon Professional
Denon Professional DN-300C MKII User manual

Denon Professional
Denon Professional DN-V755 User manual

Denon Professional
Denon Professional DN-500CB User manual