Français
ÉTAPE 8. Déballez le carton des rails (contenant les rails frontal
et dorsal) et celui de la table de sortie.
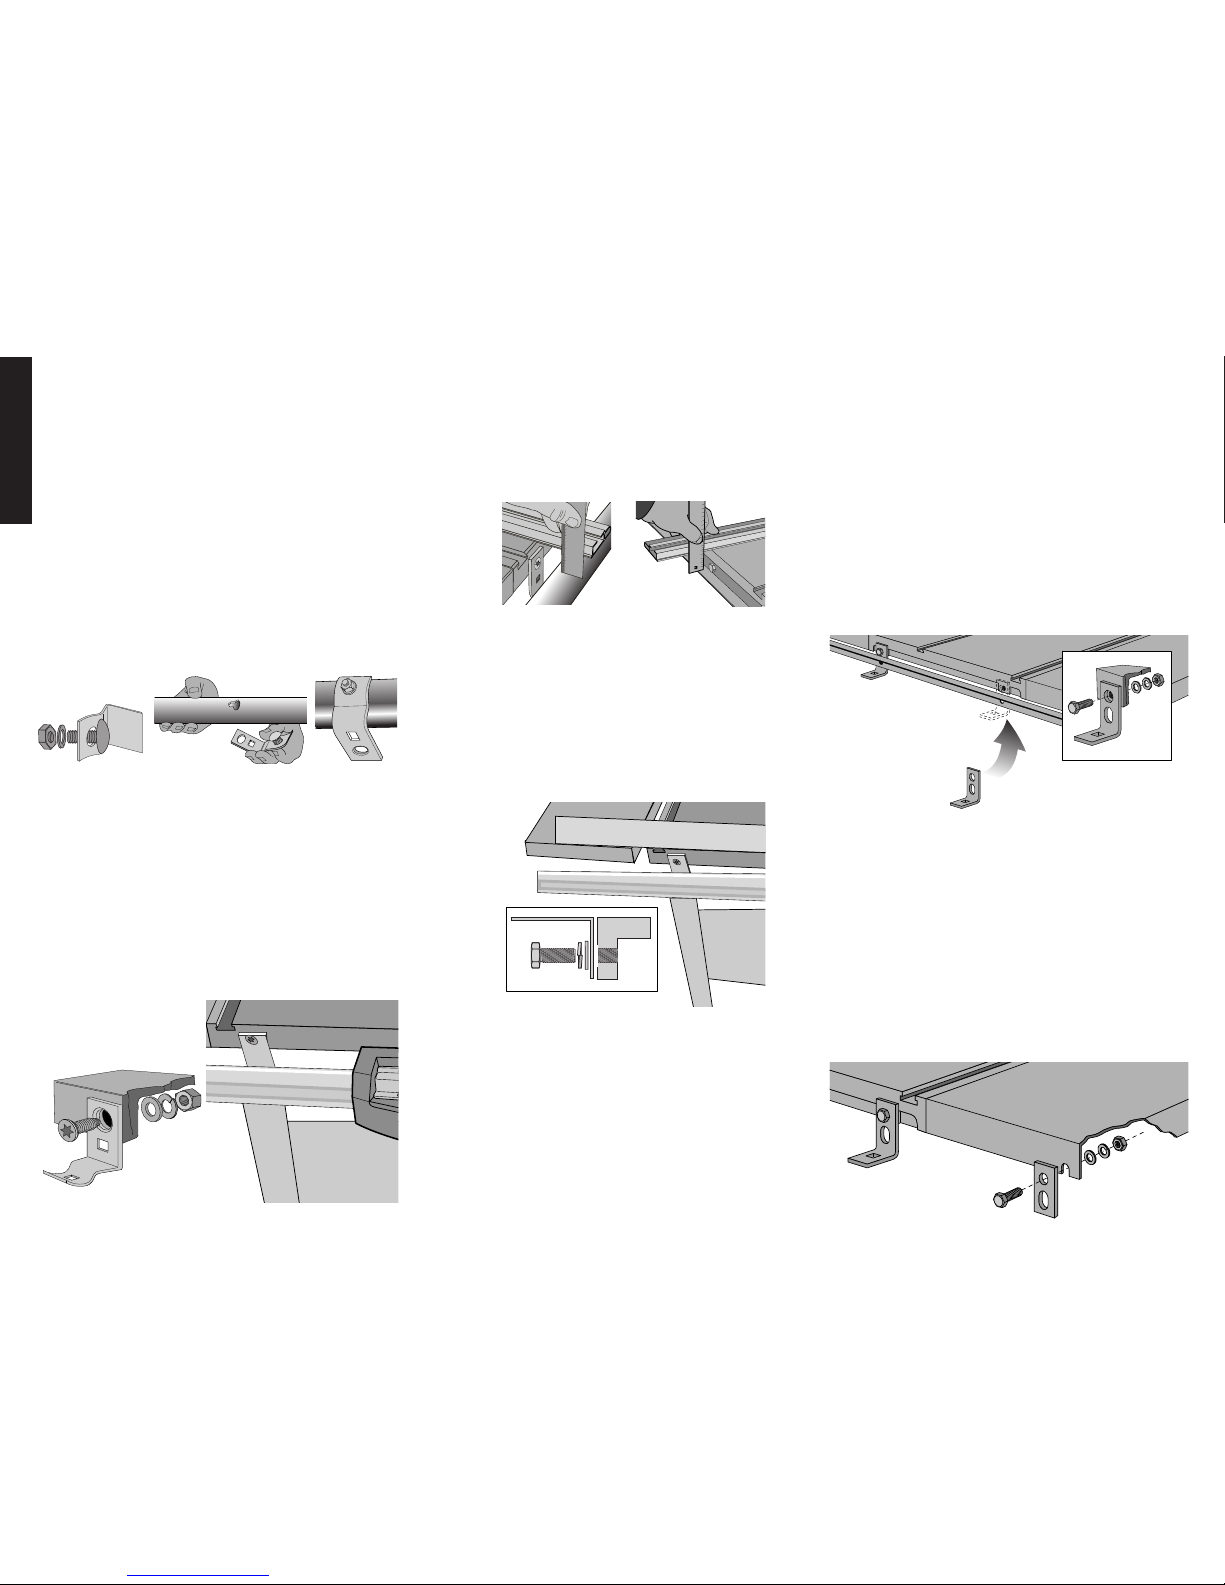
ÉTAPE 9. Monter le rail frontal et les fixations (Fig. 4).
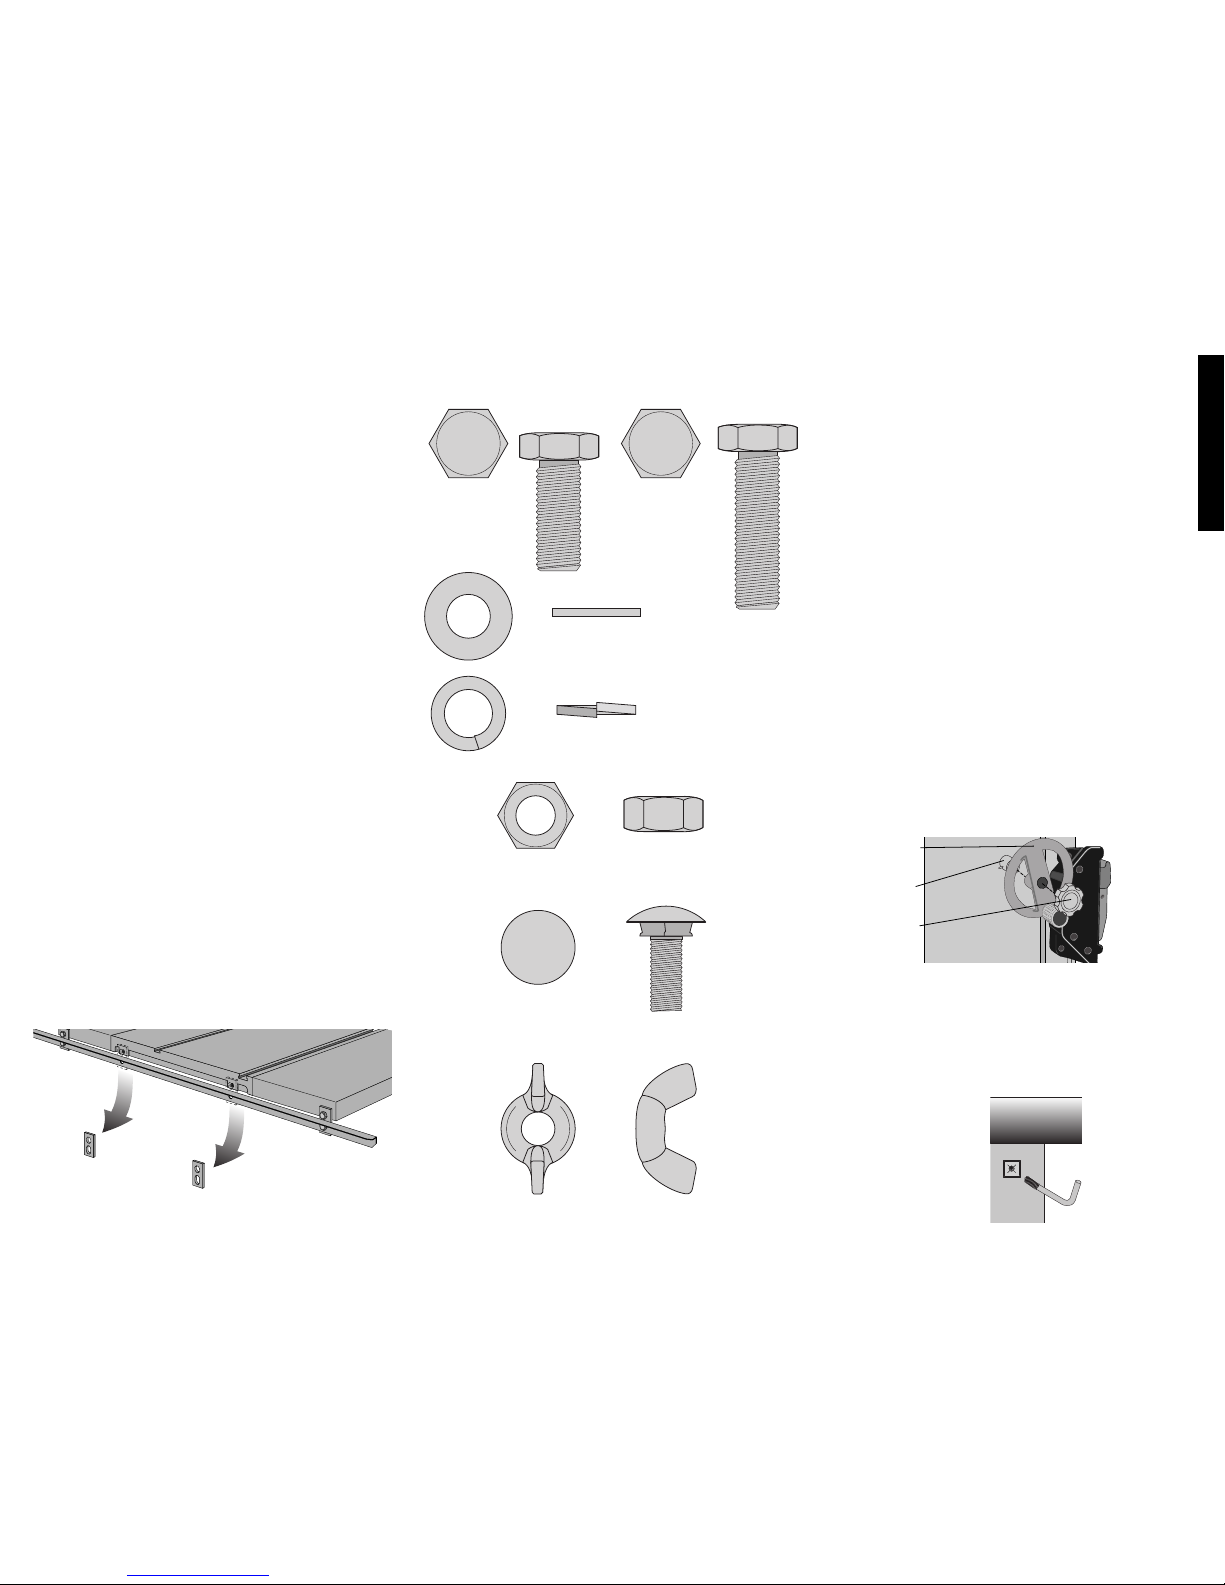
Vous aurez besoin de :
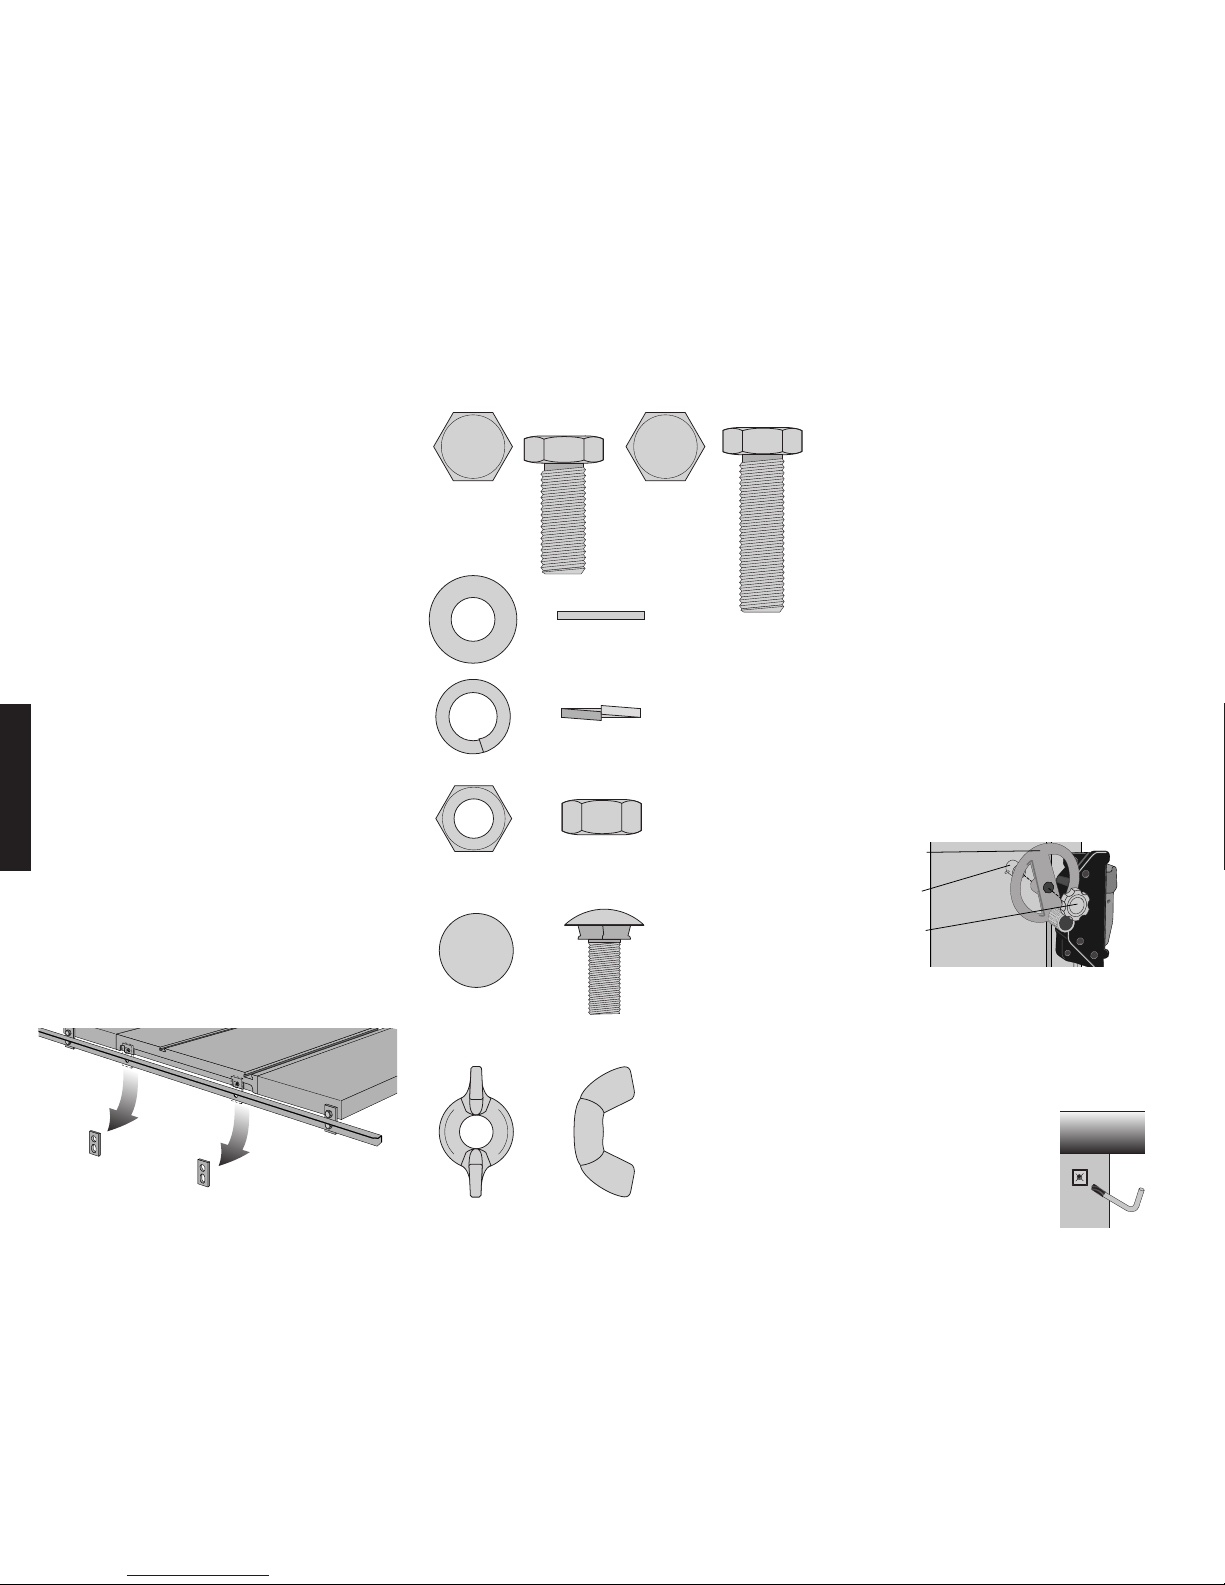
4 –boulons de carrosserie 8 mm (3 si vous
ajoutez une table coulissante)
4 –rondelles d’arrêt 8 mm
4 –écrous 8 mm
Montez les boulons de carrosserie, les rondelles et les écrous
sur les fixations du rail frontal (juste quelques pas de vis).
Mettez la tête des boulons de carrosserie dans les fentes
dans le rail frontal et faites glisser pour enclencher la partie
carrée du boulon . Vissez manuellement l’écrou pour le ser-
rer et répétez la procédure pour les trois autres fixations (si
vous ajoutez aussi une table coulissante, la fixation àl’ex-
trême gauche du rail frontal est inutile). Pendant la fixation
des fixations sur le rail, le rail doit être positionnéde manière
que l’échelle longitudinale ait le côtédroit vers le haut. Les 4
fixations doivent aussi toutes regarder dans la même direc-
tion.
ÉTAPE 10. Attacher le rail frontal avec les fixations au
dessus de la table (Fig. 5).
Vous aurez besoin de :
2 –vis àtête plate 10 x 30 mm
2 –rondelles plates 10 mm
2 –rondelles d’arrêt 10 mm
2 –écrous 10 mm
Fixez chaque vis àtravers le trou supérieur dans les fixations
centrales en positionnant la rondelle plate, la rondelle d’arrêt
et l’écrou sur le côtéinterne de la table. Serrez pour ajuster
mais pas trop. Serrez les écrous de 8 mm des fixations cen-
trales du rail, en conservant le seul serrage manuel pour les
plus extérieures.
FIG. 4
FIG. 5
FIG. 6
FIG. 7
ÉTAPE 11 Placer le rail frontal parallèlement au dessus de la
table de la scie (Fig. 6). En utilisant le devant du guide ou
une règle de vérification pour prolonger la surface de la table
par dessus le rail, assurez-vous que la distance du haut de la
table de la scie au haut du rail est la même du côtédroit et du
côtégauche de la table. Si le rail n’est pas correctement
aligné, desserrez légèrement les vis de montage et tapotez
sur le rail avec un marteau mou ou un marteau régulier et un
bloc en bois jusqu’à ce que les distances soient identiques.
Serrez àfond les articles de quincaillerie.
ÉTAPE 12. Attacher les tables de support droite et gauche (Fig.
7). Vous aurez besoin de :
6 –boulons àtête hexagonale 10 x 25 mm
6 –rondelles plates 10 mm
6 –rondelles d’arrêt 10 mm
La table de support n’étant pas en place, installez 3 écrous de
chaque côtéavec des rondelles comme montréen main-
tenant un espace de 1/4 po (6,36 mm). Faites reposer la table
de support sur les écrous, en l’encastrant dans les encoches.
En utilisant le guide comme une règle de vérification, faites
araser la table de support avec le bord de la table de la scie
et ajustez le boulon frontal. Répétez ce procédépour le
boulon dorsal et le boulon central. Serrez tous les articles de
quincaillerie. Répétez pour l’autre côté.
ÉTAPE 13. Attacher la fixation du rail frontal aux tables de
support (Fig. 4). Vous aurez besoin de :
2 –vis àtête plate 10 x 25 mm
2 –rondelles plates 10 mm
2 –rondelles d’arrêt 10 mm
2 –écrous 10 mm
Alignez la fixation frontale avec la table de support et serrez
l’écrou de la fixation au rail. Attachez les tables de support àla
fixation extérieure de support du rail frontal en positionnant les
rondelles et l’écrou sur le côtéinterne de la table. En utilisant
le devant du guide comme une règle de vérification, assurez-
vous que le coin extérieur frontal de la table de support est de
niveau avec le coin interne et la surface principale de la table.
Serrez tous les articles de quincaillerie, y compris l’écrou de
la fixation de support du rail 8 mm. Répétez cette procédure
pour l’autre table de support.
ÉTAPE 14. Attacher les fixations pour suspendre à la table de
la scie (Fig. 8). Vous aurez besoin de :
2 –boulons àtête hexagonale 10 x 35 mm
2 –rondelles plates 10 mm
2 –rondelles d’arrêt 10 mm
2 –écrous 10 mm
Fixez un boulon àtravers le trou carrédans chaque fixation
avec pour chacun une rondelle plate, une rondelle d’arrêt et
un écrou en positionnant les rondelles et l’écrou sur le côté
interne de la table. Pendant le serrage des écrous, maintenez
les fixations àl’équerre avec la table. (Si un autre accessoire
est en place, assurez-vous que les fixations pour suspendre
sont placées entre le rail dorsal et la table de la scie.)
ÉTAPE 15. Attacher les deux fixations de support dorsal (Fig.
9). (Si d’autres accessoires sont en place, les fixations de
support dorsal sont inutiles. Le rail dorsal s’attachera directe-
ment àl’accessoire).
Vous aurez besoin de :
2 –boulons àtête hexagonale 10 x 25 mm
2 –rondelles plates 10 mm
2 –rondelles d’arrêt 10 mm
2 –écrous 10 mm
Fixez un boulon àtravers le trou rond dans chaque fixation
avec pour chacun une rondelle plate, une rondelle d’arrêt et
un écrou en positionnant les rondelles et l’écrou àl’intérieur.
Assurez-vous que ces articles se trouvent en haut de chaque
fente au dos de la (les) table(s) de support et serrez. Alors que
vous serrez, maintenez les fixations àl’équerre avec la table.
FIG. 8
FIG. 9