DF ROBOT TEL0097 User manual

SIM808GPS/GPRS/GSMShieldforarduino
SIM808GPS/GPRS/GSMShieldSKU:TEL0097
Contents
1 Introduction
2 Specification
3 BoardOverview
4 ArduinoExamples
4.1 Preparation
4.2 Examples
4.2.1 MakePhoneCalls
4.2.2 SendSMSMessages
4.2.3 AutoAnsweringPhoneCallsandReadingSMSMessages
4.2.4 ReadSMSMessages
4.2.5 ConnectTCPandSendGETRequests
4.2.6 GetGPSData
5 USBDebugging(ATcommand)
5.1 Preparation
5.2 MakeaPhoneCall
5.3 AnswerthephoneandHangup
5.4 SendSMS
5.5 ReadSMS
5.6 TCPCommunication
5.7 GPSOrientation
6 SIM808LowPowerConsumptionMode
7 MinimumFunctionalityMode
8 Instructions
9 More
Introduction
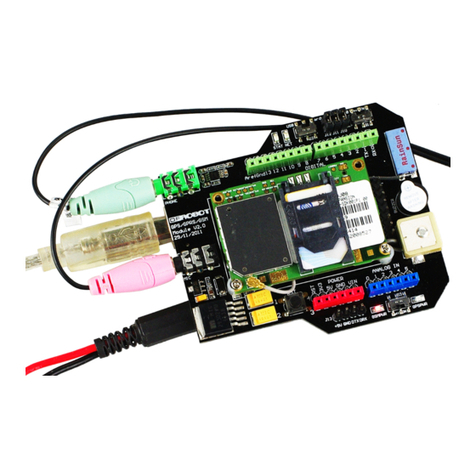
SIM808GPS/GPRS/GSMarduinoshie ld(https://www.dfrobot.com/product1469.html)isanintegratedquadbandGSM/GPRSandGPSnavigationtechnology
Arduinoexpansionshields.Acreditcardsizeonly,accordingtothestandardArduinopinpackaging,compatiblewithArduinoUNO
(https://www.dfrobot.com/product1468.html),arduinoLeonardo(https://www.dfrobot.com/product698.html),arduinoMega(https://www.dfrobot.com/product
358.html)andotherarduinomainboard(https://www.dfrobot.com/category104.html).
ComparedtothepreviousgenerationSIM908,SIM808madesomeimprovementontheperformanceandstability.InadditiontothenormalSMSandphone
functions,theshieldalsosupportsMMS,DTMF,FTPandotherfunctions.Youcanachievethedataacquisition,wirelessdatatransceiver,IoTapplicationandGPS
orientating.Theshouldintegratesonboardmicrophoneandheadphonejack,savingyourcostandmakingyourprojecteasily.itcanalsodirectlyconnecttothe
GSMandGPSantennabyanexternalantennaconnector.
SIM808GPS/GPRS/GSMArduinoShieldV1.0usesthelatestversionofSimcomSIM808module,comparedwiththeearlySIM808moduleavailableinthemarket,
thenewmodulehasbetterstability.ButGPSpartofATcommandsarenotcompatiblewiththeoldversionoftheSIM808module,pleaserefertothebottomofthe
"more"intheATcommands.
Specification
Operatingvoltage:5V
InputPower:723V
Quadband850/900/1800/1900MHz
GPRSmultislotclass12/10
GPRSmobilestationclassB
ComplywithGSMphase2/2+
Class4(2W@850/900MHz)
Class1(1W@1800/1900MHz)
Supportlowpowerconsumptionmode:100mA@7VGSMmode
SupportATcommandcontrol(3GPPTS27.007,27.005andSIMCOMenhancedATCommands)
SupportGPSsatellitenavigationtechnology
SupportLEDstatusindicator:Powersupplystatus,networkstatusandoperatingmodes
Workingenvironment:40℃~85℃
Size:69*54mm/2.71*2.12inches
BoardOverview

(/wiki/index.php/File:TEL0097_pin_mapping.png)
SIM808GPS/GPRS/GSMShield
Moduleinterfaceandprecautions:
1.Occupiedpins:D0,D1,D12,thedigitalpin"D12"isconnectedtoSIM808modulepowerGPIO.ItcanbeusedasSIM808moduleon/offcontrol.
2.SIM808onboardMICand3.5mmSIM808microphoneareusingthesameMICchannel,whenyoupluginyourmicrophone,theonboardMICwillbe
automaticallydisconnected.
3.BootswitchbuttonSIM808moduleswitch,shortpress1stostartSIM808,longpress3sturnitoff.
4.LED"ON"SIM808powerindicator,onlywhenyouconnectanexternalpower,themodulecanworkproperly.
5.NetGSMsignalindicator
1.FastFlash:SearchNetwork
2.Slowflash(3sonce):networkregistrationcomplete
6.Functionswitch
1.NoneVacantSIM808serialpintodownloadthesketch,pleasedialtohere.
2.USB_DBGWhentheexpansionboardpluggedontheArduino,dialtoheretomakeSIM808communicatewithPCtomakeadebug(ATdebugging).
3.ArduinoWhentheexpansionboardpluggedontheArduino,dialtoheretomakeSIM808communicatewithArduino.
ArduinoExamples
InthisSIM808ArduinoShields tutorialwewillcoverhowtouseArduinotodriveaSIM808GPS/GPRS/GSMShield.
DFRobot_SIM808isaopensourceArduinolibrarywithintuitivefunctions.Withanarrayoffunctionspackagedintoasinglelibrary,youcanfocusonyourproject
andnotwastetimestudyingcomplexATcommands.
Thistutorialincludes:
SendandreceiveGPRSdata
ReceiveGPSdata
SendandreceiveSMSmessages
Makeandreceivephonecalls
Preparation
Hardware:
1xArduinoUNO
1xSIM808ExpansionShield
1xExternalPowerSupply
1xSIMCard
Software:
ArduinoIDEClicktoDownloadArduinoIDEfromArduino®(https://www.arduino.cc/en/Main/Software)
DFRobot_SIM808libraryClicktoDownloadDFRobot_SIM808library(https://github.com/DFRobot/DFRobot_SIM808)
Steps:
1.InsertaSIMcardintotheSIMslotontheSIM808expansionshield
2.StacktheexpansionshieldontoanArduinoUNO
3.ConnectanexternalpowersourcetotheArduino

4.Setthefunctionswitchto`None`
5.Uploadthesamplecode
6.Setthefunctionswitchto`Arduino`andmakesureSIM808couldcommunicatewithArduinoboard
7.PresstheBootpowerbutton
8.WaitfortheSIMcardtoregisterthenetwork,theNetindicatorLEDwillslowlyflashevery3seconds
Examples
MakePhoneCalls
ThisexampletestsDFRobot_SIM808SIM808GPS/GPRS/GSMShield'scallUpfunction.
1.OpentheSIM808_CallUpexampleorcopythefollowingcodetoyourIDE
2.InputyourSIM'sphonenumberintheline:``#definePHONE_NUMBER"187******39"``
3.Uploadthecodeandsetthefunctionswitchto`Arduino`
#include<DFRobot_sim808.h>
//Mobilephonenumber,needtochange
#definePHONE_NUMBER"187******39"
DFRobot_SIM808sim808(&Serial);
voidsetup(){
//mySerial.begin(9600);
Serial.begin(9600);
//********Initializesim808module*************
while(!sim808.init()){
delay(1000);
Serial.print("Sim808initerror\r\n");
}
Serial.println("Sim808initsuccess");
Serial.println("Starttocall...");
//*********Callspecifiednumber***************
sim808.callUp(PHONE_NUMBER);
}
voidloop(){
//nothingtodo
}
SendSMSMessages
ThisexampleteststheDFRobot_SIM808GPS/GPRS/GSMshield'ssendSMSfunctions
1.OpentheSIM808_SendSMSexampleorcopythecodetoyourproject
2.InputyourSIM'sphonenumberintheline:``#definePHONE_NUMBER"187******39"``
3.Setthefunctionswitchto`Arduino`
#include<DFRobot_sim808.h>
//Mobilephonenumber,needtochange
#definePHONE_NUMBER"187*******39"
//Thecontentofmessagessent
#defineMESSAGE"hello,world"
DFRobot_SIM808sim808(&Serial);
voidsetup(){
//mySerial.begin(9600);
Serial.begin(9600);
//********Initializesim808module*************
while(!sim808.init()){
delay(1000);
Serial.print("Sim808initerror\r\n");
}
Serial.println("Sim808initsuccess");
Serial.println("Starttosendmessage...");
//********definephonenumberandtext**********
sim808.sendSMS(PHONE_NUMBER,MESSAGE);
}
voidloop(){
//nothingtodo
}
AutoAnsweringPhoneCallsandReadingSMSMessages

ThisexampleteststheDFRobot_SIM808GPS/GPRS/GSMShield'scallansweringandSMSreadingfunction.
1.Openthe`SIM808_LoopHandle`exampleorcopythecodetoyourproject
2.Downloadandsetthefunctionswitchto`Arduino`
3.TheshieldwillautoanswerphonecallsorsendSMSMessagestotheserialterminal
#include<DFRobot_sim808.h>
#defineMESSAGE_LENGTH20
chargprsBuffer[64];
char*s=NULL;
DFRobot_SIM808sim808(&Serial);
voidsetup(){
//mySerial.begin(9600);
Serial.begin(9600);
//********Initializesim808module*************
while(!sim808.init()){
Serial.print("Sim808initerror\r\n");
delay(1000);
}
delay(3000);
Serial.println("InitSuccess,pleasecallorsendSMSmessagetome!");
}
voidloop(){
//********Waitserialdata*************
if(sim808.readable()){
sim808_read_buffer(gprsBuffer,32,DEFAULT_TIMEOUT);
//Serial.print(gprsBuffer);
//**************DetectthecurrentstateofthetelephoneorSMS************************
if(NULL!=strstr(gprsBuffer,"RING")){
sim808.answer();
}elseif(NULL!=(s=strstr(gprsBuffer,"+CMTI:\"SM\""))){//SMS:$$+CMTI:"SM",24$$
charmessage[MESSAGE_LENGTH];
intmessageIndex=atoi(s+12);
sim808.readSMS(messageIndex,message,MESSAGE_LENGTH);
Serial.print("RecvMessage:");
Serial.println(message);
}
sim808_clean_buffer(gprsBuffer,32);
}
}
ReadSMSMessages
ThisexampleteststheDFRobot_SIM808GPS/GPRS/GSMShield'sabilitytoreadSMSmessages.
1.Openthe`SIM808_SMSread`exampleorcopythecodetoyourproject
2.Downloadandsetthefunctionswitchto`Arduino`
3.TheshieldwillreceiveSMSMessagesandsendthemtotheserialterminal

#include<DFRobot_sim808.h>
#defineMESSAGE_LENGTH160
charmessage[MESSAGE_LENGTH];
intmessageIndex=0;
charphone[16];
chardatetime[24];
DFRobot_SIM808sim808(&Serial);
voidsetup(){
//mySerial.begin(9600);
Serial.begin(9600);
//********Initializesim808module*************
while(!sim808.init()){
Serial.print("Sim808initerror\r\n");
delay(1000);
}
delay(3000);
Serial.println("InitSuccess,pleasesendSMSmessagetome!");
}
voidloop(){
//***********DetectingunreadSMS************************
messageIndex=sim808.isSMSunread();
Serial.print("messageIndex:");
Serial.println(messageIndex);
//***********Atleast,thereisoneUNREADSMS***********
if(messageIndex>0){
sim808.readSMS(messageIndex,message,MESSAGE_LENGTH,phone,datetime);
//***********InordernottofullSIMMemory,isbettertodeleteit**********
sim808.deleteSMS(messageIndex);
Serial.print("Fromnumber:");
Serial.println(phone);
Serial.print("Datetime:");
Serial.println(datetime);
Serial.print("RecievedMessage:");
Serial.println(message);
}
}
ConnectTCPandSendGETRequests
ThisexampleteststheDFRobot_SIM808GPS/GPRS/GSMShield'sabilitytoconnectTCPandsendGETrequests
1.Openthe`SIM808_TCPConnection`exampleorcopythecodetoyourproject
2.Downloadandsetthefunctionswitchto`Arduino`
3.Opentheserialterminal
4.Waitforuntil`Connectmbed.orgsuccess`isprintedintheterminal
5.Theserialterminalwillprint`Helloworld!`

#include<DFRobot_sim808.h>
//makesurethatthebaudrateofSIM900is9600!
//youcanusetheATCommand(AT+IPR=9600)tosetitthroughSerialDebug
DFRobot_SIM808sim808(&Serial);
charhttp_cmd[]="GET/media/uploads/mbed_official/hello.txtHTTP/1.0\r\n\r\n";
charbuffer[512];
voidsetup(){
//mySerial.begin(9600);
Serial.begin(9600);
//********Initializesim808module*************
while(!sim808.init()){
delay(1000);
Serial.print("Sim808initerror\r\n");
}
delay(3000);
//***********AttemptDHCP*******************
while(!sim808.join(F("cmnet"))){
Serial.println("Sim808joinnetworkerror");
delay(2000);
}
//************SuccessfulDHCP****************
Serial.print("IPAddressis");
Serial.println(sim808.getIPAddress());
//***********EstablishaTCPconnection************
if(!sim808.connect(TCP,"mbed.org",80)){
Serial.println("Connecterror");
}else{
Serial.println("Connectmbed.orgsuccess");
}
//***********SendaGETrequest*****************
Serial.println("waitingtofetch...");
sim808.send(http_cmd,sizeof(http_cmd)‐1);
while(true){
intret=sim808.recv(buffer,sizeof(buffer)‐1);
if(ret<=0){
Serial.println("fetchover...");
break;
}
buffer[ret]='\0';
Serial.print("Recv:");
Serial.print(ret);
Serial.print("bytes:");
Serial.println(buffer);
break;
}
//*************CloseTCPorUDPconnections**********
sim808.close();
//***Disconnectwirelessconnection,CloseMovingScene*******
sim808.disconnect();
}
voidloop(){
}
GetGPSData
ThisexampletestsSIM808GPS/GPRS/GSMShield'sabilitytoreadGPSdata.
1.Openthe`SIM808_GetGPS`exampleorcopythecodetoyourproject
2.Downloadandsetthefunctionswitchto`Arduino`
3.Opentheserialterminal
4.Placetheshieldoutside,waitforafewminutesanditwillsendGPSdatatoserialterminal

#include<DFRobot_sim808.h>
DFRobot_SIM808sim808(&Serial);
voidsetup(){
//mySerial.begin(9600);
Serial.begin(9600);
//********Initializesim808module*************
while(!sim808.init()){
delay(1000);
Serial.print("Sim808initerror\r\n");
}
//*************TurnontheGPSpower************
if(sim808.attachGPS())
Serial.println("OpentheGPSpowersuccess");
else
Serial.println("OpentheGPSpowerfailure");
}
voidloop(){
//**************GetGPSdata*******************
if(sim808.getGPS()){
Serial.print(sim808.GPSdata.year);
Serial.print("/");
Serial.print(sim808.GPSdata.month);
Serial.print("/");
Serial.print(sim808.GPSdata.day);
Serial.print("");
Serial.print(sim808.GPSdata.hour);
Serial.print(":");
Serial.print(sim808.GPSdata.minute);
Serial.print(":");
Serial.print(sim808.GPSdata.second);
Serial.print(":");
Serial.println(sim808.GPSdata.centisecond);
Serial.print("latitude:");
Serial.println(sim808.GPSdata.lat);
Serial.print("longitude:");
Serial.println(sim808.GPSdata.lon);
Serial.print("speed_kph:");
Serial.println(sim808.GPSdata.speed_kph);
Serial.print("heading:");
Serial.println(sim808.GPSdata.heading);
Serial.println();
//*************TurnofftheGPSpower************
sim808.detachGPS();
}
}
USBDebugging(ATcommand)
Inthissection,wewillsendATcommandsthroughtheserialporttodebugSIM808expansionshield.PleaserefertoSIM808ATcommandsetformorefunction.
Preparation
Hardware:
ArduinoUNOx1
SIM808expansionboardx1
Externalpowersupplyx1
Software:
ArduinoIDEClicktoDownloadArduinoIDEfromArduino®(https://www.arduino.cc/en/Main/Software)
Serialdebuggingassistant(Inthissection,weareusingDFSerialDebuggerbyLisper
(https://github.com/leffhub/DFRobotSIM808_Leonardo_mainboard/raw/master/Software/DF%20Serial%20Debugger.exe))
‘’‘STEP’‘’
1.PlugyourSIMcardontheSIM808expansionshieldandplugtheexpansionshieldonArduinoUNO,meanwhiledon'tforgettoconnectanexternalpower
source.
2.DialthefunctionswitchtoNone,downloadasamplecodeBlinktomakesuretheserialportisnotoccupied.

3.PresstheBootpowerbuttonandwaitfortheSIMcardregisteringanetworkproperly,theNetindicatorledflashesslowly(3sonce).
4.SlidethefunctionswitchtoUSB_DBG,thenwecancommunicatedirectlywithSIM808chipthroughtheserialportassistant.
MakeaPhoneCall
(/wiki/index.php/File:TEL0097_Phone_call.png)
MakeaPhoneCall
SendATintheserialportassistant,ifitreturnsOK,itmeansthatserialcommunicationhasbeenestablished.FollowtheFigure,enterATcommands,youshould
getthesamecontent.
AnswerthephoneandHangup
(/wiki/index.php/File:TEL0097_Answer_Hang_up.png)
AnswerthephoneandHangup
SendSMS

(/wiki/index.php/File:TEL0097_TCP.png)
TCPcommunication
GPSOrientation
Note:The GPSantennamustbeplacedoutsidebeforeitcanobtainastableGPSlocationdataoutput.
SendAT+CGSNPWR=1command(OpentheGPSpower)
SendAT+CGNSTST=1command(ReceiveGPSdatafromtheserialport)
(/wiki/index.php/File:TEL0097_GPS_debug.jpg)
GPS_debug
IftheGPSantennahasbeenplacedoutside,youshouldgettherightdatasoon.
WhenyouwanttopauseGPSdataoutput,youcansentAT+CGNSTST=0commandtopauseGPSdataoutput.
WhenyouwanttoturnoffGPSfunction,youcansendAT+CGNSPWR=0commandtoturnofftheGPSpower.SendAT+CPOWD=1toshutdownthe
SIM808chip.
Moreexcitinginstruction,pleaserefertoATcommandonthepageoftheend.
Thesetwotestcodeareverysimple,andeasytobeunderstood.OnlyneedtoenterthecorrespondingserialATcommands,youwouldachievethe
correspondingfunctions.
SIM808LowPowerConsumptionMode
MinimumFunctionalityMode
ThesystemwillbereducedtoasimplestmodeunderMinimumFunctionalityMode.Itwillsavemorepowerconsumptioninthismode.
AT+CFUN=<fun><fun>=0,1,4
AT+CFUN=0:Minimumfunctionalitymode.Inthismode,youcanstillcontinuetousetheserialport,buttheATcommandwithRFandSIMcardfeatures
willbedisable.
AT+CFUN=1:Fullfunctionmode(default).
AT+CFUN=4:Airplanemode.Inthismode,youcanstillcontinuetousetheserialport,buttheATcommandwithRFandSIMcardfeatureswillbe
disable.
MorefeaturespleaserefertoATcommands
Instructions

IfyouaregoingtouseSIM808GPS/GPRS/GSMShieldwithaLeonardoboard,itwillbemorelikeaSIM808GPS/GPRS/GSMmainboard
.Youcancheckitswikiforthe
usermanual.
More
SIM808GPS/GPRS/GSMShieldschematic
(https://github.com/Arduinolibrary/DFRobot_GPS_GPRS_GSM_shield/raw/master/TEL0097%20SIM808%20%20GPSGPRSGSM%20Shield(V1.0)%E5%8E%9F%E7%90%
86%E5%9B%BE.pdf)
NEWSIM800SeriesGNSSApplicationNoteV1.00
(https://github.com/leffhub/DFRobotSIM808_Leonardo_mainboard/raw/master/Documents/NEW%20SIM800%20Series_GNSS_Application%20Note%20V1.00.pdf)
SIM800SeriesATCommandManualV1.07
(https://github.com/leffhub/DFRobotSIM808_Leonardo_mainboard/blob/master/SIM800_Series_AT_Command_Manual_V1.07.pdf)
SIM808HardwareDesign_V1.00
(https://github.com/leffhub/DFRobotSIM808_Leonardo_mainboard/raw/master/Documents/SIM808_Hardware%20Design_V1.00.pdf)
SVGfile(https://github.com/Arduinolibrary/DFRobot_GPS_GPRS_GSM_shield/raw/master/TEL0097_EN.svg)
Table of contents
Other DF ROBOT Control Unit manuals
Popular Control Unit manuals by other brands
Honeywell
Honeywell RV277 installation instructions
Goetze
Goetze 851 Assembly and maintenance instructions
Goetze
Goetze 451r Assembly and maintenance instructions
Eaton
Eaton CBEU-02/03 Installation
Samson
Samson 3248 Mounting and operating instructions

Viessmann
Viessmann VITOSOLIC 200 Installation and service instructions

Bristan
Bristan PM SQSHXDIV C Fitting instructions
Global Laser
Global Laser Cameo 1250 CW user guide
FireClass
FireClass FC410DIM quick start guide
Siemens
Siemens SIMATIC 505 PPX:505-6108A user manual

Astronergy
Astronergy CHSM6610M installation manual

S+S Regeltechnik
S+S Regeltechnik THERMASREG FM Series Operating Instructions, Mounting & Installation

