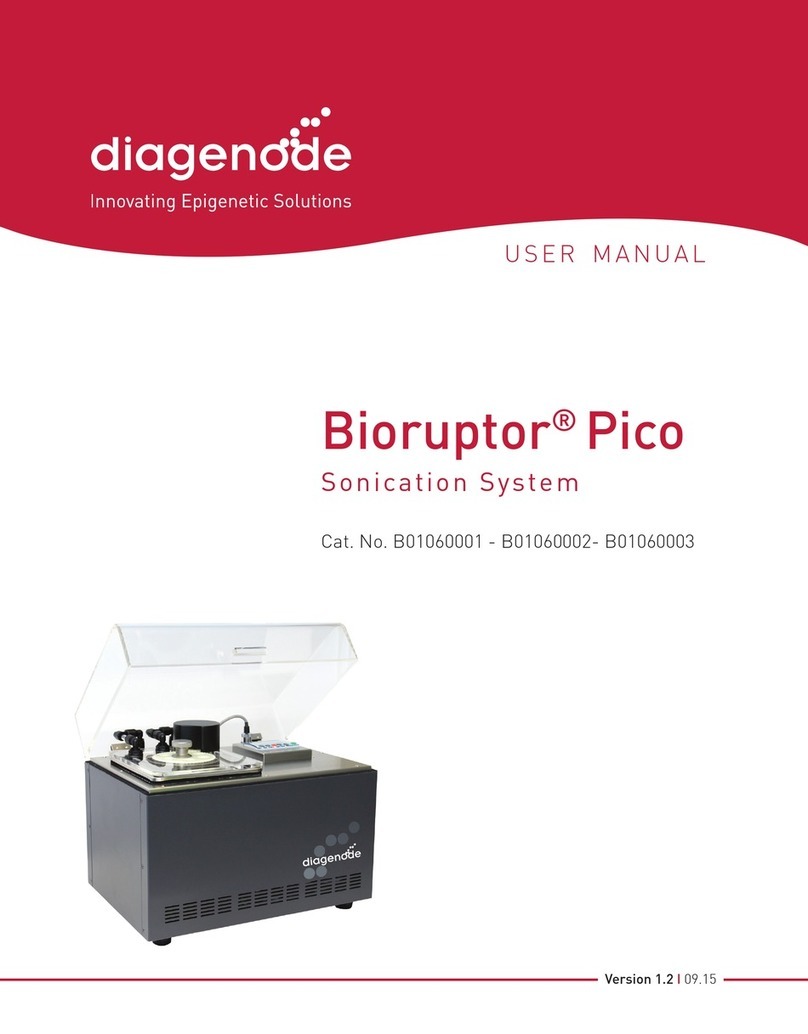
diagenode Bioruptor Pico User manual

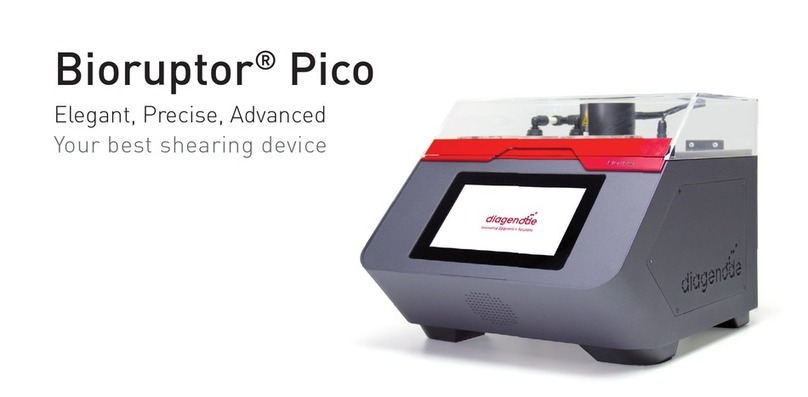
Bioruptor® Pico
Sonication System
Version 3 01_2020
USER GUIDE

Guarantee
Limited 5 years global warranty
Diagenode guarantees the Bioruptor Pico from any manufacturing defects as we rigorously test it to
meet strict quality standards. Diagenode warrants that all standard components of the instrument
will be free of defects in materials and workmanship for a period of five (5) years or for maximum
210 hours of total running time* from the date that the warranty period begins, unless the original
quotation or accompanying documentation states a different warranty period. The warranty period
begins on the date of delivery and apply only to the first purchaser of the product. The warranty
period expires when one of the two above conditions ends (5 years or 210 hours of total running
time*). If a manufacturing defect arises and a valid claim is received within the warranty period,
Diagenode, at its discretion, will repair or replace the product in accordance with the warranty
terms and conditions stated herein. In case of repair or replacement of a product under warranty,
Diagenode will cover the expenses to return the repaired or replacement product.
This warranty covers only manufacturing defects and does not cover any damage caused by misuse,
lack of compliance to recommendations stated in the manual, neglect, accidents, abrasion, or
exposure to extreme temperatures, chemical solvents, or acids. Improper or incorrectly performed
maintenance or repairs will void the warranty.
*The total running time corresponds to total sonication time ON + total sonication time OFF
that compose the cycles of the shearing process.
Technical assistance & ordering information
For the rest of the world, please contact Diagenode s.a.
https://www.diagenode.com/en/pages/support
Diagenode s.a.
BELGIUM | EUROPE
LIEGE SCIENCE PARK
Rue Bois Saint-Jean, 3
4102 Seraing (Ougrée)
Belgium
Tel: +32 4 364 20 50
Fax: +32 4 364 20 51
Diagenode Inc.
USA | NORTH AMERICA
400 Morris Avenue, Suite
#101
Denville, NJ 07834
USA
Tel: +1 862 209-4680
Fax: +1 862 209-4681
Diagenode Co., Ltd.
JAPAN
1-1-25, Arakawa
Toyama 930-0982
Japan
Tel: +81 76-482-3110
Fax: +81 76-482-3211
Looking for the manual of the previous version? Follow this link :
https://www.diagenode.com/files/products/shearing_technology/bioruptor/Bioruptor_pico_
cooler_manual.pdf

3
Contents
BIORUPTOR® PICO
Critical steps for maintenance and efficient shearing 6
Introduction 7
Technical specifications 8
Getting to know you Bioruptor Pico System 9
Equipment installation 12
Installation 13
System Operation 14
Tube holders & tubes 20
BIORUPTOR® COOLER
Safety 23
Design and functions 26
Operation 36
Maintenance 38
Disposal 43
Technical data 44


BIORUPTOR® PICO

6 BIORUPTOR® PICO MANUAL
Critical steps for maintenance
and efficient shearing
General warnings
Sonication bath temperature
• Optimal temperature for sonication is 4°C. Sample temperature should not exceed 8°C.
• The Bioruptor Cooler (Cat. No. B02010010, B02010011, B02010012) has to be used to guarantee the
automatic temperature control of the sonication bath during the entire sonication process.
Validated tubes for the Bioruptor® Pico
• DNA shearing: 0.2 ml (Cat.No. C30010020) and 0.65 ml (New Cat. No. C30010011; Old Cat. No. WA-005-
0500) Bioruptor® Microtubes for DNA shearing.
• Chromatin shearing: 0.2 ml (Cat.No. C30010020) and 1.5 ml (Cat.No. C30010016) Bioruptor® Microtubes
and 15 ml (Cat.No. C01020031) Bioruptor® Tubes & sonication beads.
Fitting tubes in the tube holder
• Place the tubes in the corresponding tube holder. Never leave empty spaces in the tube holder. Fill the
empty spaces with tubes containing the same volume of water. Screw the lid on the tube holder without
over-tightening it.
• Carefully place the tube holder on the holding plate.
• During sonication, samples must remain at the bottom of the tube. If needed, briefly centrifuge samples
during sonication after pausing the run.
DON’T
Turn on the instrument without water
Exceed 30 min of total sonication
Tilt the sonication unit
DO
Change water at least once every month
Use deionized or distilled water
QC your system with our DNA QC Kit

7
Introduction
Diagenode’s Bioruptor Pico uses a gentle method of sonication to retain the integrity of
DNA and/or biological complexes, including chromatin, protein-protein binding, protein-
DNA complexes and other biochemical and biological assay systems. The Bioruptor Pico
sonication system uses a sonication bath to generate indirect sonication waves, which
emanate from an ultrasound element below the water tank. Because the system is gentler
than other sonicators, the Bioruptor Pico produces better and more consistent results than
with harsher sonication methods. Up to 16 closed tubes can be sonicated in parallel and the
continuous rotation of tubes allows even distribution of the energy for efficient sonication.
The Bioruptor Pico enables automation of sonication, guaranteeing higher reproducibility of
results.
The effect of ultrasound on biological sample
The Bioruptor Pico sonication system uses
ultrasound to create focused mechanical stress to
shear chromatin or DNA, remove paraffin from FFPE
samples, disrupt cells and homogenize tissue, or
disperse chemical component, or reduce the size
of liposomes. Ultrasound waves pass through the
sample expanding and contracting the liquid. During
expansion, negative pressures pull the molecules
away from one another to form a cavity or bubble. This process is called cavitation. The bubble
continues to absorb energy until it can no longer sustain itself and implodes. This produces
intense focused shearing forces, that disperse and break biomolecules. The fragmentation
of chromatin or DNA takes place as a consequence of this mechanical stress or shear. With
the Bioruptor Pico, the entire volume of water present in the sonication bath is exposed to
ultrasound, allowing all the samples to be efficiently sonicated in parallel.
Use of Bioruptor® Pico by pregnant women
Exposure to 20-60 kHz sound waves has not been shown to be harmful to human health.
However, we would recommend avoiding unnecessary exposure. Diagenode recommends
that pregnant women should not be exposed to 20-60 kHz wave lengths for a long period of
time.

8 BIORUPTOR® PICO MANUAL
BIORUPTOR® PICO
Input Voltage Range 100 - 240 V
Input Frequency Range 50 - 60 Hz
Maximum Electrical Consumption 4.2 A
Ultrasonic Wave Frequency 20 - 60 kHz
Unit Dimensions
• The sonicator
• The cooler
380 (W) x 315 (D) x 275 (H) mm
200 (W) x 390 (D) x 495 (H) mm
Weight
• The sonicator
• The cooler
9 kg
26.9 kg
Placement Indoor areas
Ambient Temperature Range 15 – 25°C
Maximum Relative Humidity
80%
Altitude Up to 2,000 meters
Degree of protection IP31
Shearing Accessories
• Tube holder for 0.2 ml tubes
Cat. No. B01201144
• Tube holder for 0.65 ml tubes
Cat. No. B01201143
• Tube holder for 1.5 ml tubes
Cat. No. B01201140
• 15 ml sonication accessories
Cat. No. B01200016
Shearing Consumables
• 0.2 ml Bioruptor Pico Microtubes Cat. No. C30010020
• 0.65 ml Bioruptor Pico Microtubes Cat. No. C30010011
• 1.5 ml Bioruptor Pico Microtubes Cat. No. C30010016
• 15 ml Bioruptor Pico Tubes
Cat. No. C30010017
• 15 ml Bioruptor Pico Tubes & sonication beads
Cat. No. C01020031
Throughput
• 0.2 ml microtubes – 16 samples
• 0.65 ml microtubes – 12 samples
• 1.5 ml microtubes – 6 samples
• 15 ml tubes – 6 samples
Sample Volume Range
• 0.2 ml microtubes – 20-100 µl
• 0.65 ml microtubes – 100 µl
• 1.5 ml microtubes – 100-300 µl
• 15 ml tubes – 500 µl – 2 ml
Fragment Length Range Achievable 150 – 1,000 bp
Working Temperature Range 2 - 20°C
Variable Parameters Time ON, Time OFF,
# cycles, level of frequency
User Interface Touchscreen with Bioruptor Pico software
Bioruptor Pico technical specifications

9
Getting to know your Bioruptor Pico system
Bioruptor Pico components overview
Bioruptor Cooler (detailed instructions page 21)
Power cable (EU) Power cable (US)
Sonication unit
Sonication bath
Motorized lid
Tube holder

10 BIORUPTOR® PICO MANUAL
Sonication bath
The sonication bath is a critical component of the instrument. The generators below the
tank produce ultrasonic waves which are then transferred through water. The sonication
bath requires special handling and care as described below.
Handling
The sonication unit must remain upright at all times, especially when moved. Tilting the
sonication unit or handling roughly may damage the ultrasound emitter component,
resulting in a substantial drop in sonication efficiency. If transportation of the apparatus is
required after initial set-up, it is imperative to keep the sonication unit at a right angle to the
ground during the transport at all times.
Water quality
The water bath must be filled with purified water according to specification (see table) to
the fill line. Change water at least every month and clean sonication tank with a soft tissue.
Water temperature
The water in the sonication bath must be kept at 4°C. Ultrasonic waves produced by the
Bioruptor Pico generate heat. Drop off in sonication efficiency will occur above 8°C. To
ensure preservation of the samples and to prevent damage to the instrument, it is necessary
to start the sonication process with cold water and to keep it at 4°C during the sonication
process.
Automatic temperature control
The Bioruptor Cooler (Cat. No. B02010010, B02010011, B02010012) to guarantee the
automatic temperature control of the sonication bath during the entire sonication process.
The cooling system produces a regular water flow to maintain a constant water level in the
GRADE OF WATER COMPATIBILITY
WITH THE BIORUPTOR
Ultrapure water Type 1 or Type 1+ No
Deionized water Type 2+ or Type 2 Yes
Distilled water Type 3 Yes
Tap water N/A No

11
tank. The integrated regulating valve ensures that water will only be replaced during the off
cycle to avoid any interference between the water flow and the sonication process.
Motorized lid
The motorized lid, along with the gear plate accessory, keeps the sample
tubes in constant rotation and ensures optimal position in the sonication
bath during sonication. Avoid the immersion of the motor into the water.
Tube holders
Several sizes of tubes can be used with the Bioruptor Pico.
The minimum and maximum sample volume to be used with each tube is given in the table
below.
TUBE SIZE MINIMUM MAXIMUM
0.2 ml 20 µl 100 µl
0.65 ml 100 µl 100 µl
1.5 ml 100 µl 300 µl
15 ml 500 µl 2 ml
Bioruptor® Cooler Sonication unit

12 BIORUPTOR® PICO MANUAL
Equipment installation
The following pages contain information on installing your particular Bioruptor Pico model.
This equipment must only be installed by personnel after reading this section. Consider all
hazards even though no particular hazards have been identified during installation. Before
starting installation work, turn the main switch off and secure the unit against being re-
energized. No special tools are required. One square meter is needed to set-up the Bioruptor
Pico.
Devices are designed to be safe under the following conditions:
Installation overview
• Indoor use
• Altitude up to 2,000 meters
• Operating external temperature 15°C to 25°C
(do not install the Bioruptor in a cold room)
• Maximum relative humidity 80%
• Transient overvoltage typically present on the
MAINS supply
• Degree of protection: IP31
• Power plug must be grounded
• POLLUTION DEGREE 2 (Normally only
non-conductive pollution occurs. However,
occasionally a temporary conductivity caused
by condensation is expected)
• Never install this equipment in a place where
environmental conditions and warnings
mentioned above are infringed
Fig. Schematic installation overview of the Bioruptor Pico System in combination with the Bioruptor Cooler.

13
Installing the Bioruptor Pico system
Before starting the installation, turn the main switches off and make sure that the unit is not
plugged into an electrical outlet.
1. Open the boxes and unpack all components.
2. Place the Bioruptor on a bench.
• Important Note: Please make sure that the Bioruptor Pico is always placed on a level surface.
3. Place the Bioruptor Cooler on the bench or below the Bioruptor.
4. Connect the Bioruptor Pico to the Bioruptor Cooler with the cooling long red and blue
isolated tubing by inserting them into the connectors (Optional: Cut the length you need
for the output and input flow. Make sure there is enough slack).
5. Fill the tank of the Bioruptor Cooler with 2 - 3 liter and the sonication bath of the
Bioruptor with 700 ml.
6. Plug the valve connection cable into the outlet on the back side of the Bioruptor Cooler
and on the Bioruptor Pico.
7. Plug the power cord into the outlet and switch on the power switch on the back side of
the sonication unit.
8. Plug the power cord into the outlet of the Bioruptor Cooler.
9. Press main switch on the front side of the Bioruptor Cooler.
10. Set the temperature to 4°C.
11. Detailed operating instructions for the Bioruptor Cooler are available at page 21.
Bioruptor® CoolerBioruptor® Pico

14 BIORUPTOR® PICO MANUAL
System operation
Touch screen: Allows the user to easily program the sonication of samples.

15
LED LIGHT BAR
The LED light bar allows the tracking of the processing of your samples.
The blue light means the system is waiting for the operator.
The progressive green light indicates the progression of the shearing process.
The green light indicates the end of the shearing process.
The orange light means the protocol is on pause.
The red light indicates an alert message.
Technical Support: Diagenode contact
information for technical questions
User Protocols: Record your protocol
Diagenode dots: Go back to the top
menu
Commercial Support: Diagenode contact
information for commercial questions
Guidelines: Read Diagenode
recommendations for your applications
Go & Shear: Start a new shearing
protocol
Good Practices: Critical steps for
Bioruptor maintenance and efficient
shearing
Settings: Visualize and change the
parameters of your Bioruptor Pico
Information: General information about
your Bioruptor Pico
Edit: Edit the parameter
Question mark: Some notes to guide you
Sound: Adjust the sound level
Maintenance: Access for administrators
Language: Choose your voice language
Brightness: Adjust the brightness of the
screen
INTERFACE

16 BIORUPTOR® PICO MANUAL
START SHEARING EXPERIMENT
1. Click on ‘Protocols’ icon of the top menu.
2. Click on ‘Go & Shear’ icon to start a new
protocol or click on ‘User Protocols’ icon to
find your pre-recorded shearing protocol.
3. Select your mode. Find validated parameters
on the Easy Mode or optimize your protocol with
different levels of frequency on the Advanced
Mode.
ENTER PARAMETERS
1. Enter the sonication time ON, the sonication
time OFF and the number of cycles. These
are the parameters controlling the shearing
process:
- the time ON is the time during which there is
sonication;
- the time OFF is the time during which there
is no sonication but water circulation;
- the cycle is made up of a time ON and a time
OFF.
2. If Easy Mode was selected, select the tube type
you plan to use. The Bioruptor will automatically
swap to the correct frequency for optimal
shearing of your samples. If Advanced Mode
was selected, choose your level of frequency
that is the most convenient for your application.
PROTOCOLS
GO AND SHEAR
Choose validated
protocols
Choose your level
of frequency
GO AND SHEAR (easy mode)
30
seconds
seconds
cycles
30
10
10
min seconds
00

17
PREPARE SAMPLES
1. Fill the sonication tubes with same volume of sample.
Use the recommended tubes and sample volumes
for optimal shearing efficiency. Visit our Guidelines
folder for more information.
2. Vortex and then spin your samples.
3. Fill all positions of the tube holder with your samples
(or with water of same volume) and place it on the
motorized lid.
4. Close the lid to start the run. The sonication only
starts when the cover is closed. The cover also
prevents from any noise disturbance.

18 BIORUPTOR® PICO MANUAL
START PROCESSING & MONITOR PROGRESS
1. Click “Go” to start the shearing process. You
will then be asked to check water temperature
and right setting of your samples.
2. Once the run started, the running screen
appears. The running screen indicates
the elapsed time ON, time OFF and the
number of cycles. A progress bar and the
remaining time will be displayed on the
screen. The led indicator lights up in green.
You can pause or interrupt the shearing
process by pressing the button pause or stop,
respectively. If the cover will be opened during
a run the sonication will automatically pause.
Once the cover is again closed the machine
continues with the sonication process.
3. You will get a notification on the screen once
the shearing process ends successfully. Click
“OK” to go back to the menu.
SHEARING PROCESS
Remaining:
11:25
Remaining Time:
Sonication ON:
Sonication OFF:
Number of cycles:
25
seconds
30
seconds
13
cycles
GO AND SHEAR (easy mode)
30 seconds
seconds
cycles
30
10
10 min seconds
00

19
15 ml sonication
accessories
(Cat. No. B01200016)
1.5 ml Bioruptor®
Microtubes
(Cat. No. C30010016)
0.2 ml Bioruptor®
Microtubes
(Cat. No. C30010020)
0.65 ml Bioruptor®
Microtubes
(Cat. No. C30010011)
Tube holder for 0.2 ml tubes
(Cat. No. B01201144)
Tube holder for 0.65 ml
tubes
(Cat. No. B01201143)
Tube holder for 1.5 ml tubes
(Cat. No. B01201140)
15 ml Bioruptor® Tubes
(Cat. No. C30010017)
15 ml Bioruptor® Tubes &
sonication beads
(Cat. No. C01020031)
Tube holder
Dock
Tube holders & tubes
The holder is made up of a tube holder and its specific
dock.
To guarantee homogeneity of chromatin or DNA shearing,
the tube holders should always be completely filled with
tubes. Never leave empty spaces in the tube holder. Fill
the empty spaces with tubes containing the same volume
of distilled water.

Other manuals for Bioruptor Pico
2
Table of contents
Other diagenode Laboratory Equipment manuals
Popular Laboratory Equipment manuals by other brands

Isotech
Isotech ORION 796 Maintenance manual

J.P. SELECTA
J.P. SELECTA CENTRO-8 BL instruction manual
3D Histech
3D Histech Pannoramic 250 user guide
Novatech Instruments
Novatech Instruments 1450B instruction manual
Star Lab
Star Lab Mixer HC Quick user guide
TAN Bead
TAN Bead Maelstrom 8 Autostage user manual
