产品操作
1110
产品操作
预约清扫
您可以通过预约使机器从某一特定时间开始工作。
本机器的预约指延时开始(延时最长达23小时)。举例,现在为上午9时,您通过预约在机器
上设定了6:30,那么机器将在6小时30分钟之后开始工作,即下午3时30分钟的时候,机器会
开始工作,而且会在每天的下午3时30分钟准时开始工作,直至电源开关关掉。
注意: A. 一旦电源开关被关掉,所有预约都会被取消清零。
B. 一旦预约生效,机器会每天准时在预约好的时间开始工作。
怎样对机器进行预约?
清扫模式
3
1
2
虚拟墙使用
1
2
注意:在预约清扫模式下,所有操作都会有提示音进行确认。
1
2
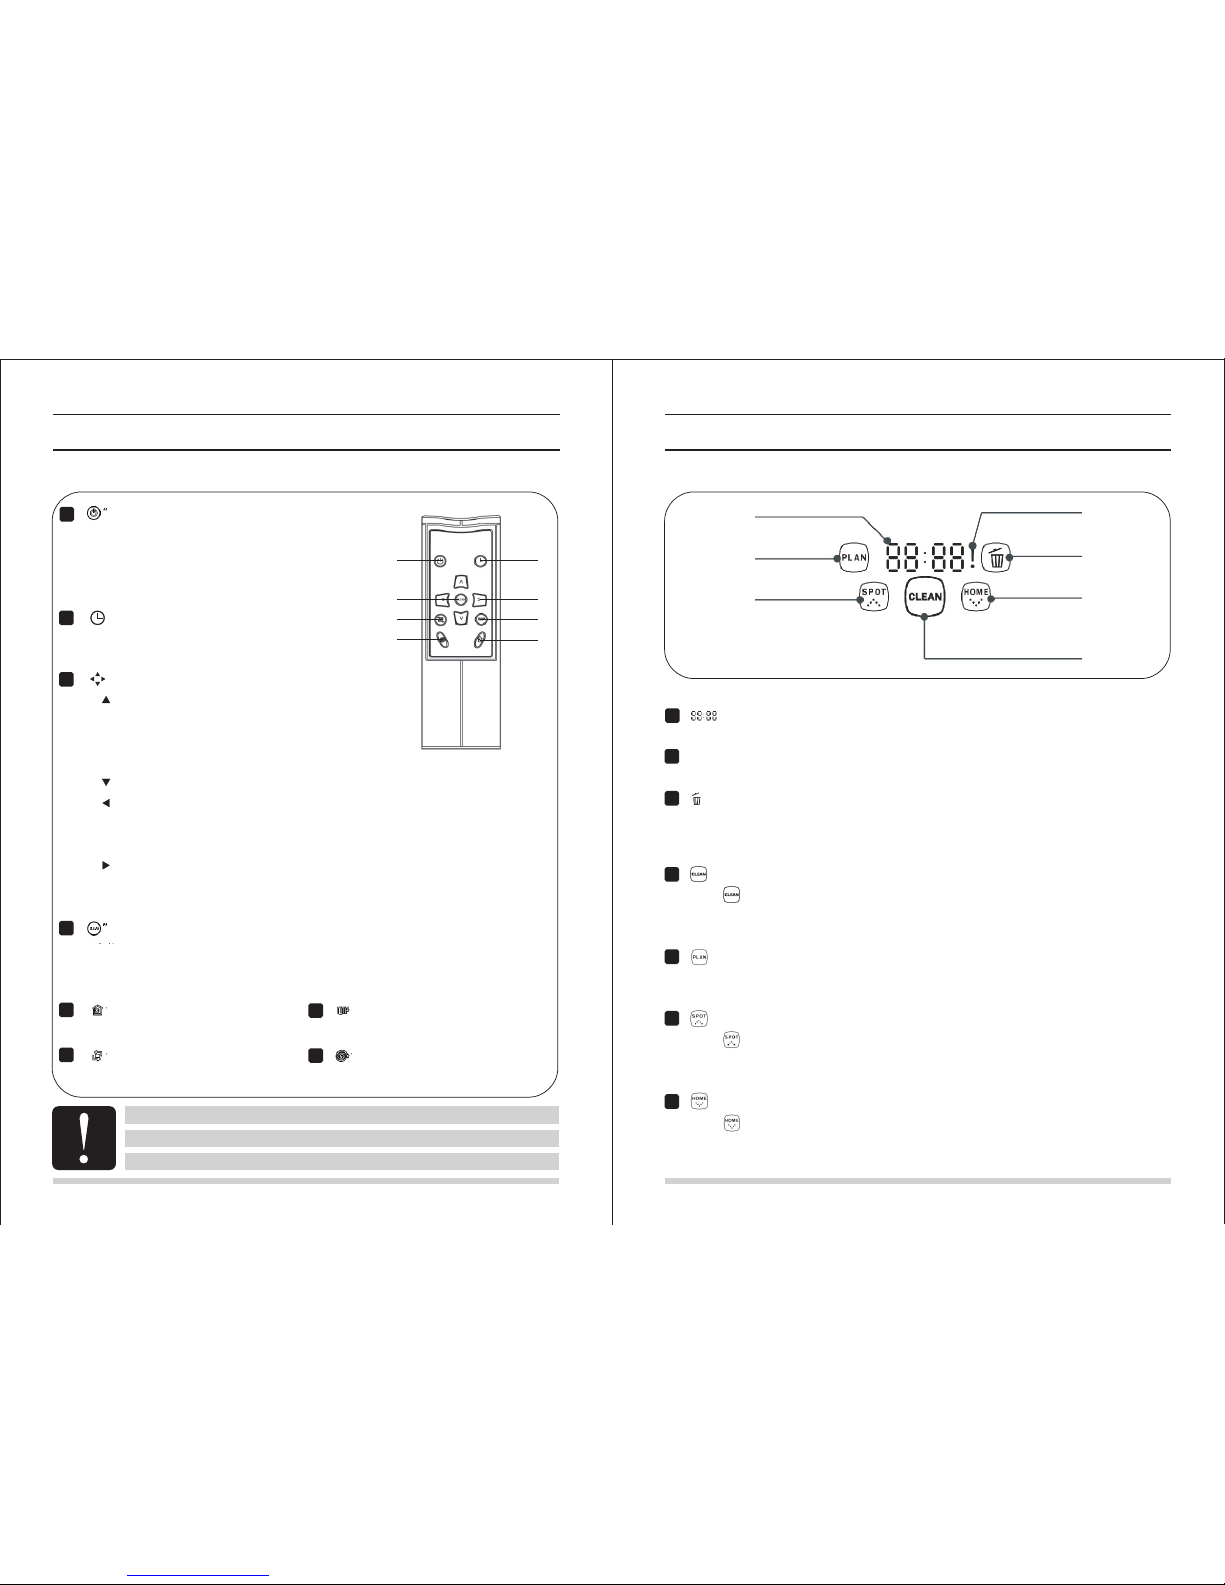
在显示屏上设置
A. 按压 “ ” 进入预约清扫模式,显示屏上的“88:88”中左边的“88”会开始闪烁;
B. 按压 “ ” 和 “ ” 对小时的数字大小进行调整;
C. 按压 “ ” 将数字从小时切换到分钟;
D. 按压 “ ” 和 “ ” 对分钟的数字大小进行调整;
E. 按压 “ ” 完成预约。
F. 若需取消预约,请在预约清扫模式下长按 “ ” 5秒钟。
在遥控器上设置
G. 按压 “ ” 进入预约清扫模式,显示屏上的“88:88”中左边的“88”会开始闪烁;
H. 按压 “ ” 对小时的数字大小进行调整;
I. 按压 “ ” 或 “ ” 将数字从小时切换到分钟;
J. 按压 “ ” 对分钟的数字大小进行调整;
K. 按压 “ ” 完成预约。
L. 若需取消预约,请在预约清扫模式下按压 “ ”键。
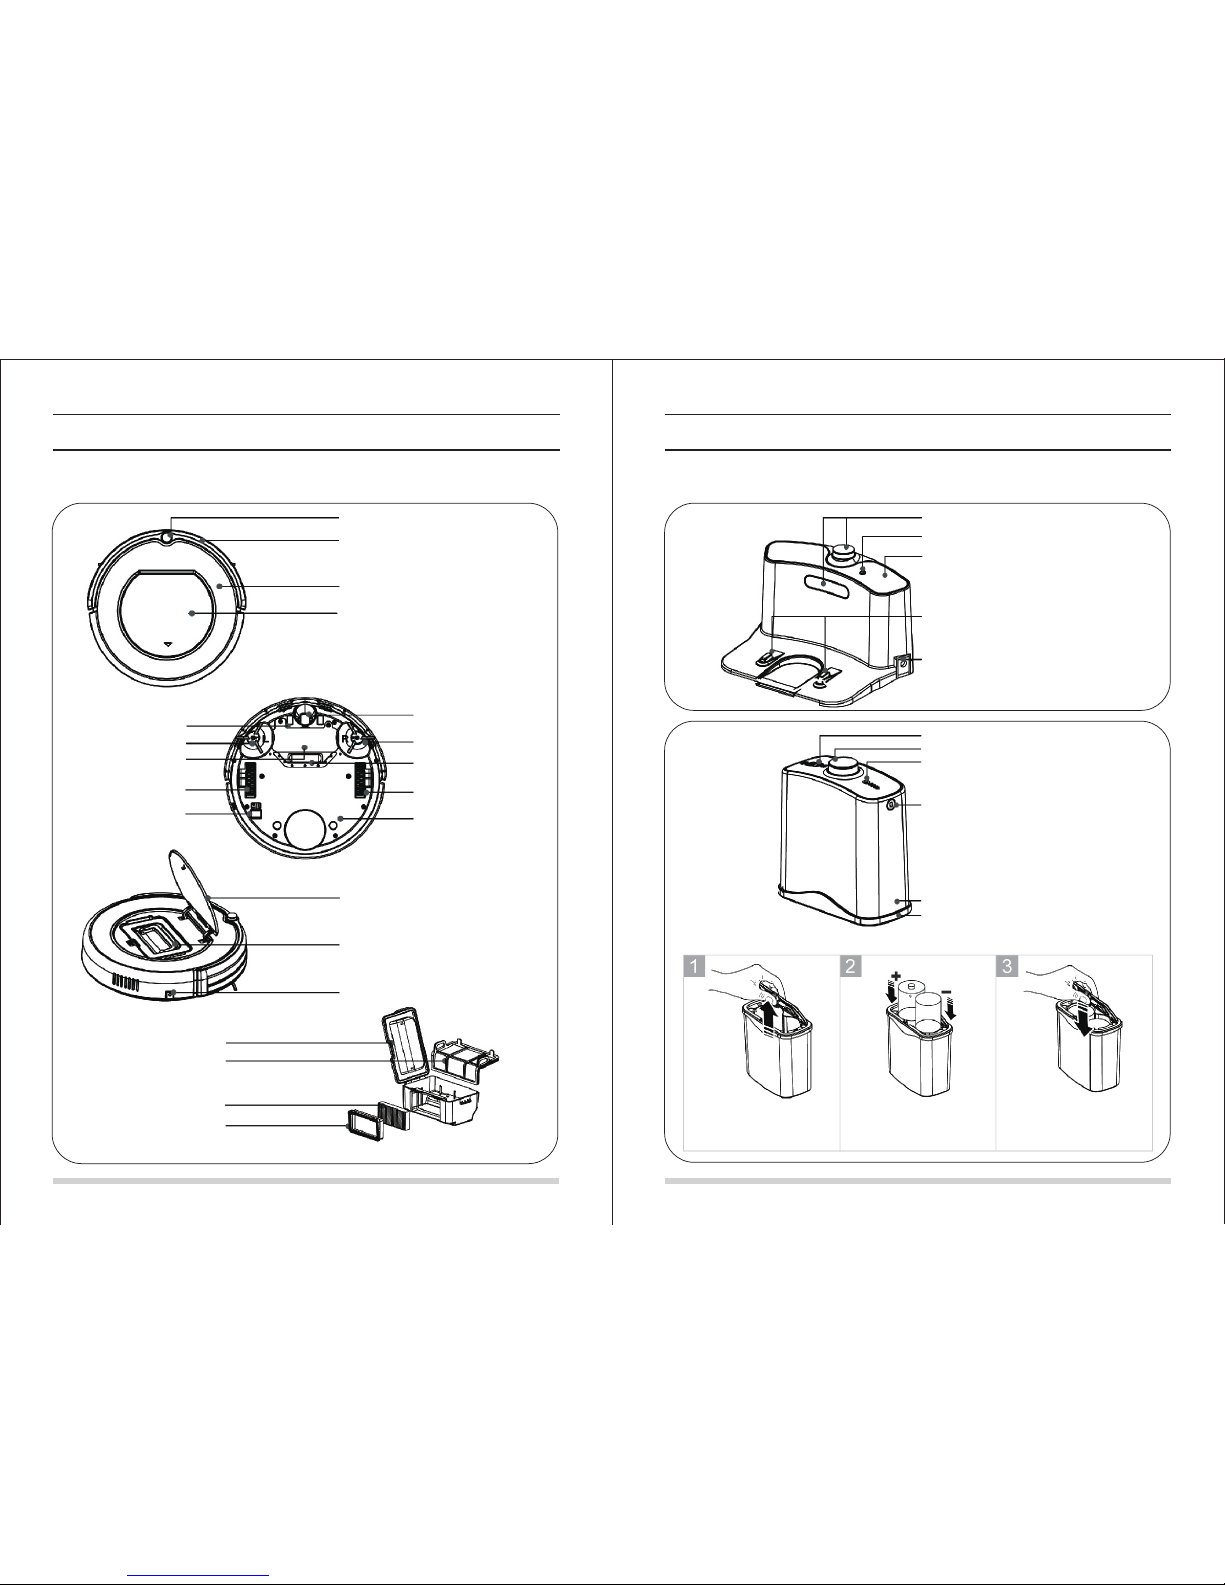
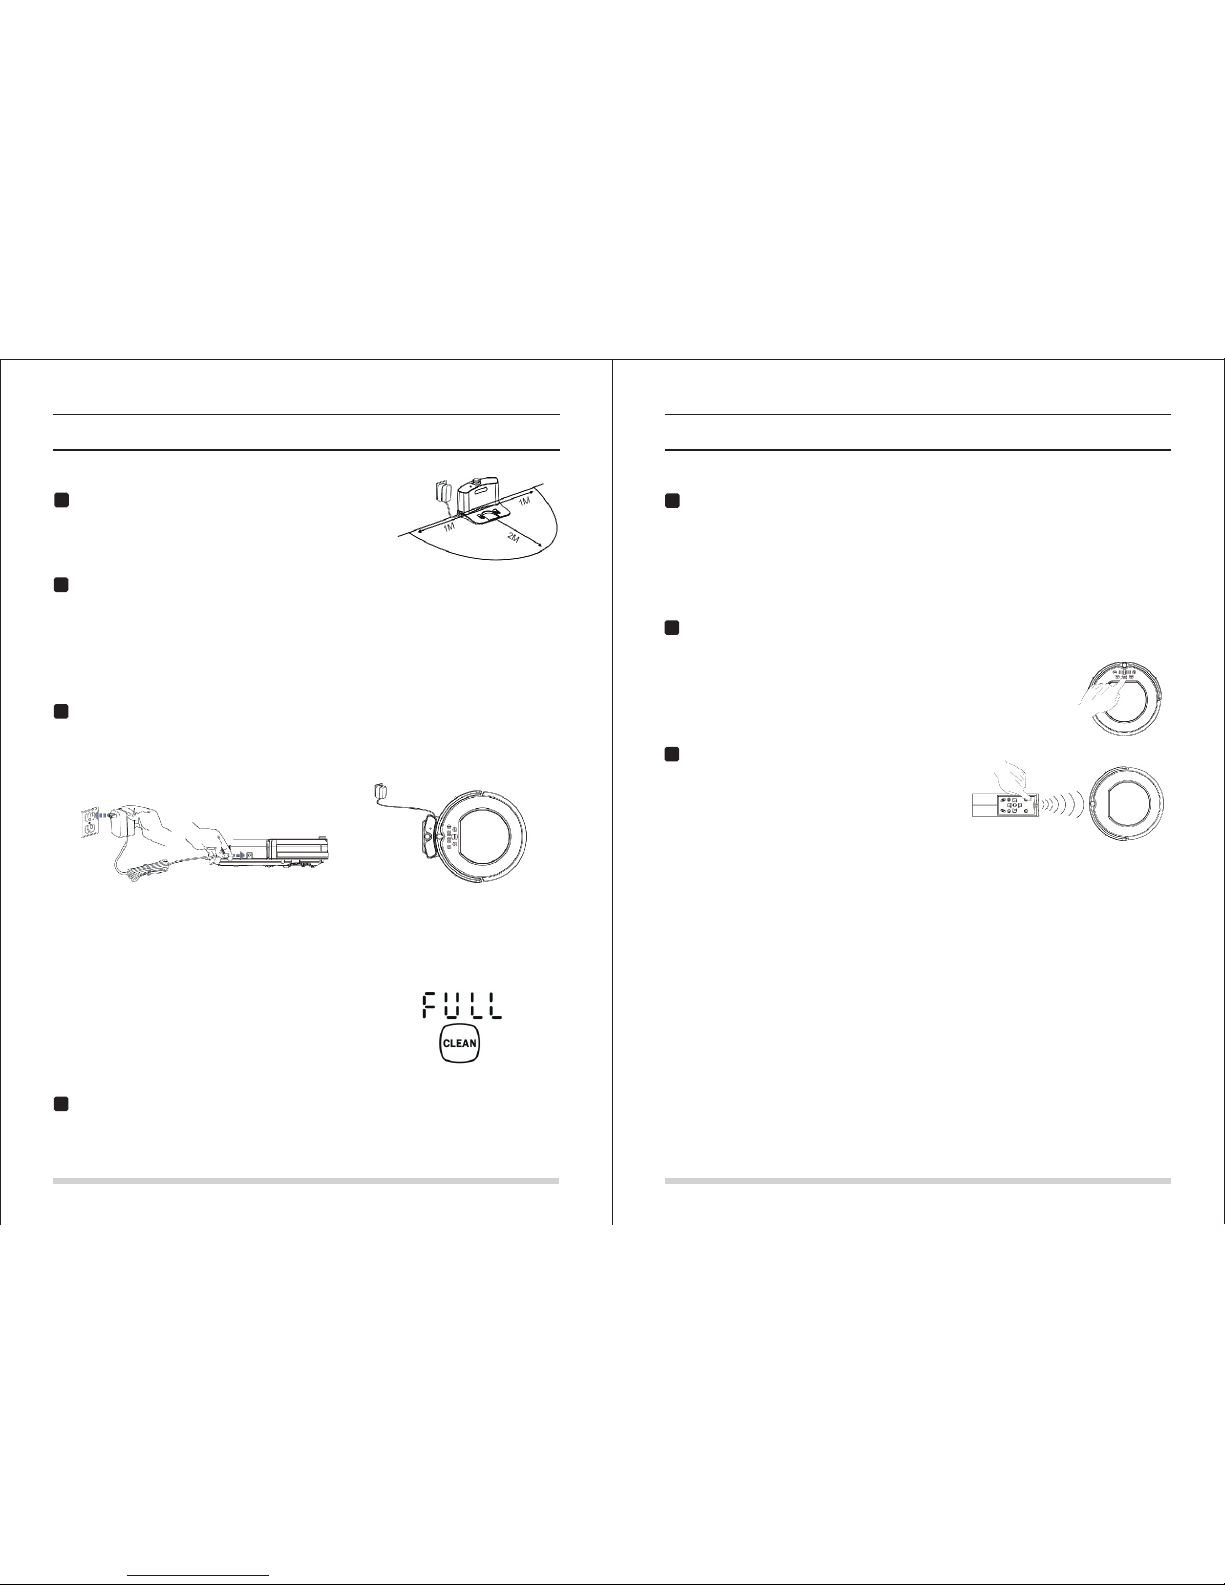
虚拟墙主要用于阻止机器进入限制区域。它可以发出一条长达4米
的红外光带,可以用于放在门前,走廊旁,或者电线及其他贵重
物品旁边,防止机器进入。
安装好虚拟墙电池后,打开电源开关。
放置虚拟墙的位置。
注意:
使用虚拟墙时,放置标记有 “ ” 的一端朝向需隔断的区域。
不使用虚拟墙时请把电源开关关掉。
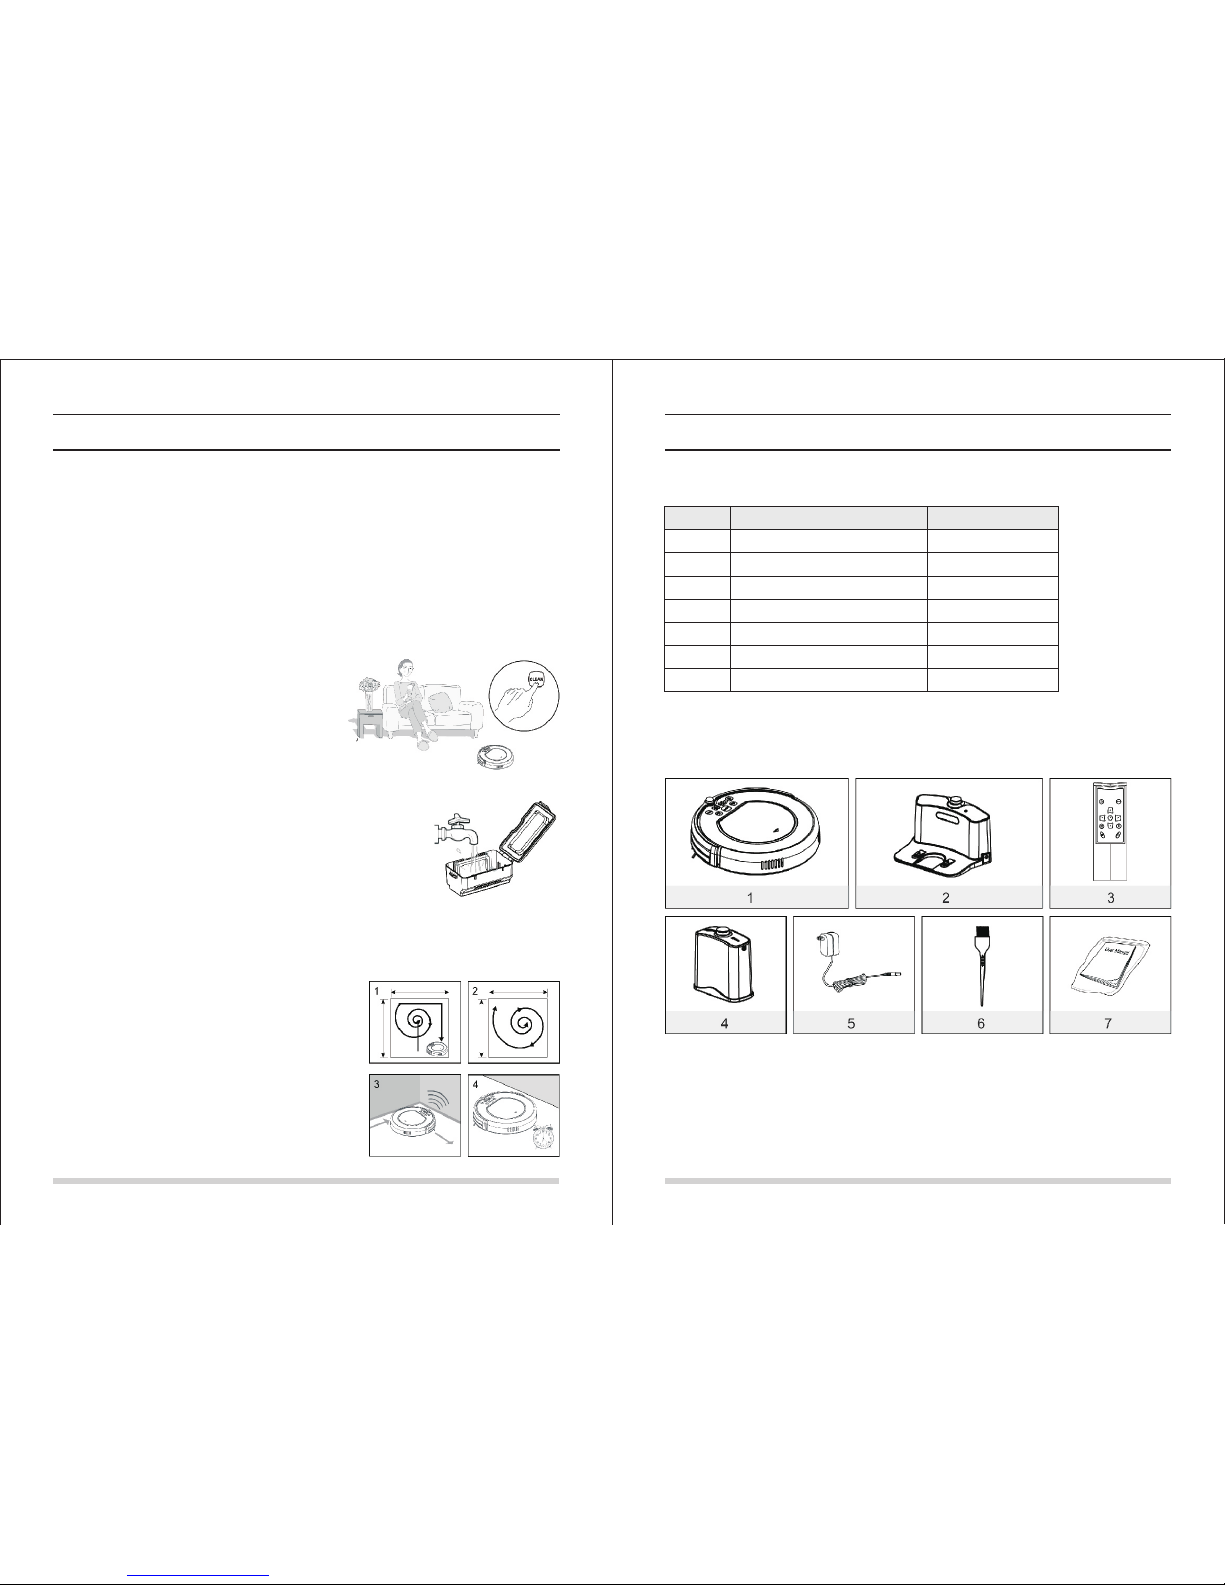
自动清扫
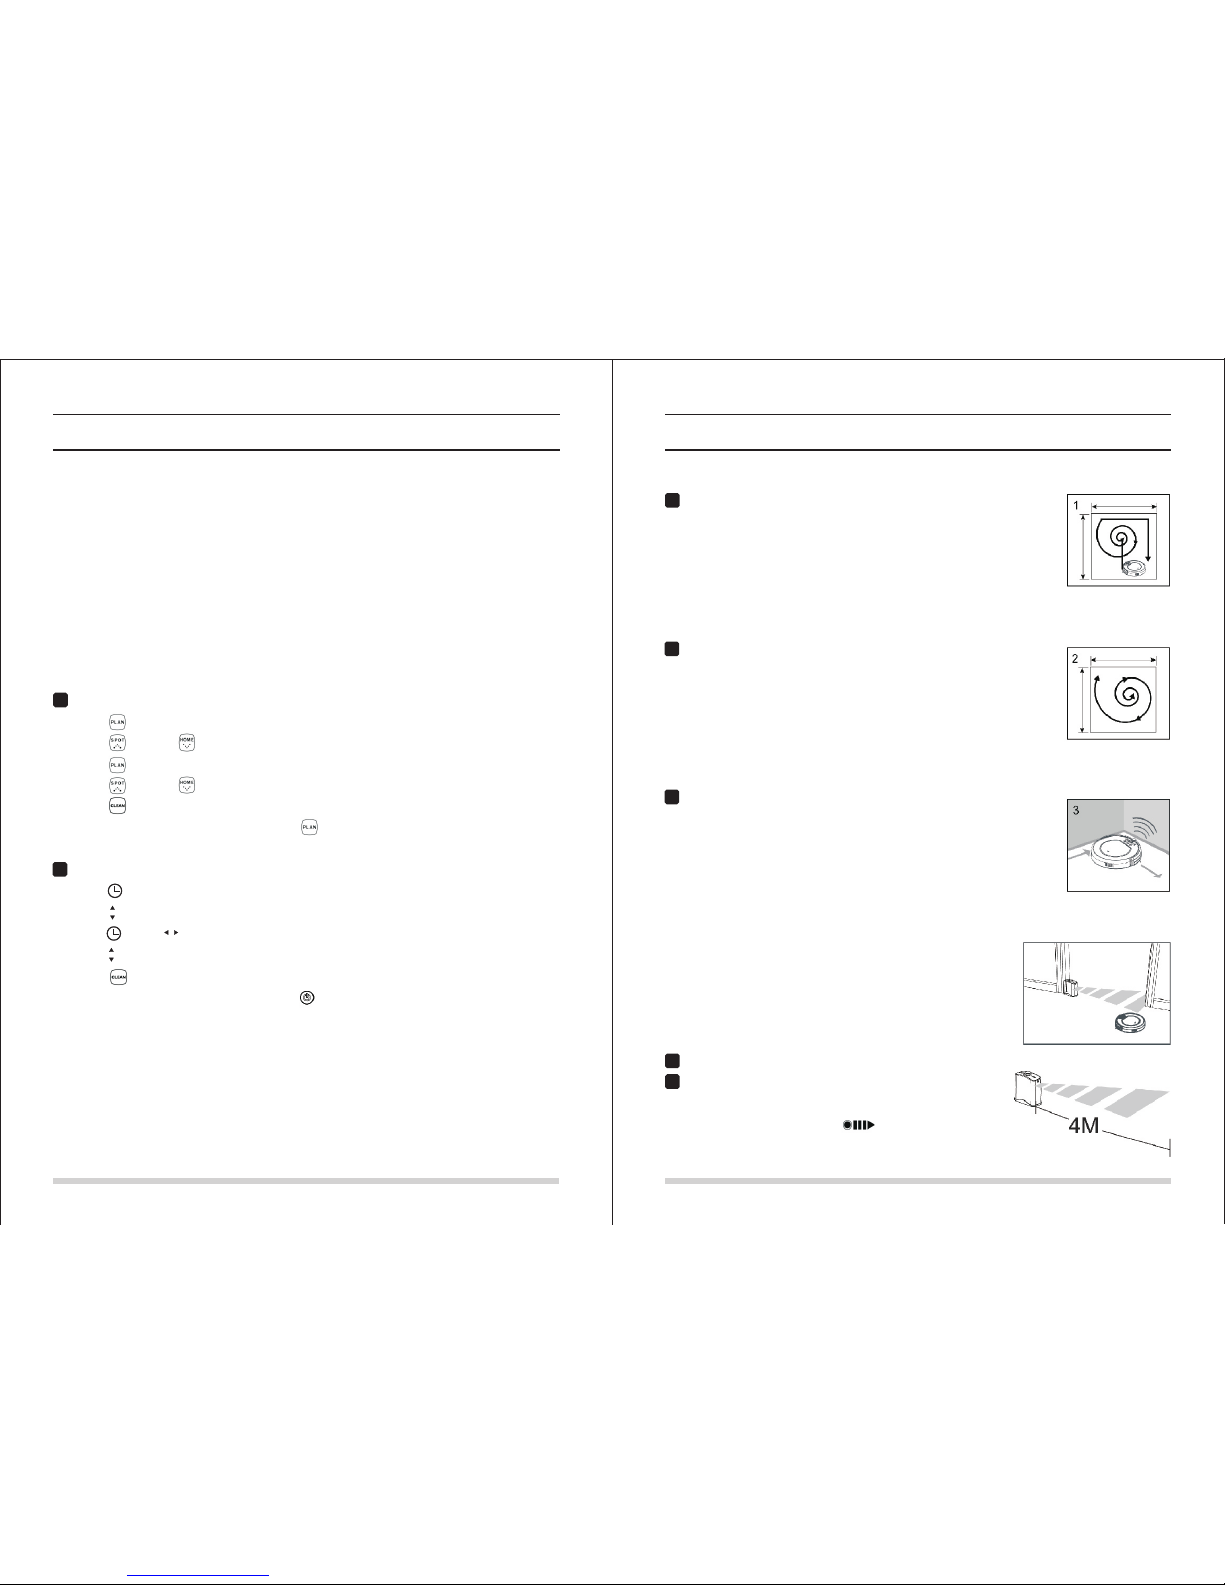
在自动清扫模式下,机器会自动清扫房间,并且依据不同的地面环境自行
对清扫模式进行调整。
注意:按压显示屏或者遥控器上的清扫键即可进入自动清扫模式。在自动
清扫模式下,通常机器会先沿直线清扫,然后螺旋形清扫。当探测到障碍
物,机器会自行调整清扫模式,如右图所示。
重点清扫
重点清扫模式有两种方式可以触发:一是当机器探测到“重灾区”时自动
进入;一是按压遥控器或显示屏上的重点清扫键进入。
注意:建议在地面上有较多垃圾时使用重点清扫模式。当“重灾区”清扫
完成时或者机器遇到障碍物时,本模式会自动终止。而一旦重点清扫模式
终止,机器会自动进入选择模式。
边缘清扫
当探测到障碍物时(如墙角),机器有一定几率触发并进入边缘清扫模式。
边缘清扫模式下,机器会沿着障碍物,用其边刷清扫障碍物边缘。
注意:可以手动按压遥控器上的边缘清扫键使机器进入边缘清扫模式;在
边缘清扫模式下,当机器清扫完5米远的距离或者遇到障碍物时,边缘清扫
模式会终止。