QuickStart
Guide
QuickStart
Guide
QuickStart
Guide
Rev Date: 09/19
Copyright © Digital Watchdog. All rights reserved.
Specifications and pricing are subject to change without notice.
Quick Start Guide
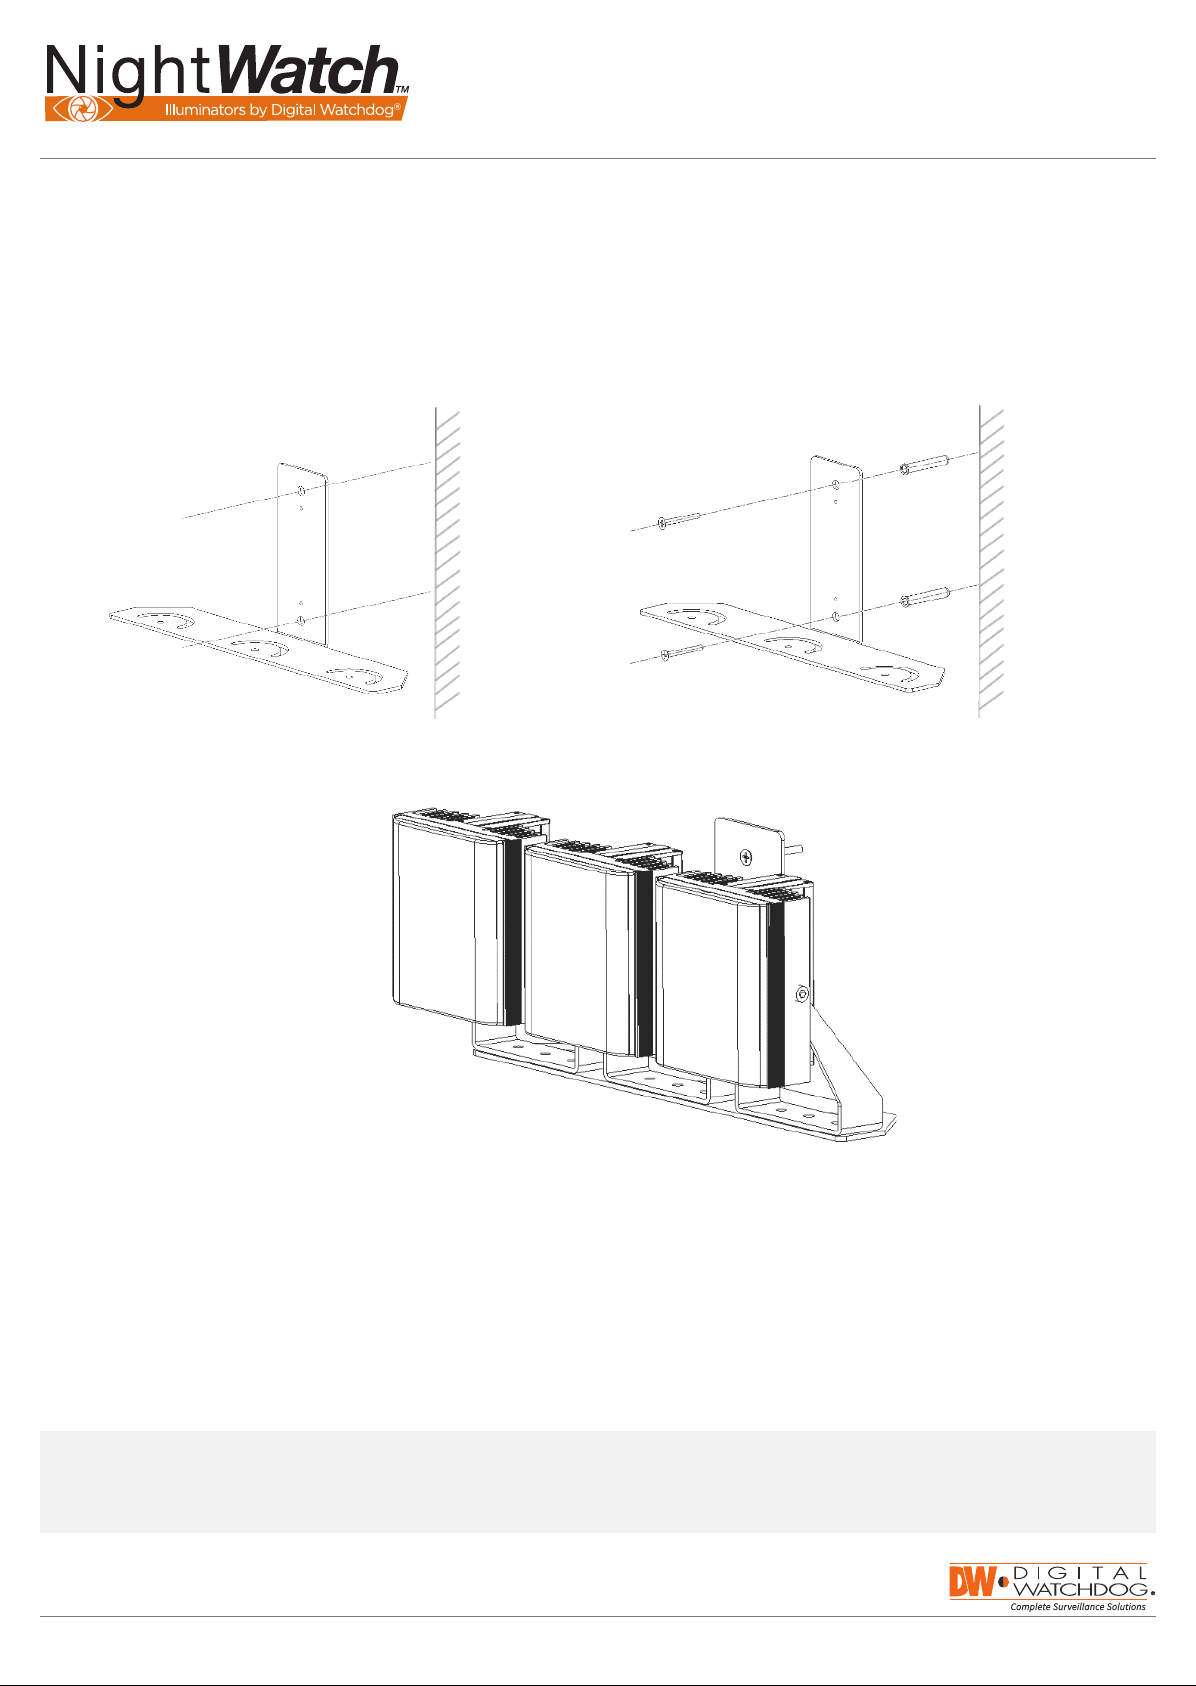
INSTALLING THE MOUNTING ACCESSORY
Attach the wall mount bracket to the structure using suitable tapping screws (PLASTIC ANCHOR, PTS1
M8x40L) as illustrated in the figure. The wall bracket must be attached to a structure such as hardwood, wall
stud, concrete or a suitable material capable of supporting the final mount assembly. The installer may need
to change the method of mounting or hardware used depending on the wall material.
LED ILLUMINATOR INSTALLATION WITH SINGLE WALL MOUNT BRACKET
1 2
3
Use the bracket as a template to mark and drill the necessary holes in the wall.
With the bracket secured to the wall attach the illuminators with the supplied M6 nuts and bolts. For each
illuminator attach the center bolt first then rotate the illuminators to the required horizontal position, then
secure with the remaining nut and bold in one of the outer holes.
Vertical adjustment can be made via the two hex bolts on each side of the illuminator.
A waterproof junction box is attached to the bracket rear plate. This allows a single power cable to be routed
to the junction box and then split to each illuminator. This can be removed if not required.
NOTE: Recommended fasteners:
• Head size: minimum 0.6”
• Screw or bolt diameter: maximum 0.5”
• Fastener strength: minimum 10 lb.


