manuals.online logo
Brands
  1. Home
  2. •
  3. Brands
  4. •
  5. Dimplex
  6. •
  7. Heater
  8. •
  9. Dimplex WMCS712N User manual

Dimplex WMCS712N User manual

WMCS(N)
MODELS:
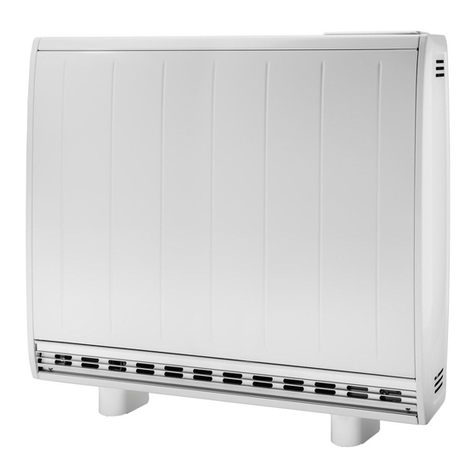
WMCS712N 1.7kW/12kWh Storage and 1kW Convector
WMCS718N 2.55kW/18kWh Storage and 1.5kW Convector
WMCS724N 3.4kW/24kWh Storage and 2kW Convector
INSTALLATION AND OPERATING
INSTRUCTIONS
IMPORTANT
PLEASE READ THIS LEAFLET CAREFULLY
AND RETAIN FOR FURTHER USE.
NOTE ALSO THE INFORMATION GIVEN ON THE HEATER
COMBINED AUTOMATIC STORAGE
AND CONVECTOR HEATER
 The Installation must be carried out by trained personnel.
 A means for disconnection must be incorporated in the fixed wiring by a double pole switch with a
contact separation of a minimum of 3mm and in accordance with the current IEE Wiring Regulations.
 The heater must not be installed immediately below a fixed socket outlet.
 The heater is not suitable for connection to a 30A ring circuit.
 Do not position the heater under windows where curtains can contact the heater casing.
 WARNING - THE SURFACES ON THIS HEATER CAN BE HOT.
 This heater meets EN60335 safety requirements. However, any heater type becomes hot in normal
operation. Care must be taken to ensure that prolonged skin contact with the heater does not occur.
 WHEREYOUNGCHILDREN,INFIRMPERSONS,ORTHEAGEDAREPRESENTTHISAPPLIANCE
MUST BE ADEQUATELY GUARDED. Contact your installer or the manufacturer for further advice.
 Thisappliance is not intended foruse by persons (including children)with reduced physical, sensory or
mental capabilities, or lack of experience and knowledge, unless they have been given supervision for
instruction concerning use of the appliance by a person responsible for their safety. Children should
be supervised to ensure that they do not play with the appliance.
 This appliance is very heavy and must be securely fixed to a wall. DO NOT UNDER ANY
CIRCUMSTANCES ATTEMPT TO MOVE OR REPOSITION THIS HEATER WITHOUT SEEKING
EXPERT ADVICE.
 To maintain stability, it is essential that the heater is placed on a level surface and care should be taken to avoid
irregular surfaces, such as may result from carpets or tiled surrounds partially protruding under the heater.
 This heater must be installed where it is impossible for switches and other controls to be touched by
a person using a bath or shower.
 IMPORTANT - Due to the newness of materials the heater will produce a slight smell for the first few
daysofoperation. ROOMSMUSTBEWELLVENTILATEDANDYOUNG CHILDREN, CAGED BIRDS,
OR PERSONS WITH RESPIRATORY COMPLAINTS MUST NOT REMAIN IN CLOSE PROXIMITY
TO THE HEATER DURING THE FIRST 48 HOURS OF THE COMMISSIONING PERIOD.
 IF,DURINGANYREASSEMBLYOFTHEHEATER,APARTOFTHETHERMALINSULATIONSHOWS
DAMAGE OR DETERIORATION WHICH MAY IMPAIR SAFETY, IT SHOULD BE REPLACED BY AN
IDENTICAL PART.
87772
INSTALLATION INSTRUCTIONS
PREPARATION
The heater will arrive
separately from its
storage bricks, the
following bricks will
be required.
Model 712N - 8 bricks
Model 718N - 12 bricks
Model 724N - 16 bricks
WARNING - This appliance must be earthed.
Only heat resisting cable (min. rating T85) should be used. The
wires in the mains cable will be coloured as follows;
GREEN & YELLOW - EARTH
BLUE - NEUTRAL
BROWN - LIVE
SUGGESTED FIXINGS
SOLID BRICK/BLOCK - No. 10 size plastic inserts, 8mm drill bit.
Drill hole 15mm deeper than plastic insert length.
PLASTERBOARD - If possible locate studding and use No. 10
woodscrewsdirectlyintothe wood,otherwise M5rawlplug intersets
are suitable.
NOTE:FOR ALL OTHER WALL TYPES (e.g. Timber frame and
hollow concrete) SEEK SPECIALIST ADVICE.
FIXING ASSEMBLY
1. ENSURETHATFIXING KITANDFEETHAVEBEEN LOCATED
BEFORE DISPOSING OF PACKAGING.
2. Fitthe feetwiththeopenend ofthe footto thefrontof theheater.
Secure each foot using the two taptite screws provided.
2.
3. Place the heater on its feet and in the desired position against
thewall. Ensurethe heateris based ona firmlevelsurface atleast
75mm from any end wall and at least 250mm below any shelf or
similarprojection. Cutaway anygripperrod orcarpetwhich would
prevent the heater sitting firmly on the floor.
3.
4. Mark the position of the two outside corners of the wall bracket
with the heater pushed tight against the wall. Remove the wall
bracket from the heater by removing the screw at each end. Place
the heater to one side and reposition the bracket against the wall
using the corner marks for alignment.
Four fixing positions must be chosen for the 724N, three for the
718N and two for the 712N. Mark the positions for the fixing holes
- two at the extreme ends and the others spaced evenly between
them. Remove the bracket from the wall, drill the holes in the
positionsmarked,and insert suitablefixingspreviously described.
Secure the wall bracket to the wall.
4.
5. If mains connection is to be made from the left hand side, at
thispointthe mainsleadmust be securedto the backofthe heater
using ties provided in the fixing kit.
5.
6. THE FOLLOWING MUST BE APPLIED WHEN FIXING THE
HEATER TO THE WALL BRACKET
i) Ifnoskirting boardis present securethe heater throughthe wall
bracket slots closest to the wall.
ii) If 100mm (4in.) skirting is present secure the heater through
the outer slots.
iii) If skirting taller than 150mm (6in.) is present this must be
reduced to 150mm (6in.) over the entire width of the heater
plus 25mm (1in.) at each end.
Do not fully tighten these screws until the bricks are loaded into
the heater as some settling of the heater may occur.
NOTE: NEVER REMOVE THESE SCREWS WITHOUT FIRST
UNLOADING THE HEATER.
6.
7. Remove the frontpanel by removing the twoself tapping screws
along its bottom edge. With hands positioned on each side of the
panel, lift upwards to unhook the top edge whilst pressing down on
the top panel with your thumbs.
Ensure the convector element is not damaged when placing this
panel to one side.
7.
8. Remove the inner front panel be removing the screws along
its top and sides. As the front insulation is attached care must
be taken when lifting this panel from the heater and placing it to
one side. Remove the internal packing by sliding it up and off the
elements taking care not to damage the insulation.
8. 9.
9. Remove oneelement to allowaccess fortheback rowofbricks.
Onthe 724Nremove theelementtotheright ofcentre, onthe 718N
remove the central element, on the 712N the left hand element
should be removed.
Loosen the two screws securing the element tails in the ceramic
connector block, and lift the element up and out of the heater.
10. Carefully fit the bottom row of the back layer of bricks placing
the two end bricks in position first with the recess towards the
element. Fit the top row of bricks also with the recess towards
the element.
11. Refit the element which has been removed by feeding the tails
down through the hole in the base insulation and into the connector
block. Ensuretheelementisfullypushedhomethensecurelytighten
the two screws in the block.
11.
12. Fit the front layer of bricks again with the recess towards the
element. The complete core will comprise:
712N - 2 x 4 Brick Columns
718N - 3 x 4 Brick Columns
724N - 4 x 4 Brick Columns
13. Replace the inner front complete with insulation by locating its
bottomedgebehind thefrontlip ofthechassisandinsertingretaining
screws along the top and both sides.
14. Check that the flap mechanism operates freely on its hinges
and that with the output control set to 1 the flap is correctly seated
in its closed position.
15. Connection of Supply to Storage - Feed the mains cable
through the cable clamp and make connections as marked on
the heater. Pull back any slack through the clamp and tighten
clamping screw. Make sure clamp is tightening on outer sheath
of cable and not on individual conductors.
WARNING - This appliance must be earthed.
15. RESTRICTED SUPPLY
16. Connection of supply to Convector isthrough acableclamp
in the case of the front panel.
Connect the wires as detailed below, pull back any slack through
the cable clamp and tighten clamping screws, see picture 16.
16.
17. Replace the outer front
panel and grille by hooking the
grilleinto its retainingslot onthe
top panel and lowering it into
position. Secure the front panel
with two self tapping screws.
17.
18. Check that the screws securing the heater to the wall bracket
have been fully tightened.
IT IS ESSENTIAL THAT ALL SCREWS ARE REPLACED TO
ENSURE EARTH CONTINUITY.
Once installed do not attempt to reposition the heater without first
obtaining the services of a competent electrician.
UNRESTRICTED
SUPPLY
ENSURE THAT CABLE CLAMP
IS SECURELY ATTACHED TO
THE CHASSIS OF THE HEATER
OPERATING INSTRUCTIONS
OPERATION
Your WMCS(N) heater combines the economy of a storage
heater with the convenience of a convector heater.
The storage heater takes in energy, when electricity tariffs
are low and dissipates it when tariffs are normal.
The convector heater provides an instant boost on
demand from normal tariff electricity.
SAFETY INSTRUCTIONS
1. Ventilate rooms well during commissioning.
2. Do not move the heater in any way once installed without the
services of a competent electrician.
3. Donotcover theheater withclothingetc. atany timeorposition
furniture close to or against the heater.
4. Ensure a clearance of at least 150mm between heaters and
curtains.
5. Should your heater fail to operate either employ the services
of a competent electrician or Telephone 0845 600 5111.
ALSO REFER TO COVER PAGE
COMMISSIONING
Set both the Input Control and the Output Control to 6 and
leave the heater for 48 hours.
Following the commissioning period adjust the controls as
stated below.
SETTING THE CONTROLS
Thecontrolsare locatedunder the hingedflap at thetop righthand
corner of the heater.
To adjust the controls on the heater, use a coin and engage it in
the slots provided on the top surface of the knob.
CONTROL FUNCTIONS
THE OUTPUT CONTROL
Most of the stored heat is radiated from the casing during the
discharge period. However, some of the heat is emitted through
the grille at the top of the heater and this additional heat (boost)
is regulated by the Output Control.
With this set to 6 the boost begins in the early afternoon. Turning
the control towards 1 will progressively delay the commencement
of the boost. At 3 the boost will start in the evening. Once set, the
boost will repeat itself automatically day after day.
If no boost is required, e.g. when the room will be unoccupied
for along period, set the Output Control to 1. With the control in
this position, the heater will take in less energy during the next
charging up period.
CONVECTOR HEATER
CONVECTOR HEATER CONTROLS
The convector is selected
by an on/off rocker switch
which illuminates when
switched on ‘1’. With the
switch on, the convector
element shall be cycled
on and off by the room
thermostat. With the
switchoff“0”theconvector
will not run. The room
thermostat knob is marked 1 to 5. The higher the setting number
chosen, the higher the level at which the room temperature will
be controlled.
Your comfort level can easily be established by gradually
adjusting the thermostat until the required room temperature is
maintained.
CLEANING
To maintain the appearance of the heater wipe occasionally with
a dry cloth when the heater is cool.
Do not use abrasive powders or furniture polish.
Discoloration of wall finishes can sometimes occur immediately
above a storage heater due to the properties of some paints and
decorating materials or the presence of environmental impurities
in the air (such as soot or incense generated for the burning of
candles, etc.).
AFTER SALES SERVICE
Your storage heater is guaranteed for two years from date of
purchase. We undertake to repair or exchange within the period,
any part found to be defective due to a manufacturing fault. This
guarantee does not affect your statutory rights.
Should you require after sales service, please contact the
supplier through whom you purchased the heater, or telephone
0845 600 5111.
Pleasedo notinitially returnfaulty appliance,or partof anappliance
to us as this may result in transit damage and/or a delay in
providing service.
Let us know your difficulty quoting the model number and serial
number (located along the wall bracket). We will then take the
appropriate action.
Customer Help Line 0845 600 5111
Fax 01489 773 053
Web-site www.unidareenvironmental.co.uk
Part No. 87772 Issue 5
THE INPUT CONTROL
Thisheaterisfittedwithauseradjustableautomaticinputcontrolwhich
varies the charge taken in response to weather conditions taking into
account the amount of energy already stored in the heater.
Set at 6 the heater takes maximum charge and at 1 the heater takes a
minimum charge at any room temperature. The casing of the heater,
particularlyinlateevening,mayfeelcool,thisisquitenormal.Theinput
control may require a few days experimentation before your comfort
level is established.
Initiallysetthecontrolto3,thefollowingeveningiftheroomistoowarm
reduce to 2 or if it is too cool increase to 4. On subsequent evenings
adjust by half divisions until your comfort level is achieved.
Having established the setting the input will automatically vary the
amount of heat stored to compensate for weather variations.
For electrical products sold within the European
Community. Atthe endof theelectricalproductsuseful
life it should not be disposed of with household waste.
Please recycle where facilities exist. Check with your
Local Authority or retailer for recycling advice in your country.
RECYCLING
This product complies with the European Safety Standards EN60335-2-30 and the European Standard
Electromagnetic Compatibility (EMC) EN55014, EN60555-2 and EN60555-3.
These cover the essential requirements of EEC Directives 2006/95/EC and 2004/108/EC
© GDC Group Ltd. All rights reserved. Material contained in this publication may not be reproduced in whole or in
part, without prior permission in writing.
A division of the GDC Group Ltd, Millbrook House, Grange Drive, Hedge End, Southampton SO30 2DF
This manual suits for next models

2

Other Dimplex Heater manuals

Dimplex DESC2TN User manual

Dimplex

Dimplex DESC2TN User manual

Dimplex WH 6100770000 User manual

Dimplex

Dimplex WH 6100770000 User manual

Dimplex DXUF 20TN User manual

Dimplex

Dimplex DXUF 20TN User manual

Dimplex QM100 User manual

Dimplex

Dimplex QM100 User manual

Dimplex SmartRad SRX80 User manual

Dimplex

Dimplex SmartRad SRX80 User manual

Dimplex DHCER20HC User manual

Dimplex

Dimplex DHCER20HC User manual

Dimplex FrostWatcher FW600 User manual

Dimplex

Dimplex FrostWatcher FW600 User manual

Dimplex PLXE User manual

Dimplex

Dimplex PLXE User manual

Dimplex FFCH5000W Series User manual

Dimplex

Dimplex FFCH5000W Series User manual

Dimplex WMS718N User manual

Dimplex

Dimplex WMS718N User manual

Dimplex H 260E User manual

Dimplex

Dimplex H 260E User manual

Dimplex AF20 Series User manual

Dimplex

Dimplex AF20 Series User manual

Dimplex OFRC10ECCb User manual

Dimplex

Dimplex OFRC10ECCb User manual

Dimplex LC Series User manual

Dimplex

Dimplex LC Series User manual

Dimplex PLX300/TI User manual

Dimplex

Dimplex PLX300/TI User manual

Dimplex XMX706N User manual

Dimplex

Dimplex XMX706N User manual

Dimplex BY 802 S User manual

Dimplex

Dimplex BY 802 S User manual

Dimplex OFC12 User manual

Dimplex

Dimplex OFC12 User manual

Dimplex OCR15 User manual

Dimplex

Dimplex OCR15 User manual

Dimplex FX 20V User manual

Dimplex

Dimplex FX 20V User manual

Dimplex DXLWP400 User manual

Dimplex

Dimplex DXLWP400 User manual

Dimplex DEP Series User manual

Dimplex

Dimplex DEP Series User manual

Dimplex PPC Series User manual

Dimplex

Dimplex PPC Series User manual

Dimplex 3082S User manual

Dimplex

Dimplex 3082S User manual

Popular Heater manuals by other brands

Desa 125 owner's manual

Desa

Desa 125 owner's manual

EUROM Outdoor Heatpanel 1800 (RC) instruction manual

EUROM

EUROM Outdoor Heatpanel 1800 (RC) instruction manual

Silverline MC973 manual

Silverline

Silverline MC973 manual

Elnur ADL Series installation instructions

Elnur

Elnur ADL Series installation instructions

DeLonghi TCH7690ER Instructions for use

DeLonghi

DeLonghi TCH7690ER Instructions for use

Star Progetti Varma Tec VARMA TOP operating instructions

Star Progetti

Star Progetti Varma Tec VARMA TOP operating instructions

Hobby Thermica premium quick guide

Hobby

Hobby Thermica premium quick guide

ARDES AR4W07P Instructions for use

ARDES

ARDES AR4W07P Instructions for use

Alva EIH200 manual

Alva

Alva EIH200 manual

Renkforce 1300622 operating instructions

Renkforce

Renkforce 1300622 operating instructions

veito CH1200 LT user manual

veito

veito CH1200 LT user manual

Rointe Lyon electric OVAL 500 instruction & installation guide

Rointe

Rointe Lyon electric OVAL 500 instruction & installation guide

SHX SHX20HLBF2002F manual

SHX

SHX SHX20HLBF2002F manual

Pelonis PTH15A2BGB owner's manual

Pelonis

Pelonis PTH15A2BGB owner's manual

Tooltech 100071 instruction manual

Tooltech

Tooltech 100071 instruction manual

Coonara chateau 2 series Operating information & installation instructions

Coonara

Coonara chateau 2 series Operating information & installation instructions

Sealey RD1500 instructions

Sealey

Sealey RD1500 instructions

Bastilipo natural liquid h2o R-ECOFLUID2-7 instruction manual

Bastilipo

Bastilipo natural liquid h2o R-ECOFLUID2-7 instruction manual

manuals.online logo
manuals.online logoBrands
  • About & Mission
  • Contact us
  • Privacy Policy
  • Terms and Conditions

Copyright 2025 Manuals.Online. All Rights Reserved.