manuals.online logo
Brands
  1. Home
  2. •
  3. Brands
  4. •
  5. Dimplex
  6. •
  7. Indoor Fireplace
  8. •
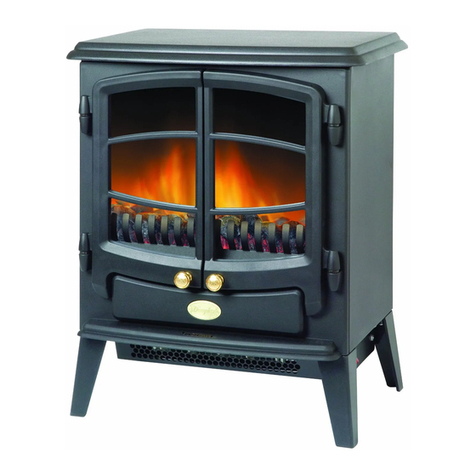
  9. Dimplex Mini Mozart Deluxe User manual

Dimplex Mini Mozart Deluxe User manual

08/ 53447/0 (UK) Issue 2
The product complies with the European Safety Standards EN60335-2-30 and the European Standard Electromagnetic Compatibility (EMC) EN55014, EN60555-2 and EN60555-3. These
cover the essential requirements of EEC Directives 2006/95/EC and 2004/108/EC
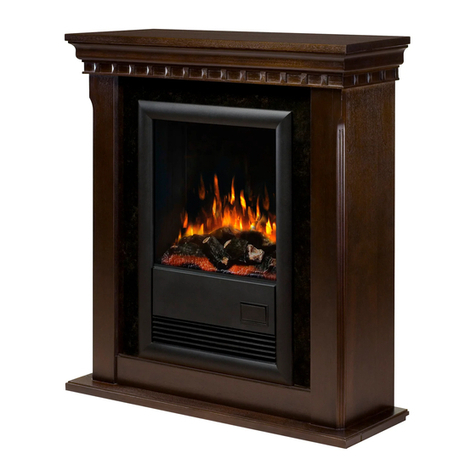
MINI MOZART DELUXE, FIGARO, ORVITEO
EN : This product is only suitable for well insulated rooms or occasional use. DE : Dieses Produkt ist nur für gut isolierte Bereiche oder gelegentliche
Verwendung geeignet. FR : Ce produit convient uniquement à des endroits bien isolés ou pour un usage occasionnel. IT : Questo prodotto è adatto
solo per spazi ben isolati o per uso occasionale. ES : Este producto sólo es adecuado para espacios bien aislados o un uso ocasional. NL : Dit product
is uitsluitend geschikt voor goed geïsoleerde ruimten of voor sporadisch gebruik. PL : Produkt ten jest odpowiedni wyłącznie do dobrze odizolowanych
miejsc lub do okazjonalnego użytku. NO : Dette produktet egner seg kun for godt isolerte rom eller sporadisk bruk. RO : Acest produs este adecvat
exclusiv spaţiilor bine ventilate sau utilizării ocazionale. CZ : Tento výrobek je vhodný pouze do dobře izolovaných prostor nebo k příležitostnému
použití. DK : Dette produkt er kun egnet til velisolerede rum eller lejlighedsvis brug. PT : Este produto somente é adequado para espaços bem isola-
dos ou uso ocasional. SE : Denna produkt är endast avsedd för välisolerade utrymmen eller tillfällig användning. FI : Tämä tuote soveltuu ainoastaan
hyvin eristettyihin tiloihin tai satunnaiseen käyttöön. SK : Tento výrobok je vhodný len pre dobre izolované priestory alebo na občasné použitie. SI : Ta
izdelek je primeren le za dobro izolirane prostore ali za občasno uporabo. HR : Ovaj proizvod je pogodan samo za dobro izolirane prostore ili povre-
menu upotrebu. HU : Ez a termék csak jól szigetelt terekhez vagy eseti használatra alkalmas.
1
2
4
1
2
3
I
II
3
min max
OFF
ON
T
econ
5
MINI MOZART DELUXE, FIGARO, ORVITEO
Important Safety Advice
When using electrical appliances, basic
precautions should be followed to reduce
the risk of re, electric shock, and injury to
persons, including the following:
If the appliance is damaged, check
immediately with the supplier before
installation and operation. Do not use this
appliance in the immediate surroundings of
a bath, shower or swimming pool. Do not
use outdoors.
This appliance must not be located
immediately above or below a xed socket
outlet or connection box.
WARNING : The appliance carries
the Warning Symbol indicating that it
must not be covered or has a Do not
cover label. Do not cover or obstruct
in any way the heat outlet grille located at the
front of the appliance Overheating will result
if the appliance is accidentally covered.
Do not place material or garments on the
appliance, or obstruct the air circulation
around the appliance, for instance by
curtains or furniturn, as this could cause
overheating and a re risk.
In the event of a fault unplug the heater.
Unplug the appliance when not required
for long periods.The supply cord must be
placed on the right hand side of the heater
away from the heat outlet at the front of the
appliance.
This appliance can be used by children
aged form 8 years and above and persons
with reduced physical, sensory or mental
capabilities or lack of experinence and
knowledge if they have been given
supervision or instruction concerning use of
the appliance in a safe way and understand
the hazards involved. Children shall not
play with the appliance. Cleaning and user
maintaince shall not be made by Children
without supervision.
Children of less than 3 years should be
kept away unless continuously supervised.
Children aged from 3 years and less than 8
years shall only switch on/off the appliance
provided that it has been placed or installed
in its intended normal operating position
and they have been given supervision or
instruction concerning use of the appliance
in a safe way and understand the hazards
involved. Children aged from 3 years and
less than 8 years shall not plug in, regulate
and clean the appliance or perform user
maintaince.
The appliance must be positioned so that
the plug is accessible.
Although this appliance complies with safety
standards, we do not recommend its use on
deep pile carpets or on long hair type of rugs.
IMPORTANT: THESE INSTRUCTIONS SHOULD BE READ CAREFULLY AND RETAINED FOR FUTURE REFERENCE
Technical Information
with mechanic thermostat room temperature control.
General
Unpack the heater carefully and retain the packaging for possible
future use, in the event of moving or returning the re to your
supplier.
The re incorporates a ame effect, which can be used with or
without heating, so that the comforting effect may be enjoyed
at any time of the year. Using the ame effect on its own only
requires little electricity.
Before connecting the heater check that the supply voltage is
the same as that stated on the heater.
Please note: Used in an environment where background
noise is very low, it may be possible to hear a sound which
is related to the operation of the ame effect. This is normal
and should not be a cause for concern.
Electrical Connection
WARNING – THIS APPLIANCE MUST BE EARTHED
This heater must be used on an AC ~ supply only and the voltage
marked on the heater must correspond to the supply voltage.
Before switching on, please read the safety warnings and
operating instructions.
Thermostat (T) - see Fig. 3
In order to maintain a certain room temperature, set the controller
to ‘max.’. Operate the appliance at full power until the required
room temperature is reached. Set back the thermostatic controller
until the appliance switches off with an audible “click”. This
temperature will be kept almost constant by the thermostatic
control switching on and off automatically.Please note that the
appliance can only be switched on when the thermostat setting
is higher then the room temperature.
If the supply cord is damaged it must be
replaced by the manufacturer or service
agent or similarly qualied person in order
to avoid a hazard.
CAUTION: In order to avoid a hazard due
to inadvertent resetting of the thermal cut-
out, this appliance must not be supplied
through an external switching device, such
as a timer, or connected to a circuit that is
regularly switched on and off by the utility.
CAUTION - Some parts of this product can
become very hot and cause burns. Particular
attention has to be given where children and
vulnerable people are present.
Model No: MMZ15,FGA15,MCFP15O
Heat Output 230V 240V
Nominal Heat Output P Nom 1.3 - 1.4 kW
Minimum Heat Output P min 0.7 - 0.7 kW
Maximum Continous Heat Output P max,c 1.3 - 1.4 kW
Auxiliary Electricity Consumption
In Standby mode el SB 0.37 - 0.41 W
Controls - See Fig. 2
Three switches provide a choice of heat settings. The appliance
is in standby mode when the mains lead is plugged in. This is
indicated by the red neon behind the ame effect screen. The
two selector switches are in the ON position when the side with
the markings on (i.e. I, or II) are pushed in.
Push button switch 1 Controls the electricity supply to
the heater and ame effect.
If both selector switches 2 and 3 are in the OFF position, the
product works on ame effect only.
Selector switch 2 (I) Provides 750W heat output
Selector switch 3 (II) Provides 1500W output with switch
2 also pressed.
Remote control - see Fig. 4
The maximum range of use is ~ 5metres.
Warning: It takes time for the receiver to respond to the
transmitter. Do not press the buttons more than once within two
seconds for correct operation.
Battery Information - see Fig. 4
1. To activate the remote control remove the battery isolation
strip, which is used to ensure your remote control reaches you
fully charged.
2. To replace the remote control battery, turn over the remote
control, and follow the diagram embossed on the remote control
3. Only use CR2025 or CR2032 size of batteries.
Thermal Safety Cut-out
The built-in overheat cut-out switches off the appliance
automatically in the event of a fault! Switch off the appliance or
disconnect the mains plug from the socket.
Remove any obstructions which may have caused the
overheating. After a short cooling down phase, the appliance
is ready for use again! If the fault should occur again, see your
local dealer!
WARNING: In order to avoid a hazard due to inadvertent
resetting of the thermal cut-out, this appliance must not be
supplied through an external switching device, such as a timer,
or connected to a circuit that is regularly switched on and off by
the utility.
Maintenance
WARNING: ALWAYS DISCONNECT FROM THE POWER
SUPPLY BEFORE ATTEMPTING ANY MAINTENANCE.
Light Emitting Diode
This re is tted with LED (Light Emitting Diode) lamps. These
LED lamps are maintenance-free and should not require
replacing during the life of the product.
Tipping Restraint - see Fig. 1
WARNING: FALLING OR TIPPING APPLIANCES CAN
CAUSE INJURY OR DEATH OF YOUNG CHILDREN, PLEASE
ENSURE CHILDREN DO NOT CLIMB, HANG OR STAND ON
THIS PRODUCT.
WARNING: THE APPLIANCE IS PROVIDED WITH A TIPPING
RESTRAINT, THIS RESTRAINT IS NOT A SUBSTITUTE FOR
PROPER ADULT SUPERVISION. THIS RESTRAINT MAY PROVIDE
PROTECTION AGAINST TIPPING FURNITURE. DO NOT ALLOW
CHILDREN TO CLIMB ON FURNITURE. FAILURE TO DETACH
THIS RESTRAINT BEFORE MOVING FURNITURE MAY RESULT IN
INJURY AND DAMAGE.
This product is provided with a ‘Tipping Restraint Kit’ as
shown in Fig 1, to prevent the product accidentally tipping
over. Fitting Instructions are supplied with this kit please
follow these instructions carefully.
Cleaning
WARNING – ALWAYS DISCONNECT FROM THE POWER
SUPPLY BEFORE CLEANING THE HEATER.
For general cleaning use a soft clean duster – never use abrasive
cleaners. The glass viewing screen should be cleaned carefully
with a soft cloth. DO NOT use proprietary glass cleaners.
To remove any accumulation of dust or uff the soft brush
attachment of a vacuum cleaner should occasionally be used
to clean the outlet grille of the fan heater.
It is possible to clean the inner glass and logset by removing
the outer glass panel. To remove the outer glass, remove the
4 screws holding the grille in position, (see Fig.5), remove the
grille and lift clear the outer glass.
Ret the outer glass in reverse of above.
WARNING: do not operate the product without the grille and outer
glass in position as this may effect the operation of the heater.
Recycling
For electrical products sold within the European
Community. At the end of the electrical products useful
life it should not be disposed of with household waste.
Please recycle where facilities exist. Check with your
Local Authority or retailer for recycling advice in your
country.
After Sales Service
Your product is guaranteed for one year from the date of
purchase. Within this period, we undertake to repair or exchange
this product free of charge (excluding lamps & subject to
availability) provided it has been installed and operated in
accordance with these instructions.
Your rights under this guarantee are additional to your statutory
rights, which in turn are not affected by this guarantee.
Should you require after sales information or assistance with this
product please go to www.dimplex.co.uk where you will nd our
self help guide by clicking on “After Sales” or ring our helpdesk
on 0844 879 3588 (UK) or 01 842 4833 (R.O.I.) .
Spare parts are also available on the website
www.dimplex.co.uk
Please retain your receipt as proof of purchase.

This manual suits for next models

5

Other Dimplex Indoor Fireplace manuals

Dimplex GDS28L8-1924SK User manual

Dimplex

Dimplex GDS28L8-1924SK User manual

Dimplex SCANDIC DELUXE SDC20RC User manual

Dimplex

Dimplex SCANDIC DELUXE SDC20RC User manual

Dimplex BOF4056 User manual

Dimplex

Dimplex BOF4056 User manual

Dimplex SP120 User manual

Dimplex

Dimplex SP120 User manual

Dimplex ORVIETO MCFP15O User manual

Dimplex

Dimplex ORVIETO MCFP15O User manual

Dimplex CHT20LE User manual

Dimplex

Dimplex CHT20LE User manual

Dimplex Xpression SP220 User manual

Dimplex

Dimplex Xpression SP220 User manual

Dimplex Optiflame Electric Fireplace User manual

Dimplex

Dimplex Optiflame Electric Fireplace User manual

Dimplex MULTIFIRE DF3015 User manual

Dimplex

Dimplex MULTIFIRE DF3015 User manual

Dimplex Anthony User manual

Dimplex

Dimplex Anthony User manual

Dimplex Opti-V PGF10 User manual

Dimplex

Dimplex Opti-V PGF10 User manual

Dimplex GDS30RBF-1801 User manual

Dimplex

Dimplex GDS30RBF-1801 User manual

Dimplex DF2024 User manual

Dimplex

Dimplex DF2024 User manual

Dimplex OPTIMYST CAS250-INT User manual

Dimplex

Dimplex OPTIMYST CAS250-INT User manual

Dimplex DLW1500B12 User manual

Dimplex

Dimplex DLW1500B12 User manual

Dimplex Clova CLV20B User manual

Dimplex

Dimplex Clova CLV20B User manual

Dimplex EF2570G User manual

Dimplex

Dimplex EF2570G User manual

Dimplex Crestmore CRS20 Instruction Manual

Dimplex

Dimplex Crestmore CRS20 Instruction Manual

Dimplex BLF74-EU User manual

Dimplex

Dimplex BLF74-EU User manual

Dimplex BLF74 User manual

Dimplex

Dimplex BLF74 User manual

Dimplex Revillusion RBF30-FG User manual

Dimplex

Dimplex Revillusion RBF30-FG User manual

Dimplex TANGO TNG20 User manual

Dimplex

Dimplex TANGO TNG20 User manual

Dimplex WINSLOW SWM3520 User manual

Dimplex

Dimplex WINSLOW SWM3520 User manual

Dimplex DF3003 User manual

Dimplex

Dimplex DF3003 User manual

Popular Indoor Fireplace manuals by other brands

Char-Broil Firenzy 03505784 Assembly instructions

Char-Broil

Char-Broil Firenzy 03505784 Assembly instructions

Montigo H34DF Installation & maintenance manual

Montigo

Montigo H34DF Installation & maintenance manual

Desa V36N-A Series OWNER'S OPERATION AND INSTALLATION MANUAL

Desa

Desa V36N-A Series OWNER'S OPERATION AND INSTALLATION MANUAL

Valor Portrait 530ILN/ILP Installation & owner's manual

Valor

Valor Portrait 530ILN/ILP Installation & owner's manual

Kingsman MCVST42NE installation instructions

Kingsman

Kingsman MCVST42NE installation instructions

Valor 417 Installation and servicing guide

Valor

Valor 417 Installation and servicing guide

Lopi 564 installation instructions

Lopi

Lopi 564 installation instructions

Flame Energy MONACO FL063 Installation and operation manual

Flame Energy

Flame Energy MONACO FL063 Installation and operation manual

HearthStone Hergom Clydesdale owner's manual

HearthStone

HearthStone Hergom Clydesdale owner's manual

Masport STORM2 owner's manual

Masport

Masport STORM2 owner's manual

Ventis HEI240 Installation and operation manual

Ventis

Ventis HEI240 Installation and operation manual

Majestic fireplaces NVCR36R Series Installation and Homeowner’s Operating Manual

Majestic fireplaces

Majestic fireplaces NVCR36R Series Installation and Homeowner’s Operating Manual

kozy heat Windim-WDM 56101 Installation and operation manual

kozy heat

kozy heat Windim-WDM 56101 Installation and operation manual

Valor 1200EAN Installation & owner's manual

Valor

Valor 1200EAN Installation & owner's manual

Travis Industries Granite 99600200 Installation instructions manual

Travis Industries

Travis Industries Granite 99600200 Installation instructions manual

Heatilator Direct Vent Gas Appliance CD4236MR owner's manual

Heatilator

Heatilator Direct Vent Gas Appliance CD4236MR owner's manual

Desa Comfort Glow LFP33NR OWNER'S OPERATION AND INSTALLATION MANUAL

Desa

Desa Comfort Glow LFP33NR OWNER'S OPERATION AND INSTALLATION MANUAL

Heatilator HEIR36H-IFT owner's manual

Heatilator

Heatilator HEIR36H-IFT owner's manual

manuals.online logo
manuals.online logoBrands
  • About & Mission
  • Contact us
  • Privacy Policy
  • Terms and Conditions

Copyright 2025 Manuals.Online. All Rights Reserved.