manuals.online logo
Brands
  1. Home
  2. •
  3. Brands
  4. •
  5. DirecTV
  6. •
  7. DVR
  8. •
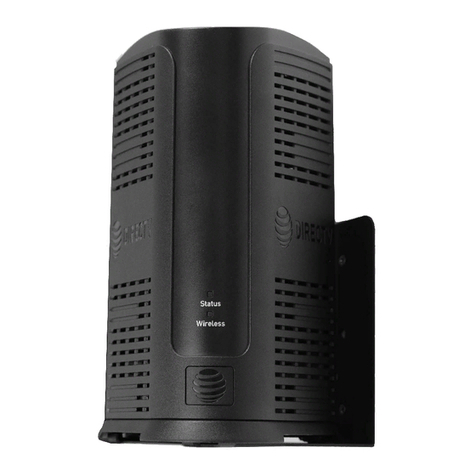
  9. DirecTV Wireless Genie Mini Technical Document

DirecTV Wireless Genie Mini Technical Document

Other DirecTV DVR manuals

DirecTV R16NC-500 User manual

DirecTV

DirecTV R16NC-500 User manual

DirecTV Genie Mini Technical Document

DirecTV

DirecTV Genie Mini Technical Document

DirecTV Genie 2 Technical Document

DirecTV

DirecTV Genie 2 Technical Document

DirecTV HR20 User manual

DirecTV

DirecTV HR20 User manual

DirecTV HR10-250 User manual

DirecTV

DirecTV HR10-250 User manual

DirecTV R10 User manual

DirecTV

DirecTV R10 User manual

DirecTV HD DVR User manual

DirecTV

DirecTV HD DVR User manual

DirecTV TiVo TCD24 Series Quick start guide

DirecTV

DirecTV TiVo TCD24 Series Quick start guide

DirecTV HR23 Owner's manual

DirecTV

DirecTV HR23 Owner's manual

DirecTV GENIE HR34 User manual

DirecTV

DirecTV GENIE HR34 User manual

DirecTV GENIE HR54 User manual

DirecTV

DirecTV GENIE HR54 User manual

DirecTV R16-300 User manual

DirecTV

DirecTV R16-300 User manual

DirecTV TCD2 Series Quick start guide

DirecTV

DirecTV TCD2 Series Quick start guide

DirecTV HD DVR User manual

DirecTV

DirecTV HD DVR User manual

DirecTV Plus HD User manual

DirecTV

DirecTV Plus HD User manual

DirecTV R10 User manual

DirecTV

DirecTV R10 User manual

DirecTV HR21700 User manual

DirecTV

DirecTV HR21700 User manual

DirecTV PLUS DVR User manual

DirecTV

DirecTV PLUS DVR User manual

DirecTV Genie User manual

DirecTV

DirecTV Genie User manual

DirecTV HR22 User manual

DirecTV

DirecTV HR22 User manual

DirecTV HD DVR User manual

DirecTV

DirecTV HD DVR User manual

DirecTV HR20QSG0806 User manual

DirecTV

DirecTV HR20QSG0806 User manual

DirecTV PLUS DVR - MANUEL 2 User manual

DirecTV

DirecTV PLUS DVR - MANUEL 2 User manual

DirecTV DVR39 User manual

DirecTV

DirecTV DVR39 User manual

Popular DVR manuals by other brands

Pace TDC577X manual

Pace

Pace TDC577X manual

Zavio NQ2040 user manual

Zavio

Zavio NQ2040 user manual

KGuard Security KG-SHA104 user manual

KGuard Security

KGuard Security KG-SHA104 user manual

SanDisk V-Mate Quick manual

SanDisk

SanDisk V-Mate Quick manual

Panasonic WJND200 - NETWORK DISK RECORDER Setup instructions

Panasonic

Panasonic WJND200 - NETWORK DISK RECORDER Setup instructions

Hunt Electronic HVRM-T1600Q Install & user's guide

Hunt Electronic

Hunt Electronic HVRM-T1600Q Install & user's guide

Portwell PIVS-6104 user manual

Portwell

Portwell PIVS-6104 user manual

AVer EXR6004 Mini Quick user guide

AVer

AVer EXR6004 Mini Quick user guide

Security Labs SLD261 owner's manual

Security Labs

Security Labs SLD261 owner's manual

Swann DIGITAL VIDEO RECORDER instruction manual

Swann

Swann DIGITAL VIDEO RECORDER instruction manual

EverFocus ECOR 4 instruction manual

EverFocus

EverFocus ECOR 4 instruction manual

Xoro HRK 7550 user manual

Xoro

Xoro HRK 7550 user manual

FLIR M3100E Series instruction manual

FLIR

FLIR M3100E Series instruction manual

VTRACKPRO FPRO300 user manual

VTRACKPRO

VTRACKPRO FPRO300 user manual

Swann NVR-7085 models instruction manual

Swann

Swann NVR-7085 models instruction manual

RMRC FPV1000 manual

RMRC

RMRC FPV1000 manual

urmet domus 1093/004AHD instructions

urmet domus

urmet domus 1093/004AHD instructions

Toshiba D-VR3SU Service manual

Toshiba

Toshiba D-VR3SU Service manual

manuals.online logo
manuals.online logoBrands
  • About & Mission
  • Contact us
  • Privacy Policy
  • Terms and Conditions

Copyright 2025 Manuals.Online. All Rights Reserved.

We’re committed to bringing you the best in video entertainment every day. Your replacement
receiver is enclosed. Here’s how to connect and activate your new receiver, plus how to return your
non-working equipment.
To avoid non-return fees, follow important return instructions at the end of this document.
1CONNECT YOUR REPLACEMENT GENIE MINI
·Carefully stack your replacement receiver on top of your non-working receiver.
·Check if your TV is high definition (HD) or standard definition (SD).
For HD: Use an HDMI cable and plug one end of the cable into the HDMI port on the receiver and
the other into the HDMI port on your TV.
For SD: Use a 10-pin mini-DIN cable and plug the black 10-pin connector into the A/V out port
on the back of your receiver and the other end(s) of the cable(s) into the corresponding colored
input ports on the back of your TV.
·Transfer one connection at a time from the non-working receiver to the replacement receiver,
except for the power cord. Need help? Go to directv.com/equipmentinstall.
·Plug the power cord into the replacement receiver, then into a power outlet. If the receiver
doesn’t automatically power up, press the POWER button.
·Turn on your TV. The CONNECTING TO VIDEO BRIDGE screen will appear.
2RESET YOUR REMOTE
·On the remote, press and hold MUTE and SELECT.
·The GREEN LED will blink twice.
·Press 9-8-7 on your remote.
·The GREEN LED will blink four times if successful.
3SETUP
Go to the Genie®HD DVR to begin setup.
·On the remote, press MENU, select SETTINGS, then WHOLE-HOME. Select MANAGE CLIENTS
and then ADD CLIENTS.
·Note the PIN that displays on the screen—you will need to enter the PIN on your
Genie Mini at its location.
Keeping the Genie on the ADD A CLIENT screen, go to the location where you have
Genie Minis.
When back at the Wireless Genie Mini location:
·Wait two minutes until the CONNECT NOW label is active.
·Verify that the Wireless Signal Strength icon displays three (3) green bars. (For troubleshooting,
go to directv.com/wirelessgeniemini)
1
Connect
2
Reset
3
Setup
4
Activate
5
Program
6
Return
Wireless Genie Mini M
ACTIVATION & EQUIPMENT
RETURN INSTRUCTIONS
(Continued on back)
Instructions can be found online at
directv.com/equipmentinstall or
by scanning the QR code.
Remote
Reset
2
10-pin single
end connects
to the receiver
HDMI
HDMI
Black component
cables are for video
Gray component
cables are for audio
Colored cable ends
connect to the TV
1
NETWORK
DOLBY
DIGITALIMAX
Wireless Genie Mini
Connecting to Video Bridge
Video Bridge Survey Mode should be active before attempting
to connect.
Video Bridge Survey Mode:
Wireless Signal Strength:
Signal Quality:
Inactive
Waiting
Connect Now
Setup Instructions
For HD
For SD
·Select CONNECT NOW and wait for the countdown to complete.
·Using your remote control, enter the PIN you noted in step 3 on the ENTER PIN screen.
·Select REPLACE A LOCATION, choose the Client you want to remove and select REPLACE.
·Select YES, REPLACE to confirm your choice.
Note: The new Wireless Genie
®
Mini may display a flashing red LED and the screen may flash gray
intermittently during this setup step.
Return to the Genie®HD DVR.
·Select DONE on the ADD A CLIENT screen.
If the Wireless Genie Mini displays the Enter PIN screen again after the 2-minute countdown, please
call 800.531.5000 to complete your activation.
4ACTIVATE YOUR REPLACEMENT GENIE MINI
Go to directv.com/activate and sign in, then follow the instructions, OR
Call 800.388.6597 for our automated activation line.
5PROGRAM YOUR REMOTE CONTROL
If you are prompted to program your remote control, follow the on-screen instructions or go to
directv.com/programremote
6 RETURN YOUR NONWORKING RECEIVER
For the fastest return method:
·Take your equipment directly to your nearest FedEx®Office Print & Ship Center or The UPS Store®
location. No need to pack anything—just bring your equipment in a sturdy bag or open box along
with your 9-digit account number (located on the packing slip on your bill).
Do not include your remote control, cables, accessories or any personal equipment such
as DVD players. If for any reason you removed the access card from the receiver, be sure to
return it in the package as well.
·Your equipment will be scanned, packed, labeled, and returned to DIRECTV. Once your equipment
is scanned, your return will immediately be noted on your account.
·Or, you can pack the equipment yourself. Just use the box your replacement receiver came in,
or another suitable box, and use the supplied return shipping label. (Remember to keep the
bottom portion of the label for your records.) Then, drop off the box at your local Post Office™or
FedEx®Office Print & Ship Center location. (You can track both on fedex.com.) Your return will be
noted on your account when we receive it, which could take up to 2 weeks.
IMPORTANT INFORMATION
We must receive your non-working receiver within 21 days of your replacement order date to
avoid non-return fees. Non-return fees are based on type of receiver: DVR ($135), HD ($45),
HD DVR ($135), Genie®HD DVR ($135), Genie Mini ($45), Wireless Video Bridge ($45), or
Genie Lite™($45).
For more information, go to directv.com/support
ATT.210001274-3
Find the closest locations:
FedEx®Office Print & Ship Center
go to fedex.com/attreturns or
call 800.463.3339
OR
The UPS Store®go to
theupsstore.com or call
800.789.4623
©2021 DIRECTV. DIRECTV and all other DIRECTV marks are trademarks of DIRECTV, LLC. All other marks are the property
of their respective owners.
Wireless Genie Mini M
ACTIVATION & EQUIPMENT
RETURN INSTRUCTIONS
Enter PIN
Enter PIN
Enter the PIN currently displayed on your server.
PIN
3
Replace a Location
Select whether you would like to add a new location or replace an
existing location.
Create a New Location
Add a New Location
Replace a Location