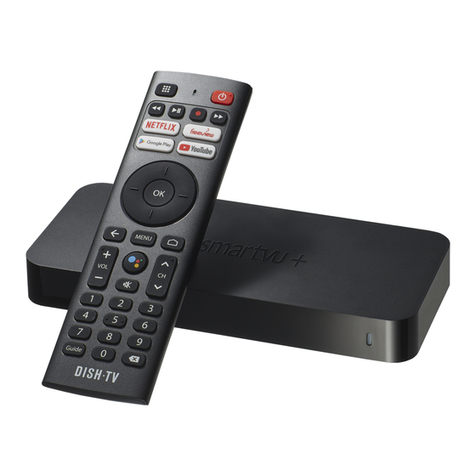
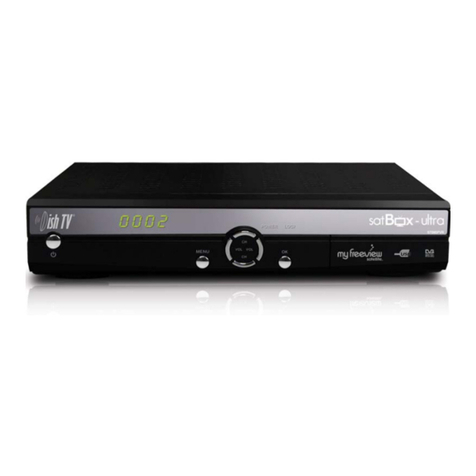
Dish TV S7010PVR User manual

User Manual
Of Digital Set Top Box
Please read this User Manual carefully to ensure proper use of this product and keep this manual for future reference.
S7010PVR

1) Read these instructions.
2) Keep these instructions.
3) Heed all warnings.
4) Follow all instructions.
5) Do not use this apparatus near water.
6) Clean only with dry cloth.
7) Do not block any ventilation openings, install in accordance with the instructions.
8) Do not install near any heat sources such as radiations, heat registers, stoves,
orother apparatus (including amplifiers) that produce heat.
9) Do not defeat the safety purpose of the polarized plug. If the provided plug does
not fit into your outlet, consult an electrician for replacement of the obsolete outlet.
10) Protected the power cord from being walked on or pinched particularly at plugs,
convenience receptacles, and the point where they exit from the apparatus.
11) Only use attachments/accessories specified by the manufacturer.
12) Unplug this apparatus during lighting storms or when unused for long periods of
time.
13) Refer all servicing to qualified service personnel. Servicing is required when the
apparatus has been damaged in any way, such as power-supply cord or plug is
damaged, liquid has been spilled or objects have fallen into the apparatus, the
apparatus has been exposed to rain or moisture, does not operate normally, or has
been dropped.
14) Mains plug is used as the disconnect device, the disconnect device shall remain
readily operable.
15) The ventilation should not be impeded by covering the ventilation openings with
items, such as newspapers, table-cloth, curtains, etc.
16) No naked flame sources, such as lighted candles, should be placed on the
apparatus.
17) Attention should be drawn to the environmental aspects of battery disposal.
18) The use of apparatus in moderate climate.
WARNING: To reduce the risk of fire or electric shock, do not expose this apparatus to
rain or moisture.
WARNING: The batteries shall not be exposed to excessive heat such as sunshine,
fire or the like.
Caution: When the apparatus was in electrostatic circumstance, it may be malfunction
and need to reset by user.
Warning: The USB memory stick should be plugged in the unit directly. USB extension
cable should not be used to avoid failing of data transferring and interference caused.
The s ymbol in dicates t hat t here a re im portant o perating and maintenance
instructions in t he lit erature a ccompanying t his unit .
The symbol indicates that dangerous voltages constituting a risk of electric
shock are present within this unit.
Important Safety Instructions
The s ymbol in dicates t hat t his product in corporates d ouble in sulation between
hazardous m ains v oltage and user a ccessible parts. W hen servicing u se o nly
identical replacement parts.
Table of Contents
Front and Rear Panel Illustration........................................................................... 1
Remote Controller ............................................................................................... 1
Connections........................................................................................................ 2
...................................................................................................... 3
Troubleshooting .................................................................................................. 8
Specifications...................................................................................................... 9
User Interface
Quick Installation............................................................................................. 3
Menu Operations..............................................................................................4
Normal Play..................................................................................................... 7

Front and Rear Panel Ill ustration
1. Front Panel
1. LNB IN: This socket connects the LNB to your receive the signal.
3. CVBS: This socket outputs composite video signal.
4. Y/Pb/Pr:These sockets connect to your TV component input terminals.
5. L/R: This socket outputs analog audio L/R signal.
6. COAXIAL: This socket connects to a coaxial socket on your surround
sound system.
7. MAINS CABLE: This is used to connect to your main power supply.
2.TO TV: Used to output RF signal for TV set.
1
2. Rear Panel
Remote Controller
Remote Key Function:
1. MUTE: Used to turn the sound on or off.
2. NUMBER KEYS: Used to select channel numbers or
input numbers in menus.
3. RECALL: Used to switch between the last two viewed
channels.
4. INFO: Used to display information about the channel
being viewed or further information about the program
when in small EPG screen.
5. SUBTITLE: Used to switch between different subtitles
that are broadcasted
6. EXIT: Used to return to the previous screen or menu.
7. CH+: Used to move around the menu screens or
selecting the channels in non-menu state.
8. VOL+:Used to move around the menu screens or
changing the volume in non-menu state.
9. OK: Used to confirm a selection within a menu.
10. RECLIST: Used to show the recorded programs list.
11. COLOR KEYS (RED/ GREEN/ YELLOW/ BLUE):
Used to operate different functions in TEXT screen or
other menus.
12. STOP: Used to stop PVR function.
13.TV/RADIO: Used to switch between TV channels and Radio stations.
14. RECORD: Used to record the program manually, and select the record duration if
pressed it again.
15. FAST FORWARD: Used to adjust the forward speed if in HDD time shifting
playback mode.
16.VIDEO MODE: Used to switch VIDEO output mode.
17.STANDBY: Used to switch the set top box to on or standby.
18. FAV: Used to switch access your favourite channels.
19. AUDIO: Used to set the sound output, the available settings are STEREO,LEFT,
RIGHT, MONO.
20. MENU: Used to open the main menu window.
21. EPG: Used to display information about the program being viewed and what's on next.
22. VOL-: Used to move around the menu screens or changing the volume in non-menu state.
23. CH- :Used to move around the menu screens or selecting the channels in non-menu state.
24. TEXT: Used to open teletext OSD display if teletext available in the broad caste stream.
25. PAUSE: Used to pause or playback the program being viewed .
26. FAST BACKWARD: Used to adjust the backward speed if in HDD time shifting
playback mode.
Note: SUBTITLE/TEXT/LANGUAGE may not be available for all channels.
RED/GREEN/YELLOW/BLUE may has specifical function in different menus.
3
1. LED DISPLAY: Used to display the time or channel information.
2. Standby Indicator: Used to visually show power state of the set
top box, the green LED will show if turned on the set top box and the
red LED will be light if the set top box entered standby mode.
3. REMOTE CONTROL SENSOR: Used to receive the signal from the
remote control.
4. USB JACK: Used to connect to an external USB 2.0 device.
4
1 2 34 5 6 7

Installing the Batteries
Remove the battery cover from the remote control and put 2xAAA size batteries inside
the compartment.
The diagram inside the battery compartment shows the correct way to install the
batteries.
OPEN
OPEN
1.Open the cover 2.Install batteries 3.Close the cover
Using the Remote Control
To use the remote control, point it towards the front of the digital set top box The remote
control has a range of up to 7 metres from the set top box at an angle of up to 60 degrees.
The remote control will not operate if its path is blocked.
Sunlight or very bright light will decrease the sensitivity of the remote
control.
Connections
Caution: Make sure to check the voltage specification of the wall outlet is the same
rating with the receiver. To prevent the risk of electric shock, do not open the cover or
the back of the receiver.
2
Note: When connecting the receiver to other equipment, e.g., TV, VCR and amplifier,
make sure to refer to relevant user manual for instruction.
Also, make sure you disconnect all the equipments from the mains supply before the
connection.
BASS
TREBLE
ECHO
DOWN UP
VOLUME
INPUT SELECTOR
MUTE
KARAOKE
CHANNEL
TEST
MODE
3 STEREO
PRO LOGIC
BYPASS
EXCITE
POWER
MIC
2
1
1
MIC VOL
2
MIC
Amplificador Digital
VIDEO IN
Y
Pb
Pr
Coaxial

SET UP- Ins talla tion ( MY D ISH )
01/01/07 00:03
Swi tch Type
DiSEqC 1.2/ USALS
Page 1/8
Move Swi tch Exit
Set E ast Lim it
Set W est Lim i
NONE
NONE
NONE
NONE
Pos ition 01
Pos ition 02
Pos ition 03
Pos ition 04
Set Limi t
Disa ble Limit Clea r
Goto R ef. GoTo
Move Step Stop
Move Conti nue Stop
User Interface
1.1 Setting Language
User can select preferred language at Setup Installation General Setting page.
(1) Press <Menu> button to enter Main Menu.
(2) Press <Left/Right> button to select SETUP option.
(3) Press <Up/Down> button to select Installation option.
(4) Press <Up/Down> button to select General Setting option.
(5) Press <OK> button to enter General Setting page.
(6) Press <Up/Down> button to select the language option.
(7) Press <Left/Right> button to set a language.
1.2.2 Transponder configuration and scan
If there exist satellite in the database, then user can edit and scan transponder in the
menu Main Menu Setup Installation TP MANAGER, as Figure 6.
Press <Left/Right> button to select satellite;
Press <Up/Down> button to select transponder.
Press <OK/Up/Down/Left/Right/0~9>, user can edit Frequency, Symbol Rate or
Polarity of the transponder.
Press <BLUE> button to scan the focused transponder.
1.Quick Installation
3
Figure 6. Scan for Transponder Figure 7. General Setting
SET UP- Ins talla tion (Tr anspo nder Ma nager ) 01/01/08 00:19
Move Switch Exi t
Sat ellit e Name EU TELSAT W 3A
No.
001
002
003
004
005
006
007
008
Fre que ncy
10928
1134 5
1147 1
1151 3
1155 4
1159 5
1163 7
1167 9
Sym bol Rat e
300 00
275 00
300 00
275 00
275 00
300 00
300 00
300 00
Pol ari ty
H
H
H
H
H
H
H
H
OK Edit
Scan Delete AllDelAdd
00 00
S Q
01/01/08 00:19
Move Switch Exi t
SETUP- Installation (General Setting)
OSD L angua ge
Audio Language
Subtitle Language
Aut o Time Zon e
Tim e Zon e
English
English
OFF
OFF
+ 08: 00
1.2 How to receive the programs?
Scan the satellites to receive the programs.
1.2.1 Satellite configuration
Satellite configuration and manager is in Main Menu->Setup->Installation->MY DISH
menu.
Firstly, select the proper switcher according to the switcher you have, as Figure 1.
For sample switcher, each branch is connected with a satellite, user can configuration it
as Figure 2.
Then user can press BLUE key to scan the focus satellite or RED key to scan multi-
satellites, as Figure 5.
Scan Mode: select Blind-Quick or Blind-Detail for blind scan, or Default to scan the
default transponder list.
Programme: select to receive all programs or only free programs.
For DiSEqC1.2 motor, user can set limit position, user location and LNB of it, as ,then
user can adjust and store max 32 position for different satellites, as Figure 3, Figure 4.
Switch Type: select DiSEqC1.0/1.2 switcher or DiSEqC1.2 motor, or select none if you
don't have any DiSEqC device.
Toneburst: enable or disable toneburst switcher.
move down to the satellite selection area, and press OK key to add the proper satellite,
as Figure 2.
LNB Type: select the LNB type according to your dish.
LNB Low Freq: set the low frequency of LNB.
LNB High Freq: set the high frequency of LNB if it is universal.
Figure 1.Satellite Installation Figure 2.Add Satellite
Figure 3. DiSEqC1.2 Setting Figure 4. DiSEqC1.2 Motor Limitation
Swi tch T
Toneb urs
Exi t
Add S AT
Edi t
SET UP- Ins talla tion ( MY D ISH )
01/01/07 00:02
Str ength 0 0%
Qua lity 00 %
Sat ellit e Name
LNB Ty pe
LNB L ow Freq
LNB H igh Fre q
22K Ton e
LNB P ower
Tran spo nder
Figure 5. Scan Mode
SET UP- Ins talla tion ( MY D ISH )
01/01/07 00:03
Toneb urst
OFF
NONE
Swi tch Type
Prog ra mme All
Bli nd-Det ail
Scan Mo de
Sca n Mode
Move Swi tch Exit
OK Sc an
7.0 E
Move Swit ch Exit
SET UP- Ins talla tion ( MY D ISH )
01/01/07 00:02
Swi tch Type
Toneburst
OFF
NONE
NONE
SET UP- Ins talla tion ( MY D ISH )
01/01/07 00:02
Swi tch Type
DiSEqC 1.2/ USALS
Page 1/8
NONE
NONE
NONE
NONE
Pos ition 01
Pos ition 02
Pos ition 03
Pos ition 04
Mov e Swi tch Exit
Set L NBSet L ocati onSet L imit
Table of contents
Other Dish TV Set-top Box manuals

Dish TV
Dish TV aerialBox-DVD T5050 User manual

Dish TV
Dish TV satBox-ultra User manual

Dish TV
Dish TV Freeview plus User manual

Dish TV
Dish TV aerialBox-ultra T1050PVR User manual

Dish TV
Dish TV AerialBox ultra T1050PVR User manual

Dish TV
Dish TV satBox S8200 User manual

Dish TV
Dish TV S7080 User manual

Dish TV
Dish TV Freeview S7090PVR User manual

Dish TV
Dish TV myfreeview HD User manual

Dish TV
Dish TV S8100-ZC User manual