manuals.online logo
Brands
  1. Home
  2. •
  3. Brands
  4. •
  5. DIVERSITECH
  6. •
  7. Water Pump
  8. •
  9. DIVERSITECH BP-46 User manual

DIVERSITECH BP-46 User manual

BOILER PUMP BOILER PUMP BOILER PUMP
678.542.3600
800.995.2222
678.542.3700 Fax
www.diversitech.com
All pumps manufactured by or for DiversiTech Corporation (the Company) and sold by the
Company under the DiversiTech brand are warranted to be free of defects in workmanship
and materials for a period of 24 months from date of sale from the distributor to the
contractor. The Company will credit, repair or replace, at its option, any Pump if deemed
defective within this time period. All products returned to the Company must include a
return authorization issued by the Company. The returned product should be suitably
packaged and shipped prepaid from the point of shipment to the point designated in the
Company’s return authorization.
This warranty is a limited warranty and shall be in lieu of any other warranties, expressed or
implied, including, but not limited to, any implied warranty of merchantability or tness for a
particular purpose. There are no other warranties that extend beyond the description of the
face hereof. The liability of the Company arising out of it’s supply of said products, or their
use shall not in any case exceed the cost of correcting defects in the products as set forth
above. The Company shall not be liable for any costs or damage incurred by its customers
in the removal or replacement of defective products from units in which the products have
been assembled. In no event shall the company be liable for loss of prots, indirect,
consequential, or incidental damages.
BP-46, BP-46-230
Condensate Removal Pump Condensate Removal Pump Condensate Removal Pump
TROUBLESHOOTING
LIMITED WARRANTY
Instruction Manual
DOC30613
MADE IN KOREA
The unit does not run.
The unit makes loud noises
when running.
The unit runs but does not
pump the liquid out.
Liquid drains back into the
pump from the outlet piping.
Liquid leaks from around
the check valve.
a) Check the power supply.
b) Check the appliance to see if the
condensation is actually being produced.
c) Make sure the inlet piping is not clogged. If it is
clogged, the appliance may eventually be damaged.
a) Make sure the inside of reservoir is clean.
b) Make sure there is no siphoning action.
a) Check that the highest point of the outlet piping does
not exceed the maximum delivery head of the pump.
b) Check that the inside of outlet piping is clean.
c) Inspect the check valve following the maintenance
instructions.
a) The check valve may have debris in it. Clean the
check valve following the maintenance instructions.
a) Make sure the outlet piping is tightly connected with
the check valve.
b) Make sure the check valve is fastened properly.
c) If the o-ring under the check valve is damaged,
replace with a new one.
DRAIN CONNECTION
1. Position the pump beneath the equipment / unit so that condensate or high temperature
discharge water ows into the pump inlet freely (use either of the two openings provided). When
pressurized hot water is connected always use a tundish prior to entering the pump.
2. The inlet pipe should be positioned as close to the bottom of the tank as possible and the
bottom cut at an angle of greater than 30° to ensure the free ow of the condensate from the
boiler.
3. If the pump is to be used for both boiler condensate & PRV discharge, the copper PRV pipe
should only be inserted at least 1.4” (but no greater than 1.8”) into the tank inlet.
INLET CONDENSATE DRAIN CONNECTION
1. Connect the 3/8” I.D tubing to the discharge adapter / non return valve. For best results, secure
tubing with clamp but do not pinch, or restrict the tubing. The non return valve has a quick
release mechanism with a 1/4 turn bayonet type tting.
2. Tubing should rise vertically but not exceed the maximum shut o head (pumping height)
of 46’ above the pump. Any horizontal runs should be taken into consideration when assessing
the maximum shut o. This shut o will be reduced if bends and horizontal runs are included in
the outlet pipe work. If in doubt please contact DiversiTech for advice.
3. At highest point angle tubing horizontally and create a downward slop to drainage point. Do
not bend sharply or twist the tubing in a way that might result in collapse or restriction of the
tubing. Creating a downward slope will allow condensate to drain by gravity and keep tubing
empty.
4. If not possible to create a downward slope, try to create an inverted “U” trap directly above
the pump at the highest point.
OUTLET CONDENSATE CONNECTIONS
COMMISSIONING & TESTING
1. Before commissioning, check for debris in the tank. Remove any material which might block the
drain line or drain into the pump tank.
2. Turn on power and slowly ll the tank with clean water, as the oat rises to the on level position the
motor should turn on.
3. Leave the clean water in the tank as this will eectively prime the pump ready for use and help to
prevent any ue products passing through the pump from the boiler condensate drain pipe.
This pump is designed for use with condensing boiler applications. Caution must be taken to ensure
acidity of condensate does not increase below the average pH of 2.8 (to prevent pitting) by routinely
cleaning or ushing tank with fresh water.
MAINTENANCE & SERVICING
1. Before servicing the pump, disconnect the electric power for both the pump and the equipment
unit.
2. It is recommended that the pump be checked every six months for proper operation. It is
important to check for debris which may cause a blockage to the pump discharge
adapter/non return valve. Check for proper free movement of pump oat and switch and
check for free, unrestricted movement of motor and fan.
3. Clean the holding tank and oat with warm water and mild soap. Rinse completely when nished.
4. Check the inlet and outlet piping. Clean as necessary. Be sure there are no kinks in the outlet
line that would inhibit or restrict ow.
BOILER PUMP BOILER PUMP BOILER PUMP
BOILER PUMP
Boiler Pump
NAME OF EACH COMPONENT
GENERAL FEATURES OF
INSTALLATION GUIDE
SPECIFICATIONS
Condensate Removal Pump Condensate Removal Pump Condensate Removal Pump
Cover
Check Valve
Main Plate
Inlet Hole of Drain Hose
Reservoir
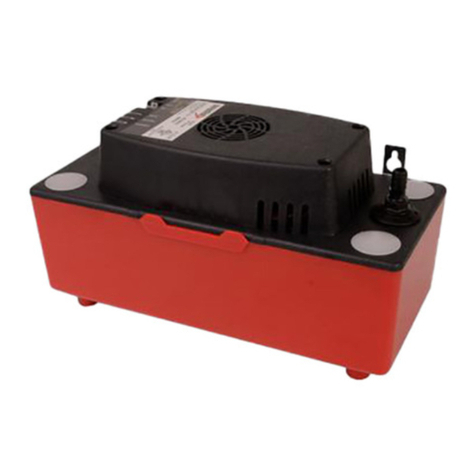
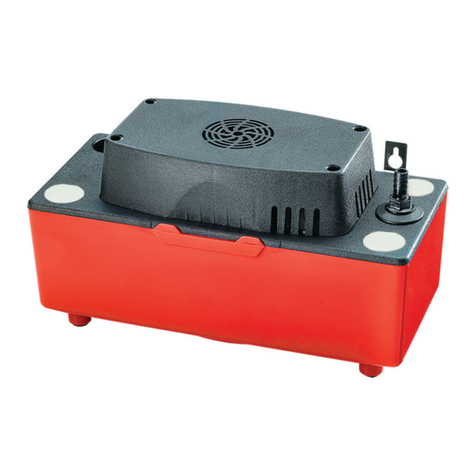
The DiversiTech Boiler Pump is designed to automatically remove the water produced by
condensing furnace and boilers that produce high temperature condensate. Can also be
used for air conditioning evaporation coils, especially when high li is required. These pumps
can also be used for other types of fresh water removal from refrigeration equipment,
dehumidiers, water dispensers, etc. where gravity drainage is impossible.
High performance pump - up to 46’ of li
Up to 212 degrees Fahrenheit condensate
Flame retardant and high impact plastic construction
Low noise motor with thermal protector
Stainless steel pump sha
90 degree turn check valve for easy servicing
WARNING
1. DO NOT USE TO PUMP FLAMMABLE OR EXPLOSIVE FLUIDS SUCH AS GASOLINE, FUEL OIL, ALCOHOL, ETC.
2. DO NOT USE IN EXPLOSIVE ATMOSPHERES
3. DO NOT HANDLE PUMP WITH WET HANDS OR WHEN STANDING ON A WET OR DAMP SURFACE OR IN
WATER
4. RISK OF ELECTRIC SHOCK  THIS PUMP IS SUPPLIED WITH A GROUNDING CONDUCTOR AND
GROUNDINGTYPE ATTACHMENT PLUG. TO REDUCE THE RISK OF ELECTRIC SHOCK, BE CERTAIN THAT IT IS
CONNECTED ONLY TO A PROPERLY GOUNDED, GROUNDINGTYPE RECEPTACLE.
5. CONNECT THE PUMP ONLY TO THE POWER SUPPLY SPECIFIED ON THE NAMEPLATE OF THE PUMP
6. IN ANY INSTALLATION WHERE PROPERTY DAMAGE AND/OR PERSONAL INJURY MIGHT RESULT FROM AN
INOPERATIVE PUMP, A BACKUP SYSTEM AND/OR ALARM SHOULD BE USED
7. DO NOT TWIST THE DRAIN HOSE AND DISCHARGE HOSE
8. BEFORE ANY MAINTENANCE OR REPAIR OF THE PUMP PLEASE DISCONNECT THE PUMP FROM THE
POWER SUPPLY TO AVOID AN ELECTRICAL SHOCK
9. KEEP CHILDREN AWAY FROM THE PUMP
10. THIS IS NOT A SUBMERSIBLE PUMP
11. ALL SERVICE AND INSTALLATION SHOULD BE DONE BY A QUALIFIED SERVICE TECHNICIAN
12. THE INTERMITTENT RATING OF THIS PUMP IS NOT LONGER THAN 5 MINUTES
BP-46
114 Gal/Hr
1. This condensate pump is designed for pumping away condensate from condensing
boilers, PRV discharge and high temperature water up to 212°F. The pump is controlled
by a oat / switch mechanism which turns the pump on to discharge the condensate
when approximately .7 gallons of condensate collects in the tank. The pump switches o
automatically when the tank drains to approximately .3 gallons, giving a drink cycle of .4
gallons.
2. This pump is carefully packaged, inspected and tested to ensure safe operation and
delivery. When you receive the pump, examine it carefully to determine that there are
no broken or damaged parts that may have occurred during shipment. If damage has
occurred, please contact your supplier. They will assist you in replacement or repair, if
required.
3. Read the instructions carefully before attempting to install, operate or service the pump.
Know the pump application, limitations and potential hazards. Protect yourself and
others by observing all safety information. Failure to comply with instructions could result
in personal injury and/or property damage! Please retain these instructions for future
reference. Installation and connections are to be made by a qualied person.
4. If installed for combined boiler condensate & PRV discharge, this pump is only suitable for
boilers up to 143MBH.
46’
Model
Max Flow
Max Head
Tank Capacity
Volts
Hz
Discharge Size
High-level Alarm
1 Gal
230V/1A
60 Hz
3/8”
240VA C , 3A dry contact
9.8”
Overall Height
4.5”
Inlet Height
12.8”
Length
Width 6.3”
Cable Length 5.9’
*Suitable for boilers up to 1,028 MBH (when used for boiler condensate only)
SAFETY
1. Do not use to pump ammable or explosive uids such as gasoline, fuel oil, kerosene, etc.
Do not use in explosive environments. This pump should be used with liquids compatible
with the pump component materials.
2. Do not handle the pump with wet hands or when standing on a wet or damp surface, or
in water. To reduce the risk of electrical shock, be certain that the electrical supply is
connected to a permanent EARTH ground.
3. For installations where property damage and/or personal injury might result from an
inoperative or leaking pump due to power cuts, discharge line blockage, or any other
reason, a backup system and/or alarm should be used.
4. Support the pump and piping when assembling and when installed. Failure to do so may
cause piping to break, pump to fail, motor bearing failures, etc.
INSTALLING THE PUMP
1. Carefully unpack the pump.
2. The pump is designed to be oor standing and it is essential that the pump must sit on a
level surface. If installing on bare oor boards, to reduce noise transmission, it is advisable
to place the pump onto a noise absorbing material (such as underlay or carpet).
3. The pump should not be installled in a manner that will subject it to splashing or spraying.
4. PRV discharge should be routed through a tundish before entering the pump.
ELECTRICAL CONNECTIONS
1. If desired, connect overow safety switch terminals. Normally closed contact can be
used to shut down equipment and normally open contact can be used to activate
optional audible or visual alarm. The microswitch in the overow safety is rated for 240V, 3A.
2. Plug the pump into a suitable outlet based on the voltage specied on the label located
on the pump.
3. If a permanent wiring solution is preferred, the plug can be cut o and the pump can be
wired in accordance with NEC and local codes.
4. If pump is installed on a separate branch circuit, a 3.0 amp fuse is recommended.
115V 230V
BP-46-230
115V/2.7A
How to Use the Check Valve
To uninstall
Turn 90° counter-clock-wise
Pull up to remove check valve from hole
To install
Turn check valve 90° clockwise
Insert the check valve into the hole

This manual suits for next models

1

Other DIVERSITECH Water Pump manuals

DIVERSITECH CP-NL20 Manual

DIVERSITECH

DIVERSITECH CP-NL20 Manual

DIVERSITECH ClearVue Mini User manual

DIVERSITECH

DIVERSITECH ClearVue Mini User manual

DIVERSITECH CP-16 Manual

DIVERSITECH

DIVERSITECH CP-16 Manual

DIVERSITECH INSTALL+ PH-0.8-LC User manual

DIVERSITECH

DIVERSITECH INSTALL+ PH-0.8-LC User manual

DIVERSITECH CP-22 User manual

DIVERSITECH

DIVERSITECH CP-22 User manual

DIVERSITECH CP-22 Manual

DIVERSITECH

DIVERSITECH CP-22 Manual

DIVERSITECH ASURITY PROCP-22S User manual

DIVERSITECH

DIVERSITECH ASURITY PROCP-22S User manual

DIVERSITECH CP-22LP-P User manual

DIVERSITECH

DIVERSITECH CP-22LP-P User manual

DIVERSITECH Pump House PH-2LE User manual

DIVERSITECH

DIVERSITECH Pump House PH-2LE User manual

DIVERSITECH Mini-Split CP-M230 User manual

DIVERSITECH

DIVERSITECH Mini-Split CP-M230 User manual

DIVERSITECH CP-22 User manual

DIVERSITECH

DIVERSITECH CP-22 User manual

DIVERSITECH Asurity ULTRACP-22 User manual

DIVERSITECH

DIVERSITECH Asurity ULTRACP-22 User manual

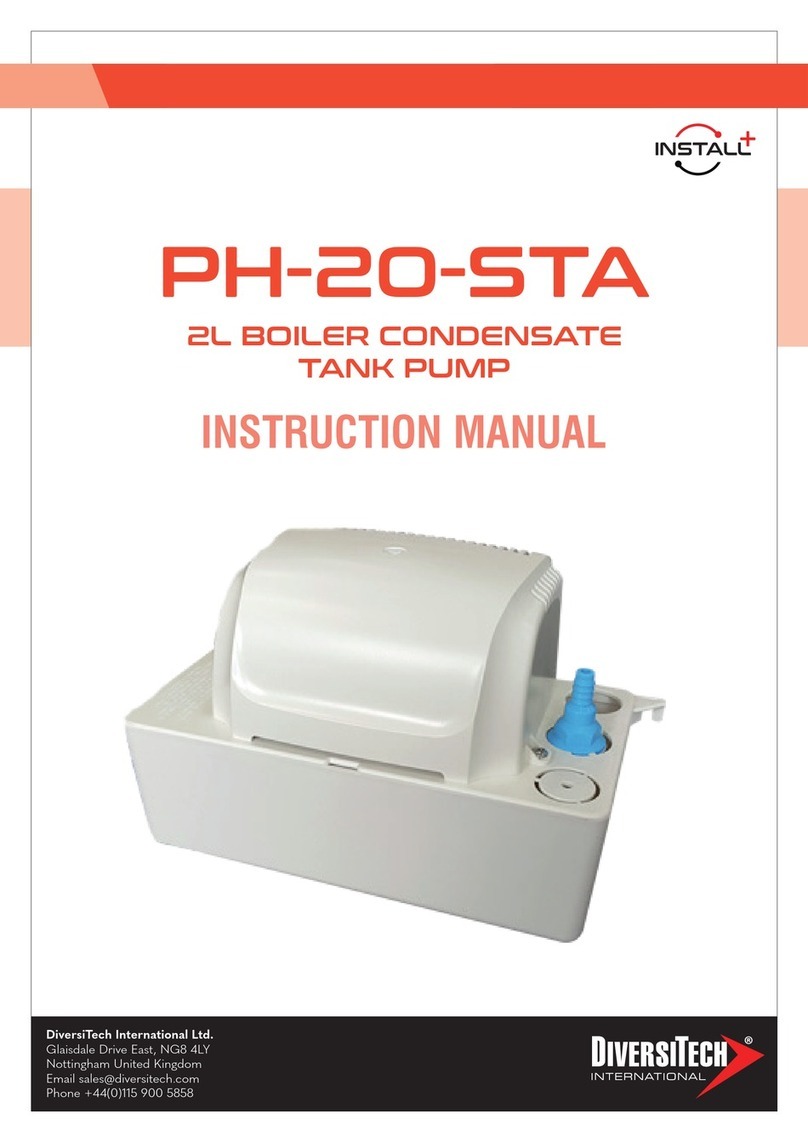
DIVERSITECH INSTALL+ PH-20-STA User manual

DIVERSITECH

DIVERSITECH INSTALL+ PH-20-STA User manual

DIVERSITECH ClearVue User guide

DIVERSITECH

DIVERSITECH ClearVue User guide

Popular Water Pump manuals by other brands

BUSCH R 5 series instruction manual

BUSCH

BUSCH R 5 series instruction manual

EBARA BEST ONE Operating and maintenance manual

EBARA

EBARA BEST ONE Operating and maintenance manual

Biral T2 S Installation and operating instructions

Biral

Biral T2 S Installation and operating instructions

Wilo Rexa FIT Series Installation and operating instructions

Wilo

Wilo Rexa FIT Series Installation and operating instructions

EINHELL RG-DP 8535 operating instructions

EINHELL

EINHELL RG-DP 8535 operating instructions

Nakayama PRO NP2035 manual

Nakayama

Nakayama PRO NP2035 manual

MYERS SR1830 Installation and service manual

MYERS

MYERS SR1830 Installation and service manual

Kolmeks L Series manual

Kolmeks

Kolmeks L Series manual

Pond Boss DLILYSOL40 manual

Pond Boss

Pond Boss DLILYSOL40 manual

Grundfos alpha2 l instructions

Grundfos

Grundfos alpha2 l instructions

Ribimex RIBILAND PRPGP750/67 User and maintenance manual

Ribimex

Ribimex RIBILAND PRPGP750/67 User and maintenance manual

Lincoln 85353 Service & operating manual

Lincoln

Lincoln 85353 Service & operating manual

Kärcher BP 2 Garden manual

Kärcher

Kärcher BP 2 Garden manual

IBO IVR-10 user manual

IBO

IBO IVR-10 user manual

Rietschle VVB 220.80 manual

Rietschle

Rietschle VVB 220.80 manual

Graco Husky 1050HP Operation

Graco

Graco Husky 1050HP Operation

Kärcher BPE 4200/50 instructions

Kärcher

Kärcher BPE 4200/50 instructions

Ecolab Chameleon PLUS BW3 installation guide

Ecolab

Ecolab Chameleon PLUS BW3 installation guide

manuals.online logo
manuals.online logoBrands
  • About & Mission
  • Contact us
  • Privacy Policy
  • Terms and Conditions

Copyright 2025 Manuals.Online. All Rights Reserved.