DNP IDW520 User manual

1
IDW520 Photo ID System
Quick Start Guide
© 2021. DNP Imagingcomm America Corp. DOC PN: DOC-R-IDW520-FX
All rights reserved. Rev: 05.04.2021
IDW520 ID Photo System
Panasonic FZ80 Camera Edition
2
IDW520 Photo ID System
Before You Begin
Use this guide to set up your IDW520 system for the first time, and as
a reference when you’re using the system every day. If you need more
information on how to operate your system, use the help videos on your
console (?button on the main screen) or download the User Guide from our
website: http://www.dnpphoto.com
Technical Support
For technical support or other information, contact DNP at:
Ordering Supplies
To order more media, contact DNP Support at http://www.dnpphoto.com or
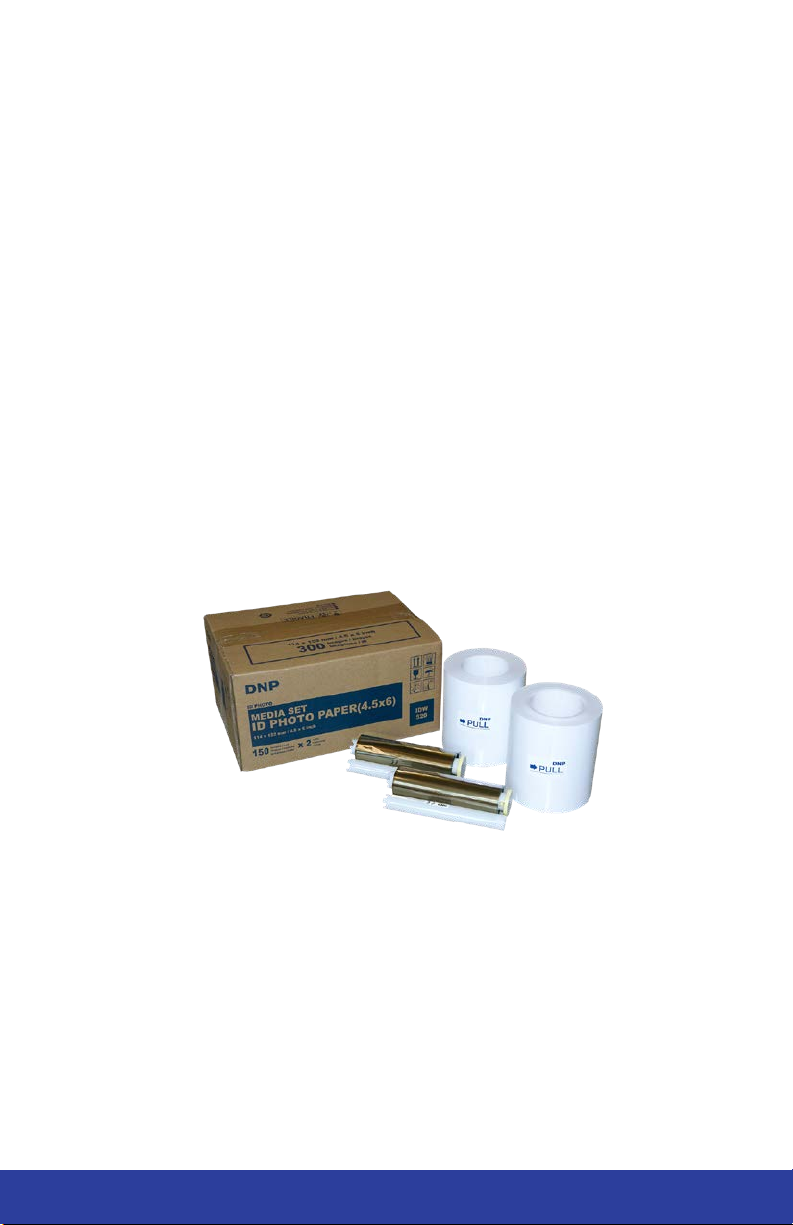
Each media kit contains 300 sheets (contents 2 rolls @150 sheets, 2 ink
ribbons @ 150 images)
PRINTER ID MEDIA KIT
3
IDW520 Photo ID System
INSTALLING THE SYSTEM
Preparing the Camera
• Unpack the camera.
• Locate the Wi-Fi SD card that was shipped in the box with your console
kit.
• Place the rechargeable battery in the battery compartment and the SD
card in the card slot. The battery compartment and SD card slot are
located on the bottom of the camera. Close the door.
• Use the supplied charging cable and plug to charge the camera
battery. The charging port is on the side of the camera inside the HDMI
compartment. Plug the cable into the charge port and the plug adaptor,
then plug the adaptor into a
wall outlet.
• Make sure the camera is
OFF before charging (the
camera will not charge if it is
powered ON. When the red
light appears on the top of the
camera, the battery is charging.
The camera battery must be
charged prior to use.
• Connect the camera strap and
lens lanyard to the camera.

4
IDW520 Photo ID System
Setting up the Printer
Printer Components
RIBBON
COMPARTMENT
PAPER
COMPARTMENT
PAPER TRAY
PAPER SCRAP BIN
PRINTER PAPER SPOOLS
Printer paper spacers must be removed for ID Meida use

5
IDW520 Photo ID System
Set Up your Printer
• Unpack the printer. Remove any
packaging foam or tape from the
outside of the printer.
• Connect your printer. Make sure
your printer is powered OFF. Connect
a USB cable to the type-B (small)
USB port (yellow circle) and to the
rear bottom console port.
• Connect the power cord to the printer
(blue circle) and plug it into a wall
outlet.
• Power ON the printer.
Install the Paper
• Prep the paper compartment. Remove the scrap bin and set it aside.
Remove the paper spools from the printer, located behind the scrap bin.
Note: The first time you set up your printer, make sure there are no spacers
on the paper spools. Rotate the spacer to unlatch it, compress the paper
spool tensioners, and slide the spacer off the spool. Repeat for the other
spool. The spacers are not used with the IDW paper 4.5” paper rolls.
• Mount the paper roll onto the paper
spools. Make sure the paper roll is oriented
so that the leading edge of the paper roll is
coming over the top of the paper roll and
directed towards the front and bottom of the
paper roll.
• Set the paper in the printer. Place the
mounted paper roll into the printer paper
compartment. Remove the seal on the paper.
• Feed the paper into the printer. Feed the
paper so that the paper comes over the top
of the roll and into the bottom of the printer
paper compartment. Continue feeding the
paper until the printer beeps. The ERROR
LED changes from flashing red and orange
to flashing red.
• Replace the scrap bin. Reset the scrap bin
in the printer.

6
IDW520 Photo ID System
Install the Ink Ribbon
• Orient the Ribbon. Orient the new ink ribbon so that
the supply side (larger side with yellow spool end) is
towards you, and the take-up spool (smaller side with
white spool ends) is towards the back of the printer.
• Place the ribbon in the printer. Place the left sides
of the ribbons onto the printer flanges one at a time.
Press the right sides of the ribbons into their holders until they click into
place. Remove any slack from the ribbon by rotating the ribbon towards
the supply side. Close the ribbon compartment.
NOTE: The yellow ribbon flange is inserted into the yellow holder.
• Wait for the blank prints. With the printer turned ON, the printer will
initialize and eject 3 blanks sheets of paper. The Power / Ready light
will remain lit. The printer is ready to print. If the error light remains lit,
recheck that the paper and ribbon are loaded correctly.
• Install the paper tray. The paper tray can hold up to 20 prints. However,
it is recommended that prints are removed from the tray at regular
intervals to prevent paper jams.
SUPPLY
TAKE-UP
PLACE THIS SIDE
FIRST
PLACE THIS SIDE
SECOND

7
IDW520 Photo ID System
Setting up the Processor Console
• Unpack the console from the shipping box. Remove any protective
plastic sheeting, packaging materials, or foam from the processor
console.
• Plug the printer USB cable into the bottom port on the back of the
console.
• Plug the power cord into the console power port and into a wall outlet.
Do not power on the processor console at this time.
BOTTOM USB
PORT POWER PORT

8
IDW520 Photo ID System
USING THE SYSTEM
Starting the System (for the 1st time)
Follow the proper sequence when powering ON the system. First the photo
printer, then the IDW520 console, and finally the passport camera.
• Power ON the ID Photo Printer.
• Press the power switch on the back of the printer. As the printer
initializes, it will check the media quantities and make sure everything
is properly installed.
• When the power light on the printer is green, it is ready for use.
• Power ON the Processor Console.
• Press and hold the power button on the right side of the console
for a few seconds. Release the power button when the boot screen
appears and the console will complete booting-up.
• The console will initialize.
• When the main screen is displayed on the console and the printer
window has a green outline, you can continue.
• Once the printer and console are powered ON, a POST test image is
printed - this signals that the printer and console are connected and
ready for use.
• Power ON the ID Photo Camera.
• Make sure the battery is fully charged and the SD Wi-Fi camera card
is installed.
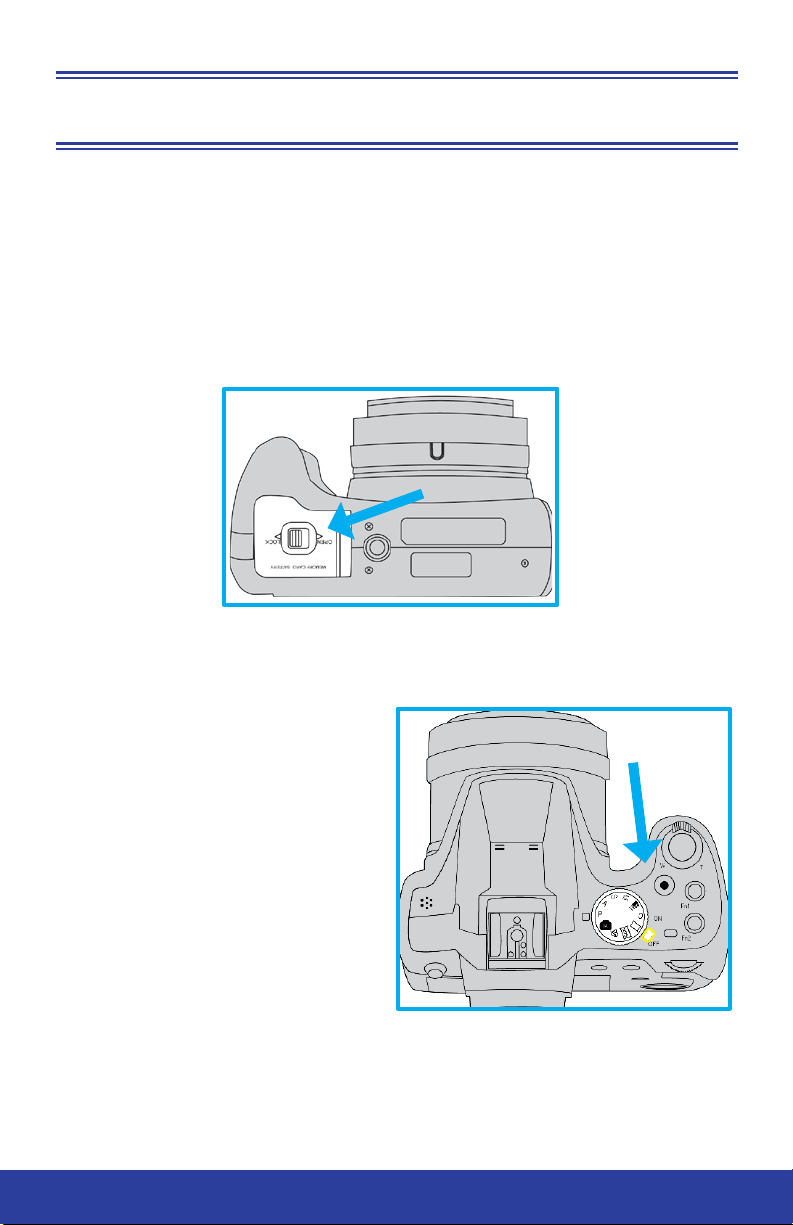
• Make sure the dial on the top of the camera is in the P position.
• Power the camera ON.
• The camera will initialize and the LCD screen on the back of the
camera will power on.
• Verify the system is ready for use.
• The camera icon turns green when the system is ready for use.
You are now ready to take ID photos!
9
IDW520 Photo ID System
1. Start the System
• Follow the proper sequence when powering ON the system. First the
photo printer, then the IDW520 console, and finally the passport
camera. Do not turn the camera ON until you see the console main
screen.
• When you see the CAMERA CONNECTED message on the console,
you’re ready to begin. This takes about a minute.
2. Take the photo.
• Place the subject in front of a white or off-white background with no
textures or patterns.
• Have the person stand (or sit) close to the background to minimize
shadows.
• If possible, use lights to properly illuminate the subject and/or use the
camera flash to further reduce shadows.
• Stand 6 feet (2 meters) away from the subject. Hold the camera so that
the camera lens is eye-level with the subject.
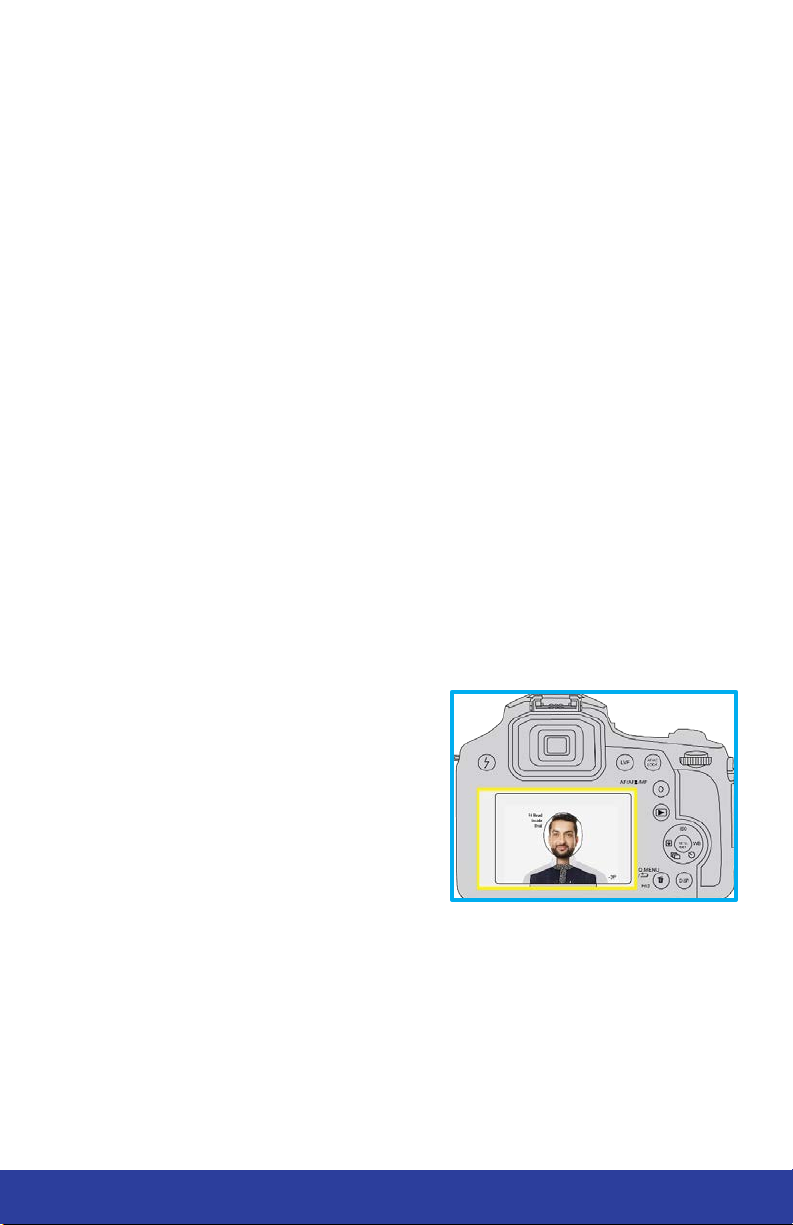
• Center the subject’s head in the guide on the camera screen. Use the
zoom to line up the subject’s head within the guide.
• Take the picture.
• Review the photo on the camera screen and verify that the subject’s
head fits within the guides.
• Press the Fn2 button on the top of
the camera.
• The print count menu appears on
the camera LCD screen. Check that
print count is 1and press the MENU/
SETbuttontosendtheimagetotheIDW520
console. The printer icon appears
and the image transfer begins.
3. Exit PLAYBACK Mode.
• Press the PLAYBACK button again to exit PLAYBACK mode and return
to CAMERA mode.
Do not leave the camera in PLAYBACK mode.
10
IDW520 Photo ID System
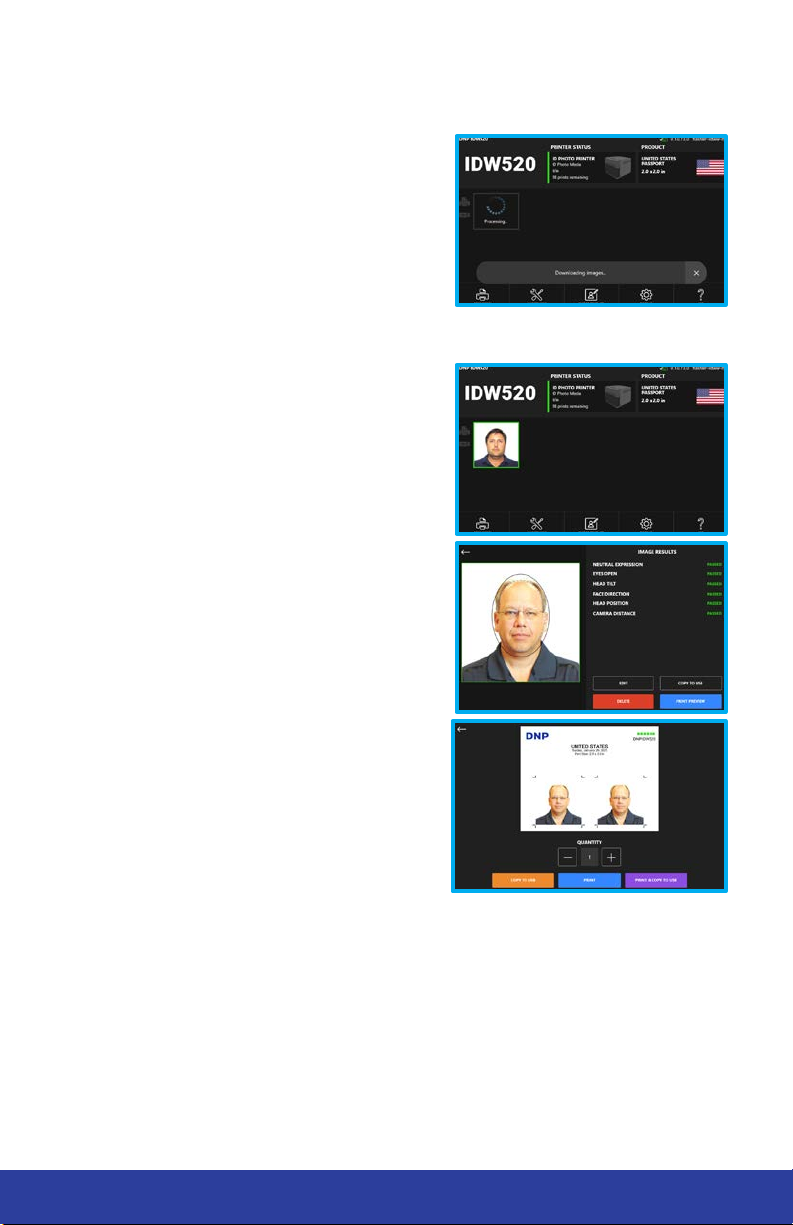
4. Verify the Image Transfer.
• The IDW520 console displays a
DOWNLOADING IMAGE message.
As the thumbnail appears a
PROCESSING message appears
on each thumbnail. When the
DOWNLOAD COMPLETE message
appears, your images have
transferred.
• For information on transferring
multiple images at once, see your
user manual.
5. Print the image.
• Images that transfer appear in your
image gallery. Select an image by
touching it. This opens the Image
Results screen. From this screen you
can:
• Press PRINT PREVIEW to review
and print your image.
• Press EDIT to edit your image
• Press DELETE to delete your
image.
• Press COPY TO USB to copy this
image to a USB drive.
• From the print preview screen, press
the PRINT button to print the image.
You can also copy to USB or print
and copy to USB from this screen.
Reprinting Images
Reprinting an image is simple! From the main screen, touch the thumbnail of
the image. From the inspection screen, press the Print Preview button. On
the review screen, press Print.
Other manuals for IDW520
1
Table of contents
Other DNP Printer manuals


