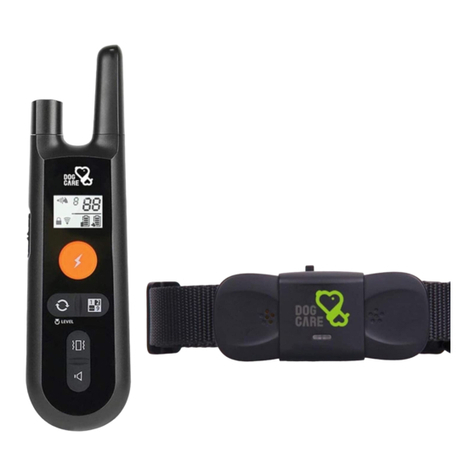
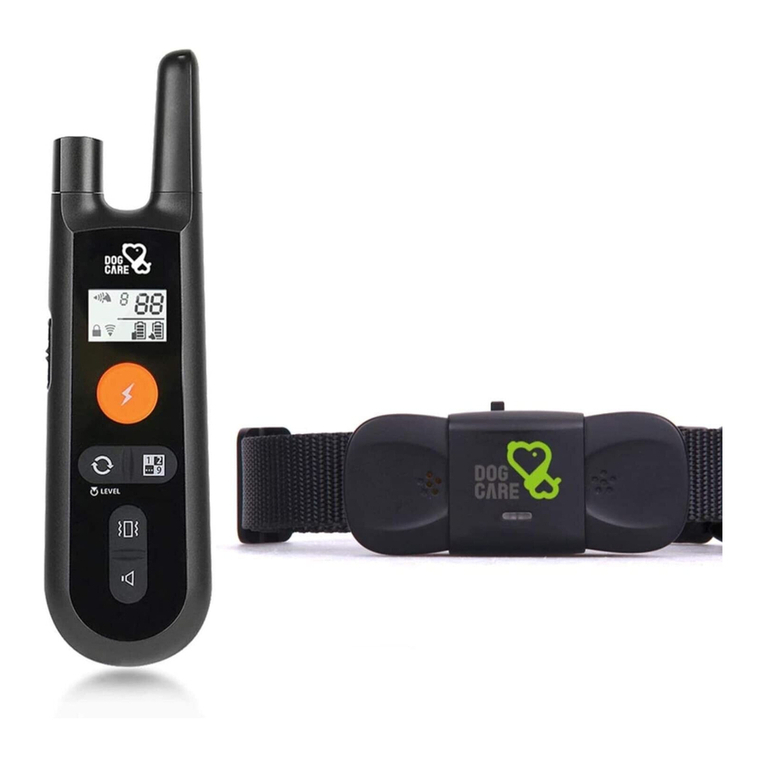
Dog Care WELL-D SD EC11 User manual

WELL-D SD
Dog Training Collar
(Model: EC11)
DogCare WELL-D SD Dog Training Collar (Model: EC-11) FAQ’s
1.
Can’t turn on Remote.
a.
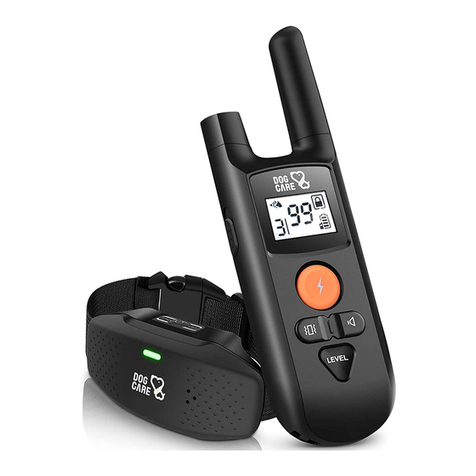
Please make sure the remote is charged. Plug the charging cable into the port at the
bottom of the remote and the other end into a working power outlet. Charging should
take about 2 to 3 hours. (It is suggested to charge only for 2 to 3 hours to preserve longer
battery life).
b.
After charging, twist the knob on the top left of the remote clockwise. The remote should
beep and the screen should light up. The battery level will be indicated by the bars shown
on the battery.
2.
Can’t turn on the Receiver.
a.
Please make sure the Receiver (collar) is charged.
The light on the receiver (collar) should blink
green if it is charged. If it needs to be charged it will turn red.
Plug the charging cable into the
port at the bottom of the receiver and the other end into a working power outlet.
Charging should take about 2 to 3 hours. (It is suggested to charge only for 2 to 3 hours to
preserve longer battery life).
b.
Press and hold the ON / OFF button on the top of the Receiver until the collar makes a
double beep and vibrates (press it hard).
3.
The Receiver/Collar does not respond.
a.
Make sure the receiver and the remote are both charged and have enough power.
b.
Make sure the receiver and remote have been paired. (See #6).
c.
Check to see that both units are turned on.
d.
If you have more than one receiver check your remote control and make sure that the
receiver is on the corresponding channel. (Test the different channels if necessary by
changing the channel with the button on the right side of the remote and pressing the beep
or vibrate button to confirm. Re-pair if necessary. See #6).
e.
Press the beep and/or the vibrate button to test the response. (To test the shock see #9).
4
.
The Receiver/Collar is not charging.
a.
When not in use the collar automatically turns off after about 6 to 8 hours. If any
button is pushed the time is extended.
b.
Turn ON the Receiver/Collar first and then the Remote Control. Test the collar by
pushing the vibrate or beep button.
5. The collar turns off on it’s own.

a. If no signal (beep, vibration or shock) is sent to the Receiver/Collar within 6-8 hours, it
will go into Sleep Mode (the collar will turn OFF). To use the units again, make sure to
turn them ON.
b. This is designed to save power, but also to remind owners to check the prong’s contact
with their dog’s skin.
6.
How to “Pair” the receiver (collar) with the remote.
a.
The remote and receiver have been paired at the factory. Channel Display is “1”. (The
EC-11 supports a maximum of 3 receivers).
i.
To start, the collar should be turned OFF. Press the ON/OFF button on the top
of the collar for 3 to 5 seconds. The indicator will not flash when it is off.
(When On it flashes green about every 5 seconds).
ii.
The remote should be ON. Twist the knob at the top left of the remote
clockwise.
iii.
Hold the ON/OFF button on the collar for about 5 seconds until the light
alternately flashes green and red.
iv.
Then push the small orange pairing button on the back of the remote for about
5 seconds. When it pairs the receiver (collar) will beep and will go back to
flashing green at a normal speed.
v.
You can test by pressing the beep or vibration buttons.
7.
To Pair Additional Collars to the Remote. (EC-11 can pair up to 3 collars on 1 remote).
i.
The collar should be turned OFF. Press the ON/OFF button on the top of the
collar for 3 to 5 seconds. The indicator will not flash when it is off.
ii.
The remote should be ON. Twist the knob at the top left of the remote
clockwise.
iii. Toggle the channel switching button and select channel 2 or 3. The display will
show the channel number.
iv.
Hold the ON/OFF button on the collar for about 5 seconds until the light
alternately flashes green and red.
v.
Then push the small orange pairing button on the back of the remote for about
5 seconds. When it pairs the receiver (collar) will beep and will go back to
flashing green at a normal speed.
vi.
You can test by pressing the beep or vibration buttons.
8.
What does the security key lock function do?
a. The security lock button is located on the left side of the remote. It locks or unlocks the
remote. In the locked position it will prevent the remote from working and from shocking
your dog if a button on the front of the remote is accidentally pushed.
9.
How do I test the shock?
a. Make sure the receiver and remote are charged.
b. Adjust the static/shock level to about 10. (You should feel something at this level, but it
won’t be too powerful).
c. Press and hold the static level regulator button (Level) on the remote while simultaneously
rotating the knob on the top left to the desired strength.

d. To test the shock both prongs must be in contact with the skin. (It is suggested to test on
your right forearm at about level 10). When both electrodes/prongs are in contact with
your skin make a quick press to the shock button (orange button). Don't hold down the
button, and don't press it multiple times, just one click.
e. You can adjust the level up to 15 or 20 if you don’t feel anything.
10.
Shock Setting does not seem to work on my dog.
a. Both electrodes (prongs) must be touched simultaneously for the shock to work.
b. You may want to change the shock levels. Start at 30 or 40 and go up by 5 or 10 each time
when testing to see if it has an effect on your dog.
c. If your dog has a thick undercoat you may need to separate the fur to make sure that both
electrodes are touching their skin.
d. You may need to trim some of the fur to make sure your dog’s skin touches both prongs.
e. You can also wet the area as water helps to conduct the electric static.
11.
There is a delay between when I push the orange shock button and when the shock happens.
a. When the battery is low there may be a delay with the shock function. Make sure the
remote and receiver are fully charged.
b. Do not hold down the shock button. Try giving one quick press.
12.
Can I remove the metal prongs and just use the beep and vibrate settings?
a. No. The metal prongs cannot/should not be removed. Removing them will cause the collar
to be ineffective.
b. If you don't want to use Static/Shock you can set the “shock level” to the minimum.
c. Silicone caps that come with the training collar can be placed on the prongs. This will
slightly lessen the strength of the shock through the prongs. (Extra or replacement silicone
caps can be purchased at): https://www.amazon.com/DOG-CARE-Training-Replacement-
Caps
d. Note: Both prongs need to be in contact with your dog’s skin for the shock to work.
e. Note: The collar should not be worn for over 8 hours. You should often check the area
where the prongs contact your dog and make adjustments as necessary to avoid irritation.
f. Never use the collar with receiver attached to a leash. The metal prongs could hurt your
dog.
13.
What size dog is this collar for?
The collar fits dogs from around 10 lbs to 100 lbs. The belt is adjustable and fits neck sizes
from 9.8 inches to 24.8 inches.
14.
The collar/belt does not fit my dog.
a. The collar is adjustable. When fitting the training collar on your dog you should be able to
fit one or two fingers between the collar and your dog’s neck.
15.
The collar/belt ripped where it is attached to the receiver.
a. The belt on model EC-11 is not replaceable as it comes attached to the receiver.
b. If this was caused by improper use i.e. the dog chewing the belt, a new training collar can
be ordered directly from our DogCare website at:
https://dogcareglobal.com/collections/all-products/products/dog-training-collar-receiver-1
or through Amazon at: https://www.amazon.com/Dog-Training-Collar-Receiver-
Rechargeable.
c. If this is a product defect you can contact customer support. You may be asked to send a
picture and a brief explanation of what happened along with some additional information.
16.
Where can I purchase just the collar/receiver?
a. You can purchase a second collar at: https://www.amazon.com/Dog-Training-Collar-
Receiver-Rechargeable
The EC-11 model remote will pair with up to 3 receivers.
b.
Note: The remote is not sold separately from the receivers/collars.
17.
Can I buy the Remote Control only?
a.
No. The Remote is not sold separately from the receivers/collars.
18.
Does the collar stop my dog from barking without using the remote controller?
a.
No. This collar is manually controlled by the owner/trainer. It is a training collar, not a
bark collar. DogCare, Inc. does sell an automatic, bark-activated collar:
https://www.amazon.com/DOG-CARE-Rechargeable-Bark-Collar
19.
The receiver is not waterproof.
a.
The receiver is Rainproof.
b.
The receiver is made of waterproof materials, but it is possible that water may get into
the charging port. Always make sure that the port is tightly covered. It might be helpful
to also cover the port with a strong tape to prevent water from getting in.
c.
If water gets into the receiver you could try to dry it with a hair dryer or stick it in dry
rice for 8-hours. These actions may help with waterproof function.
Training
1.
Use verbal commands first. Supplement with a corrective stimulus only as needed.
2.
Be consistent with your verbal commands, using the same word(s) every time.
3.
Work with your pet on one behavior at a time to avoid confusion or frustration.
4.
Use as little stimulus as possible and only to reinforce verbal commands as necessary.
a.
You can start by using the beep as a warning along with your verbal command. The
dog will become conditioned to the beep (and your verbal command) preceding the
corrective stimulus and will soon learn to recognize it as a warning.
5.
Using food, treats, and praise is recommended to help with positive and effective training.
6.
Do not rely solely on this product to train your dog. Some dogs may not respond to this
product.
•
If your dog shows signs of growling, snarling, biting, or aggression while using the collar,
discontinue use immediately and contact a professional trainer for advice.
Safety
1.
The receiver collar is not a regular collar and should never be attached to a leash to walk your
dog. The metal prongs could hurt your dog during pulling.

2.
To avoid rashes or discomfort on your dog’s skin do not leave the collar on your dog for over 8
hours.
3.
Check periodically to make sure that the area where the prongs contact your dog’s skin are
not irritated. You can adjust the collar slightly to other spots on your dog’s neck. You can also
use the silicone caps to cover the metal prongs.
4.
Do not allow children or anyone with little or no experience with dogs to handle this training
device.
5.
This device is only intended to be used to train dogs. It should not be used for other purposes.
6.
Do not use this device on dogs that are under 6-months, sick, pregnant, or older dogs.
7.
For aggressive dogs, please use this device with caution.
For additional assistance
please contact our customer support team at 1-833-220-1900, 9:00am to
9:00pm Eastern Time, 7-days a week. You can also Chat with us at:
https://dogcare.afterservice.vip/web/index. Or Email us at: [email protected].
Table of contents
Other Dog Care Pet Care Product manuals

Dog Care
Dog Care MANNER TM01-1 User manual

Dog Care
Dog Care TC05 User manual

Dog Care
Dog Care NOAH 2.5 DF01 User manual

Dog Care
Dog Care WELL-D LE TC08 User manual

Dog Care
Dog Care NOAH DF01 User manual

Dog Care
Dog Care TC01 User manual

Dog Care
Dog Care TC05 User manual

Dog Care
Dog Care PC01 Installation guide

Dog Care
Dog Care EDGE UT01 User manual

Dog Care
Dog Care TC01 User manual