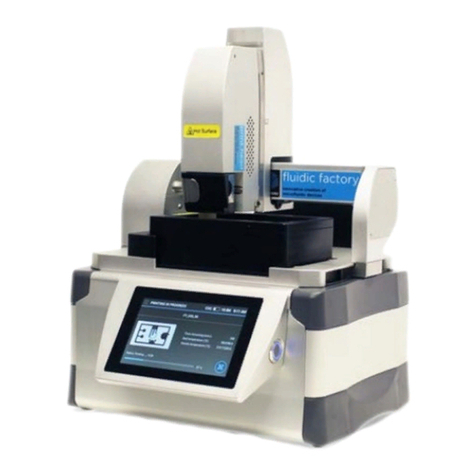
Dolomite fluidic factory User manual

MAR-000276_v.1.3
Chapter: Introduction
Page 1 of 48
Fluidic Factory
USER MANUAL
Version: 1.0
Author: AM
Date: xx/xx/2016
P/N: xxxxxxx
Fl
P/N:
Fluidic Factory 3D Printer
USER MANUAL
Version: 1.3
Author: AM
Date: 16/03/2016
Part Number MAR-000276

MAR-000276_v.1.3
Chapter: Introduction
Page 2 of 48
Contents
1Introduction...................................................................................................................................... 4
2Safety .............................................................................................................................................. 7
3Using the Fluidic Factory................................................................................................................. 9
3.1 Overview ................................................................................................................................. 9
3.2 Box Contents.........................................................................................................................13
4Quick Start Guide .......................................................................................................................... 15
Installing and running the Fluidic Factory .....................................................................................15
4.1 Assembly Instructions ........................................................................................................... 17
4.1.1 Attaching the Print Head to the Fluidic Factory.............................................................17
4.1.2 Fitting the Heated Print Bed and Insert .........................................................................19
4.1.3 Fitting the Filament Coil, Holder Guide and Nozzle ......................................................20
4.2 Attaching the Gearbox .......................................................................................................... 22
4.2.1 Powering up the Fluidic Factory.................................................................................... 22
5Operating the Fluidic Factory ........................................................................................................ 24
5.1 Date and Time Settings......................................................................................................... 24
5.2 Recent Samples .................................................................................................................... 24
5.3 External Storage ................................................................................................................... 25
5.4 Tools...................................................................................................................................... 25
5.4.1 Move printer to home position.......................................................................................25
5.4.2 Move printer to cleaning position ..................................................................................26
5.4.3 Calibrate printer............................................................................................................. 26
5.4.4 Detach Print Head from printer ..................................................................................... 27
5.4.5 View application logs..................................................................................................... 28
5.4.6 Export logs to external storage .....................................................................................28
5.4.7 Device information......................................................................................................... 28
5.5 Starting a Print Run ............................................................................................................... 28
5.6 Aborting a Print Run..............................................................................................................29
5.7 Changing the COC Filament Reel......................................................................................... 30
5.8 Recovering a Broken Filament.............................................................................................. 32
6Creating New Print Files ...............................................................................................................34
6.1 Installing the PC Software.....................................................................................................34
6.2 Using the PC Software..........................................................................................................36
6.2.1 Open File.......................................................................................................................36
6.2.2 Place/Review Design ....................................................................................................38
6.2.3 Review Print Path.......................................................................................................... 39
6.2.4 Export ............................................................................................................................39
6.2.5 Errors.............................................................................................................................40

MAR-000276_v.1.3
Chapter: Introduction
Page 3 of 48
7Support.......................................................................................................................................... 43
7.1 Servicing................................................................................................................................ 43
7.2 Cleaning ................................................................................................................................ 43
7.3 FAQ .......................................................................................................................................43
8Appendices....................................................................................................................................44
8.1 Appendix A Technical Specifications ....................................................................................44
8.2 Appendix B Error Codes .......................................................................................................45

MAR-000276_v.1.3
Chapter: Introduction
Page 4 of 48
1 Introduction
Thank you for purchasing the Fluidic Factory from Dolomite Microfluidics.
These instructions have been carefully prepared to guide the installer and
end-user through the installation and use of the Fluidic Factory.
Before attempting to use this product, please read this manual thoroughly
and follow the instructions carefully. In doing so you will ensure the safety of
yourself and that of others around you, and you can look forward to your
purchase giving you long and satisfactory service.
Please keep the manual easily accessible and in immediate vicinity of the
module. Only suitably qualified and trained personnel should operate this
unit.
Fluidic Factory is not only the world's first COC printer, but is also the first
printer able to fabricate fluidically sealed devices. Fluidic Factory uses FDM
(fused deposition modelling) method to melt the polymer at high
temperatures, eject it through the nozzle onto the print bed and let it
solidifies at temperatures below 75°C. What sets the Fluidic Factor apart
from all other FDM printers is the unique way in which the layers are formed.
It can achieve this because of a state of the art approach to 3D printing.
Intelligent software:
The desktop PC software analyses the 3D geometry of the device
and identifies the internal voids and surfaces. The print paths are
then created from the inside of the device outwards and the print
head deposits filaments in a continuous, leak-proof manner.
Intuitive user interface and workflow:
Fluidic Factory features a tap screen and USB drive to enable easy
transfer of print files from a PC. Once the USB is inserted into the
Fluidic Factory, the file becomes available to select and print. Once
printing is started, the screen displays the time left to print, real-time
status and filament use.
Inductive heating:
Fluidic Factory's clever design allows COC filaments to melt together
when depositing on top of each other. A small volume of polymer is
melted to a fluid state at very high temperatures and only held a few
seconds before ejecting and depositing in a 'squashed' manner. This
ensures excellent adherence, optimal polymer quality and leak-free
channels.
'Squashed' bead method*:
Fluidic Factory uses a 'squashed' bead method when depositing
beads as opposed to many traditional FDM printers which deposit
beads in circular cross-sections. The system is optimized for fluidic
sealing.*FDM printers eject the molten polymer, which cools down
and solidifies. What is ejected is called a bead. The size of the bead
depends on the speed that the nozzle is moving, the nozzle
diameter and the rate at which the polymer is ejected.

MAR-000276_v.1.3
Chapter: Introduction
Page 5 of 48
Figure 1 illustrates how the chip is built up in a series of layers and how the
squashed bead forms a fluidically sealed channel
Features are created by adding layers with an obround cross sectional area
("cylinder" with flattened, parallel top and bottom and semi-cylindrical sides).
As adjacent layers are printed, the polymer flows into the areas above and
below the semi-cylindrical layers to create one seamless layer
Figure 1

MAR-000276_v.1.3
Chapter: Introduction
Page 6 of 48
Why Use COC?
COC (cyclic olefin copolymer) has a number of unique properties that make
it an excellent material for printing microfluidic chips:
FDA approved
Optically transparent
Non-auto fluorescent
Excellent resistance towards water-soluble chemicals, acids, alkalis
and alcohols
Biocompatible
Very low water absorption
Compatible with various sterilizing processes
Excellent mechanical properties allowing more realistic prototype
manufacturing
Channel geometries, circular, triangular or rectangular channel
geometries can be printed (dependent on the mode of printing).
Other cross-sections are also possible.

MAR-000276_v.1.3
Chapter: Safety
Page 7 of 48
2 Safety
Warning and safety information
The printing bed and the print nozzle will get hot during normal
use. Avoid direct contact especially after long periods of use.
These areas will remain hot for some time even after printing has
stopped.
The Fluidic Factory has an uneven weight distribution, take care
during unpacking, assembly and if moving.
Robotic parts may move without warning.
The Fluidic Factory should only be used by competent, suitably
trained personnel after they have read and understood this
manual, and considered any hazard involved.
Do not cover the Fluidic Factory during use.
Place the Fluidic Factory on a solid horizontal surface. Ensure the
area around the unit is clear.
In the case of accidental spillage, carefully wipe with a dry cloth,
taking into account the nature of the spilled liquid and the
necessary safety precautions.
Comply with all safety and accident prevention regulations
applicable to laboratory work.

MAR-000276_v.1.3
Chapter: Safety
Page 8 of 48
Always connect the Fluidic Factory to an earthed AC power outlet.
The operating voltage is indicated on the specification sticker. Non
observance of this provision may result in damage to the Fluidic
Factory or in personal injury or damage to property.
This product does NOT comply with the ATEX directive and must
not be used in explosive atmospheres.
Disassembling any part of the Fluidic Factory other than those
described in this User Guide will invalidate the warranty.
Cleaning
Cleaning should only be performed by personnel trained in such
work, and who are aware of the possible dangers involved. The
Fluidic Factory (and all the associated hardware) has not been
designed for sterilisation or use with an autoclave.
Returning Equipment
Equipment which has been contaminated with, or exposed to, body fluids,
toxic chemicals or any other substance hazardous to health must be
decontaminated before it is returned to Dolomite Microfluidics or its
distributor. An RMA number must also be obtained Please contact
support@dolomite-microfluidics.com
Environmental Conditions
For indoor use only
Temperature range: +5°C to +40°C
Humidity: Maximum relative humidity of 80%

MAR-000276_v.1.3
Chapter: Using the Fluidic Factory
Page 9 of 48
3 Using the Fluidic Factory
3.1 Overview
Print Head
Heated Print Bed
On/off Button
Induction
Heater
USB Socket
Print Head Release
and Fitting Catch
Figure 2: Front View
Filament
Guide
Gearbox
Print Bed Insert
Tap Screen

MAR-000276_v.1.3
Chapter: Using the Fluidic Factory
Page 10 of 48
Mains Socket
and Power
Switch
Filament Reel
Holder Position
Sockets for Service Personnel only
Filament
Tensioning
Arm
Figure 3: Rear View

MAR-000276_v.1.3
Chapter: Using the Fluidic Factory
Page 11 of 48
Filament Guide
Filament
Guide Holder
Interface Plate
Filament
Tensioning Arm
Cooling Fan
Print Head Release
and Fitting Catch
Print Nozzle
Gearbox
Release Catch
Induction Heater
Figure 4: Print Head View

MAR-000276_v.1.3
Chapter: Using the Fluidic Factory
Page 12 of 48
Figure 5 below shows the interface at the Home Screen position.
Figure 5: Home Screen Interface
Clock and Date Adjust
Tools Selector
External
Storage
Tab
Recent
Samples
Tab
Filament Length
Indicator
Print Design
Files

MAR-000276_v.1.3
Chapter: Using the Fluidic Factory
Page 13 of 48
3.2 Box Contents
When you open the box containing your Fluidic Factory, ensure that you
have all of the following parts, as shown in Figure 6 below.
Component
Image
Core unit (Part Number: 3200524)
Print head (Part Number: 3200503)
Gearbox

MAR-000276_v.1.3
Chapter: Using the Fluidic Factory
Page 14 of 48
COC filament reel with nozzle and filament
guide (x4) (Part Number: 3200504)
Please note, for your convenience, the first one
of these assemblies comes ready fitted into the
Filament Reel Holder
Filament Reel Holder (Part Number: 3200501)
Heated Print Bed (Part Number: 3200502)
Print Bed Insert (x 2) (Part Number: 3200525)
Country Specific Power Cord
Figure 6

MAR-000276_v.1.3
Chapter: Quick Start Guide
Page 15 of 48
4 Quick Start Guide
Installing and running the Fluidic Factory
Unpack the contents of the box and check all the components match the box contents list in
section 3.2
Attach the Print Head by clipping it on the interface plate. The Release/Engage Catch must
be used to engage the Print Head (see section 4.1.1)
Fit the clean Print Bed Insert into the Heated Print Bed where it is magnetically held, then clip
it onto the Fluidic Factory Core Unit (see section 4.1.2)
Slide the Filament Coil/Filament Coil holder onto the rear of the Fluidic Factory ensuring the
Filament Guide is secured into the Filament Coil Holder. (see section 4.1.3)

MAR-000276_v.1.3
Chapter: Quick Start Guide
Page 16 of 48
Pull back the Filament Tensioning Arm and fit the Print Nozzle into the Print Head (see
section 4.1.3)
Offer the Gearbox up to the Print Head. Push back the Filament Tensioning Arm, rotate the
Gearbox clockwise pushing firmly on the bottom left corner of the Gearbox to lock it into
place. Release the arm.(see section 4.1.4)
Power up the Fluidic factory by pressing the Power Switch at the rear of the unit then
triggering the On/Off Button on the side of the screen (see section 4.1.5)
Perform a calibration by selecting Tools -> Calibrate Printer (see section 5.4.3). The Print
Bed must be free of any objects including chips and hands etc.

MAR-000276_v.1.3
Chapter: Quick Start Guide
Page 17 of 48
If a chip design is not yet loaded on the Fluidic Factory, convert chip .stl designs to .phff
format using the Fluidic Factory PC software, then export the design files to a USB memory
stick (see section 6.2)
Load chip design files onto the Fluidic Factory using a USB (see section 6.2.1)
Select the design you want to print and start the print run (see section 5.2 and 5.3)
4.1 Assembly Instructions
Once the Fluidic Factory is unpacked, it only takes 10 minutes to assemble
and start printing.
The following components must be fitted to the Fluidic Factory before
microfluidic chips can be printed;
1 Print Head
2 Heated Printer Bed and Insert
3 Filament Coil Holder
4 Filament Coil
5 Filament Coil Guide
6 Print Nozzle
7 Gearbox
4.1.1 Attaching the Print Head to the Fluidic Factory
NOTE: The Print Head can only be attached when the interface plate is in it upper position (see Figure 6)

MAR-000276_v.1.3
Chapter: Quick Start Guide
Page 18 of 48
With the Fluidic Factory disconnected from the mains
electricity, the Print Head can be fitted. Check that the
Interface Plate on the core Fluidic Factory is in its
upper position. If it is not already, manually pull the
Interface Plate upwards until the Release Catch is
above the case work as shown. See Figure 7 for the
correct position and Figure 8 for the incorrect position.
Align the two lugs at the bottom of the Print Head with
the recess on the interface plate. See Figure 9.
Push the Print Head whilst pushing in the release and
fitting catch. See Figure 10.
Figure 9
Figure 10
Figure 7
Figure 8

MAR-000276_v.1.3
Chapter: Quick Start Guide
Page 19 of 48
Ensure that the Print Head is fully engaged once the
Release and Fitting Catch has been released. See
Figure 11.
4.1.2 Fitting the Heated Print Bed and Insert
Fit the Print Bed Insert into the Print Bed with the handle
on the right facing away from the electrical contacts.
The Bed Insert is held in place by magnetic force. See
Figure 12.
Slide the Bed Insert so that it is justified to the bottom
right hand corner. See Figure 13.
Push the Print Bed into position so that the spring loaded pins
align with the contacts and the Print Bed sits flat on the Fluidic
Factory. See Figure 14 which is correct and Figure 15 which is
incorrect.
Figure 11
Figure 12
Figure 13
Figure 14
Figure 15

MAR-000276_v.1.3
Chapter: Quick Start Guide
Page 20 of 48
4.1.3 Fitting the Filament Coil, Holder Guide and Nozzle
Slide the Filament Coil in its holder onto the rear of the Fluidic
Factory. See Figures 16 and 17.
Ensure that the Filament Guide is pushed into the
recess on the Filament Reel Holder. See Figure 18.
Figure 8
Figure 18
Figure 16
Figure 17
CAUTION: The filament is slightly brittle, please handle any of the components that are in contact with the
filament with care, to avoid breakage. If the filament does break, follow the instructions in section 5.8
Other manuals for fluidic factory
1
Table of contents
Other Dolomite 3D Printer manuals