4
CENTRAL RV VACUUM
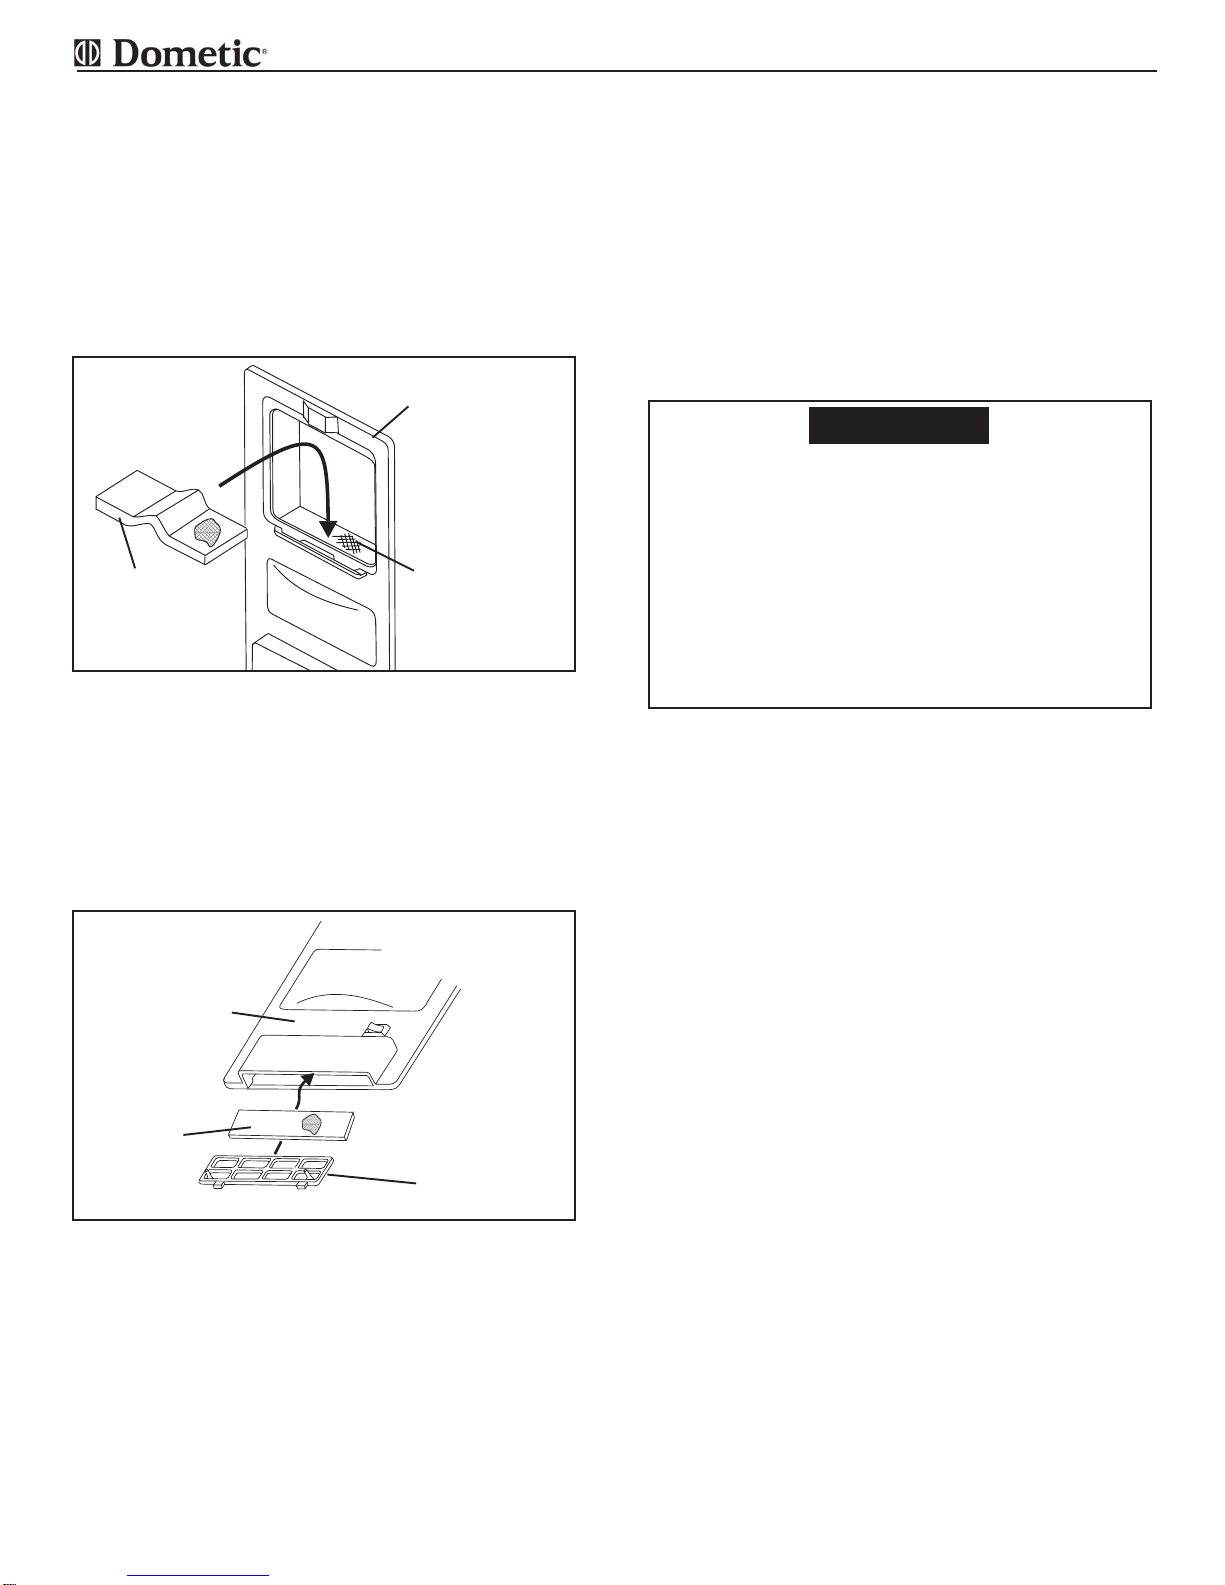
FIG. 3
FIG. 2
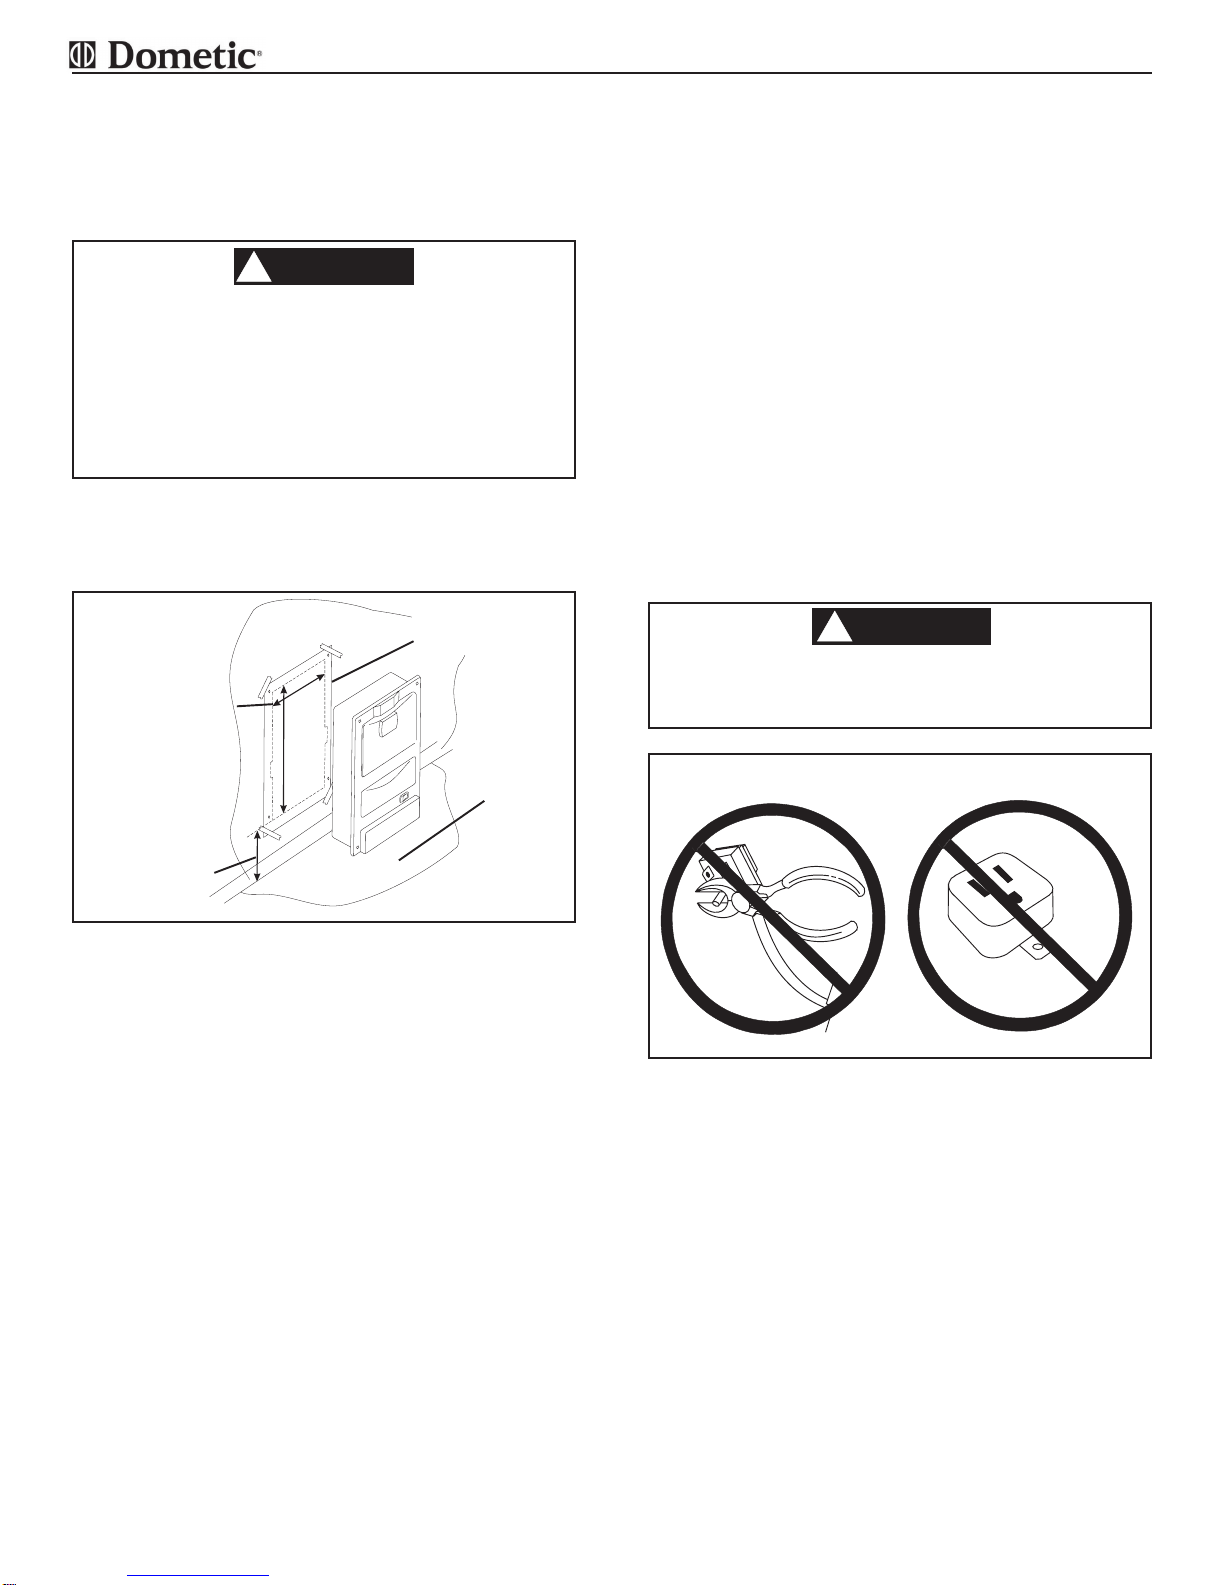
CUTOUT
OPENING
7-3/4” x 15-7/8”
6” MIN
CLEARANCE
WALL TAPE TEMPLATE
TO WALL
FLOOR
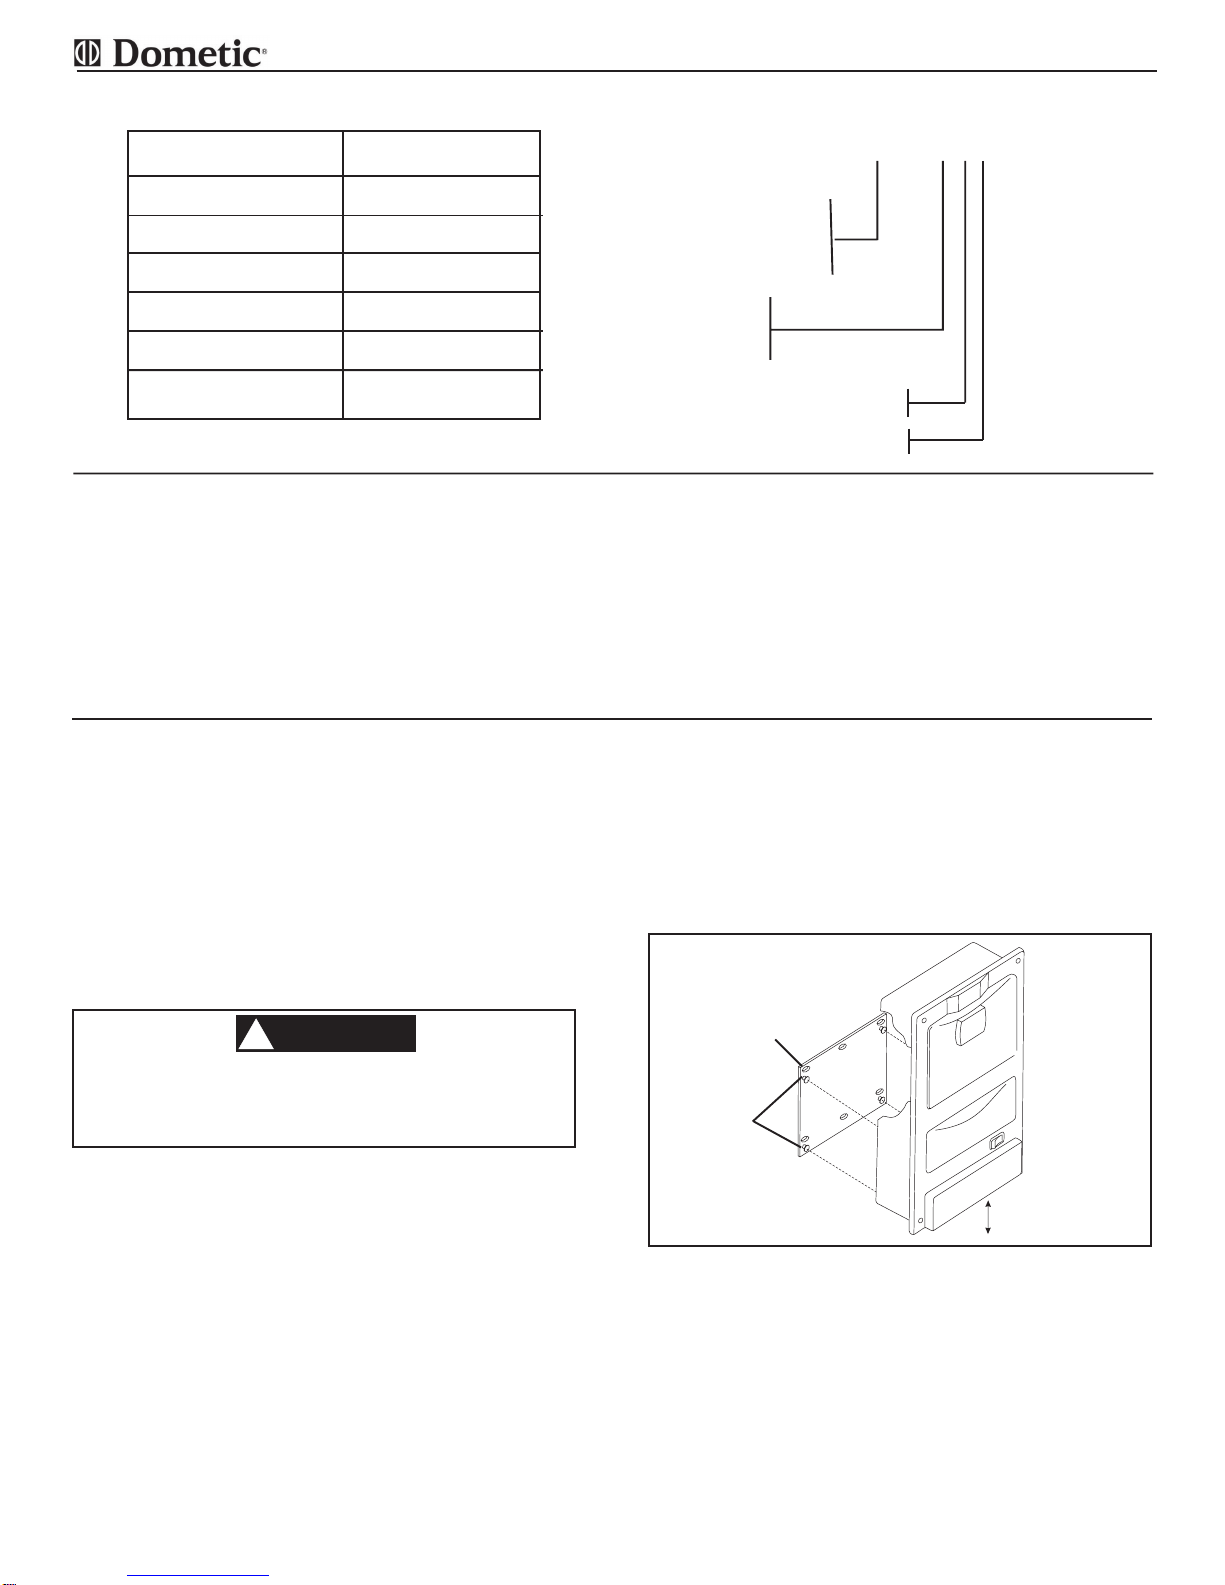
2. Flush Mount installation
a. To reach with vacuum hose as far as possible,
choosea wall or surface that is centrally located
andhasanearby 110VoltACpowerconnection.
The vacuum cleaner requires 3-7/8” wall depth
(measuredfromthefrontofthewall).
b. Attach paper template with tape to wall or sur-
faceaminimumof 6“ above the floor, if mounted
inaverticalposition.Thiswillallowsufficientclear-
ance for exhaust air. See FIG. 2.
g. Testunit for operation before installing. Check to
besure vacuumcleanerbag,motorfilter,exhaust
filterandgateare inplace.SeeOperatingInstruc-
tions, Steps D, E, and F. Slide the unit , bottom
firstintothe openingandsecuretowall withthe4
woodscrews.
Note:Neverusevacuumcleanerwithoutdustbag
or motor filter in place.
Note: Optimal installation uses 6 wood screws
instead of 4 to reduce risk of loosening due to
roadvibration.
C. GROUNDINGINSTRUCTIONS -EXTERNAL MOUNT
1. Thisappliancemustbegrounded. If it should mal-
functionorbreakdown,groundingprovidesapathof
least resistance for electric current to reduce the
risk of electric shock. See FIG. 3.
D. GROUNDINGINSTRUCTIONS -FLUSH MOUNT
2. Forpermanentlyconnected appliances, (in-wallin-
stallation) this appliance must be connected to a
grounded metal permanent wiring system; or an
equipment-grounded conductor must be run with
thecircuitconductors and connected to the equip-
mentgroundingterminalorleadontheappliance.
Note:Allwiringmustcomplywith theNationalElec-
tricalCodeANSI/NFPA 70-(latest edition); or CSA
Standard C22.1, Canadian Electric Code, Parts 1
and 2; and any applicable local codes.
c. Tapethe template to the mounting surface of the
desired location. The bottom of the cut out must
betheminimumof6”abovethefloor.
d. Centerpunchallofthe circles with an awl or nail.
Removethe template.Drawa lineconnectingthe
circlesusingapencil and straight edge. This will
outline an area 7-3/4” x 15-7/8” that is to be cut
out.
e. Drillthe4 corner marks with a 1/16” drill bit, then
sawoutthe opening. Be sure to followthelineas
the mounting holes are close to the edge of the
cut out.
Note: Instructionsalso printed on paper template.
f. Place the vacuum cleaner upside down with its’
back towards you. Remove the 2-3/4 ”x 1-3/8”
coverplateonthevacuumcleaner.Install16AWG
cable(ratedat 900 C) to theunit.Usenonmetallic
sheathed cable with ground (Romex) or flexible
metal conduit with ground, to electrical outlet.
(Check your local electrical code.) Make the
connection through the Romex clamp (do not
pinchwiring).Replace cover plate.
There may be electrical wiring in the wall.
DisconnectAC power cord and the positive
(+) 12 volt DC terminal at the supply bat-
tery. Failure to follow this instruction may
create a shock hazard causing death or se-
vere personal injury.
WARNING
!
To avoid possible electrical shock, be sure
thatelectricityisturnedoffatthemainswitch
or circuit breaker.