29-31 Richland St. Kingsgrove. Sydney NSW 2208 Australia
Phone: 02 9554 9600 | Fax: 02 9554 9433
enquiries@domuslighng.com | www.domuslighng.com
Installaon Manual
Control Knob
SENSTIME LUX
Note:
• Pleaseswitchthepoweroandletthelampcoolbeforetouchingthelamp(s).
• Whenadjusnglampholders,ensurethatlampsarenottouchingorincloseproximitytosensorhead
(morethan40mm),heatfromthelamp(s)maydistortthePIRSensorordestroytheplascencloserofPIR
Sensor.
• Loosenlocknutsandscrewsonsensorandlampbeforemakinganyadjustments.
• Do NOTaempttoopenthefaciaofthespotlight,asthiswillvoidwarranty.
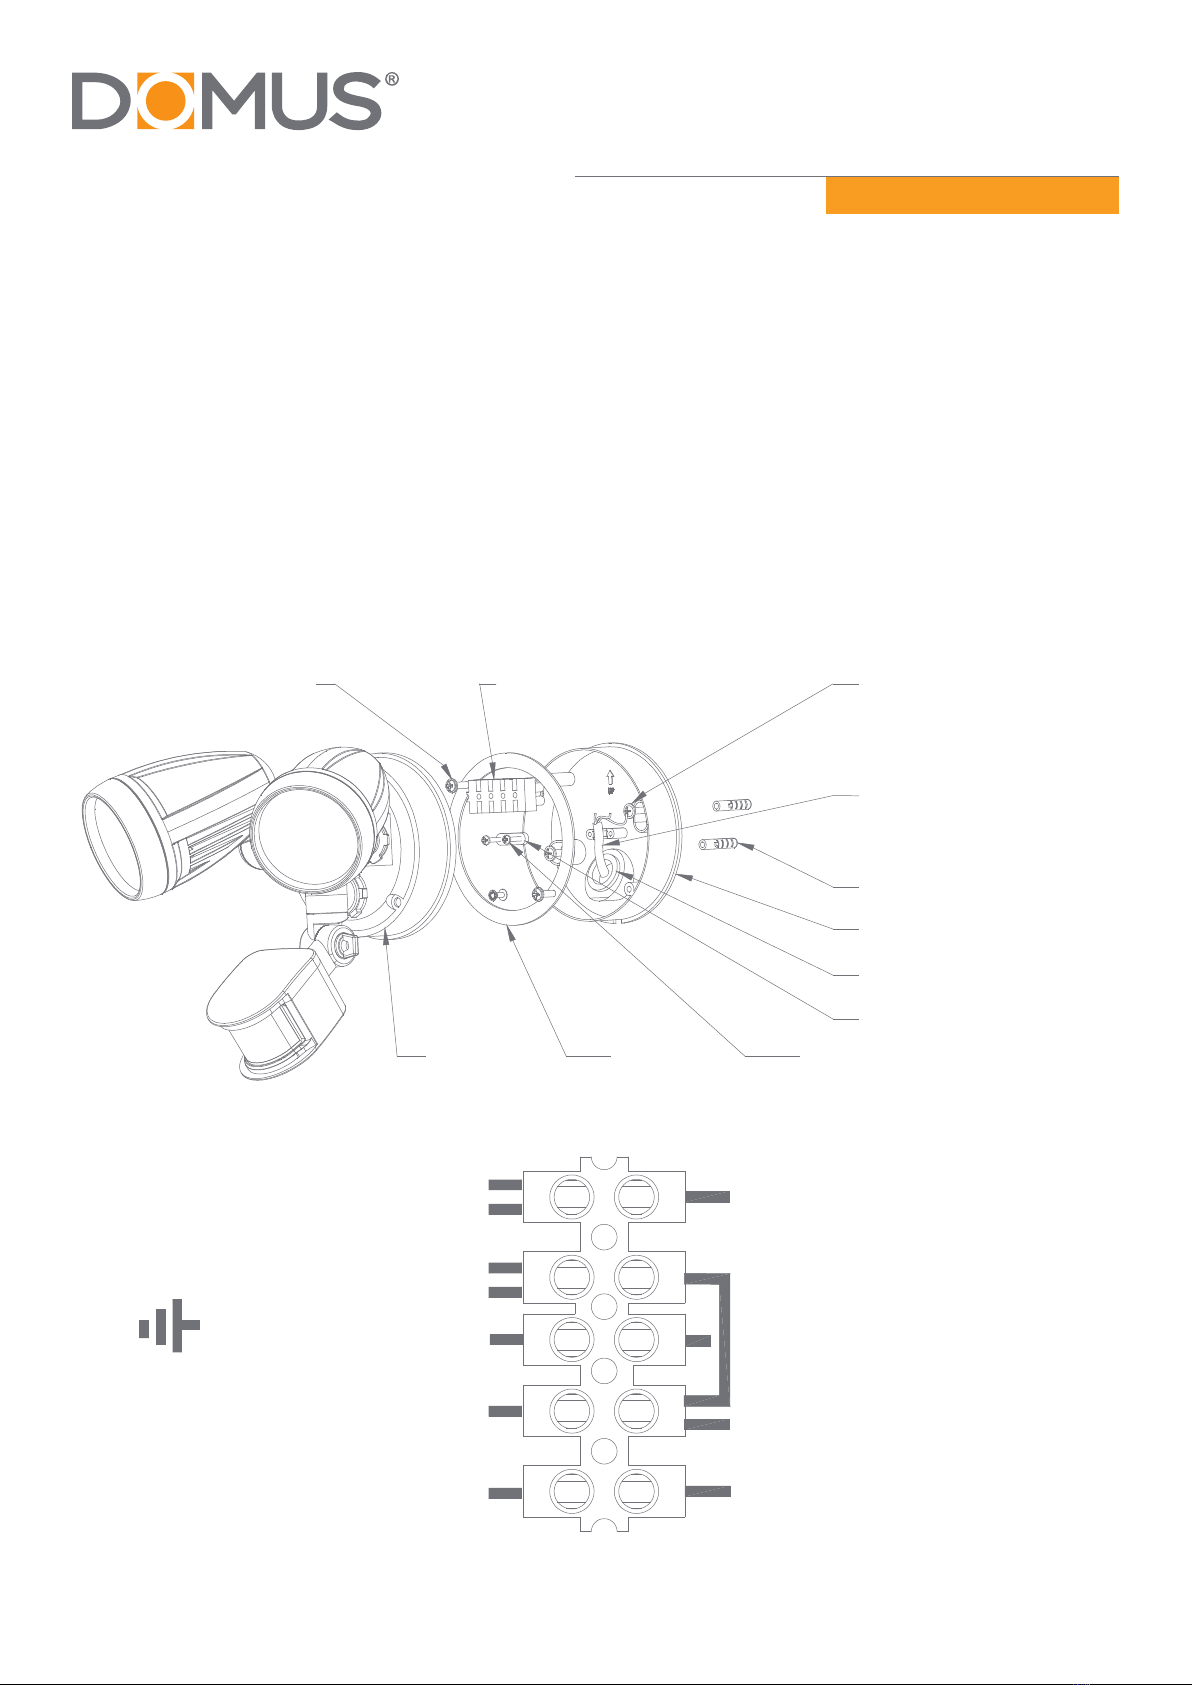
Notes for electrician
Thesecuritylampshouldbewiredtoitsownlightswitch.
Donotinterconnectwithotherlightsonthesameswitch.
Earthconneconmustberequired.
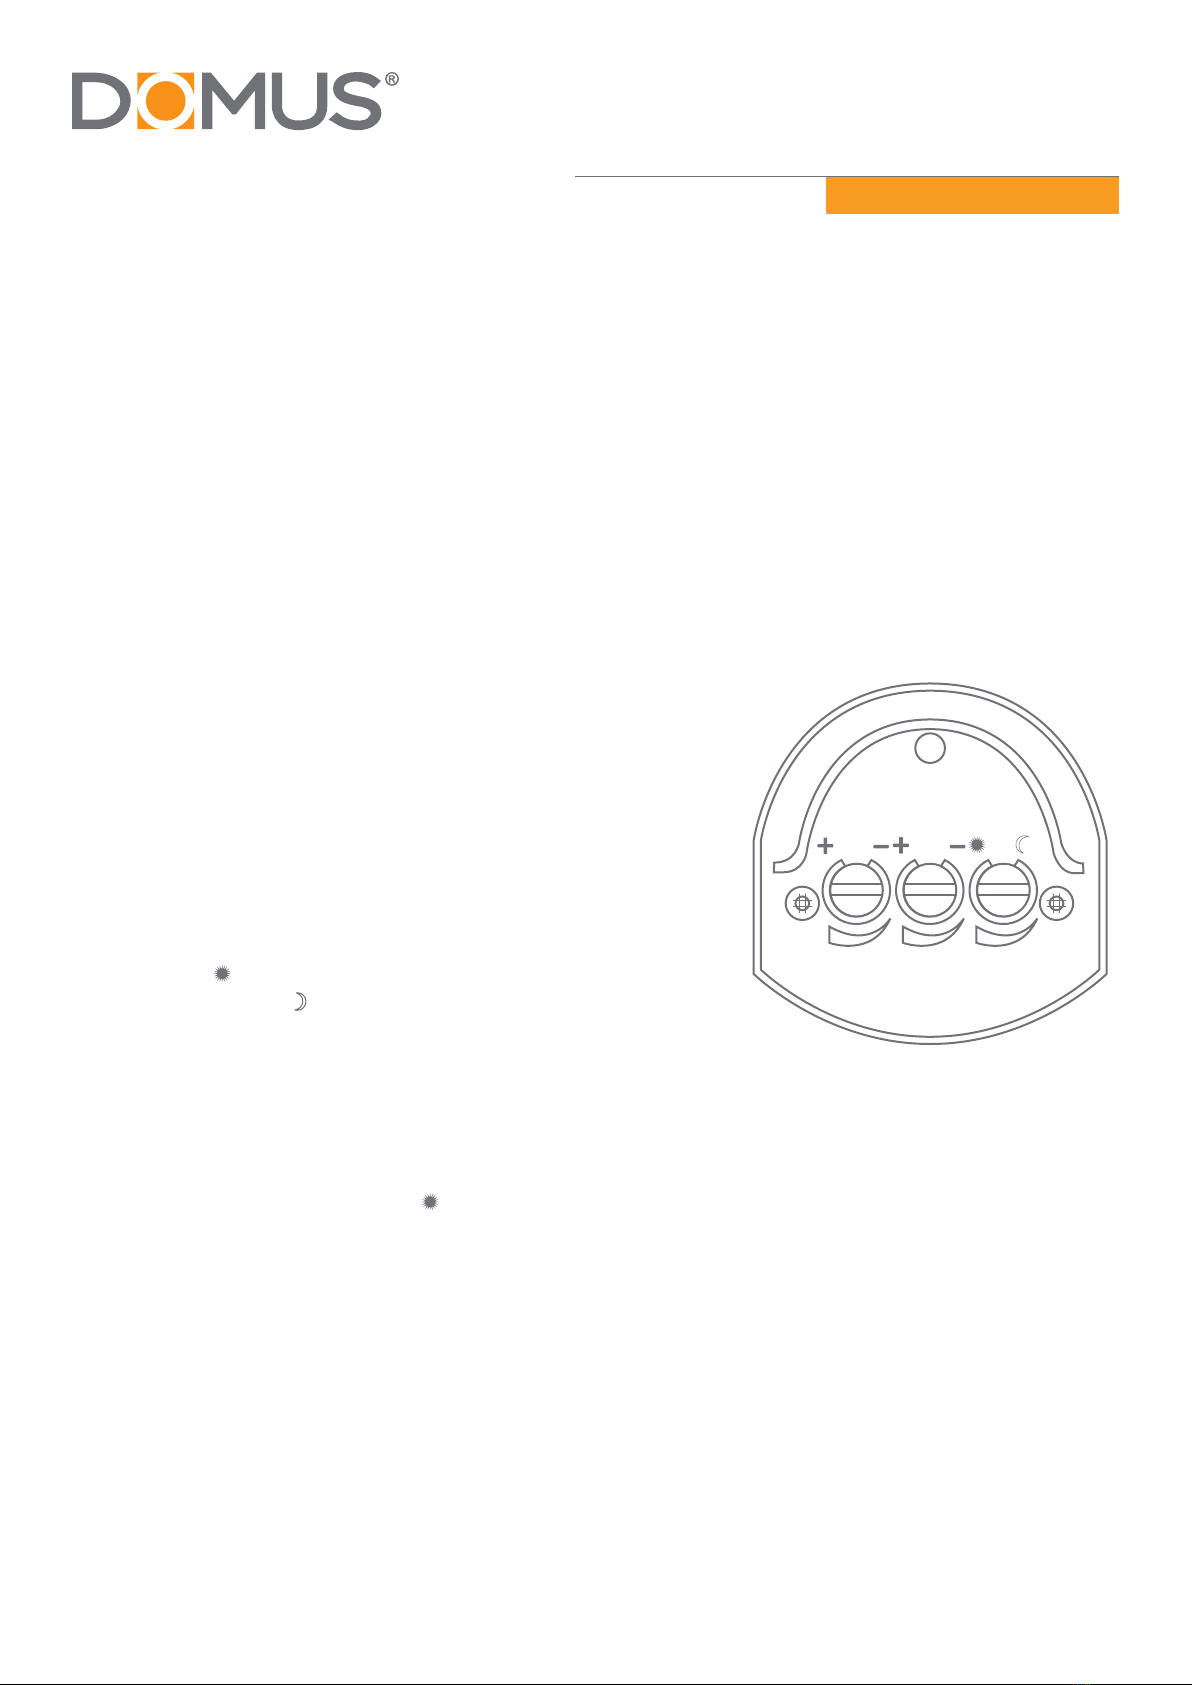
Understanding the controls
Adjusng the duraon me:Thelengthofmethatremains
switchedonaeracvaoncanbeadjustedfrom(10±5)seconds
to(4±1)minutes.RotangtheTIMEknob+to-willreducethe
duraonme.
Note:OncethelighthasbeentriggeredbythePIRsensorany
subsequentdeteconwillstartthemedperiodagainfromthe
beginning.
Adjusng the LUX control level: The Lux control module has a
builtinsensingdevice(photocell)thatdetectsdaylightand
darkness.The()posiondenotesthattheoodlightcanworkat
dayandnight,andthe()posiononlyworkatnight.Youcansetto
operatetheunitatthedesiredlevelbyadjusngtheLUXknob.
Adjusng the sensivity:ThesensivitymeanstheMaximum
distancewhichPIRSensorcanbetriggeredbymovementbody.TurningtheSENSknob+to-willdecreasethe
sensivity.
Seng the controls
1. PuttheLuxcontrolknobtolight()posion,turnthewallswitchonandwaithalfaminuteforthecontrol
circuittostabilise.AtthisstageensurethattheTIMEcontrolknobissetatminimumduraon.Thesecurity
lampwillnowswitchonandremainonforabout30seconds(within60seconds).
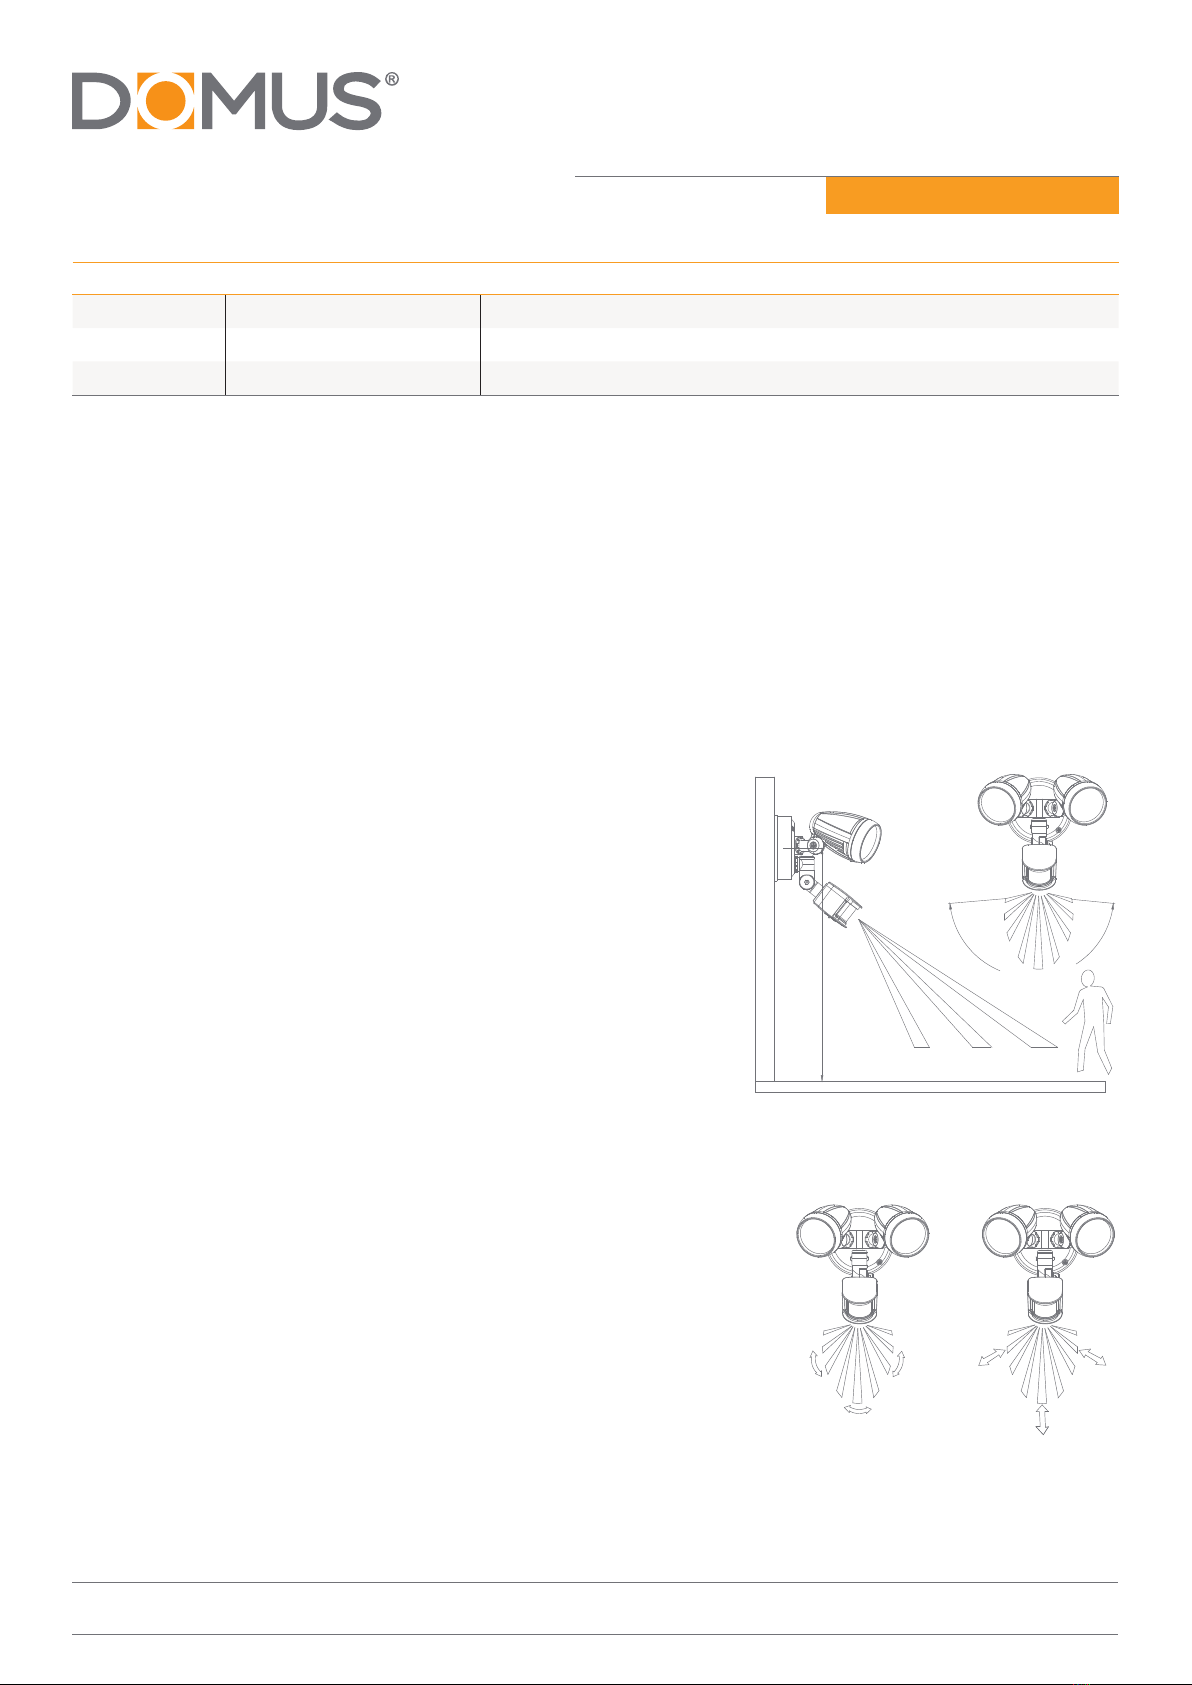
2. Directthesensortowardthedesiredareatobescannedbyadjusngtheelbowjointandswiveljointon
the sensor arm.
Important: loosen all lock nuts and screws on sensor and lamp before making any adjustments.
3. Haveanotherpersonmoveacrossthecentreoftheareatobescannedandslowlyadjusttheangleofthe
sensorarmunltheunitsensorsthepresenceofthemovingperson,causingthelighttoswitchon.
4. Adjustmecontroltorequiredseng.
5. Tosetthelightlevelatwhichthelightswillautomacallyswitch“on”atnight,turntheLUXcontrolknob
fromdaylighttonight.Ifthelampsarerequiredtoswitchonearlier,e.g.Dusk,waitforthedesiredlight
level,thenslowlyturntheLUXcontrolknobtowardsdaylightwhilesomeonewalksacrossthecentreofthe
areatobedetected.Whentheoodlightsswitchon,releasetheLUXcontrolknob.Youmayneedtomake
furtheradjustmentstoachieveyourideallightlevelseng.