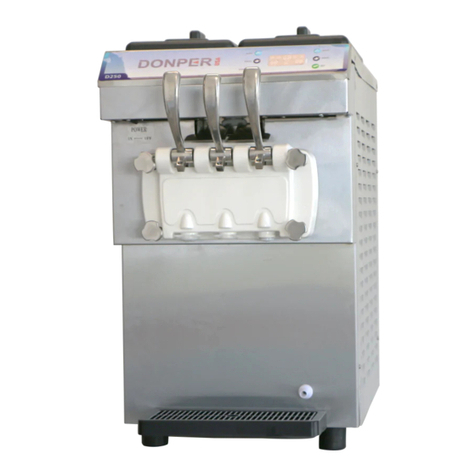
DONPER BH7480 User manual

DONPER USA—USER MANUAL
1 — COPYRIGHT DONPER USA 2015
Model BH7480 & BT7280
User Manual
www.donperusa.com 1‐844‐DONPER1

DONPER USA—USER MANUAL
2 — COPYRIGHT DONPER USA 2015
Thank you for your purchase of a Donper SoServe Machine.
It is important to read the enre User Manual before operang
the machine, as there are several safety issues you must know
and understand to safely operate the machine.
If you have any quesons about the material in this manual,
please call Donper USA at 1‐844‐366‐7371 or email us at
have read and understood the material in this manual.
Thank you again for your purchase and enjoy your machine!

DONPER USA—USER MANUAL
3 — COPYRIGHT DONPER USA 2015
Table of Contents
Introduction 4
Machine Specifications 5
Machine Parts Identification 9
Installation 10
Operating the Machine 12
Controls 12
WashMode 14
Auto Mode 15
Adjusting Product Firmness 15
Standby Mode 16
Cleaning 19
Reassembly After Cleaning 22
Adding Mix to the Machine 24
Error Codes and Solutions 25
Routine Maintenance 30
Troubleshooting 35
Warranty 38

DONPER USA—USER MANUAL
4 — COPYRIGHT DONPER USA 2015
The Donper Model BH7480 soft serve machine, when properly op-
erated and maintained, is designed to produce a smooth and
creamy product to be enjoyed by all. However, it is important to un-
derstand that the 7480 is a machine, and like ALL machines, the
7480 will require regular cleaning and maintenance to ensure prop-
er and safe operation.
Failure to clean and maintain the 7480 as described in this manual
will reduce the performance and operational life of the machine, as
well as voiding the machine warranty provided by Donper USA.
The following symbols will be used throughout this manual:
General Information
Cautionary Information
Important Safety Issue - Careful Attention Required to Avoid
Injury.
Electrical Shock Hazzard - Careful Attention Required to
Avoid Injury.
To avoid physical injury, this User Manual must be read and
understood completely before operating or performing any
installation or maintenance on the machine.
Call 1-844-366-7371 before operating the machine if you have
any questions about the instructions in this manual.

DONPER USA—USER MANUAL
5 — COPYRIGHT DONPER USA 2015
Electrical Requirements (BH7480)
Voltage 230 V 60 Hz Single Phase
Rated Input Power 22 A (4.6 kW)
Power Plug Type NEMA L6‐30P
Required Breaker Size 30A, Double Pole
Main Compressor 2 HP R404A
Hopper Cooling Compressor 1/6 HP R134A
Drive Motors (ea) 1 HP (750W)
Size and Capacity (BH7480)
Freezing Cylinders (ea) 2 Qt (1.9 L)
Refrigerated Hoppers (ea) 9.5 Qt ( 9 L)
Appx. Hourly Producon* 46‐59 Qt (44‐56 L)
Height 56.5 in (1435 mm)
Width 21.25 in (540 mm)
Depth 30.5 in (750 mm)
Weight 397 lbs (180 kg)
R404A (main compressor) 900 g
R134a (hopper compressor) 130g
A dedicated 30 amp circuit is required to operate the machine.
Using a shared circuit may damage the machine and will void the
machine warranty.
The machine uses an air cooled refrigeraon system which requires
a minimum of 6‐8 inches of clearance on the leand right sides of
the machine and at least 8 inches of clearance behind the machine.

DONPER USA—USER MANUAL
6 — COPYRIGHT DONPER USA 2015
BH7480

DONPER USA—USER MANUAL
7 — COPYRIGHT DONPER USA 2015
Electrical Requirements (BT7280)
Voltage 230 V 60 Hz Single Phase
Rated Input Power 22 A (4.6 kW)
Power Plug Type NEMA L6‐30P
Required Breaker Size 30A, Double Pole
Main Compressor 2 HP R404A
Hopper Cooling Compressor 1/6 HP R134A
Drive Motors (ea) 1 HP (750W)
Size and Capacity (BT7280)
Freezing Cylinders (ea) 2 Qt (1.9 L)
Refrigerated Hoppers (ea) 9.5 Qt ( 9 L)
Appx. Hourly Producon* 46‐59 Qt (44‐56 L)
Height 32.5 in (1435 mm)
Width 21.25 in (540 mm)
Depth 35.5 in (750 mm)
Weight 352 lbs (180 kg)
R404A (main compressor) 900 g
R134a (hopper compressor) 130g
A dedicated 30 amp circuit is required to operate the machine.
Using a shared circuit may damage the machine and will void the
machine warranty.
The machine uses an air cooled refrigeraon system which requires
a minimum of 6‐8 inches of clearance on the leand right sides of
the machine and at least 8 inches of clearance behind the machine.

DONPER USA—USER MANUAL
8 — COPYRIGHT DONPER USA 2015
BT7280
Measurements in Inches
(millimeters)

DONPER USA—USER MANUAL
9 — COPYRIGHT DONPER USA 2015

DONPER USA—USER MANUAL
10 — COPYRIGHT DONPER USA 2015
Model BH7480 units use air cooled refrigeration systems
and require a minimum of 6-8 inches of clearance around
the sides of the machine and 8 inches around the back pan-
el to allow for adequate air flow. Failure to allow proper
clearance will restrict the airflow into the machine, will re-
duce the refrigeration capability, and will likely cause over-
heating and/or damage to the cooling system of the ma-
chine.
The BH7480 is shipped on a pallet and the machine is secured/
bolted to the pallet to prevent shipping damage. To install the
machine, the bolts connecting the pallet bracket to the base of
the machine must be removed. Once the pallet bracket bolts are
removed, the machine may be carefully removed from the pallet.
USE EXTREME CAUTION REMOVING THE MACHINE
FROM THE PALLET. Professional unpacking and installation
is recommended due to the weight of the machine and poten-
tial bodily injury due to improper handling.

DONPER USA—USER MANUAL
11 — COPYRIGHT DONPER USA 2015
This equipment is intended to be installed in ac-
cordance with the National Electrical Code (NEC),
NFPA 70. A licensed electrician must install the
electrical connections for the machine to insure
safe operation. The machine must be properly
grounded. Failure to properly ground the machine
can result in severe bodily injury from electrical
shock.
ELECTRICIAN — When making the electrical connections,
note that the beater rotation must be counter clockwise as
viewed looking into the freezing cylinder from the front of the
machine. If the rotation direction is incorrect, it will be neces-
sary to change the position of the hot wires in the machine plug
to allow the motors to rotate in the correct direction.

DONPER USA—USER MANUAL
12 — COPYRIGHT DONPER USA 2015
Below are the controls for the machine:
Main Power Switch
Dispense valve handles. Leand
right handles dispense pure product
and the middle handle dispenses a
mix or twist of the 2 pure products.
Digital Control Panel
Hopper refrigeraon power
switch. This turns on the second‐
ary compressor that cools the
product in the 2 hoppers.

DONPER USA—USER MANUAL
13 — COPYRIGHT DONPER USA 2015
Machine Controls (cont’) for BH7480 and BT7280
1) Dispensing Handles
2) Main Power Switch
3) Valve Body Thumb Screws
4) Drip Tray Cover
5) Hopper Cooling Switch
6) Valve Body
7) Drip Tray
A) Level Switch
B) Air Cap
C) Feed Tube

DONPER USA—USER MANUAL
14 — COPYRIGHT DONPER USA 2015
To operate the machine in any mode, the main power switch must
first be turned to the “ON” posion.
The machine has 3 operang modes:
1) Wash Mode: This is when the refrigeraon system is turned offand
the mixing motors are running. You use this mode to circulate
cleaning or sanizing soluon through the machine hopper and bar‐
rels.
2) Auto Mode: This is the normal operang mode of the machine
where the refrigeraon system and the mixing motors are on so
that the machine is freezing and preparing soserve product to
serve.
3) Standby Mode: This is where the machine is configured to keep the
product in the barrels refrigerated for extended periods of me
(during slow sales periods or even overnight).
OPERATING IN THE WASH MODE:
Press the “Wash” buon and the “Wash ” indicator light will turn on.
Both the right and lemixing motors will turn on simultaneously. To
stop, simply press the “Wash” buon again. During the Wash Mode,
the refrigeraon system for the freezing cylinders will be OFF. Wash
Mode only rotates both beaters inside of the freezing cylinders with‐
out any freezing. Wash Mode is used to drain mix from the machine or
rinse the beater assemblies with water or sanizing soluon.

DONPER USA—USER MANUAL
15 — COPYRIGHT DONPER USA 2015
OPERATING IN THE AUTO MODE:
There are two Auto buons on the front control panel, one for the le
barrel and one for the right cylinder. The two sides can be controlled in‐
dependently of each other. Press the Auto buon on the control panel
to begin freezing inside the corresponding freezing cylinder. When in
Auto Mode, the indicator light will turn on along with the corresponding
beater motor. The numeral values on the display will increase from 0 to
99 and then stop at 00. When the number value reaches 00, this indi‐
cates that the product in the freezing cylinder is ready to serve. When
the number reaches 00, the indicator light above the AUTO buon will
then flash, indicang that the product is ready and has reached the de‐
sired firmness level. Note that the hopper cooling switch should also be
turned on during the AUTO mode operaon to keep the product in the
hoppers refrigerated and to prevent spoiling. NEVER RUN THE MACHINE
IN AUTO MODE WITH WATER IN THE FREEZING CYLINDERS—DAMAGE
WILL OCCUR.
Adjusng the Product Firmness Level:
With the Power Switch ON and both Auto buons OFF, press the up and
down buons simultaneously and hold for 5 seconds (machine will beep
5 mes) for the side you wish to adjust. A numerical value of 1 to 10
(the firmness seng) will begin to flash on the screen. Use the up and
down buons to adjust the firmness seng with 1 being soer product
and 10 being firmer product. Once the firmness is set, the control panel
will automacally return back to “00” aer about 10 seconds of no fur‐
ther adjustments.

DONPER USA—USER MANUAL
16 — COPYRIGHT DONPER USA 2015
Adjusng the Product Firmness Level: (cont’)
The recommended starng seng for the product firmness level is 5.
With your product in the machine for the first me and the AUTO fea‐
ture running, wait unl the display cycles from 0 to 99 and then shows
00. Dispense some of the product from the machine and check the con‐
sistency/firmness. If a firmer product is desired, then increase the firm‐
ness seng by 1‐2 and allow the machine to recycle back to 00 again
and retest the firmness. Repeat this process unl the desired product
firmness is reached.
As a guide to help determine the appropriate product firmness seng,
the numbers on the display in AUTO mode should start at 0 and quickly
rise to about 84 to 87 when the product inside the freezing cylinders is in
a complete liquid state (for example, when the machine is first filled with
fresh product and started aer cleaning). If the numbers rise above 87
to start, then increase the firmness seng 1‐2 number values and re‐
start the AUTO mode and observe if the numbers stop increasing rapidly
somewhere near 84‐87.
OPERATING IN THE STANDBY MODE:
During long non‐use periods, the machine can be placed in Standby
Mode in order to keep the product inside the freezing cylinders refriger‐
ated.

DONPER USA—USER MANUAL
17 — COPYRIGHT DONPER USA 2015
OPERATING IN THE STANDBY MODE: (cont’)
To start the Standby mode, with the machine in Auto Mode on both
sides, press and hold the Wash buon for five (5) seconds (machine will
beep 5 mes), then release. The LCD displays will now alternate be‐
tween “00” and “bb”. Both mixer motors will turn offand the refrigera‐
on system will keep the product in the cylinders refrigerated. In this
mode it is also necessary to make sure that the hopper cooling system
switch is set to ON. Not turning the hopper cooling switch on will allow
the product in the hoppers to spoil.
To enter standby mode you must also remove the feed tubes from
inside the hoppers and reverse their position, as shown above. To
do this you first remove the air caps from the top end of the feed
Normal Feed Tube
Posion
Standby Feed Tube
Posion

DONPER USA—USER MANUAL
18 — COPYRIGHT DONPER USA 2015
OPERATING IN THE STANDBY MODE: (cont’)
tube and insert into the bottom end. Now, insert the feed tubes
back inside (reverse insertion positioning) the hopper to prevent
product from entering the freezing cylinder. The hole-side of the
feed tube should now be at the top.
When in the Standby Mode is it also advised to remove the valve
caps (typically the star shaped caps) from the dispensing aperture
of the valve body. You should also remove the drip tray and drip
tray cover. These parts should be sanitized upon removal and
dried for later use. The exterior of the machine, and specifically
the valve body, should also be cleaned and sanitized.
To exit Standby Mode and return to normal operation (Auto Mode),
press and hold the Wash button for five (5) seconds (machine will
beep 5 times), then release the Wash button. The machine will re-
turn to the Auto Mode when the Wash button is released and will
begin rotating the augers and cycling the refrigeration system so
that the product is frozen to the selected consistency.
When exiting the Standby Mode and returning to the Auto mode,
the feed tubes must be reversed from the Standby position with
the holes positioned on the top of the feed tube to the normal op-
erating position with the holes being nearer the bottom so that the
product mix can flow into the freezing cylinder. Failure return the
feed tubes to the Auto position may result in damage to the ma-
chine.

DONPER USA—USER MANUAL
19 — COPYRIGHT DONPER USA 2015
Draining Product from the Machine
Step 1: Turn the Auto Mode OFF for both freezing cylinders.
Place the hopper cooling switch in the OFF position.
Step 2: Remove the hopper lids and feed tubes from the hop-
per. Remove the all of the star caps from the dispenser valves.
Step 3: Unscrew the Adjustable Flow Rate Screws in the han-
dles to allow the draw valves to fully open.
Step 4: Place a large bucket beneath the dispenser door. Press
the Wash button. Pull and hold all three (3) handles down until
all the product is removed from the freezing cylinders and hop-
pers. Press the Wash button to turn Wash Mode off.
Step 5: Pour water/cleaning solution into the hoppers and re-
peat step 4 until the water being drained into the bucket comes
out clean.
Cleaning the Machine (Quick Rinse & Sanitize)
Every 2-3 days the machine should be shut down and fully
cleaned. For mix changes or sanitizations between product
changes, follow the steps below.
Step 1: Pour a gallon of room-temperature water into each hop-
per. Allow the water to flow down into the freezing cylinders. Us-
ing a tube brush, clean the inside of the hoppers including the L-
shaped level probes.
Step 2: Press the Wash button and run in Wash Mode for 1-2
minutes.

DONPER USA—USER MANUAL
20 — COPYRIGHT DONPER USA 2015
Cleaning the Machine (Quick Rinse & Sanitize cont’)
Step 3: While the unit is in Wash Mode, place a large bucket be-
neath the dispenser door. Pull and hold all three (3) handles
down until all the water is removed from the machine. Press the
Wash button to turn Wash Mode off and discard the water.
Step 4: Repeat this rinse process 2-3 more times until the dis-
carded water becomes clear.
Step 5: Repeat steps 1-3 using water containing approved sani-
tizing solution and then rinse with a water solution.
Step 6: If the machine is to be immediately run with new product,
then pour 1-2 cups of the product into the hoppers, activate the
WASH mode, and dispense the product out the valves until the
water remaining in the cylinders is pushed out by the product.
If the machine is not going to be run immediately with new prod-
uct after cleaning, you will need to remove the dispensing door
and beater bars and dry the freezing cylinder and beater bar
components to prevent corrosion or oxidation (rust). Once you’ve
removed the dispensing door and beater bars it’s a good practice
to go ahead and do the full clean processof the components in a
sink with warm soapy water before reassembling the machine
parts (after clean rinsing and drying all parts).
.
This manual suits for next models
1
Table of contents
Other DONPER Ice Cream Maker manuals