manuals.online logo
Brands
  1. Home
  2. •
  3. Brands
  4. •
  5. Dorel
  6. •
  7. Indoor Furnishing
  8. •
  9. Dorel Ameriwood 5454207Y User manual

Dorel Ameriwood 5454207Y User manual

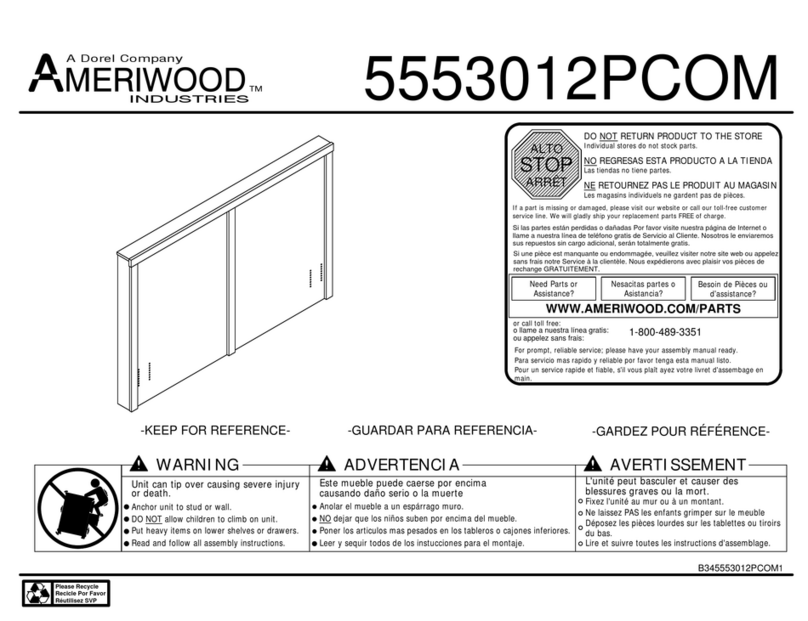
WARNING ADVERTENCIA AVERTISSEMENT
Unit can tip over causing severe injury
or death.
Anchor unit to stud or wall.
DO NOT allow children to climb on unit.
Put heavy items on lower shelves or drawers.
Read and follow all assembly instructions.
Este mueble puede caerse por encima
causando daño serio o la muerte
Anolar el mueble a un espárrago muro.
NO dejar que los niños suben por encima del mueble.
Poner los articulos mas pesados en los tableros o cajones inferiores.
Leer y sequir todos de los instucciones para el montaje.
L'unité peut basculer et causer des
blessures graves ou la mort.
Fixez l'unité au mur ou à un montant.
Ne laissez PAS les enfants grimper sur le meuble
Déposez les pièces lourdes sur les tablettes ou tiroirs
du bas.
Lire et suivre toutes les instructions d'assemblage.
STOP
ALTO
ARRÊT
DO NOT RETURN PRODUCT TO THE STORE
NO REGRESAS ESTA PRODUCTO A LA TIENDA
NE RETOURNEZ PAS LE PRODUIT AU MAGASIN
Individual stores do not stock parts.
Las tiendas no tiene partes.
Les magasins individuels ne gardent pas de pièces.
If a part is missing or damaged, please visit our website or call our toll-free customer
service line. We will gladly ship your replacement parts FREE of charge.
Si las partes están perdidas o dañadas Por favor visite nuestra página de Internet o
llame a nuestra línea de teléfono gratis de Servicio al Cliente. Nosotros le enviaremos
sus repuestos sin cargo adicional, serán totalmente gratis.
Si une pièce est manquante ou endommagée, veuillez visiter notre site web ou appelez
sans frais notre Service à la clientèle. Nous expédierons avec plaisir vos pièces de
rechange GRATUITEMENT.
Need Parts or
Assistance? Nesacitas partes o
Asistancia? Besoin de Pièces ou
d'assistance?
WWW.AMERIWOOD.COM/PARTS
or call toll free:
o llame a nuestra línea gratis:
ou appelez sans frais: 1-800-489-3351
For prompt, reliable service; please have your assembly manual ready.
Para servicio mas rapido y reliable por favor tenga esta manual listo.
Pour un service rapide et fiable, s'il vous plaît ayez votre livret d'assembage en
main.
-KEEP FOR REFERENCE- -GUARDAR PARA REFERENCIA- -GARDEZ POUR RÉFÉRENCE-
B345454207Y02
5454207Y
Please Recycle
Recicle Por Favor
Réutilisez SVP
A Dorel Company
MERIWOOD
INDUSTRIES
TM
xxxxxxxxxxxxxxx
xxxxxxx
xxxxxxxxxxxxxxxx
xxxxxxxxx
xxxxxxxxxxxxxxx
xxxxx
xxxxxxxxxxxxxxx
xxxxxxxxxx
xxxxxxxxxxxxxxxx
xxxxx
xxxxxxxxxxxxxxx
xxxxxxxxxxxxxxxxxxxx
9:00am - 5:00pm
B345454207Y02
3 /16
?? www.ameriwood.com ??
PARTS - PIEZAS - PIECES
left panel
panel izquierdo
panneau gauche
35454207011
right panel
panel derecho
panneau droit
35454207021
top
parte superior
panneau supérieur
35454207071
left frame panel
el panel izquierdo
del marco
panneau gauche
35454207050
fixed shelf
estante fijo
étagère fixe
35454207080
back panel
panel trasero
panneau arriere
K545420700
ABCD
EFGHI
JKLM
2 partitions
2 particiones
2 cloisons
35454207030
modesty panel
el panel de la modestia
panneau di modestie
35454207040
right frame panel
el panel derecho
del marco
panneau droit
35454207060
shelf
estante
étagère
35454207090
2 doors
2 puertas
2 portes
35454207100
left molding
moldeado izquierdo
moulure gauche
35454207110
right molding
moldeado derecho
moulure droite
35454207120
This piece is paperboard construction.
It is not made from wood, but is
required for the assembly of your unit.
Esto pedazo son la construcción del
cartón. Ello no son hecho de madera,
pero se requlere para la asamblea de
su unidad.
Ces pièce sont de construction en
carton. Elle ne sont pas fabriquées de
bois, mais nécessaires pour
l'assemblage de votre meuble.
B345454207Y02
4 /16
?? www.ameriwood.com ??
PARTS - PIEZAS - PIECES
x
116
#A22500
cam lock
cerradura de leva
serrure de came
x
38
#A21520
compression dowel
clavija de compresion
goujon de compression
x42
#A53600
angle bracket
équerre
anaquel del ángulo
x
5
36
#A12210
1/2" pan head
cabeza redondo 1/2"
tête ronde
x
2
16
cam bolt
#A22510
perno de leva
boulon de came
x10 25
#A21110
nail
clavo
clou
x
6
4x
8
2
x94
#A80250
shelf support
soporte de tablero
support de la tablette
#A12810
1" pan head
cabeza redondo 1"
tête reonde 1"
x
13 4
#A81180
plastic spacer
plástico más espacial
spacer plastique
x
11 4
#A20310
1/4-20 wing nut
1/4-20 tuerca
écrou á oreilles 1/4-20
x
12
4
#A19605
1/4-20 x 1-12" bolt
1/4-20 x 1-12perno
1/4-20 x 1-12" bolt
#A22810
connector housing bolt
perno de la cubierta
del conectador
boulon de reccordement
x
14 1
#A84050
safety bracket
estuche de cinturon de seguridad
ensemble de support de securite
x
15 2
#A54270
connecting plate
placa de conexión
plaque de reccordement
x
16 2
#A30030
catch kit
juego o equipo del retén
loquet
x
17 4
#A60110
hinge
bisagra
charnière
14a
14b
14c
14d
16a
16b
x
72
#A22820
connecting housing
el albergue del conector
le logement du
connecteur
1
B345454207Y02
5 /16
?? www.ameriwood.com ??
Note: Unit should be assembled on a clean surface.
Insert two cams (1) into the holes in the left panel (A) and right panel (B). Insert
one connector housing (7) into hole in each panel. Fasten six cam bolts (2) into
each panel using a Philips screwdriver.
2
2
2
2
2
2
7
2
A
B
x
14
x
2
12
x
72
Note: L'unité doit être assemblée sur une
surface propre.
Insérez deux cames (1) dans les trous du
panneau gauche (A) et du panneau droit (B).
insérez una raccord (7) dans les trous de
chaque panneau. Fixez avec six boulons de
came (2) cans chaque panneau avec un
tournevis à tête cruciforme.
7
2
2
22
Nota: La unidad se debe armar en una superficie limpia.
Inserte dos levas (1) en los agujeros del panel izquierdo (A) y el panel derecho (B). Inserte uno
perno de la cubierta del conectador (7) en los agujeros de cada panel. Sujete seis pernos de la
leva (2) dentro de cada panel usando un destornillador de Philips.
2
3½ turn to fully
lock.
½ se vuelven a
totalmente
cerradura.
½ tour pour
verrouiller
complètement.
4
Tighten to fully seat. Do not over
tighten.
Apriétese a totalmente asiento. No
haga encima de apriétese.
Serrez pour mettre le siège bien en
place. Ne pas trop serrer.
Proper orientation of cam.
La orientación apropiada de leva.
Bonne orientation de la came.
1
This illustration shows how the CAM fastening system works.
Esta ilustración muestra el sistema de fijación de leva y como funciona.
Cette illustration montre le système de fixation CAME et son fonctionnement.
Lock
Apretar
Serrer
Proper orientation of CAM LOCK
Posición correcta de la cerradura de leva.
Bonne orientation de la SERRURE DE CAME
11
2
2
B345454207Y02
6 /16
?? www.ameriwood.com ??
42x
5
2x
x
18
E
F
H
4
5
5
Insert eight cams (1) into the holes in the fixed shelf (H), left frame panel (E), and right frame panel (F). Fasten two angle brackets (4) to the fixed shelf (H) using two
screws (5).
Insérez huit cames (1) dans les trous de létagère fixe (H), du panneau gauche (E), et du panneau droit (F). Fixez deux équerres (4) à l'étagère fixe (H) avec deux vis (5).
1
Inserte ocho levas (1) en los agujeros del estante fijo (H), el panel del marco izquierdo (E), y el panel del marco derecho (F). Sujete dos corchetes menores/mayores
(4) al estante fijo (H) usando dos tornillos (5).
1
1
Proper orientation of CAM LOCK
Posición correcta de la cerradura de leva.
Bonne orientation de la SERRURE DE CAME
3
B345454207Y02
7 /16
?? www.ameriwood.com ??
Finished Edge
Borde Acabado
Bord Fini
Finished Edge
Borde Acabado
Bord Fini
x
38
D
CC
x
16 2
5
4x
Approx.
7/16"
3
16a
16a
133
33
33
33
Insert four cams (1) into the holes in the modesty panel (D). Use a hammer to tap eight compression dowels (3) into the edge holes in the two
partitions (C). Fasten one plastic catch (16a) to each partition using four screws (5) as shown.
16b
Insérez quatre cames (1) dans les trous du panneau de modestie
(D). Utilisez un marteau pour enfoncer huit goujons de compression
(3) dans les trous du bord dans les deux cloisons (C). Fixez deux
loquets en plastique (16a) à chaque cloison (D) avec quatre vis (5)
comme montré.
Inserte cuatro levas (1) en los agujeros del panel de la modestia (D).
Utilice un martillo para golpear ligeramente ocho pasadores de la
compresión (3) en los agujeros del borde en las dos particiones (C).
Sujete dos retenes plásticos (16a) a cada partición (D) usando cuatro
tornillos (5) como se muestra.
5
1
Proper orientation of CAM LOCK
Posición correcta de la cerradura de leva.
Bonne orientation de la SERRURE DE CAME
x
14
4
B345454207Y02
8 /16
?? www.ameriwood.com ??
5
10x
x
15 2
DE
A
H
5
5
5
Join the fixed shelf (H), modesty panel (D), left frame panel (E), and right frame panel (F), to the left panel (A) and right panel (B) and tighten the cams (1) using a
screwdriver.
Fasten the fixed shelf (H) and modesty panel (D) together using two screws (5) through the angle brackets attached to the fixed shelf. Fasten the left frame panel (E) and
right frame panel (F) to the modesty panel (D) with the connecting plates (15) and eight screws (5).
F
B
Joindre l'étagère fixe (H), le panneau de modestie (D), le panneau gauche (E), et le panneau
droit (F), au panneau gauche (A) et au panneau droit (B) et serrez les cames (1) avec un
tournevis. Fixez l'étagère fixe (H) et le panneau de modestie (D) ensemble avec deux vis (5)
dans les équerres fixées à l'étagère fixe. Fixez le panneau gauche (E) et le panneau droit (F)
au panneau de modestie (D) avec plaques de reccordement (15) et huit vis (5).
15
Ensamble el estante fijo (H), el panel de la modestia (D), el panel del marco izquierdo (E), y el
panel del marco derecho (F), al panel izquierdo (A) y panel derecho (B) y apriete las levas (1)
usando un destornillador. Sujete el estante fijo (H) y el panel de la modestia (D) juntos usando
dos tornillos (5) a través de los corchetes menores/mayores unidos al estante fijo. Sujete el panel
del marco izquierdo (E) y el panel del marco derecho (F) al panel de la modestia (D) con las
placas de conexión (15) y ocho tornillos (5).
UNLOCK LOCK
APRETAR
DESAPRETAR
OUVRIR SERRER
5
B345454207Y02
9 /16
?? www.ameriwood.com ??
end view
revisión final
vue finale
x
17 4
5
8x
x
8
2
Attach the four hinges (17) to the left molding (K) and right molding (L) using eight screws (5) as shown. Fasten one connecting bolt (8) to each molding as shown.
55
5555
55
88
17
17 17
17
KL
orientation of hinge on left molding.
orientación de la bisagra en el molde izquierdo.
orientation de la charnière sur la
moulure gauche.
orientation of hinge on right molding.
orientación de la bisagra en el molde derecho.
orientation de la charnière sur la
moulure droite.
Fixez les quatre charnières (17) à la moulure gauche (K) et à la moulure droite (L) avec huit vis (5) comme montré. Fixez un boulon de racordement (8) à chaque moulure
comme montré.
Una las cuatro bisagras (17) al molde izquierdo (K) y al molde derecho (L) usando ocho tornillos (5) como se muestra. Sujete un perno de conexión (8) a cada molde
como se muestra.
end view
revisión final
vue finale
6
B345454207Y02
10 /16
?? www.ameriwood.com ??
x
6
4
Stand the unit upright and attach the left molding (K) to the left panel (A) and modesty panel (D) using two screws (6) and tighten the connecting housing (7) using a
screwdriver. Attach the right molding (L) to the right panel (B) and modesty panel (D) using two screws (6) and tighten the connecting housing (7).
back surface
regresse hacia la superficie de atrás
surface arrière
Mettre l'unité debout et fixez la moulure
gauche (K) au panneau gauche (A) et au
panneau de modestie (D) avec deux vis (6)
et serrez raccords (7) avec un tournevis.
Fixez la moulure droite (L) au panneau droit
(B) et au panneau de modestie (D) avec
deux vis (6) et serrez les raccords (7). L
B
6
6
D
KA
6
6
Coloque la unidad vertical y una el molde izquierdo (K) al panel izquierdo (A) y al panel de la modestia (D) usando dos
tornillos (6) y apriete la cubierta de la conexión (7) usando un destornillador. Una el molde derecho (L) al panel
derecho (B) y al panel de la modestia (D) usando dos tornillos (6) y apriete la cubierta de conexión (7).
After bolt inserts into
connector (7), turn the
screw clockwise to lock
in place.
Después de que el
perno se inserte en el
conectador (7), de
vuelta al tornillo a la
derecha para asegurar
en el lugar..
Après avoir inséré le
boulon dans le raccord
(7), tournez la vis dans
le sens des aiguilles
d'une montre pour
verrouiller en place.
7
B345454207Y02
11 /16
?? www.ameriwood.com ??
G
CCB
A
x
14 1
14c
14b
14a 14d
14b
14a
Fasten four cam bolts (2) to the top (G). Attach the safety bracket (14a) using the screw (14b).
Attach the partitons (C) to the fixed shelf (H) as shown. Pay attention to the position of the plastic catches on the partitions (C).
Fasten the top (G) to the unit and tighten the cams (1) using a screwdriver.
x
2
4
front surface
superficie delantera
surface avant
G
H
Fixez quatre boulons de came (2) à la tablette supérieure (G). Fixez le support de
sécurité (14a) avec la vis (14b). Fixez les cloisons (C) à l'étagère fixe (H) comme
montré. Portez attention à la position des loquets en plastique sur les cloisons
(C). Fixez la tablette supérieure (G) à l'unité et serrez les cames (1) avec un tournevis.
Sujete cuatro pernos de la leva (2) a la parte superior (G). Una el soporte de seguridad
(14a) usando el tornillo (14b). Una las particiones (C) al estante fijo (H) como se muestra.
Preste la atención a la posición de los retenes plásticos respecto a las particiones (C).
Sujete la parte superior (G) a la unidad y apriete las levas (1) usando un destornillador.
2
8
B345454207Y02
12 /16
?? www.ameriwood.com ??
10 x 25
10
product collapse, and/or serious injury.
Por favor asegúrese que las Parte de atrás se atan
firmemente. Todos los clavos deben manejarse en las
partes recto y deben apretarse firmemente. El fracaso para
hacer para que podría causar inestabilidad, derrumbamiento
del producto, y/o la lesión seria.
S’il-vous-plaît assurez-vous que les PANNEAUX
ARRIÈRES sont attachés solidement. Tous les clous
doivent être enfoncés perpendiculairement et solidement
dans les parties. Sinon le meuble peut devenir instable,
s’effondrer subitement et/ou causer des blessures graves.
tightened firmly. Failure to do so could cause instability,
All nails must be driven into the parts straight and
Please make sure that the Backs are attached securely.
ADVERTENCIA
AVERTISSEMENT
WARNING
Carefully and with assistance of another person, lay the unit down on the
front surface to attach the back panel.
Flush the edge of the back panel with the bottom edge of the fixed shelf
(H). Align squarely and nail straight through into back edges.
back panel
panel trasero
panneau arriere
raw surface
superficie cruda
surface crue
H
Avec l'aide d'une autre personne,
déposez délicatement l'unité sur sa
surface avant pour fixer le panneau
arrière.
Placez le bord du panneau arrière à
égalité avec le bord inférieur de
l'étagère fixe (H). Alignez
carrément et clouez
perpendiculairement dans les bords
arrière.
Cuidadosamente y con ayuda de otra persona, ponga la unidad abajo en
la superficie delantera para unir el panel trasero.
Aliñe los bordes del panel trasero con el borde inferior del estante fijo (H).
Alinee en ángulo recto y clave derecho a través en los bordes traseros.
9
B345454207Y02
13 /16
?? www.ameriwood.com ??
14c14b
14a
x
14 1
14d
14c
14d
Option 1:
Fasten the safety bracket (14a) to a stud in the wall with the
screw (14d).
Option 2:
Drill a 316" diameter hole (5mm) in the wall board. Tap the
wall anchor (14c) into the hole until it is flush. Fasten the
safety bracket (14a) to the wall anchor with the screw (14d).
Opción 1:
Sujete la correa de seguridad (14a) coloque un tornillo en la
pared con el tornillo (14d).
Opción 2:
Perfore un agujero del diámetro del 316" (5mm) en el cartón
de yeso. Golpee ligeramente el ancla de la pared (14c) en
el agujero hasta que este alineado. Sujete la correa de
seguridad (14a) al ancla de la pared (14c) cin el tornillo
(14d). La página pasada es como un manual anterior.
L'option 1:
Fixez la courroie de sécurité (14a) à un montant dans le
mure avec une vis (14d).
L'option 2:
Percez un trou de 316" (5mm) dans le mur. Enfoncez
l'ancrage mural (14d) dans le trou jusqu'à ce qu'il soit à
égalité avec le mur. Attachez la courroie de sécurité (14a) à
l'ancrage mural (14d) avec la vis (14c). wall board
muro
mur
option 1
opción 1
l'option 1
option 2
opción 2
l'option 2
10
B345454207Y02
14 /16
?? www.ameriwood.com ??
x
16 2
16a 16b
5
12x
94x
Attach the two doors (J) to the unit as shown using eight screws (5) and a Philips screwdriver.
Fasten a plactic catch (16b) to each door (J) as shown using four screws (5).
Insert four shelf supports (9) (with the flat side up) into the adjustable shelf holes in the partitions (C).
Place the shelf (I) onto the shelf supports (9).
5
5
5
55
5J
J
99
I
Fixez les deux portes (J) à l'unité comme montré avec huit vis (5)
et un tournevis à tête cruciforme. Fixez un loquet en plastique
(16b) à chaque porte (J) comme montré en utilisant quatre vis (5).
Insérez quatre supports de tablettes (9) (avec le côté plat sur le
dessus) dans les trous d'étagères réglables dans les cloisons (C).
Placez l'étagère (I) sur les supports de tablette (9).
Una las dos puertas (J) a la unidad como se muestra usando ocho
tornillos (5) y un destornillador de Philips. Sujete un retén plástico
(16b) a cada puerta (J) como se muestra usando cuatro tornillos (5).
Inserte cuatro ayudas de estante (9) (con el lado plano para arriba)
en los agujeros del estante ajustable en las particiones (C).
Coloque el estante (I) sobre las ayudas de estante (9).
C
C
16b
16b
11
B345454207Y02
15 /16
?? www.ameriwood.com ??
x
11 4
x
13 4
x
12
4
11
11
13
13
12
12
12
12
Attach the bed frame to the headboard using the hardware
shown below. Depending on the style of metal bed frame you
have, the plastic spacer (13) may or may not be needed.
bed frame
marco de la cama
cadre de lit
Fixez le cadre du lit à la tête de lit avec quincaillerie illustrée
ci-dessous. Selon le modèle de cadre de lit en métal que vous
avez, l'espaceur en plastique (13) peut ou peut ne pas être
nécessaire.
Una el marco de la cama de la cabecera usando el equipo
demostrado abajo. Dependiendo del estilo de metal del marco
de la cama que usted tiene, el espaciador plástico (13) puede
o no puede ser necesario.
B345454207Y02
16 /16
?? www.ameriwood.com ??
MAXIMUM LOADS – CARGA MAXIMA - CHARGES MAXIMALES
This unit has been designed to support the
maximum loads shown. Exceeding these load limits
could cause sagging, instability, product collapse,
and/or serious injury.
Esta unidad ha sido diseñada para soportar la carga
máxima anotada. El exceder estos límites puede
causar inestabilidad, colapsarse y/o causar serias
lesiones.
Ce meuble a été conçu pour supporter les charges
maximales indiquées. En excédant ces limites de
charge, le meuble pourrait devenir instable,
s’effondrer, et/ou causer des blessures graves.
15 lbs.
6.8 kg.
10 lbs.
4.53 kg.

Other Dorel Indoor Furnishing manuals

Dorel DA6545N User manual

Dorel

Dorel DA6545N User manual

Dorel WM3669 User manual

Dorel

Dorel WM3669 User manual

Dorel Baby Relax DA7501W User manual

Dorel

Dorel Baby Relax DA7501W User manual

Dorel WM275P2CGL-DC User manual

Dorel

Dorel WM275P2CGL-DC User manual

Dorel DA7239 User manual

Dorel

Dorel DA7239 User manual

Dorel AMERIWOOD 34825 User manual

Dorel

Dorel AMERIWOOD 34825 User manual

Dorel AMERIWOOD INDUSTRIES 5453015Y User manual

Dorel

Dorel AMERIWOOD INDUSTRIES 5453015Y User manual

Dorel AMERIWOOD INDUSTRIES 5452207Y User manual

Dorel

Dorel AMERIWOOD INDUSTRIES 5452207Y User manual

Dorel Ameriwood 9111083ST User manual

Dorel

Dorel Ameriwood 9111083ST User manual

Dorel 01WM6108EC User manual

Dorel

Dorel 01WM6108EC User manual

Dorel 2363079UK User manual

Dorel

Dorel 2363079UK User manual

Dorel DA7319-7BLS User manual

Dorel

Dorel DA7319-7BLS User manual

Dorel Baby Relax Lakeley User manual

Dorel

Dorel Baby Relax Lakeley User manual

Dorel DA6627-BL User manual

Dorel

Dorel DA6627-BL User manual

Dorel DAS001413 User manual

Dorel

Dorel DAS001413 User manual

Dorel Ameriwood 5676322PCOM User manual

Dorel

Dorel Ameriwood 5676322PCOM User manual

Dorel AMERIWOOD 7642015P User manual

Dorel

Dorel AMERIWOOD 7642015P User manual
Dorel Ameriwood Industries 5958325K User manual

Dorel

Dorel Ameriwood Industries 5958325K User manual

Dorel AMERIWOOD 5675322PCOM User manual

Dorel

Dorel AMERIWOOD 5675322PCOM User manual

Dorel AMERIWOOD 5527303PCOM User manual

Dorel

Dorel AMERIWOOD 5527303PCOM User manual

Dorel 1748899COMNUK User manual

Dorel

Dorel 1748899COMNUK User manual

Dorel DL1009-1 User manual

Dorel

Dorel DL1009-1 User manual

Dorel DA6940E User manual

Dorel

Dorel DA6940E User manual

Dorel 5278296COMUK User manual

Dorel

Dorel 5278296COMUK User manual

Popular Indoor Furnishing manuals by other brands

ROOMS TO GO SYNE 2179-52PHR ZG Reclining Sofa w/Pwr headrest... Assembly instructions

ROOMS TO GO

ROOMS TO GO SYNE 2179-52PHR ZG Reclining Sofa w/Pwr headrest... Assembly instructions

SEI BC922400TX Assembly instruction

SEI

SEI BC922400TX Assembly instruction

Furniture of America CM2815 Assembly instructions

Furniture of America

Furniture of America CM2815 Assembly instructions

workstories Albion Coffee Assembly guide

workstories

workstories Albion Coffee Assembly guide

Costway HY10039 user manual

Costway

Costway HY10039 user manual

supremo LEISURE Barcelona Round Table Product Assembly

supremo LEISURE

supremo LEISURE Barcelona Round Table Product Assembly

TRIBU VISAVIS 01773 Assembly instructions

TRIBU

TRIBU VISAVIS 01773 Assembly instructions

Emmezeta SPRS42412 Assembling Instruction

Emmezeta

Emmezeta SPRS42412 Assembling Instruction

Gautier 160 manual

Gautier

Gautier 160 manual

Coaster Blake 511121 Assembly instructions

Coaster

Coaster Blake 511121 Assembly instructions

VIPACK AMORI BED AMBE9014 Assembly instructions

VIPACK

VIPACK AMORI BED AMBE9014 Assembly instructions

Style selections 1142FC-13-220 manual

Style selections

Style selections 1142FC-13-220 manual

Production Basics 8539 Assembly manual

Production Basics

Production Basics 8539 Assembly manual

FANCII MIRA 2 quick start guide

FANCII

FANCII MIRA 2 quick start guide

Southern Enterprises CM351300TX Assembly instructions

Southern Enterprises

Southern Enterprises CM351300TX Assembly instructions

Unfinished Furniture of Wilmington C-47 Assembly instructions

Unfinished Furniture of Wilmington

Unfinished Furniture of Wilmington C-47 Assembly instructions

Kesper 25527 Assembly and safety instructions

Kesper

Kesper 25527 Assembly and safety instructions

Steve Silver VA950SO quick start guide

Steve Silver

Steve Silver VA950SO quick start guide

manuals.online logo
manuals.online logoBrands
  • About & Mission
  • Contact us
  • Privacy Policy
  • Terms and Conditions

Copyright 2025 Manuals.Online. All Rights Reserved.