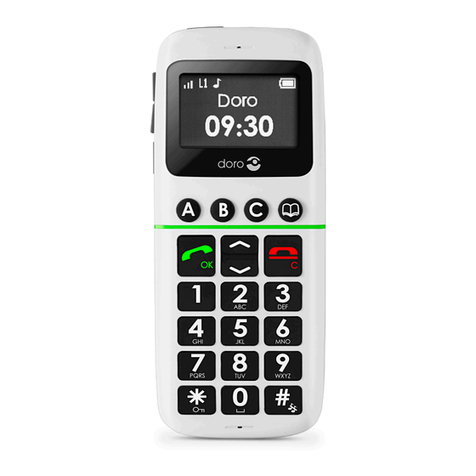
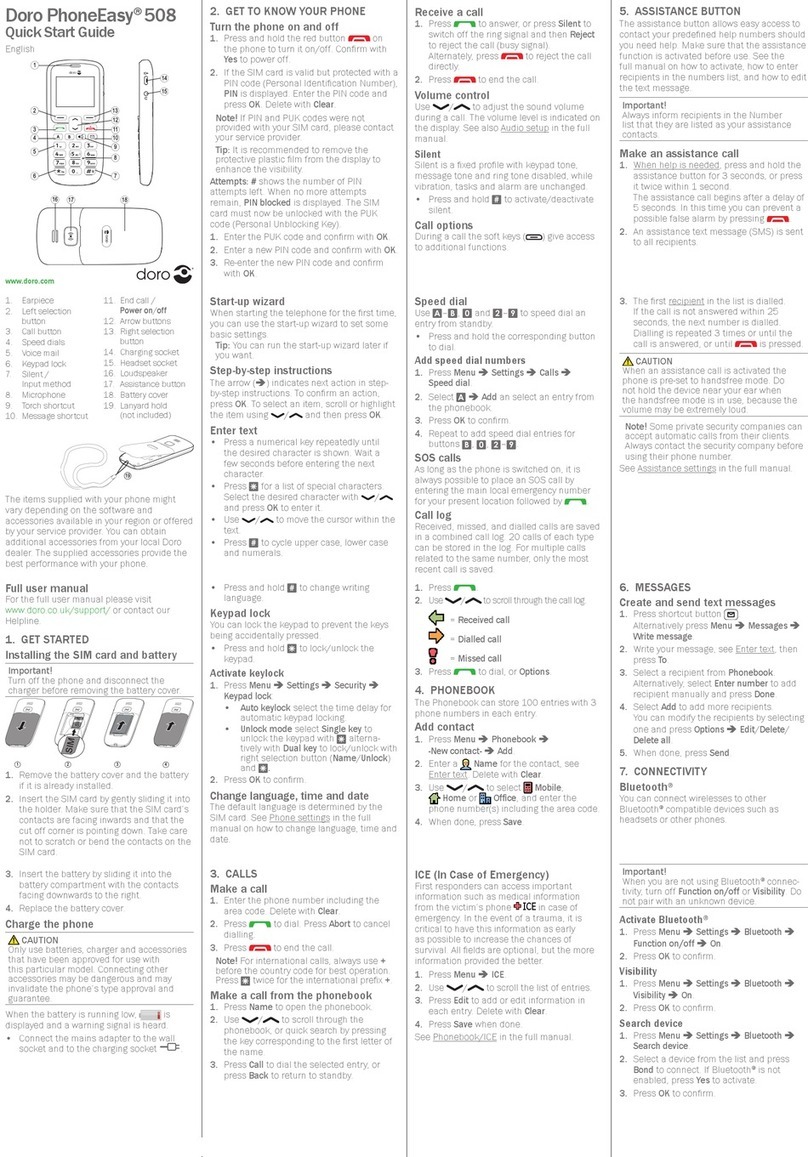
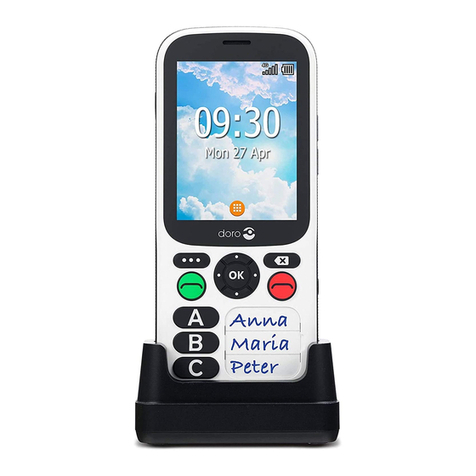
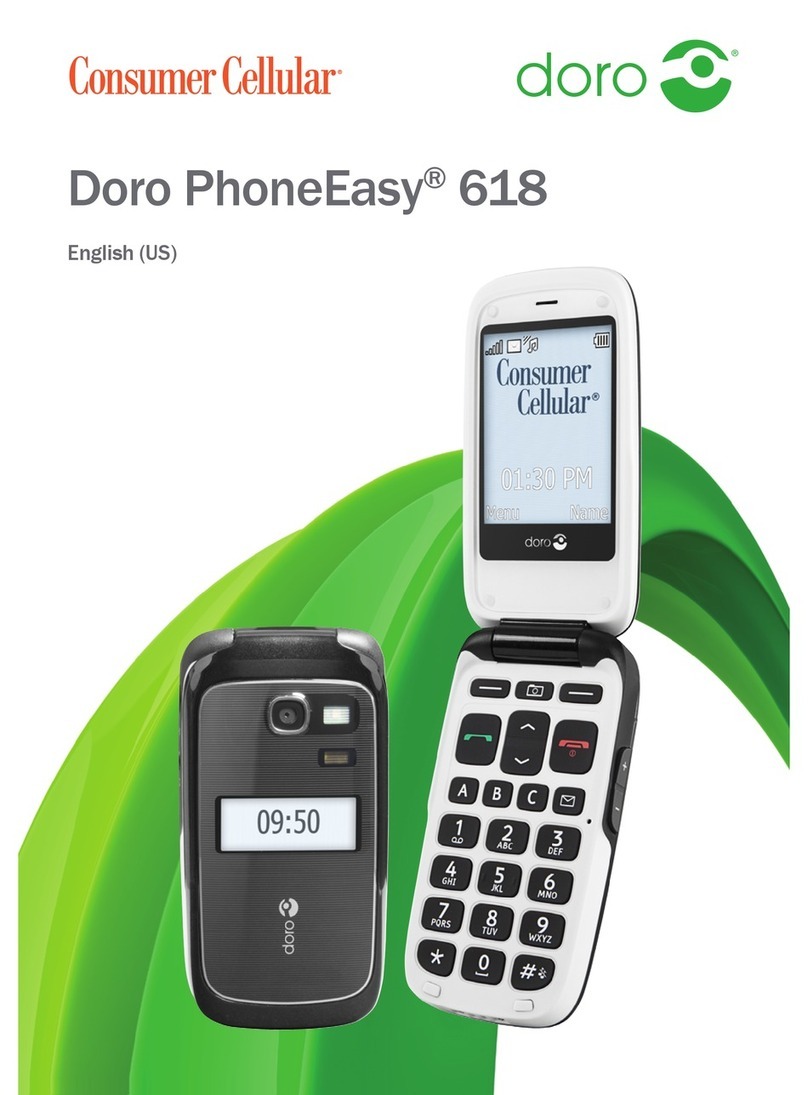
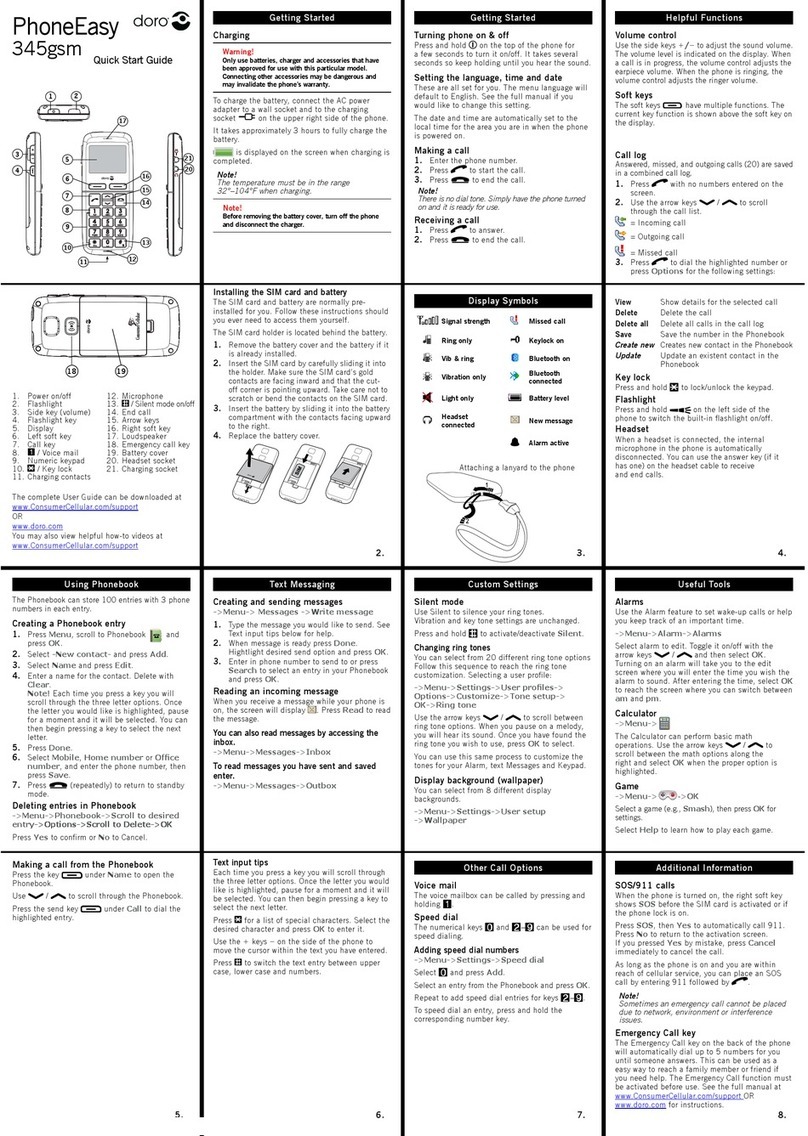
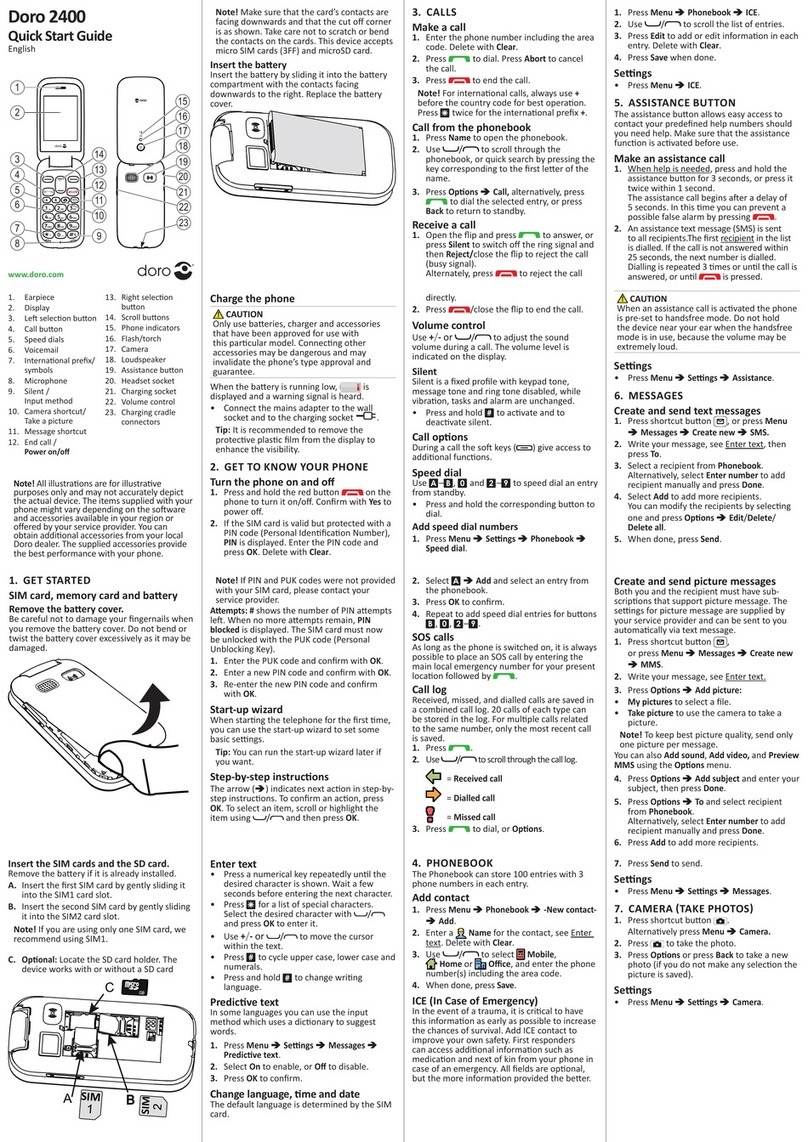
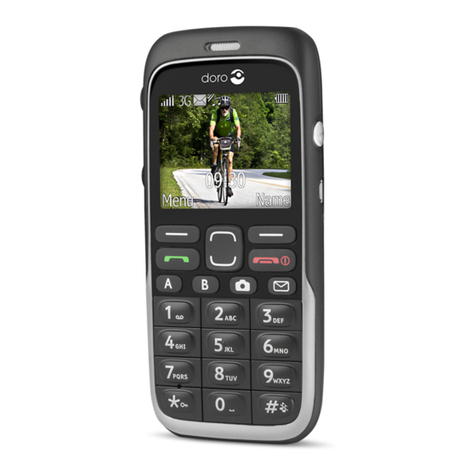
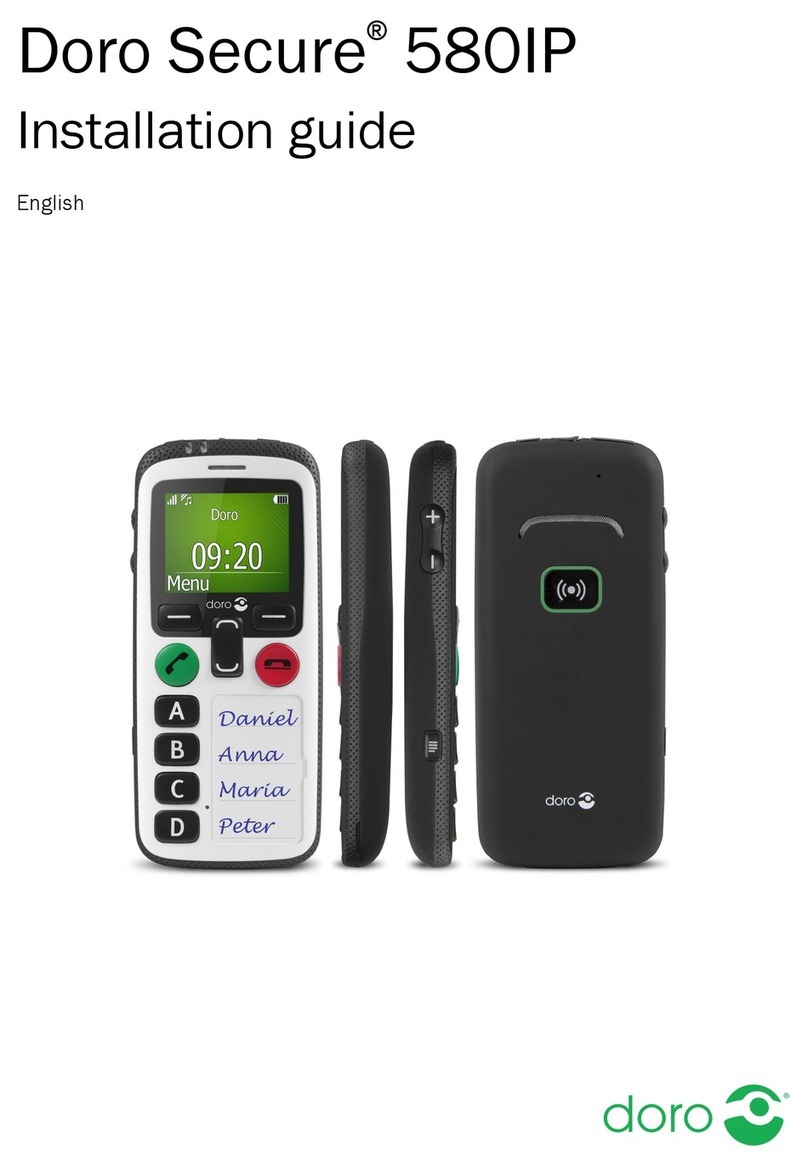
Doro HANDLEEASY 326GSM User manual

+DQGOH(DV\
*60

4
2
1
3
56
7
8
9

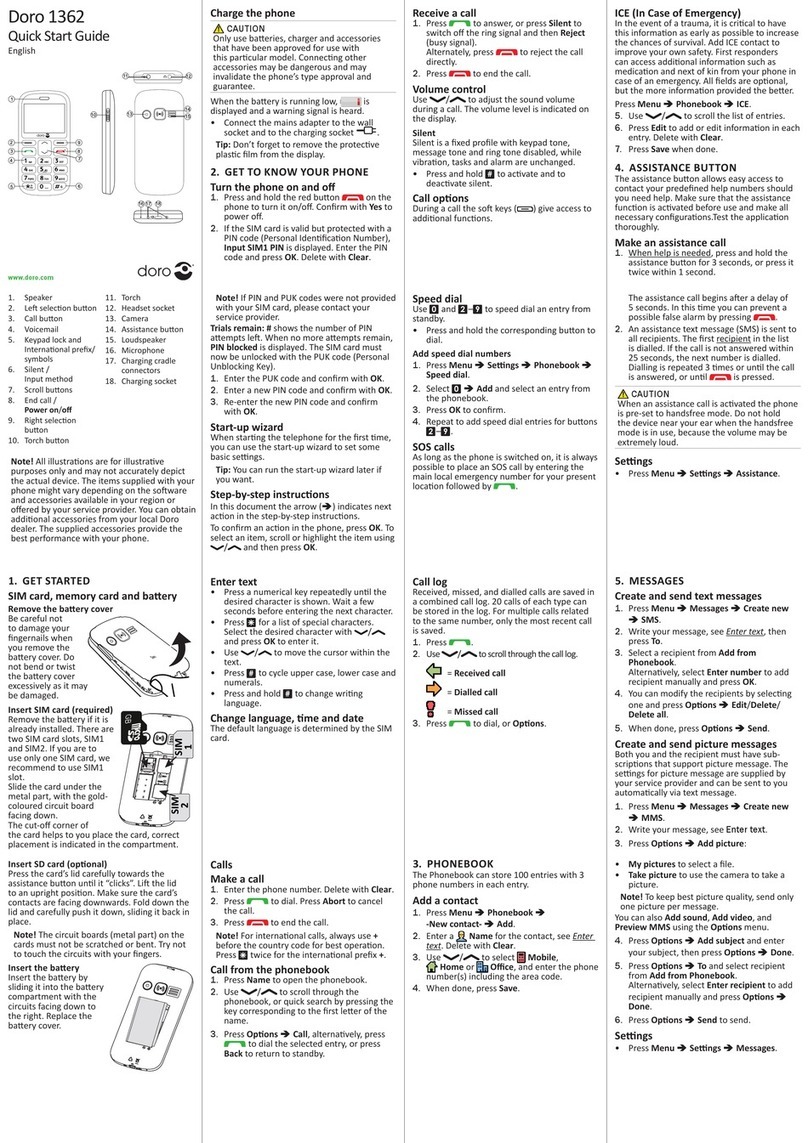
1 UPP volym/
navigering
2 NED volym/
navigering
3 Menyknapp/OK W
4 Uppringnings/
svarsknapp
5 *och knapplås
6 #och ringsignal/
vibrator
7 Nedkopplingsknapp
(AV/PÅ)
8 Direktvalsknappar
9 Laddnings/
headset-uttag
Svenska
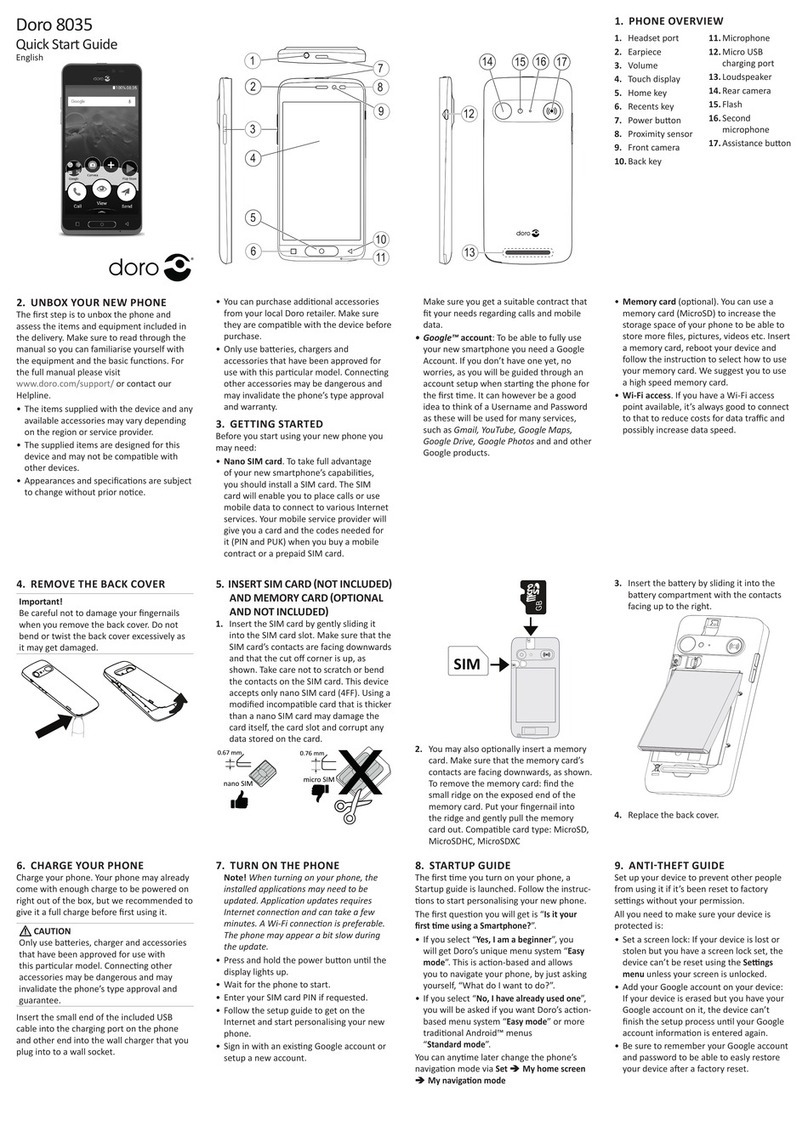
1 Volume UP/
navigation
2 Volume DOWN/
navigation
3 Menu button/OK W
4 Dialling/answer
button
5 *and keypad lock
6 #and ring setup/
vibrator
7 Disconnect button
(ON/OFF)
8 One-touch
memory buttons
9 Charging/headset
socket
English

1 OPP volum/
navigering
2 NED volum/
navigering
3 Menyknapp/OK W
4 Oppringings-
/svarknapp
5 *og tastelås
6 #og ringesignal/
vibrator
7 Nedkoblingsknapp
(AV/PÅ)
8 Hurtigtaster
9 Lade-/hodesettuttak
Norsk
1 OP lydstyrke/
navigering
2 NED lydstyrke/
navigering
3 Menutast/ OK W
4 Opkalds-/besvartast
5 *og tastaturlås
6 #og ringesignal/
vibrator
7 Afbrydertast FRA/TIL
8 Hurtigvalgstaster
9 Stik til opladning/
headset
Dansk

1 Augmentation du
volume/navigation
2 Diminution du
volume/navigation
3 Touche de
Gp¿OHPHQWGX
menu/OK W
4 Touche de décroché
5 Touche *et
de verrouillage
du clavier
6 Touche #et
de réglage de
sonnerie/vibreur
7 Touche de raccroché
et de mise en/
hors service
8 Touches de
mémoires directes
9 Prise du chargeur
et du casque
Français
1 Lisää
äänenvoimakkuutta
/ siirtyminen ylös
2 Vähemmän
äänenvoimakkuutta
/ siirtyminen alas
3 Valikkonäppäin/OK W
4 Soitto-/vastauspainike
5 *ja näppäinlukko
6 #ja soittoääni/
värinähälytin
7 Katkaisu-/virtapainike
8 Pikavalintapainikkeet
9 Lataamis-/
kuulokeliitäntä
Suomi

1
English
Operation
Important!
Before you can make or receive calls you must carry out the steps
detailed in Settings / Installation.
Turning On/Of f
Thetelephonecanbeturnedonbypressing
down L/1until the ON signal is heard and
the display lights up.
If the SIM card is locked with a PIN code
3HUVRQDO,GHQWL¿FDWLRQ1XPEHU³Enter PIN:”
willbeshowninthedisplay.Enteryourpin
FRGHDQGFRQ¿UPZLWKWon the side.
Normally the SIM card will be locked after three
incorrectentries.Thedisplayshowshowmany
attemptsyouhaveleftwith”Trials Remain:”.
If the PIN code is locked by mistake you will
need the PUK code (Personal Unblocking Key)
suppliedwithyourSIMcardtounlockit.
Normally you will have ten attempts to enter the
FRUUHFW38.FRGHDQGFRQ¿UPZLWKW.Then
HQWHUDQHZ3,1FRGHDQGFRQ¿UPLW
Thetelephonecanbeturnedoffbypressing
down L/1until the OFF signal is heard.
IfthecodeswerenotsuppliedwiththeSIM
cardyoucangetthemfromyournetwork
operator.

2
English
Making a call
1. Enterthedesirednumberfollowedbyq.A
signal will be heard as the number is dialled.
Move the cursor backwards and delete/
change with L.
2. Press Lto end the call.
Please note!
When making international calls press *twice for the
LQWHUQDWLRQDOSUHÀ[WKH+VLJQUHSODFHVWKHSUHÀ[
Dialling with the one-touch buttons
1. Press A-D followed by q.Asignalwillbe
heard as the number is dialled. Alternatively,
hold down A-D until the signal is heard
(approx. 2 seconds).
2. Press Lto end the call.
Dialling with speed dial numbers
1. Press Wand scroll between the entries with
}/{. Alternatively enter the speed dial entry
number (1-50) for quick selection.
2. Press qforthedesirednumber.Asignalis
heard as the number is dialled.
3. Press Lto end the call.
Receiving a call
1. Wait for ring signal.
2. Press qto answer. Press Lto end the call.
Alternatively, press Limmediately to reject
the call.

3
English
Speaker function
The speaker function means that the telephone
canbeplacedonthetable,leavingyourhands
free.
1. Dialthenumberintheusualway.
2. When the call is connected, press q.
3. 3ODFHWKHWHOHSKRQHRQDÀDWVXUIDFHHJDWDEOH
4. Speak into the microphone on the lower front
edge of the telephone (max 1 metre away).
5. The volume can be adjusted during a call
with }/{.
6. To change between the speaker function
and handset use, press q.
7. Press Lto end the call.
Please note!
In speaker mode, it is only possible for one person at a time to
talk. The alternation between the one speaking and the one
listening is automatic and dependent on the sound level in the
URRPFRQWDLQLQJWKHWHOHSKRQH\RXDQGWKHVRXQGIURPWKHOLQH
FDOOHU,WLVWKHUHIRUHHVVHQWLDOWKDWWKHUHDUHQRORXGQRLVHVHJ
music, in the immediate vicinity of the telephone, as this will
disrupt the speaker function.
Volume control
Thevolumecanbeadjustedduringacallwith
}/{on the side.

4
English
Redial
Press qandscrollbetweenthe15most
recent dialled/incoming numbers with }/{.
Press qto dial or Lto end.
New calls (Caller ID memory)
Thedisplayshowswhoiscallingbeforeyou
answer,oryoucanviewthe10mostrecent
missed calls.
Missedcallsareindicatedwiththe symbol
and the number of missed calls.
If multiple calls are received from the same
numberonlythemostrecentofthesecallswill
be saved.
Retrieving and dialling
1. Press W.
2. Scroll to the desired entry with {/}.
3. Press qto dial or Lto end.
&DOOHULGHQWL¿FDWLRQPHVVDJHV
Inadditiontonumberdisplay,thefollowing
messages will be shown occasionally:
?????? No information available, i.e. an
internationalcallorawithheldnumber.

5
English
Emergency calls
When the telephone is switched on, it is
possibletoplaceanemergencycall(999/112)
by entering 999/112 followed by q.Most
mobile networks accept emergency calls even
when the SIM card is not in the telephone.
Keypad lock
The keypad lock is turned on/off by pressing
down */Lfor approx. 2 seconds).
is shown in the display when the keypad
lock is active.
Headset
Thetelephonecanbeusedwithaheadset/ear
hook, and is equipped with a socket for this.
When using a headset calls are answered and
madeinexactlythesamewayasusual.When
a headset is connected, the microphone in the
telephone is disconnected automatically. This
telephone supports the answer function with a
button on the headset cable.
Wa r n i n g!
Only use batteries, charger and accessories that have been
approved for use with this particular model. Connecting other
accessories may invalidate the telephone’s type-approval and
guarantee; furthermore it could be dangerous.
Connection to a USB port on a computer may damage the
telephone or the computer. The volume may be high on the
KHDGVHW7KLVFDQEHDGMXVWHGGXULQJWKHÀUVWFDOO
6
English
Settings
Saving one-touch numbers
This telephone is able to save 4 telephone
numbersontheone-touchA-D buttons.
1. Enter the telephone number, including the
area code. Skip backwards/change with L.
2. Press down the desired one-touch button A-D
until is shown in the display.
3. Press Wto save or Lto end.
Saving speed dial numbers
The telephone is able to save 50 speed dial
numbers.
1. Enter the telephone number, including the
area code. Skip backwards/change with L.
2. Press Wandscrolltothedesiredentrywith
}/{.
3. Press Wto save or Lto end.
Please note!
It is not possible to delete saved numbers. If you need to change
a number just save the new number in the same location as the
old one. To save an international number, press *twice for the
LQWHUQDWLRQDOSUHÀ[WKHVLJQUHSODFHVWKHSUHÀ[DQGHQWHU
WKHFRXQWU\FRGHDUHDFRGHSRVVLEO\OHDYLQJRXWWKHÀUVW]HUR
DQGWHOHSKRQHQXPEHU,IDSDXVHDSSUR[VHFRQGVLVUHTXLUHG
in the telephone number, press *three times until pis shown.

7
English
If you want to save a number that can dial numbers after the
call is answered, save the number with a win front of the
numbers that you wish to send. Press *four times until wis
shown. When you make the call, the telephone will enter all the
numbers before the w. Wait for an answer and then press Wto
send the numbers after w.
Ring Setup
Choosebetweenthe9differentringsignalsby:
1. Press W, the one-touch numbers will be shown.
2. Press down Wfor approx. 2 seconds, the
ring signals will be shown.
3. Scrollbetweentheringsignalswith{/}.
4. When you have selected the ring signal you
want, press W.
5. Press Lto end.
Ringsignalstrengthisadjustedinstandby
mode by holding }or {pressed down for
approx. 2 seconds and then pressing }or {.

8
English
Vibrator
Press down #for approx. 2 seconds to
activatethevibratorwithorwithoutringsignal.
Pressandholdrepeatedlytomovebetween
the different modes.
Ring signal
Vibrator only
Ring signal and vibratorRing signal and vibrator
Time/date
1. Press W, the one-touch numbers will be shown.
2. Press down Wfor approx. 2 seconds, the
ring signals will be shown.
3. Press down Wfor approx. 2 seconds).
4. Press Wto enter time (HH:MM). Press Wto
save.
5. Scrolltodatewith}/{.PressWand enter
date (YYYY.MM.DD). Press Wto save.
6. Press Lto end.

9
English
Installation
Always ensure that the telephone is turned off
beforethebatterycoverisremoved.
Charging
Connectthemainsadaptertothewallsocket
andthesocketonthetelephone.Chargethe
WHOHSKRQHIRUKRXUVWKH¿UVWWLPH
Battery
As batteries only have a certain lifespan it is
quitenormalthatcalltimeandstandbytime
will decrease somewhat compared to the
VSHFL¿FDWLRQVZKHQWKHWHOHSKRQHLVXVHG
regularly. Fully-charged batteries (5 hours
charging) will last for approx 160 hours standby
time or approx 140 minutes call time. These times
apply at normal room temperature. Full battery
capacity will not be reached until the batteries
have been charged 4-5 times. The telephone has
an automatic charging mechanism that prevents
the batteries from being overcharged or damaged
due to prolonged charging.
When the battery is running low, is
displayed and a warning signal will be heard.
Wa r n i n g !
Only use batteries, charger and accessories that have been
approved for use with this particular model.

10
English
Connecting other accessories may invalidate the telephone’s
type-approval and guarantee; furthermore it could be dangerous.
Connection to a USB port on a computer may damage the
telephone or the computer.
Battery cover
To remove the battery cover on the back of
the telephone, press carefully on the ribbed
surfaceandslidethecoverdownwards.
Toreplace,slidethecoverfrombelowandup
along the telephone.
Installation/removal of battery
Insert the battery with the contacts facing upwards.
Placethetopofthebatteryintheholdersonthe
telephone. Then press carefully on the bottom of
the battery until it locks in place. To remove the
battery, carefully press and lift the bottom of the
EDWWHU\LQWKH³¿QJHUVKDSHG´JURRYH
Installation/removal of SIM card
The SIM card holder is located under the
battery cover behind the battery. Make sure
thattheSIMcard’sgoldcontactsarefacing
inwardsandthecut-offcorneriscorrectly
positioned (upwards). The SIM card and its
contactsareeasytodamageifyouscratchor
bendthem,sobecarefulwhenyouhandle,
insertortakeoutthecard.IftheSIMcardis
missingorhasbeeninsertedincorrectly,
will be shown in the display.

11
English
The display
Indicator Status
Charging is in progress
Charging completed
Signal strength
Line 1 (certain operators have 2 lines)
Battery indicator
Keypad lock activated.
Missed call.
Roam, connected to another network
Headset connected
No SIM card
SIMcarderror
Error indication
Volume indicator
No light Turned off

12
English
Care and Maintenance
Your unit is a technically advanced product and should
betreatedwiththegreatestcare.Byfollowingthe
advice below, you can ensure that the guarantee will
cover any damage.
• Protect the unit from moisture. Rain/snowfall,
moisture and all types of liquid can contain
substances that corrode the electronic circuits. If the
unit gets wet, you should remove the battery and
allow the unit to dry completely before you replace it.
• Do not use or keep the unit in dusty, dirty
environments. The unit’s moving parts and electronic
components can be damaged.
• Donotkeeptheunitinwarmplaces.High
temperatures can reduce the lifespan for electronic
equipment, damage batteries and distort or melt
certain plastics.
• Do not keep the unit in cold places. When the unit
warms up to normal temperature, condensation can
form on the inside which can damage the electronic
circuits.
• Do not try to open the unit in any other way than that
which is indicated here.
• Donotdroptheunit.Donotknockorshakeiteither.
If it is treated roughly the circuits and precision
mechanics can be broken.
• Do not use strong chemicals to clean the unit.
• Use the charger indoors.
Theadviceaboveappliestotheunit,battery,charger
orotheraccessories.Ifthetelephoneisnotworking
as it should, please contact the place of purchase for
service.Don’tforgetthereceiptoracopyoftheinvoice.

13
English
Further safety information
Theunitandtheaccessoriescancontainsmallparts.
Keep them out of the reach of small children.
Operating environment
Remember to follow any particular rules that may
apply wherever you happen to be, and always turn off
the unit whenever its use is forbidden, or it can cause
interference or danger. Only use the unit in its normal
userposition.Thisunitcomplieswithguidelinesfor
radiation when it is used either in a normal position
against your ear, or when it is at least 2.2 cm (7/8 inch)
from your body. If the unit is carried close to your body
in a case, belt holder or other holder these should not
containanymetal,andtheproductshouldbeplaced
DWWKHGLVWDQFHIURP\RXUERG\VSHFL¿HGDERYH0DNH
sure that the distance instructions above are followed
untilthetransferiscomplete.Partsoftheunitare
magnetic.Theunitcanattractmetalobjects.Donot
keepcreditcardsorothermagneticmedianeartheunit,
as information stored on them can be erased.
Medical units
Theuseofequipmentthattransmitsradiosignals,
HJPRELOHSKRQHVFDQLQWHUIHUHZLWKLQVXI¿FLHQWO\
protectedmedicalapparatus.Consultadoctororthe
manufacturer of the apparatus to determine if it has
adequate protection against external radio signals, or if
youhaveanyquestions.Ifnoticeshavebeenputupat
health care facilities instructing you to turn off the unit
while you are there, you should comply. Hospitals and
otherhealthcarefacilitiessometimesuseequipment
that can be sensitive to external radio signals.

14
English
Pacemaker
Pacemaker manufacturers recommend a distance of
at least 15 cm (6 inches) between a mobile phone and
apacemakertoavoidtheriskofinterferencewiththe
pacemaker. These recommendations are in accordance
with independent research and recommendations from
Wireless Technology Research. People with pacemakers
should:
• alwayskeeptheunitatadistanceofatleast15cmfrom
the pacemaker
• notcarrytheunitinabreast-pocket
• hold the unit against the ear on the opposite
side from the pacemaker to reduce the risk of
interference.
Ifyoususpectthatthereisariskofinterference,turnoff
theunitandmoveitfurtheraway.
Hearing aids
Somedigitalwirelessunitscancauseinterferenceto
some hearing aids. Using the Doro HearPlus eh346m
EarHookcaneliminatethisforhearingaidswitha‘T’
position.Ifanyotherinterferenceoccurs,pleasecontact
your operator.

15
English
Vehicles
Radio signals can affect electronic systems in motor
vehicles (e.g. electronic fuel injection, ABS brakes,
automaticcruisecontrol,airbagsystems)thathave
been incorrectly installed or are inadequately protected.
Contact the manufacturer or its representative for
moreinformationaboutyourvehicleoranyadditional
equipment.
'RQRWNHHSRUWUDQVSRUWÀDPPDEOHOLTXLGVJDVHVRU
explosives together with the unit or its accessories. For
vehicles equipped with air bags: Remember that air
EDJV¿OOZLWKDLUZLWKFRQVLGHUDEOHIRUFH
'RQRWSODFHREMHFWVLQFOXGLQJ¿[HGRUSRUWDEOHUDGLR
equipmentintheareaabovetheairbagorthearea
where it might expand. Serious injuries may be caused
if the mobile phone equipment is incorrectly installed
DQGWKHDLUEDJ¿OOVZLWKDLU
,WLVIRUELGGHQWRXVHWKHXQLWZKLOVWÀ\LQJ7XUQRIIWKH
unit before you board a plane. Using wireless telecom
unitsinsideaplanecaninvolverisksforairsafetyand
interfere with telecommunications. It can also be illegal.
Areas with explosion risk
Always turn off the unit when you are in an area
wherethereisariskofexplosionandfollowallsigns
and instructions. An explosion risk exists in places
that include areas where you are normally requested
to turn off your car engine. Within such an area,
VSDUNVFDQFDXVHH[SORVLRQRU¿UHZKLFKFDQOHDGWR
SHUVRQDOLQMXULHVHYHQGHDWK7XUQRIIWKHXQLWDW¿OOLQJ
stations i.e. near petrol pumps and garages. Follow
therestrictionsthatareinforceontheuseofradio
equipment near places where fuel is stored and sold,
Other manuals for HANDLEEASY 326GSM
1
Table of contents
Other Doro Cell Phone manuals