5 If any error occurs, please follow the advices of the «Error Messages»
section.
Advice: For customer's convenience we suggest to use a stylus designed
to control the devices with a touchscreen. The stylus will facilitate your work
with the counter. Two styluses for the resistive touch screens are the part of
delivery set (see Fig.16).
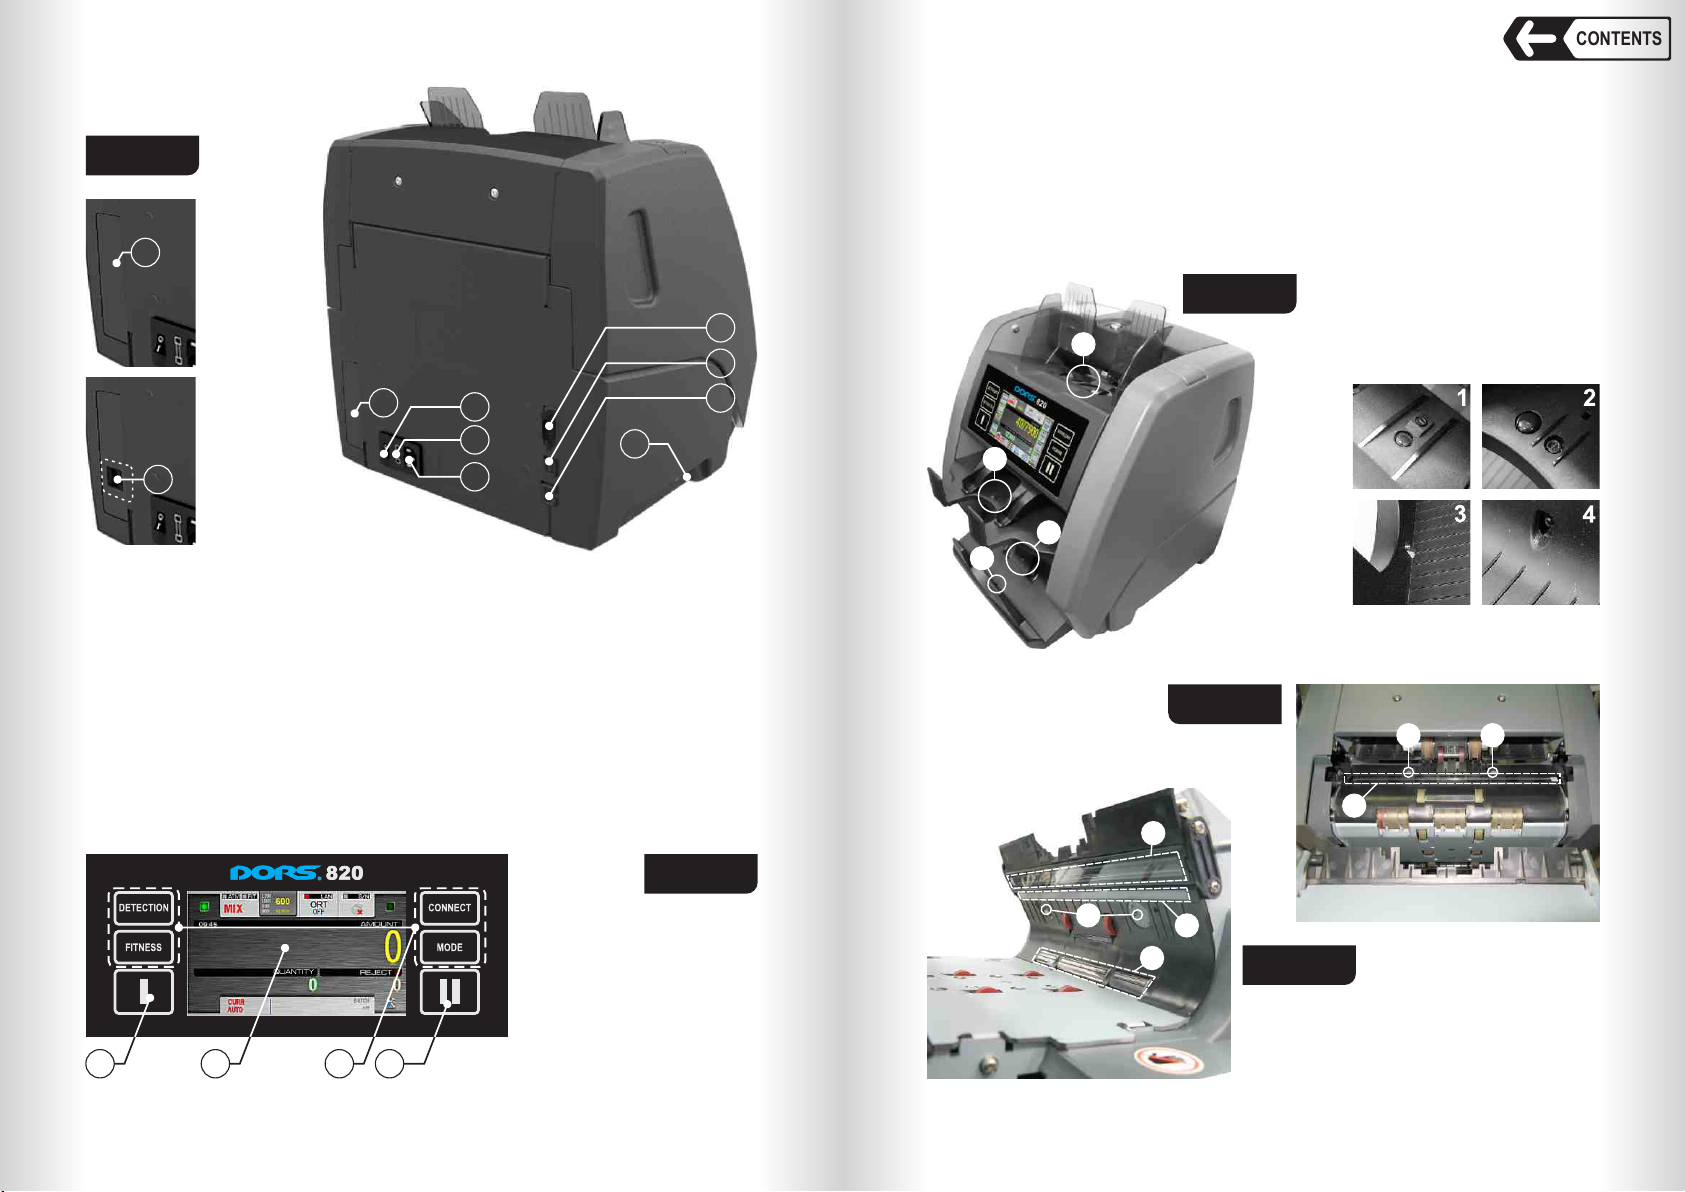
1 «Common» Submenu (see Fig.17)
Contains the categories «Detection», «Count rate», «Add»,
and the keys «Info», «Pocket limits», «Print», «Addit.»
Detection
Each counting mode has own range of available detection.
In COUNT mode the transmissive UV control (UV-T) and the optical density
control of banknotes (DENSITY) are available.
In DEN and MIX modes the available kinds of detection are: the reflective
UV control (UV-R), magnetic marks control (MG), strict level of counterfeit
detection (STRICT).
UV-T and UV-R are respectively translucent and reflective ultraviolet
detection mode. When it's activated ( , ), and a banknote with
an increased UV fluorescence has been found (for example, a counterfeit
printed on plain paper), the banknote goes to the reject pocket (the reasons of
rejection are available in the «REPORT» submenu).
UV-T is translucent UV control. When is on, the banknotes with
increased UV-luminescence (for instance, counterfeit notes printed on regular
paper) will be redirected to reject pocket (reject reason is available in REPORT
menu).
Fig. 15 Fig. 16
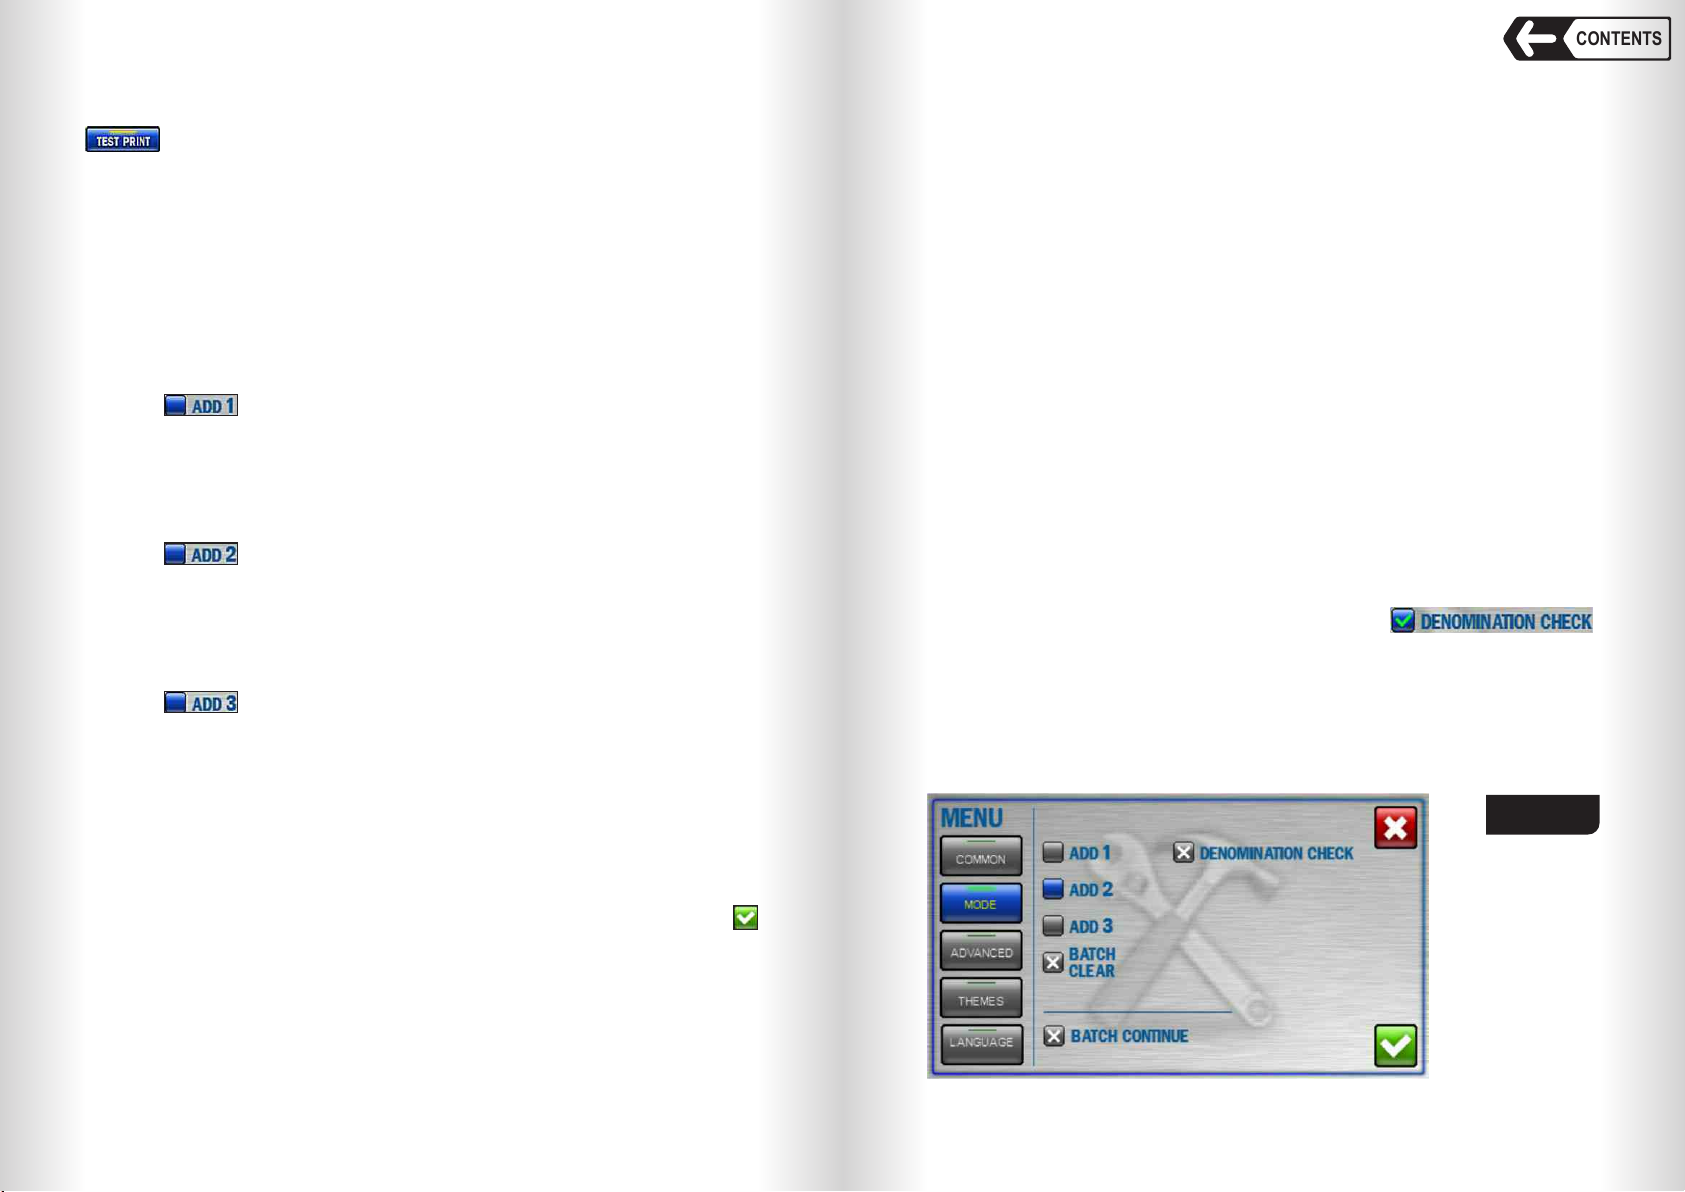
Counter settings menu
To enter User settings menu touch MENU icon (see Fig.13). The display will
return User settings menu. In its left part, there are the submenu keys, in the
right part there are the corresponding parameters.
To save the changes and exit the menu touch . After the exit the screen
shows the selected settings.
To exit without saving touch .
1312
CONTENTS
DENSITY is banknote optical density control. When is on, the
banknotes with increased density (for instance, two notes stuck together) as
well as the banknotes with increased transparency will be redirected to reject
pocket (reject reason is available in REPORT menu).
MG is magnet marks control. When is on, the banknotes without
magnet marks will be redirected to reject pocket (reject reason is available in
REPORT menu).
UV-R is reflective UV control. When is on, the banknotes with increa-
sed UV-luminescence (for instance, counterfeit notes printed on regular
paper) will be redirected to reject pocket (reject reason is available in REPORT
menu).
STRICT is strict verification level. When is off, the banknotes are
checked for the main authentication features only. When is on, the
banknotes are checked for both main and additional authentication features (if
any additional features are available)
IMPORTANT: When is on, authenticity control degree of the bank-
notes increases, but the number of rejected banknotes may increase, (reject
reason is «suspicious note»).
Note: Don’t turn off STRICT if counted banknotes authenticity is uncertain.
Fig. 17
Count rate
The user can choose any of four counting rates (600, 900 (1000), 1200, or
1500 banknotes per minute). The check-box against the selected speed is
highlighted in blue. For counting of worn notes we suggest lower speed (600 or
900 notes/min).
Warning: When S/N or Fitness mode is on, only two counting speeds (600
and 1000 notes/min) are available.
Banknote counter DORS 820Banknote counter DORS 820