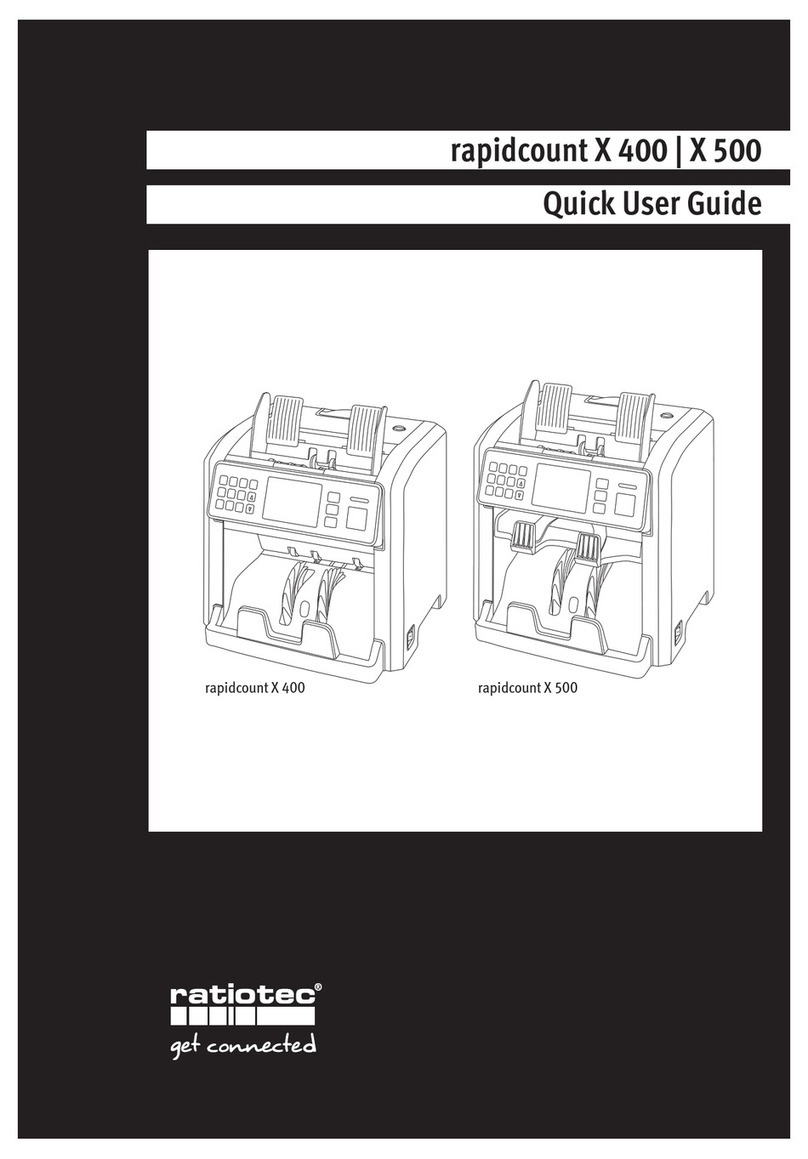
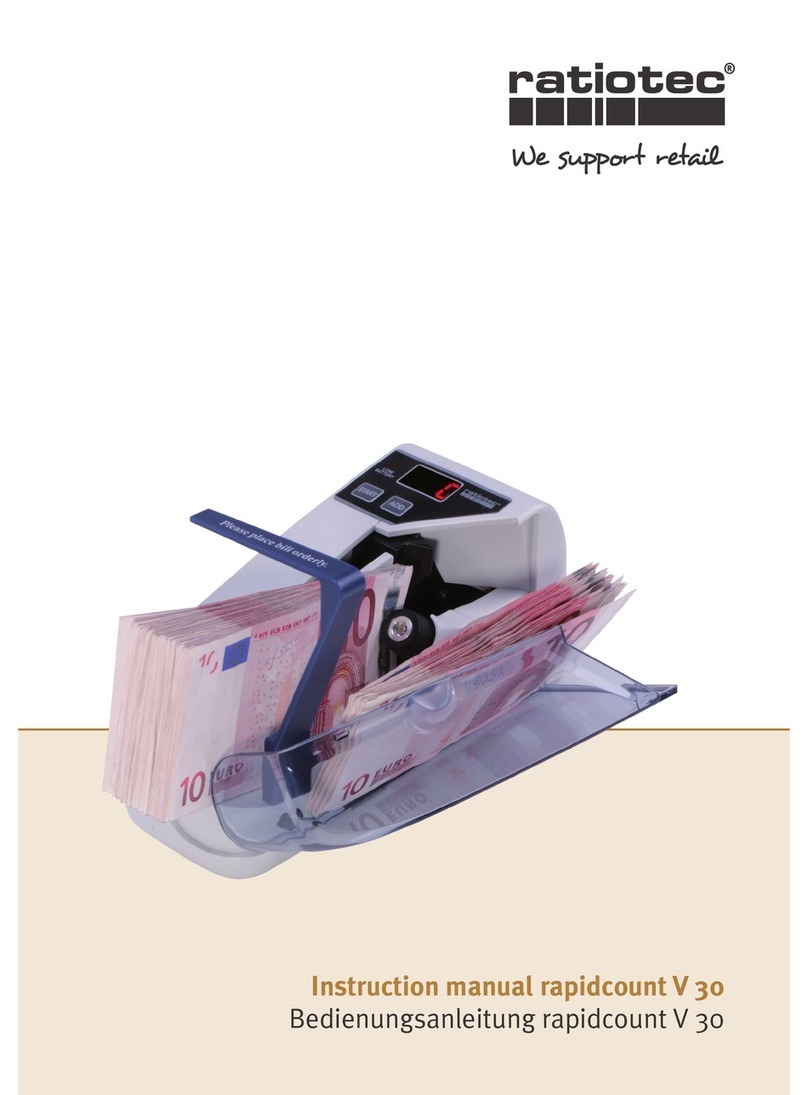
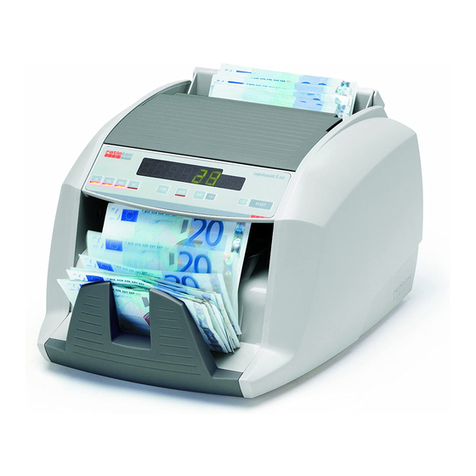
ratiotec Compact User manual

Instruction manual rapidcount Compact
Bedienungsanleitung rapidcount Compact
We support retail

2

Inhalt / contents
Seite / page
Bedienungsanleitung ........................................................ 4 – 9
Instructions for use ........................................................ 10 – 15
Instrucciones de uso ...................................................... 16 – 21
Istruzioni per l’uso ........................................................ 22 – 27
Mot d’emploi ................................................................. 28 – 33
Update Software ............................................................34 – 37
3

4
Bedienungsanleitung rapidcount Compact
Einleitung
Sehr geehrte Kundin, sehr geehrter Kunde,
vielen Dank, dass Sie sich für die Banknotenzählmaschine rapidcount Compact von ratiotec entschie-
den haben. Mit dem Kauf dieses Qualitätsproduktes haben Sie eine gute Wahl getroffen. Mit diesem
Gerät sind Sie in der Lage, schnell und komfortabel gemischte Banknoten zu zählen. Für einen stö-
rungsfreien und fehlerlosen Betrieb lesen Sie bitte die Bedienungsanleitung sorgfältig durch. Wir
empfehlen außerdem, die Maschine einmal im Jahr warten zu lassen. Es wird ein jährliches maximales
Zählvolumen von 0,3 Millionen Banknoten empfohlen.
1. Display
2. Tasten
3. Banknoteneinzug
4. Banknotenschiene
5. Banknotenablage
Vorderseite
1
2
3
4
1. Wartungsentriegelung
2. Anschluss für optional erhältlichen
Drucker
3. Netzsteckeranschluss
4. Anschluss für optional erhältliches
Display
5. Mini-USB-Anschluss
6. SD-Karten-Anschluss
Rückseite
1
2
3
Allgemeine Vorsorgemaßnahmen
Stellen Sie die Maschine nicht an einen zu warmen oder feuchten Ort. Setzen Sie die Maschine keinem
direkten Sonnenlicht oder Regen aus. Stellen Sie die Maschine auf eine ebene und stabile Fläche. Ge-
ben Sie keine Münzen oder andere Gegenstände in den Einzug. Lehnen Sie sich nicht über das Gerät,
da sich sonst Haare oder Krawatten im Einzug verklemmen können.
Lieferumfang
Banknotenzählmaschine rapidcount Compact, Banknotenschiene, Netzkabel, Bedienungsanleitung
5
4
5
6
Geräteansichten

Inbetriebnahme
5
1. CUR: Auswahl der Währung, Auswahl im Menü
2. MODE: Auswahl des Zählmodus
3. ADD: De-/ Aktivieren der Additionsfunktion,
Änderungen im Menü vornehmen
4. BAT: Auswahl eines voreingestellten Batchwertes
5. +1/+10: Einstellen des Batchwertes
6. CLR: Zurücksetzen des Zähl- und Batchwertes
7. PRT: Drucken der Zählergebnisse
8. REP: Öffnen und Verlassen der Zählübersicht
9. MENU: Öffnen und Verlassen des Menüs
10. RESET: Starten des Zählvorgangs
11. Ein-/Ausschalter: Ein- und Ausschalten des
Gerätes
Bedienfeld
12 3
456
1. Währung
2. Zählmodus
3. Batterieanzeige
4. Anzahl der gezählten Banknoten
5. Wert der gezählten Banknoten
6. Bündelfunktion
7. Autofunktion
8. Additionsfunktion
Display
Selbst-Diagnose
Schließen Sie das Netzkabel an die Maschine an und schalten Sie die Maschine durch langes Drücken
des Ein-/Ausschalters ein. Die Maschine führt nun einen Selbsttest durch.
Hinweis: Selbsttest nicht durch Ausschalten oder eine Zählung unterbrechen!
Nach dem erfolgreichen Selbsttest steht die Maschine in den zuletzt verwendeten Einstellungen zur
Verfügung.
Vor dem Zählen
Sortieren Sie stark zerknitterte oder verschmutzte Banknoten aus. Entfernen Sie Büroklammern oder
Tackernadeln von den Banknoten. Stellen Sie die Einzugsöffnung auf die Größe der zu zählenden Bank-
noten ein, um unnötige Fehler zu vermeiden.
Hinweis: Sollte eine Fehlermeldung erscheinen, finden Sie entsprechende Vorgehensweisen
unter dem Menüpunkt Fehlermeldungen.
789
1011
1 2 3
4
5
6
7
8
!
!

Bedienung
Optionen
6
Währungsmodus
Drücken Sie die CUR-Taste so oft, bis die zu zählende Währung (EUR, GBP,CHF) links im Display ange-
zeigt wird. Bei Auswahl von „Free“ befinden Sie sich im Stückzählmodus der Maschine. Die Echtheits-
prüfung ist nicht aktiviert. Gezählt wird die Anzahl der Banknoten. Im Stückzählmodus können Sie auch
Dokumente wie Gutscheine oder Eintrittskarten zählen.
Zählmodus
Nach Auswahl einer Währung können Sie durch Drücken der MODE-Taste zwischen den Zählmodi
„Sort“ und „Mix“ wählen. Legen Sie die Banknoten in den Banknoteneinzug ein. Das Gerät beginnt au-
tomatisch mit dem Zählvorgang. Anschließend werden die Stückzahl (PCS) und der Wert (VAL) der ge-
zählten Banknoten angezeigt. Durch die Banknotenschiene werden die Banknoten heruntergedrückt.
a.) Sortiermodus
Im Modus „Sort“ werden vorsortierte Bankno-
ten gezählt. Die Stückelung der ersten Banknote
wird als Referenz benutzt. Bei anderen Stücke-
lungen ertönt ein Signal und die Fehlermeldung
„Denomination different“ wird angezeigt. Ent-
nehmen Sie die Banknote anderer Stückelung
aus dem Banknotenauswurf und setzen Sie den
Zählvorgang über die RESET-Taste fort.
b.) Mix-Modus
In Modus „MIX“ werden unsortierte Banknoten
gezählt. Während der Wertzählung ist die Prü-
fung der UV-, Infrarot- und der magnetischen
Merkmale sowie die Bilderkennung aktiviert.
Zählübersicht
Über die REP-Taste können Sie sich eine detaillierte Übersicht über die gezählten Scheine anzeigen
lassen. Neben der Anzahl und dem Wert pro Stückelung werden Ihnen unten auch die Gesamtanzahl
und der Gesamtwert angezeigt. Die Zählergebnisse sind nach dem Ausschalten des Gerätes nicht mehr
verfügbar. Zum Verlassen der Zählübersicht drücken Sie die REP-Taste erneut.
Bündelfunktion
Die Bündelfunktion ermöglicht es Ihnen, eine von Ihnen vorab bestimmte Menge Banknoten (z.B. 10
Stück) aus einem größeren Stapel Banknoten abzuzählen, beispielsweise zur Bündelung von Bandero-
len. Sie können mit der BAT-Taste die voreingestellten Bündelwerte 100/50/20/10/--- auswählen oder
mit der +1/+10-Taste einen eigenen Wert bis maximal 200 einstellen. Durch langes Drücken der Taste er-
höht sich der Wert um 10; durch kurzes Drücken erhöht er sich um 1. Wird der Bündelwert beim Zählen
erreicht, stoppt das Gerät. Um mit dem Zählvorgang fortzufahren, betätigen Sie die RESET-Taste. Wenn
Sie die Bündelfunktion deaktivieren wollen, wählen Sie --- über die BAT-Taste aus.
Additionsfunktion
Mit der Additionsfunktion können Sie mehrere Zählvorgänge zu einem Wert addieren. Drücken Sie dazu
die ADD-Taste. Die aktive Additionsfunktion wird mit „ADD“ unten links im Display angezeigt. Während
eines Zählvorganges werden der Wert und die Anzahl der aktuell gezählten Scheine direkt zur Gesamt-
summe addiert. Um die Gesamtsumme zu löschen, drücken Sie bitte die CLR-Taste.

7
Autofunktion
Bei aktivierter Autofunktion beginnt die Maschine automatisch mit dem Zählvorgang, sobald Bankno-
ten in den Banknoteneinzug gelegt werden. Ist die Option deaktiviert, beginnt die Maschine, wenn Sie
die RESET-Taste drücken. Zum Ein- oder Ausschalten der Autofunktion drücken Sie die MENU-Taste
und anschließend die CUR-Taste, um die Option „Auto“ auszuwählen. Mit der ADD-Taste können Sie die
aktuelle Einstellung ändern. Über die MENU-Taste verlassen Sie das Menü. Bei aktivierter Autofunktion
erscheint ein A unten im Display, bei manuellem Start erscheint ein M.
Druckfunktion
Durch langes Drücken der PRT-Taste wird ein Ausdruck der Zählergebnisse auf dem angeschlossenen
Drucker ausgegeben. Es werden die Anzahl und Wert pro Stückelung, die Gesamtanzahl und –stücke-
lung und die aktuelle Uhrzeit/Datum ausgedruckt. Ändern Sie die Zeiteinstellungen über die MENU-
Taste. Anschließend drücken Sie ADD, um den Punkt „Time setting“ auszuwählen. Ändern Sie die aktu-
ellen Daten, indem Sie mit CUR zu einer Stelle navigieren und diese mit ADD erhöhen oder mit MODE
verringern. Mit MENU speichern Sie die Änderungen und verlassen das Menü.
Standby-Funktion
Bei aktivierter Standbyfunktion schaltet sich das Display bei Nichtbenutzen der Maschine nach der
ausgewählten Zeit automatisch ab. Zum Aktivieren des Displays drücken Sie eine beliebige Taste oder
führen Sie direkt einen Zählvorgang durch. Zum Einstellen der Standbyzeit drücken Sie die MENU-Taste
und anschließend die CUR-Taste um die Option Sleep Time auszuwählen. Mit der ADD-Taste können Sie
die Zeiteinstellung (Aus/ 5 Minuten/ 10 Minuten) ändern. Schließen Sie das Menü mit der MENU-Taste.
Fehlermeldungen
Sobald Sie die Maschine anschalten, wird ein Selbsttest durchgeführt, bei denen Fehlermeldungen
auftreten können. Sollte während des Betriebes ein Fehler auftreten, stoppt die Maschine und die ent-
sprechende Fehlermeldung wird im Display angezeigt.
Fehlermeldung Ursache Maßnahme
Right counting sensor Der rechte Zählsensor ist durch
einen Fremdkörper verdeckt oder
stark verschmutzt.
Entfernen Sie die Banknote(n).
Reinigen Sie den Sensor.
Left counting sensor Der linke Zählsensor ist durch einen
Fremdkörper verdeckt oder stark
verschmutzt.
Entfernen Sie die Banknote(n).
Reinigen Sie den Sensor.
Banknote feeding sensor Der Sensor ist verdeckt durch ein-
gelegte Banknote(n) oder stark ver-
schmutzt.
Entfernen Sie die oben eingelegte(n)
Banknote(n). Reinigen Sie den Sen-
sor.
IRA/IRB/IRC/IRE/IRF/IRG/ IRH/Co-
lor/Spectrum sensor
Der Sensor ist durch eingelegte
Banknote(n) verdeckt oder stark
verschmutzt.
Entfernen Sie die oben eingelegte(n)
Banknote(n). Reinigen Sie den Sen-
sor.
Magnetic B Sensor/
Magnetic C Sensor
Der Sensor ist verdeckt durch ein-
gelegte Banknote(n) oder stark ver-
schmutzt.
Entfernen Sie die oben eingelegte(n)
Banknote(n). Reinigen Sie den Sen-
sor.
Fehlermeldungen beim Start der Maschine

8
Fehlermeldung Ursache Maßnahme
Rotate speed sensor Die Sensorik zur Prüfung des Bewe-
gungszustands ist ausgefallen.
Setzen Sie sich bitte mit unserem
Serviceteam in Verbindung.
Internal memory fault Die Banknotenzählmaschine wurde
während eines Zählvorgangs aus-
geschaltet.
Setzen Sie sich bitte mit unserem
Serviceteam in Verbindung.
Fehlermeldung Ursache Maßnahme
Incomplete notes Eine unvollständige Banknote wurde
eingezogen.
Entfernen Sie alle Banknoten von der
Banknotenablage und starten Sie den
Zählvorgang neu.
Magnetic feature fail Die eingezogene Banknote ist stark
beschädigt, verschmutzt oder es be-
steht Falschgeldverdacht.
Entfernen Sie die zuletzt ausgeworfene
Banknote. Überprüfen Sie, ob die Bank-
note in Ordnung ist und führen Sie den
Zählvorgang mit Drücken der RESET-
Taste fort.
IR error Die eingezogene Banknote ist stark
beschädigt, verschmutzt oder es be-
steht Falschgeldverdacht.
Entfernen Sie die zuletzt ausgeworfene
Banknote. Überprüfen Sie, ob die Bank-
note in Ordnung ist und führen Sie den
Zählvorgang mit Drücken der RESET-
Taste fort.
Image error Die eingezogene Banknote ist stark
beschädigt, verschmutzt oder es be-
steht Falschgeldverdacht.
Entfernen Sie die zuletzt ausgeworfene
Banknote. Überprüfen Sie, ob die Bank-
note in Ordnung ist und führen Sie den
Zählvorgang durch Drücken der RESET-
Taste fort.
Paper error Die eingezogene Banknote ist stark
beschädigt, verschmutzt oder es be-
steht Falschgeldverdacht.
Entfernen Sie die zuletzt ausgeworfene
Banknote. Überprüfen Sie, ob die Bank-
note in Ordnung ist und führen Sie den
Zählvorgang durch Drücken der RESET-
Taste fort.
Spectrum error Die eingezogene Banknote ist stark
beschädigt, verschmutzt oder es be-
steht Falschgeldverdacht.
Entfernen Sie die zuletzt ausgeworfene
Banknote. Überprüfen Sie, ob die Bank-
note in Ordnung ist und führen Sie den
Zählvorgang durch Drücken der RESET-
Taste fort.
Holograph error Die eingezogene Banknote ist stark
beschädigt, verschmutzt oder es be-
steht Falschgeldverdacht.
Entfernen Sie die zuletzt ausgeworfene
Banknote. Überprüfen Sie, ob die Bank-
note in Ordnung ist und führen Sie den
Zählvorgang durch Drücken der RESET-
Taste fort.
Denomination error Die Banknotenzählmaschine befindet
sich im Wertzählmodus, Einzelsor-
tenzählung. Die Banknote entspricht
nicht der erwarteten Referenzsorte.
Entnehmen Sie die zuletzt ausgeworfene
Banknote. Führen den Zählvorgang mit
Drücken der RESET-Taste fort.
Fehlermeldungen im Betrieb
9
Fehlermeldung Ursache Maßnahme
Slant notes Die Banknotenzählmaschine hat die
Banknote schräg eingezogen.
Entfernen Sie alle Banknoten von der
Banknotenablage und starten Sie den
Zählvorgang neu.
Double notes,
Chained notes
Mehrere Noten sind direkt hinterei-
nander eingezogen worden und wur-
den als eine Note erkannt.
Entfernen Sie alle Banknoten von der
Banknotenablage und starten Sie den
Zählvorgang neu.
Passing error Die Banknote wurde falsch oder nicht
eingezogen.
Drücken Sie die RESET-Taste. Öffnen Sie
die Wartungsentriegelung und entfernen
Sie die Banknote.
Regelmäßige Reinigung der Maschine
Die Maschine hat viele empfindliche Sensoren, um ihre Aufgaben zu erfüllen. Es wird empfohlen, die
Maschine mindestens einmal im Monat zu säubern.
Hinweis: Schalten Sie die Maschine vor dem Reinigen aus und ziehen den Netzstecker!
Verschmutzungen können Sie mit einem Druckluftspray, weichen Tuch oder Pinsel entfernen. Öffnen
Sie auch die seitliche Klappe und befreien die Maschine und die Sensoren von Staub und eventuellen
Fremdkörpern. Starten Sie die Maschine danach neu. Lassen Sie Ihre Maschine regelmäßig von ratiotec
warten um Fehlern vorzubeugen.
Technische Daten rapidcount Compact
Zählt sortierte/
unsortierte Banknoten
/
Währung Euro / GBP / CHF
Formaterkennung Bis 500 Euro
Echtheitsprüfung Vollbilderkennung (CIS), UV-, IR-, MG-Merkmale
Geschwindigkeit 225 Banknoten / Minute
Laufleistung 0,3 Millionen Banknoten / Jahr
Kapazität Einzug / Stapelfach 100 / 100
Start-Stopp-Automatik
Bündelfunktion
Additionsfunktion
Optionen Akku, Belegdrucker, externes Display, SD-Karte
Stromversorgung 100 – 240V 50/ 60Hz
Betriebstemperatur 0°C bis 40°C
Abmessungen (l x b x h in mm) 170 x 157 x 152
Gewicht in kg 1,77
!
Technische Daten

10
User manual rapidcount Compact
Introduction
Dear customer,
Thank you for deciding on the rapidcount Compact banknote counter from ratiotec. You made a good
choice with the purchase of this quality product. With this device you will be able to count unsorted
banknotes both quickly and easily. Please read through the operating instructions carefully to ensure a
smooth and trouble-free operation. We additionally recommend an yearly maintenance of the product.
The ideal counting capacity is limited to 0,3 million banknotes per year.
1. Display
2. Keys
3. Banknote feeder
4. Banknote rail
5. Banknote stacker
Front side
1
2
3
4
1. Service cover
2. Connection for printer
3. Connection for mains cable
4. Connection for external display
5. Mini USB port
6. SD Card port
Rear side
1
2
3
Preventive measures
Do not store the machine in a hot or humid place. Do not expose the machine to direct sunlight or rain.
Operate the machine only on a flat and firm surface. Do not insert coins or other items in the banknote
feeder, except for banknotes. Do not lean over the device to avoid hair or ties jamming in the banknote
feeder.
Contents
Banknote counter rapidcount Compact, banknote rail, mains cable, user manual.
5
4
5
6
Device views

11
1. CUR: Choose a currency, navigate between
menu options
2. MODE: Chose a counting mode
3. ADD: Deactivate / activate the addition function,
change menu options
4. BAT: Choose a preset batch amount
5. +1/+10: Choose a batch amount
6. CLR: Delete the counting result or batch amount
7. PRT: Print the counting results
8. REP: Open and close the display of counting
results
9. MENU: Open and close the menu
10. RESET: Start the counting process
11. ON/OFF: Turn on/off the device
Control panel
12 3
456
1. Currency
2. Counting mode
3. Battery level
4. Quantity of banknotes counted
5. Value of banknotes counted
6. Batch function
7. Auto function
8. Addition function
Display
Self-test
Connect the mains cable and switch on the machine by holding the on/off key for one second. The ma-
chine performs a self-test. Afterwards the machine is available with the last used settings.
Tip: Do not interrupt the self-test by switching off the machine or starting a counting process!
Before counting
To avoid interruptions, sort out damaged or soiled banknotes and remove paper clips and adhesive
tape. Adjust the banknote feeder to the size of the banknote by sliding the grey tab.
Note: In case an error message is shown, please go to section “Error messages”.
789
1011
!
!
Operation
1 2 3
4
5
6
7
8

12
Currency mode
Keep pressing the CUR key until the currency (EUR, GBP, CHF) is shown in the top left corner of the
display. “Free” stands for the piece counting mode. In this mode the counterfeit detection is not acti-
vated. The machine only counts the number of inserted banknotes. You can also count documents like
vouchers or tickets.
Counting mode
After choosing a currency you can switch between the counting mode „Sort“ and „Mix“ by pressing the
MODE-key. Insert the banknotes into the banknote feeder. The device automatically starts the counting
process. Afterwards the quantity (PCS) and amount (VAL) of counted banknotes is shown. The bankno-
te rail keeps the banknotes together. Counterfeit detection is activated and includes checking of UV-, IR
and MG-features as well as image recognition.
a.) Sort mode
In “Sort” mode, sorted banknotes of the same
denomination can be counted. The denomina-
tion of the first counted banknote is used as
reference. If other denominations are found,
the machine beeps and the error message “De-
nomination different” is shown. Please remove
the banknote with different denomination from
the banknote stacker and continue the counting
process by pressing the RESET-key.
Mix mode
In “MIX” mode, unsorted banknotes can be
counted.
Display of results
After pressing the REP key in EUR, GBP or CHF mode, the counting results are displayed. The quantity
and amount for each denomination and for the total stack will be shown. The counting results will be
deleted when you turn off the machine. To close the display of results press the REP key again.
Batch function
By using the Batch function it is possible to count a preset number of banknotes (e.g. 10 pcs) from a
bigger stack of banknotes, for instance to form a banknote bundle. You can choose the preset batch
quantities of 100/50/20/10/--- by pressing the BAT key or set your own quantity up to 200 by pressing
the +1/+10 key. When holding this key for a few seconds, the batch quantity increases by 10. When
pressing the key shortly, the batch quantity increases by 1. When, during a counting process, the batch
quantity is reached, the device will stop. In order to continue the counting process, press the RESET
key. Choose --- by pressing the BAT key to deactivate the Batch function.
Addition function
The Addition function enables you to add several counting processes to one total sum. Press the ADD
key to activate this function. “ADD” will be shown in the bottom left corner of the display. During a coun-
ting process, the number and value of the banknotes that are currently being counted will be directly
added to the total sum. Press the CLR key to delete the total sum.
Options
Counting process

13
Auto function
When Auto function is activated, the machine will automatically start the counting process when bank-
notes are placed in the banknote feeder. When this option is deactivated, the machine starts counting
manually when you press the RESET key. To turn on or off the Auto function press the MENU key to
enter the Time Set menu. Then press the CUR key to choose the “Auto” option and activate or deacti-
vate the “Auto” option pressing the ADD. Press the MENU key to exit the menu. If the Auto function is
activated, an „A“ will be shown on the display. If the manual start is activated, an “M” will be displayed.
Print function
By holding the PRT key for a few seconds, an overview of the counting results will be printed through
the printer connected. The receipt shows the quantity and value for each denomination, the total quan-
tity and value and the current time/date. You can change the time settings by pressing MENU to enter
the Time Set. Afterwards press ADD to chose „Time setting“. Use CUR to navigate to a digit, increase
the digit with ADD and lower it with MODE. Save the changes and leave the menu by pressing MENU.
Standby function
When the Standby function is activated, the display automatically turns off after not using the machine
for the preset amount of time. To activate the display, press any key or start a counting procedure.
In order to set the standby time press MENU. Then press CUR to navigate to “Sleep time”. Then it is
possible to change the standby time (Off / 5 minutes/ 10 minutes) by pressing the ADD key. Close the
menu by pressing the MENU key.
Error messages
When you turn on the rapidcount Compact, it performs a self-test in which error messages may be dis-
played. In case an error occurs during the counting process, the machine stops and an error message
is displayed.
Error message Cause Action
Right counting sensor The right counting sensor is blocked
or soiled.
Remove the banknotes. Clean the
sensor.
Left counting sensor The left counting sensor is blocked
or soiled.
Remove the banknotes. Clean the
sensor.
Banknote feeding sensor The sensor is soiled or blocked by
inserted banknotes in the banknote
feeder.
Remove the inserted banknotes.
Clean the sensor.
IRA/IRB/IRC/IRE/IRF/IRG/ IRH/
Color/Spectrum sensor
The sensor is soiled or blocked by
inserted banknotes in the banknote
feeder.
Remove the inserted banknotes.
Clean the sensor.
Magnetic B Sensor/
Magnetic C Sensor
The sensor is soiled or blocked by
inserted banknotes in the banknote
feeder.
Remove the inserted banknotes.
Clean the sensor.
Rotate speed sensor The sensors for recognition of the
state of movement are not working.
Please contact our service team.
Error messages at the start of the device

14
Error message Cause Action
Internal memory fault The banknote counter has been tur-
ned off during a counting process.
Please contact our service team.
Error message Cause Action
Incomplete notes A damaged banknote was inserted. Remove the banknotes from the bank-
note stacker and continue the counting
process.
Magnetic feature fail The inserted banknote is damaged,
soiled or might be counterfeit.
Remove the top banknote from the
banknote stacker. Check if it is genuine
and continue the counting process by
pressing the RESET key.
IR error The inserted banknote is damaged,
soiled or might be counterfeit.
Remove the top banknote from the
banknote stacker. Check if it is genuine
and continue the counting process by
pressing the RESET key.
Image error The inserted banknote is damaged,
soiled or might be counterfeit.
Remove the top banknote from the
banknote stacker. Check if it is genuine
and continue the counting process by
pressing the RESET key.
Paper error The inserted banknote is damaged,
soiled or might be counterfeit.
Remove the top banknote from the
banknote stacker. Check if it is genuine
and continue the counting process by
pressing the RESET key.
Spectrum error The inserted banknote is damaged,
soiled or might be counterfeit.
Remove the top banknote from the
banknote stacker. Check if it is genuine
and continue the counting process by
pressing the RESET key.
Holograph error The inserted banknote is damaged,
soiled or might be counterfeit.
Remove the top banknote from the
banknote stacker. Check if it is genuine
and continue the counting process by
pressing the RESET key.
Denomination error The device currently counts in „Sort“
mode. The banknote does not meet the
expected reference.
Remove the top banknote from the
banknote stacker. Continue the coun-
ting process by pressing the RESET key.
Slant notes The device has pulled in the banknote
diagonally and not straight.
Remove all banknotes from the bank-
note stacker and restart the counting
process.
Double notes,
Chained notes
Several banknotes were inserted too
quickly and were recognised as one
banknote.
Remove all banknotes from the bank-
note stacker and restart the counting
process.
Passing error The banknote was not pulled in correct-
ly.
Press the RESET key. Open the service
cover and remove the banknote.
Error messages during operation

15
Regular cleaning
The machine has many sensitive sensors to perform its functions. We recommend cleaning the machine
at least once a month.
Note: Turn off the machine before cleaning and unplug the mains cable.
You can remove debris by using compressed air, a soft cloth or a brush. Please also open the service
cover and remove dust and foreign material from the sensors. Afterwards restart the machine. We addi-
tionally recommend an annual maintenance of the product to prevent error messages.
Functions rapidcount Compact
Counts sorted / unsorted banknotes /
Currency Euro / GBP / CHF
Size recognition Up to 500 Euro
Counterfeit detection Image recognition (CIS), UV, IR, MG features
Speed 225 banknotes / minute
Counting capacity 0,3 million banknotes / year
Capacity feeder / stacker 100 / 100
Automatic start-stop function
Batch function
Addition function
Options Rechargeable battery, receipt printer, external display, SD card
Power supply 100 – 240V 50/ 60Hz
Operating temperature 0°C to 40°C
Measurements (l x w x h in mm) 170 x 157 x 152
Weight in kg 1,77
!
Technical Data

16
Manual de usuario rapidcount Compact
Introducción
Estimado cliente,
Gracias por decidirse por la contadora de billetes rapidcount Compact de ratiotec. Ha tomado una deci-
sión acertada con la compra de este producto de calidad. Con este aparato usted puede contar billetes
mezclados tanto rápida como cómodamente. Por favor lea las instrucciones de uso cuidadosamente
para asegurar un funcionamiento libre de errores. Además le recomendamos llevar a cabo una revisión
de mantenimiento anual. La capacidad ideal de contaje annual de este aparato asciende a 0,3 millones
de billetes por año.
1. Pantalla
2. Teclas
3. Entrada de billetes
4. Guía de billetes
5. Salida de billetes
Parte frontal
1
2
3
4
1. Cubierta de mantenimiento
2. Conexión para impresora
3. Conexión para cable de
alimentación
4. Conexión para pantalla externa
5. Puerto Mini USB
6. Puerto para Tarjeta SD
Parte posterior
1
2
3
Cuidados preventivos
No guarde su aparato en un lugar caliente o húmedo. No exponga la máquina a la luz directa del sol o
a la lluvia. Opere la máquina únicamente sobre una superficie firme y lisa. No introduzca monedas u
otros objetos en la ranura de entrada, excepto billetes. No se incline sobre el aparato, ya que su pelo o
corbata podrían atascarse en la entrada de billetes.
Contenido del envío
Contadora de billetes rapidcount Compact, guía de billetes, cable de corriente, manual de usuario.
5
4
5
6
Componentes

17
1. CUR: Seleccionar una divisa, navegar
entre las opciones del menú
2. MODE: Seleccionar un modo de conteo.
3. ADD: Activa / desactiva la función
Adición, modifica las opciones
del menú.
4. BAT: Selecciona una cantidad
preseleccionada para fajos.
5. +1/+10: Selecciona una cantidad para
el lote.
6. CLR: Borra los resultados de conteo y
la cantidad del lote.
7. PRT: Imprime los resultados del conteo.
8. REP: Abre y cierra la pantalla de
resumen de conteo.
9. MENU: Abre y cierra el menú.
10. RESET: Comienza el proceso de conteo.
11. ON/OFF: Enciende y apaga el aparato.
Panel de control
12 3
456
1. Divisa
2. Modo de conteo
3. Estado de la batería
4. Cantidad de billetes contados
5. Valor de los billetes contados
6. Función de fajos
7. Función Auto
8. Función Adición
Pantalla
Test automático
Conecte el cable de alimentación y encienda la máquina apretando la tecla ON/OFF durante un segun-
do. La máquina llevará a cabo un test automático. Seguidamente la máquina estará disponible para su
uso con los últimos ajustes.
Consejo: ¡No interrupta el test automático apagando la máquina o comenzando
un proceso de conteo!
Antes de contar
Para evitar interrupciones, separe billetes dañados o sucios y retire cualquier clip o cinta adhesiva que
pueda haber. Ajuste la anchura de la entrada de billetes con la pestaña gris.
Consejo: En caso de que ocurra algún error, por favor consulte el capítulo de
mensajes de error.
789
1011
!
!
Operatión
1 2 3
4
5
6
7
8

18
Modo de divisa
Presione la tecla CUR repetidamente hasta que la divisa (EUR, GBP, CHF) se muestre en la esquina
izquierda superior de la pantalla. “Free” indica conteo de unidades, no de valor. En este modo la detec-
ción de billetes falsos no está activada. La máquina sólo cuenta la cantidad de billetes introducidos.
También puede contar documentos como vales o tiquets.
Modo de conteo
Tras seleccionar una divisa, usted puede elegir entre los modos de conteo “Sort” y “Mix” presionando
la tecla MODE. Introduzca los billetes en la entrada de billetes. El aparato comienza automáticamente
el proceso de conteo. Seguidamente, la cantidad (PCS) y el valor (VAL) de los billetes contados se
muestra en la pantalla. La guía de billetes mantiene los billetes juntos. La detección de billetes falsos
está activada e incluye la comprobación de las características Ultravioletas, Infrarrojas y Magnéticas,
así como el reconocimiento de imagen.
a.) Modo Sort
En el modo “Sort” se pueden contar billetes clasificados de la
misma denominación. La denominación del primer billete con-
tado se utiliza como referencia. Si se detecta una denominación
diferente, el aparato emitirá un pitido y el mensaje de error “De-
nomination different” se mostrará. Por favor retire el billete con
la denominación diferente de la salida de billetes y continue el
proceso de conteo presionando la tecla RESET.
b) Modo Mix
En el modo “Mix” se pueden
contar billetes no clasificados.
Presentación de los resultados
Presionando la tecla REP en los modos “EUR”, “GBP” o “CHF” los resultados de conteo se mostrarán
en la pantalla. La cantidad de billetes y el valor total de cada denominación y del fajo completo serán
mostrados. Los resultados del conteo se borrarán cuando apague el aparato. Para cerrar la pantalla de
resultados presione la tecla REP nuevamente.
Función Batch (Fajos)
Usando la función Batch (Fajos) es posible contar una cantidad preseleccionada billetes (e.g. 10 uds)
de un lote de billetes para, por ejemplo, hacer un fajo de billetes. Puede seleccionar una de las canti-
dades de billetes preajustadas de 100 / 50 / 20 / 10 / - unidades presionando la tecla BAT, o seleccionar
su cantidad deseada por medio de la tecla +1/+10. Si presiona dicha tecla durante varios segundos la
cantidad del fajo incrementará en 10 unidades. Si presiona la tecla brevemente, la cantidad del fajo
aumentará en 1 unidad. Cuando se alcance la cantidad indicada del fajo durante el proceso de conteo
el aparato se detendrá. Para continuar el proceso de conteo presione la tecla RESET. Elija “–“ presio-
nando la tecla BAT para desactivar la función de Fajos.
Función Adición
La función Adición permite añadir varios procesos de conteo a una suma total. Presione la tecla ADD
para activar esta función, aparecerá “ADD” en la esquina inferior izquierda de la pantalla. Durante el
proceso de conteo, la cantidad y valor de los billetes que se estén contando se añadirán directamente
a una suma total. Presione la tecla CLR para borrar el resultado actual de la suma total.
Proceso de conteo
Opciones

19
Función Auto
Cuando la función Auto esté activada, el aparato comenzará el proceso de conteo automáticamente
cuando coloque billetes en la entrada de billetes. Cuando esta opción esté desactivada, el proceso de
conteo se deberá iniciar manualmente presionando la tecla RESET. Para activar o desactivar la función
Auto, presione la tecla MENU. Seguidamente, seleccione la opción “Auto” con la tecla CUR y modifique
los ajustes actuales con la tecla ADD. Salga del menú presionando nuevamente la tecla MENU. Si la
función Auto está activada se mostrará una “A” en la pantalla. Si, por el contrario, el comienzo manual
está activado se mostrará una “M”.
Impresión
Si mantiene presionada la tecla PRT durante varios segundos se imprimirán los resultados de conteo
en la impresora conectada. El ticket mostrará la cantidad y valor de cada denominación, la cantidad y
valor total de los billetes contados, así como la fecha y hora actuales. Puede modificar los ajustes de
hora presionando la tecla MENU. Con la tecla ADD elija “Time settings” y navegue por los dígitos con la
tecla CUR. Podrá incrementar o reducir el dígito con las teclas ADD y MODE. Guarde la configuración y
salga del menú presionando la tela MENU.
Función Stand by
Cuando la función “Stand by” está activada la pantalla se desactiva automáticamente si no se utiliza
la máquina duranta un tiempo predeterminado. Para reactivar la pantalla, presione cualquier botón o
inicie un procedimiento de conteo. Para seleccionar un tiempo de “Stand by” presione MENU. Navegue
hasta la función “Sleep time” con la tecla CUR. Podrá elegir el tiempo de “Stand by” (Off-Desactivado
/ 5 min / 10 min) por medio de la tecla ADD. Guarde la configuración y salga del menú presionando la
tela MENU.
Mensajes de error
Al conectar la rapidcount Compact, esta realiza un test automático durante el cual pueden aparecer
mensajes de error. En caso de que ocurra un error durante el proceso de conteo, la máquina se deten-
drá y mostrará un mensaje de error en la pantalla.
Mensaje de error Causa Solución
Right counting sensor El sensor de conteo derecho está
bloqueado o sucio.
Retire los billetes. Limpie el sensor.
Left counting sensor El sensor de conteo izquierdo está
bloqueado o sucio.
Retire los billetes. Limpie el sensor.
Banknote feeding sensor El sensor de alimentación está sucio
o bloqueado por billetes en la ra-
nura de entrada.
Retire los billetes insertados. Limpie
el sensor.
IRA/IRB/IRC/IRE/IRF/IRG/ IRH/Co-
lor/Spectrum sensor
El sensor está sucio o bloqueado
por billetes en la ranura de entrada.
Retire los billetes insertados. Limpie
el sensor.
Magnetic B Sensor/
Magnetic C Sensor
El sensor está sucio o bloqueado
por billetes en la ranura de entrada.
Retire los billetes insertados. Limpie
el sensor.
Mensajes de error durante el arranque del aparato

20
Mensaje de error Causa Solución
Rotate speed sensor Los sensores de reconocimiento de
velocidad de rotación no están fun-
cionando.
Por favor contacte a su servicio de
mantenimiento.
Internal memory fault La contadora de billetes ha sido
desconectada durante un proceso
de conteo.
Por favor contacte a su servicio de
mantenimiento.
Mensaje de error Causa Solución
Incomplete notes Se ha introducido un billete dañado. Retire los billetes de la salida de billetes
y continue el proceso de conteo.
Magnetic feature fail El billete introducido está dañado, sucio
o puede ser falso.
Retire el último billete de la salida de
billetes. Compruebe si se trata de un
billete falso y continúe el proceso de
conteo presionando la tecla RESET.
IR error El billete introducido está dañado, sucio
o puede ser falso.
Retire el último billete de la salida de
billetes. Compruebe si se trata de un
billete falso y continúe el proceso de
conteo presionando la tecla RESET.
Image error El billete introducido está dañado, sucio
o puede ser falso.
Retire el último billete de la salida de
billetes. Compruebe si se trata de un
billete falso y continúe el proceso de
conteo presionando la tecla RESET.
Paper error El billete introducido está dañado, sucio
o puede ser falso.
Retire el último billete de la salida de
billetes. Compruebe si se trata de un
billete falso y continúe el proceso de
conteo presionando la tecla RESET.
Spectrum error El billete introducido está dañado, sucio
o puede ser falso.
Retire el último billete de la salida de
billetes. Compruebe si se trata de un
billete falso y continúe el proceso de
conteo presionando la tecla RESET.
Holograph error El billete introducido está dañado, sucio
o puede ser falso.
Retire el último billete de la salida de
billetes. Compruebe si se trata de un
billete falso y continúe el proceso de
conteo presionando la tecla RESET.
Denomination error El aparato se encuentra en modo “Sort”.
El billete no corresponde con la denomi-
nación esperada.
Retire el último billete de la salida de
billetes y continúe el proceso de conteo
presionando la tecla RESET.
Slant notes El billete ha entrado diagonalmente en
el aparato.
Retire todos los billetes de la salida de
billetes y reinicie el proceso de conteo.
Double notes,
Chained notes
Varios billetes han sido introducidos
rápidamente y se han reconocido como
uno solo.
Retire todos los billetes de la salida de
billetes y reinicie el proceso de conteo.
Passing error El billete no ha sido transportado cor-
rectamente.
Presione RESET. Abra el aparato y retire
el billete atascado.
Mensajes de error durante la operación:
Table of contents
Languages:
Other ratiotec Banknote Counter manuals

ratiotec
ratiotec rapidcount T 575 Use and care manual

ratiotec
ratiotec Rapidcount S User manual

ratiotec
ratiotec Rapidcount S Series Use and care manual

ratiotec
ratiotec rapidcount X 400 Instruction manual

ratiotec
ratiotec Rapidcount V 30 User manual

ratiotec
ratiotec rapidcount T 575 User manual

ratiotec
ratiotec S 20 User manual

ratiotec
ratiotec Cash Box Product information sheet

ratiotec
ratiotec Rapidcount X 500 Product information sheet

ratiotec
ratiotec Soldi Smart Plus Use and care manual