manuals.online logo
Brands
  1. Home
  2. •
  3. Brands
  4. •
  5. dosatron
  6. •
  7. Industrial Equipment
  8. •
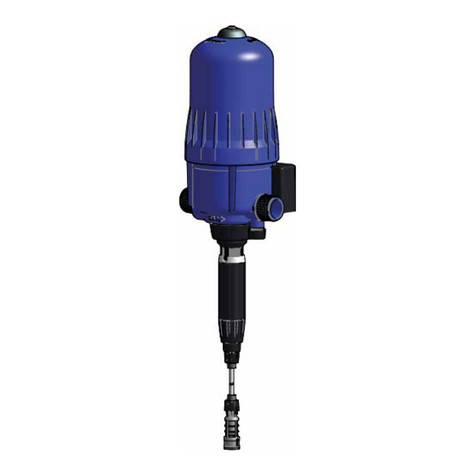
  9. dosatron D8RE2 User manual

dosatron D8RE2 User manual

PDI753
PDI751
PDI702
Part PJDI120VMINI-H:
D8RE2 - 40 GPM
Mini Maintenance Kit
This kit contains:
PAR T S
GENUINE
DOSATRON
2090 Sunnydale Blvd.
Clearwater, FL 33765
1-800-523-8499 • 1-727-443-5404
www.dosatronusa.com
(1) JDI121 Plunger Seal
(1) PDI756 Top Guide
(1) PDI752 Check Valve
Cone
(1) MDI359 Check Valve
Spring
(1) JDI131 Check Valve
Cone O-Ring
(1) Silicone DOSA-LUBE
Instructions
(Parts included in kit noted in blue)
1.
PDI748
Unscrew
hose nut
(PDI748)
and remove
the hose.
Disassembly
NOTE: Reassembly instructions
on back.
Kit Contents:
JDI121:
Plunger seal
PDI756:Top Guide
PDI752:
Check Valve
Cone
MDI359: Check
Valve Spring
JDI131:
Check Valve
Cone O-Ring
DOSA-LUBE:
Silicone
2. Unscrew the
check valve
nut (PDI747).
Remove the
check valve
assembly
(PJDI118)
by pulling
it down.
5.
Unscrew the
adjusting sleeve
(PPDI037) until it
comes off. Hold
the black sleeve
(8P159) and
push up on the
threaded part of
the white injection
stem (PDI753).
Then slide it out
of the black
sleeve (8P159)
from the top.
PDI753
8P159
PPDI037
Unscrew the
upper bell
housing
(8MP039) and
remove the
piston assembly
(8PC002) out of
the unit.
8MP039
8PC002
JDI121
PJDI119
7.
8.
Unscrew the locking nut (PDI702)
from the injection stem assembly
(8CD033) and remove the black
anti-rotation
lock (PDI751)
by spreading
it apart, then
slide it down
over the
threads of
the injection
stem (PDI753).
Unscrew injection stem assembly
nut (PDI702) and pull down on the
injection stem assembly (8CD033) to
detach from the body of the unit.
PDI702
8CD033
Take off the top
guide (PDI756)
by giving it a 1/4
turn counter
clockwise, and
discard.
Discard the
check valve
spring (MDI359),
check valve
cone (PDI752)
and check
valve cone
o-ring (JDI131).
3.
4.
6.
From the tip
of the plunger
(PJDI119),
remove the
plunger seal
(JDI121), pinch
the seal, roll it
off, then discard.
PDI747
PJDI118
Use Dosa-Lube on
specied parts only.
PDI756
JDI131
MDI359
PDI752
8CD033
CAUTION: Parts may contain
concentrated chemicals. The use of
Proper Protective Equipment is recom-
mended when performing maintenance.
Don’t forget to reset your
injection rate to the proper ratio.
Reassembly
9. Using the Dosa-Lube provided in
the kit, rub a small amount onto the
injection stem o-ring (JDI122) and
the black stem o-ring (JDI100).
JDI122
JDI100
Slide the white
injection stem
(PDI753) down
into the black
sleeve (8P159),
making sure the
key inside the
sleeve is aligned
with the groove
on the white
injection stem. Pull
down on the white
injection stem
(PDI753) as far as
it will go.
10.
11. Slide the injection
stem assembly
nut (PDI702)
onto the black
sleeve (8P159).
Then screw
the adjusting
sleeve
(PPDI037)
back onto the
black injection
sleeve (8P159).
PPDI037
8P159
PDI702
15. Take the new
plunger seal
(JDI121) and
place it on
the groove of
the plunger
(PJDI119) at
the bottom of
the piston.
Attach the injection stem assembly
(8CD033) to the bottom of unit
making sure
make sure
to cut in
a straight
line.
Attach
the hose
and the
hose nut
(PDI748)
back to the
unit.
18. Cut 1” off from the top of the
suction hose to ensure a tight t,
PDI748
17.
14. Insert the new check valve assembly
(PJDI118) back into the bottom of the
injection stem assembly (8CD033)
and screw the check valve nut
(PDI747) back on.
8CD033
Take the new check valve cone
(PDI752)and install the new check
valve cone o-ring (JDI131). Place
the cone part going down into the
check valve barb (PDI742). Insert
the new check valve spring (MDI359)
onto the rod of the check valve cone
(PDI752), place the new top guide
(PDI756) on top and push down,
then turn 1/4 clockwise until the top
guide locks into the check valve barb
(PDI742). Apply Dosa-Lube on the
check valve o-ring (20J002).
NOTE: Do not apply Dosa-Lube
inside the check valve.
13.
12. Reinstall the “C”
clamp (PDI751)
by gently
sliding it over
the threads
at the bottom
of the white
injection stem
(PDI753).
Screw back
the locking
nut (PDI733).
PDI751
PDI753
PDI733
the teeth on
the sleeve t
into the grooves
of the blue
body. Screw the
injection stem
nut (PDI702)
back on.
16. Insert the piston assembly
(8PC002) into the lower housing
(8PP010NPT), then screw the
upper bell housing (8MP039)
back in place.
8P159
PDI753
PDI756
JDI131
MDI359
PDI752
PDI742
20J002
PDI747
PJDI118
JDI121
PJDI119
8MP039
8PC002
8PP010NPT
PDI702
8CD033

Other manuals for D8RE2

1

This manual suits for next models

1

Other dosatron Industrial Equipment manuals

dosatron DI 1500 User manual

dosatron

dosatron DI 1500 User manual

dosatron MKD40MZ1000 User manual

dosatron

dosatron MKD40MZ1000 User manual

dosatron D9 Green Line User manual

dosatron

dosatron D9 Green Line User manual

dosatron MKD40MZ5AF User manual

dosatron

dosatron MKD40MZ5AF User manual

dosatron D40 User manual

dosatron

dosatron D40 User manual

dosatron HSPKD45 User manual

dosatron

dosatron HSPKD45 User manual

dosatron D 20 S User manual

dosatron

dosatron D 20 S User manual

dosatron DosaCart HS15-16 User manual

dosatron

dosatron DosaCart HS15-16 User manual

Popular Industrial Equipment manuals by other brands

Siemens SIMATIC NET S7-1200 operating instructions

Siemens

Siemens SIMATIC NET S7-1200 operating instructions

Bungard RDC 21-K Translation of the original instructions

Bungard

Bungard RDC 21-K Translation of the original instructions

Wexxar BEL 270 V.02 Operation & service manual

Wexxar

Wexxar BEL 270 V.02 Operation & service manual

ABB HT616345 Operation manual

ABB

ABB HT616345 Operation manual

Zimmer GPP5000 Series Installation and operating instructions

Zimmer

Zimmer GPP5000 Series Installation and operating instructions

PRODEM PHP 220 manual

PRODEM

PRODEM PHP 220 manual

ABB HT597057 Operation manual

ABB

ABB HT597057 Operation manual

ABB HT612916 Operation manual

ABB

ABB HT612916 Operation manual

Gunnebo Wedge K12 Additional Installation, Operation and Maintenance Instructions

Gunnebo

Gunnebo Wedge K12 Additional Installation, Operation and Maintenance Instructions

ABB HT565235 Operation manual

ABB

ABB HT565235 Operation manual

Vertiv XTE 401 Series installation manual

Vertiv

Vertiv XTE 401 Series installation manual

Milnor 48040F7B manual

Milnor

Milnor 48040F7B manual

Deekax TALTERI DIVK-290 DEMA Installation and user manual

Deekax

Deekax TALTERI DIVK-290 DEMA Installation and user manual

Vollrath FC-6HC-01120-AD Operator's manual

Vollrath

Vollrath FC-6HC-01120-AD Operator's manual

Reliable DDX-LP PrePak Instructions for installation, operation care and maintenance

Reliable

Reliable DDX-LP PrePak Instructions for installation, operation care and maintenance

ABB ACS880-7107LC DC Hardware manual

ABB

ABB ACS880-7107LC DC Hardware manual

ABB HT598325 Operation manual

ABB

ABB HT598325 Operation manual

TECHNOLOG Cello 6S product manual

TECHNOLOG

TECHNOLOG Cello 6S product manual

manuals.online logo
manuals.online logoBrands
  • About & Mission
  • Contact us
  • Privacy Policy
  • Terms and Conditions

Copyright 2025 Manuals.Online. All Rights Reserved.