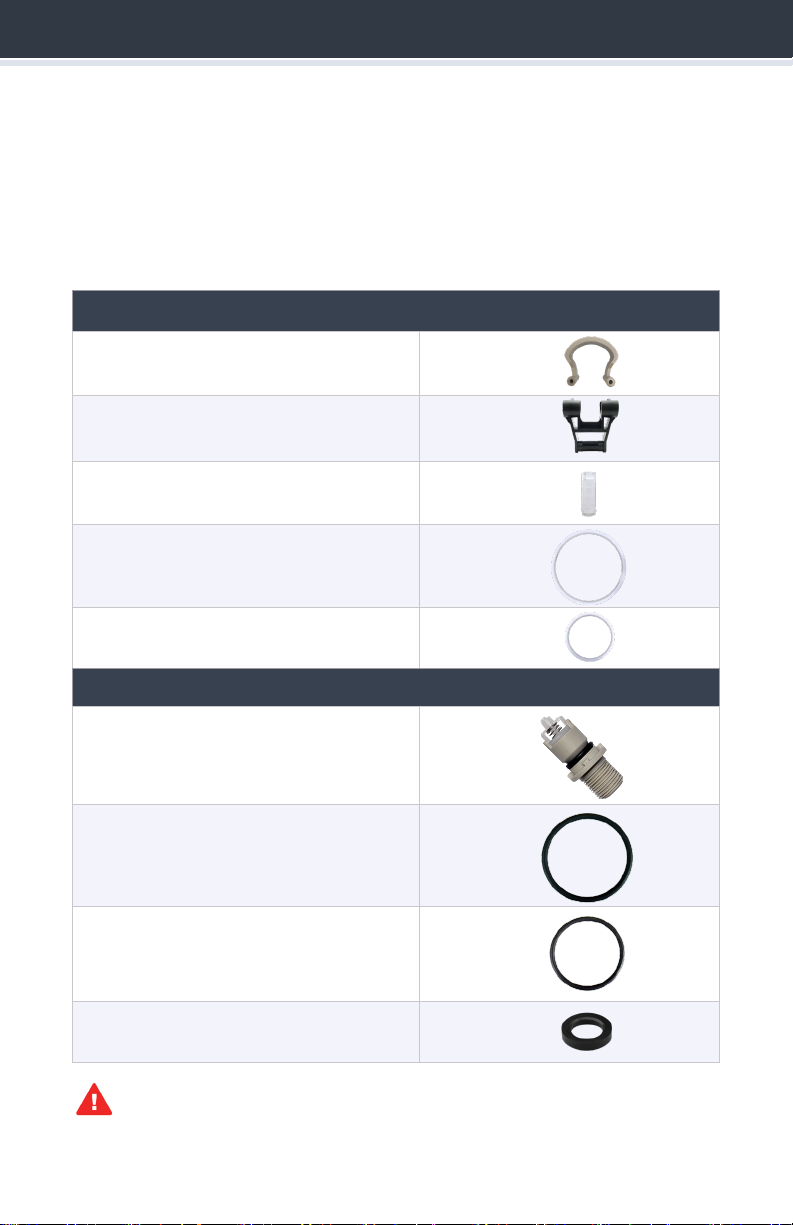
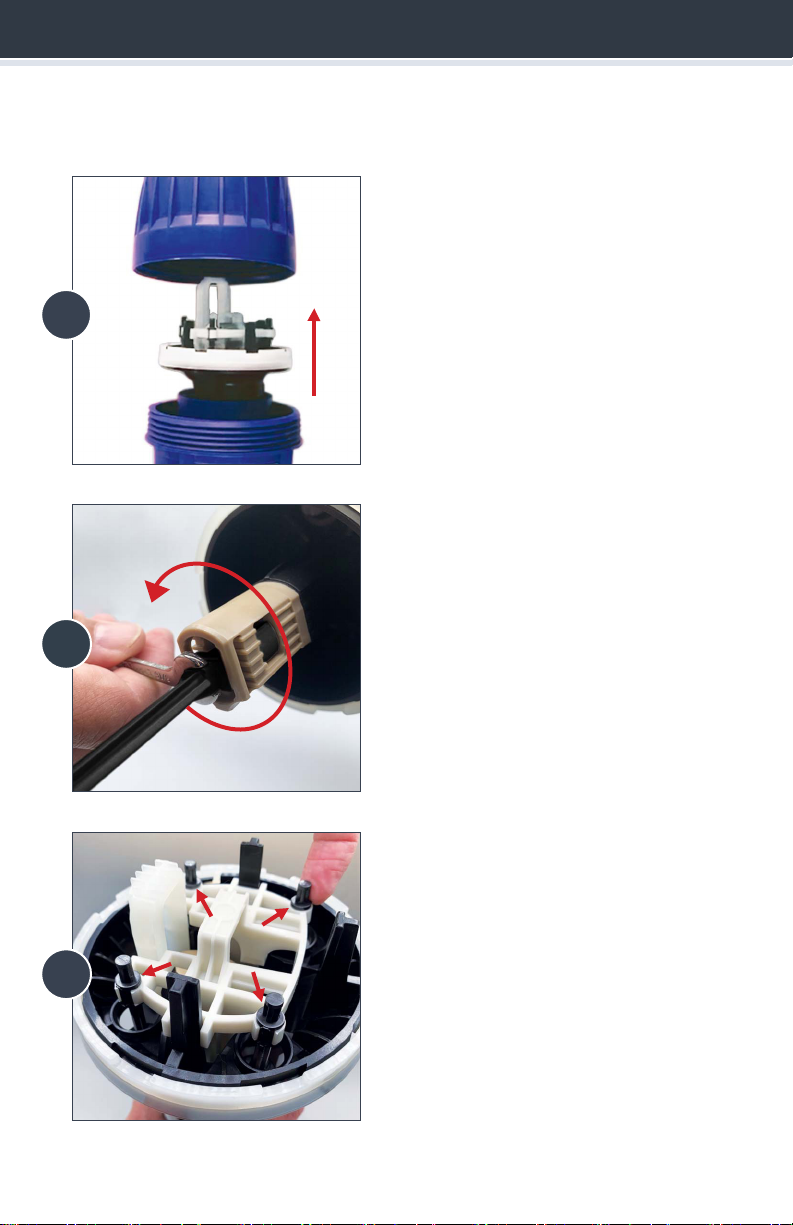
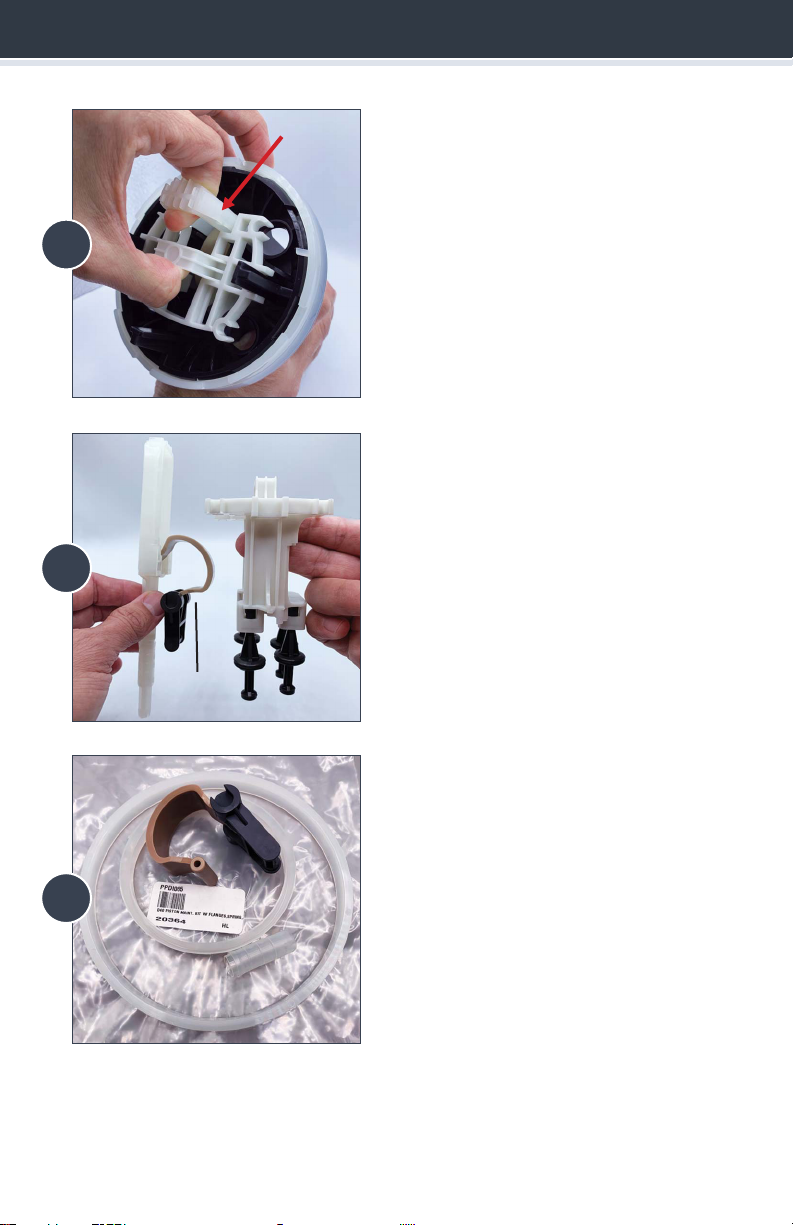
CHAT at www.dosatron.com
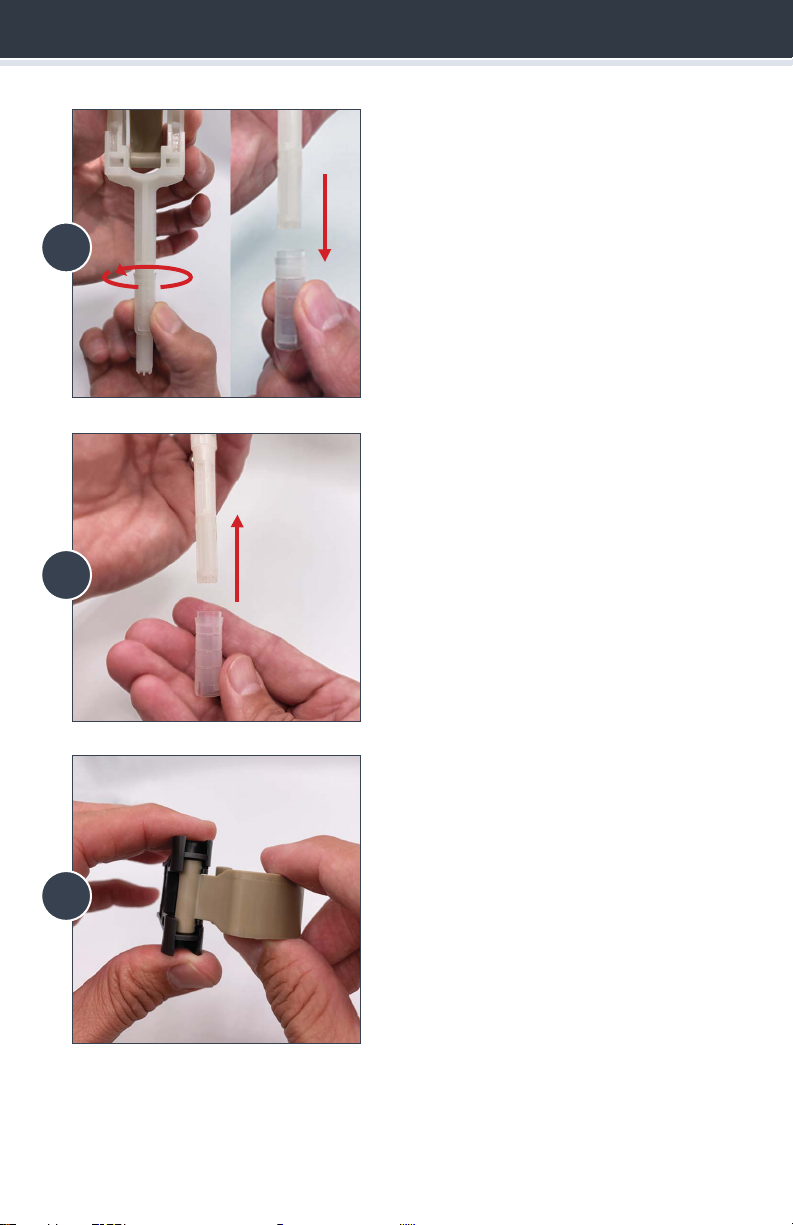
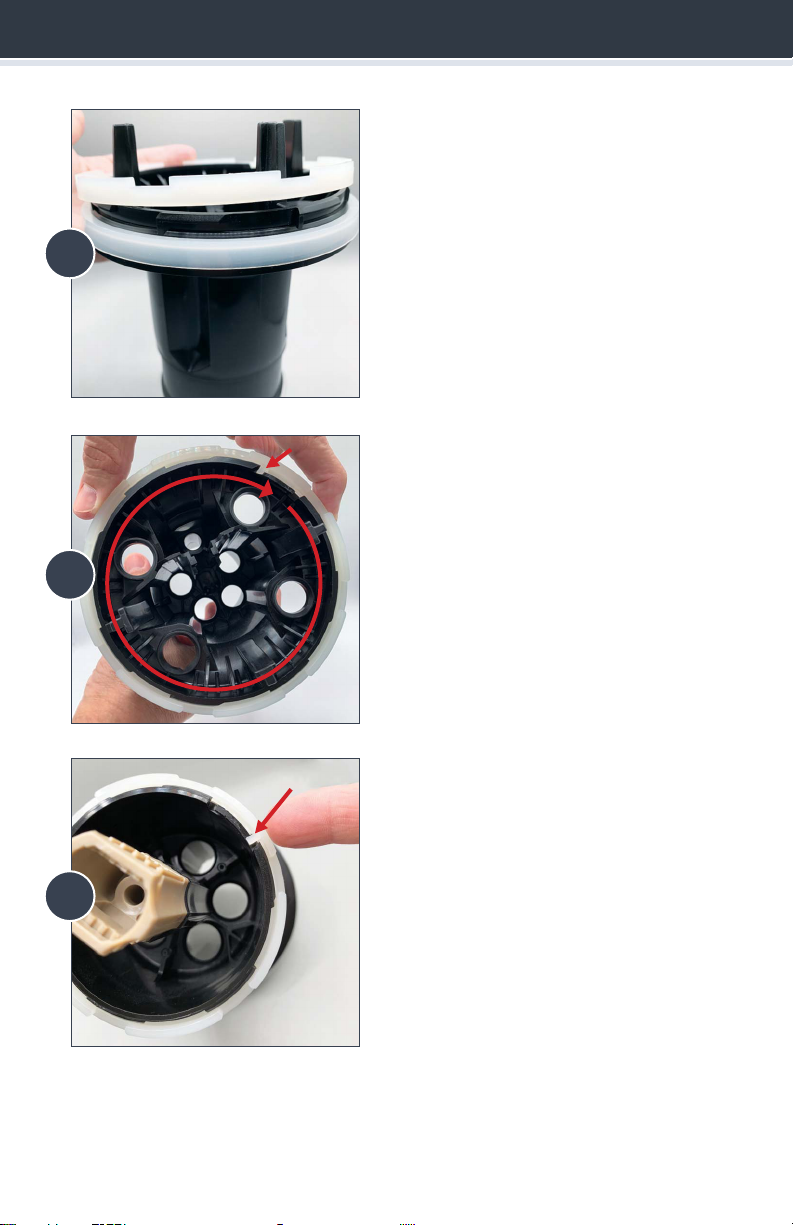
Pick up the NEW Lower Flange
(PDI1092) and slide it onto the
piston shell, with the Vshape
opening facing downward and
at edge facing up. Push down
until it sits on the edge of the
black piston shell.
Hold the white lock ring with the
at edge facing down towards the
Piston, and place the lock ring on
top of the NEW Lower Flange.
The tabs on the inside of the
lock ring should align with the
gaps around the edge of the
piston shell; and the white tooth
and black lock lever should be
close together.
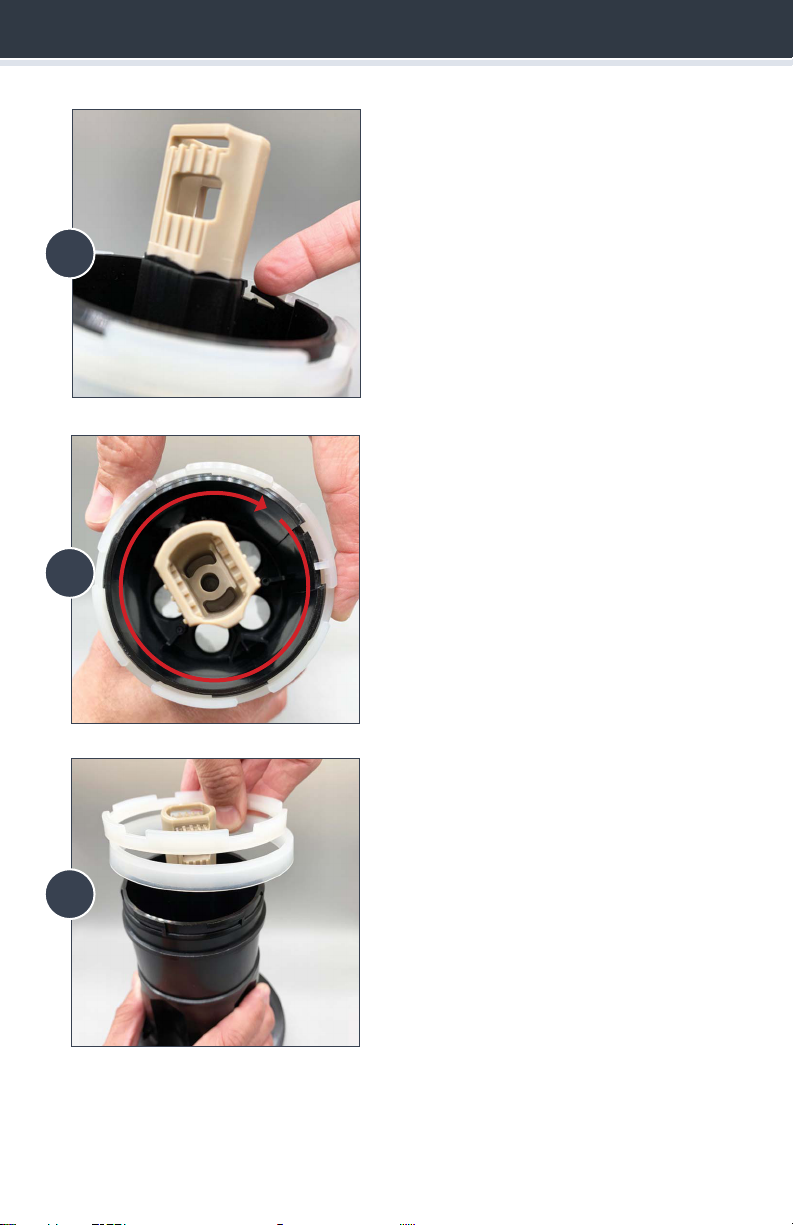
Push down on the lock ring so
that the at edge touches the top
of the white Flange.
Then, rotate the lock ring 1/2 of
an inch turn counterclockwise to
lock it into place.
22
23
24
8