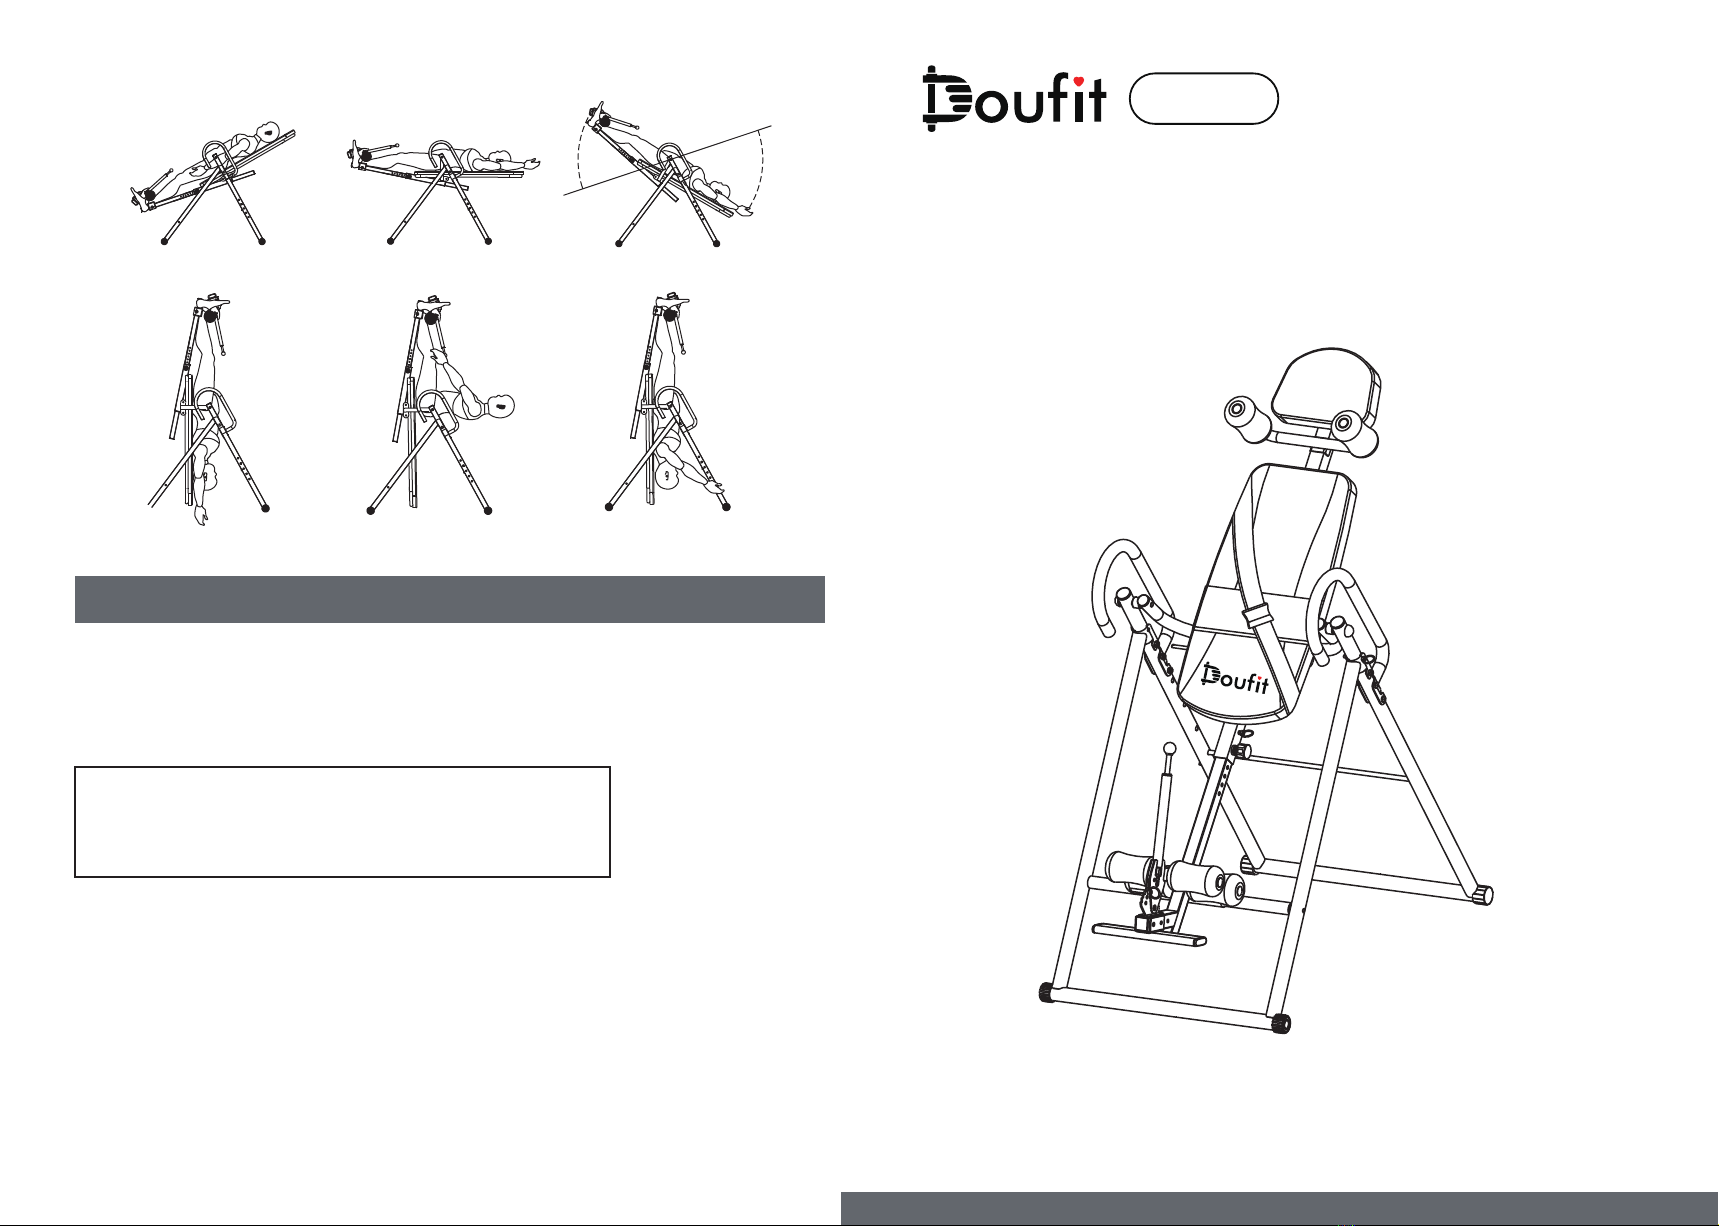
* The maximum load bearing is 120 Kg (about 264 Lbs).
* The maximum limited height is 195cm (about 6’5’’).
* The maximum inversion angle is 180°.
* If you feel unwell during using the product, please stop using it immediately and
consult your doctor for instructions before next use.
* Don’t use the product immediately after diet, drinking or exercise. You need to wait
for at least 1 hour. Do not use this product without your physician's approval.
* Please place the product on a flat and dry place. Ensure it is firmly arranged without
sloshing to avoid falling.
* Please wear suitable clothes and sneakers before exercise.
* Keep children and pets away from the equipment and prohibit others to stand near by
the product while using.
* Only one person will be allow to use the product at a time.
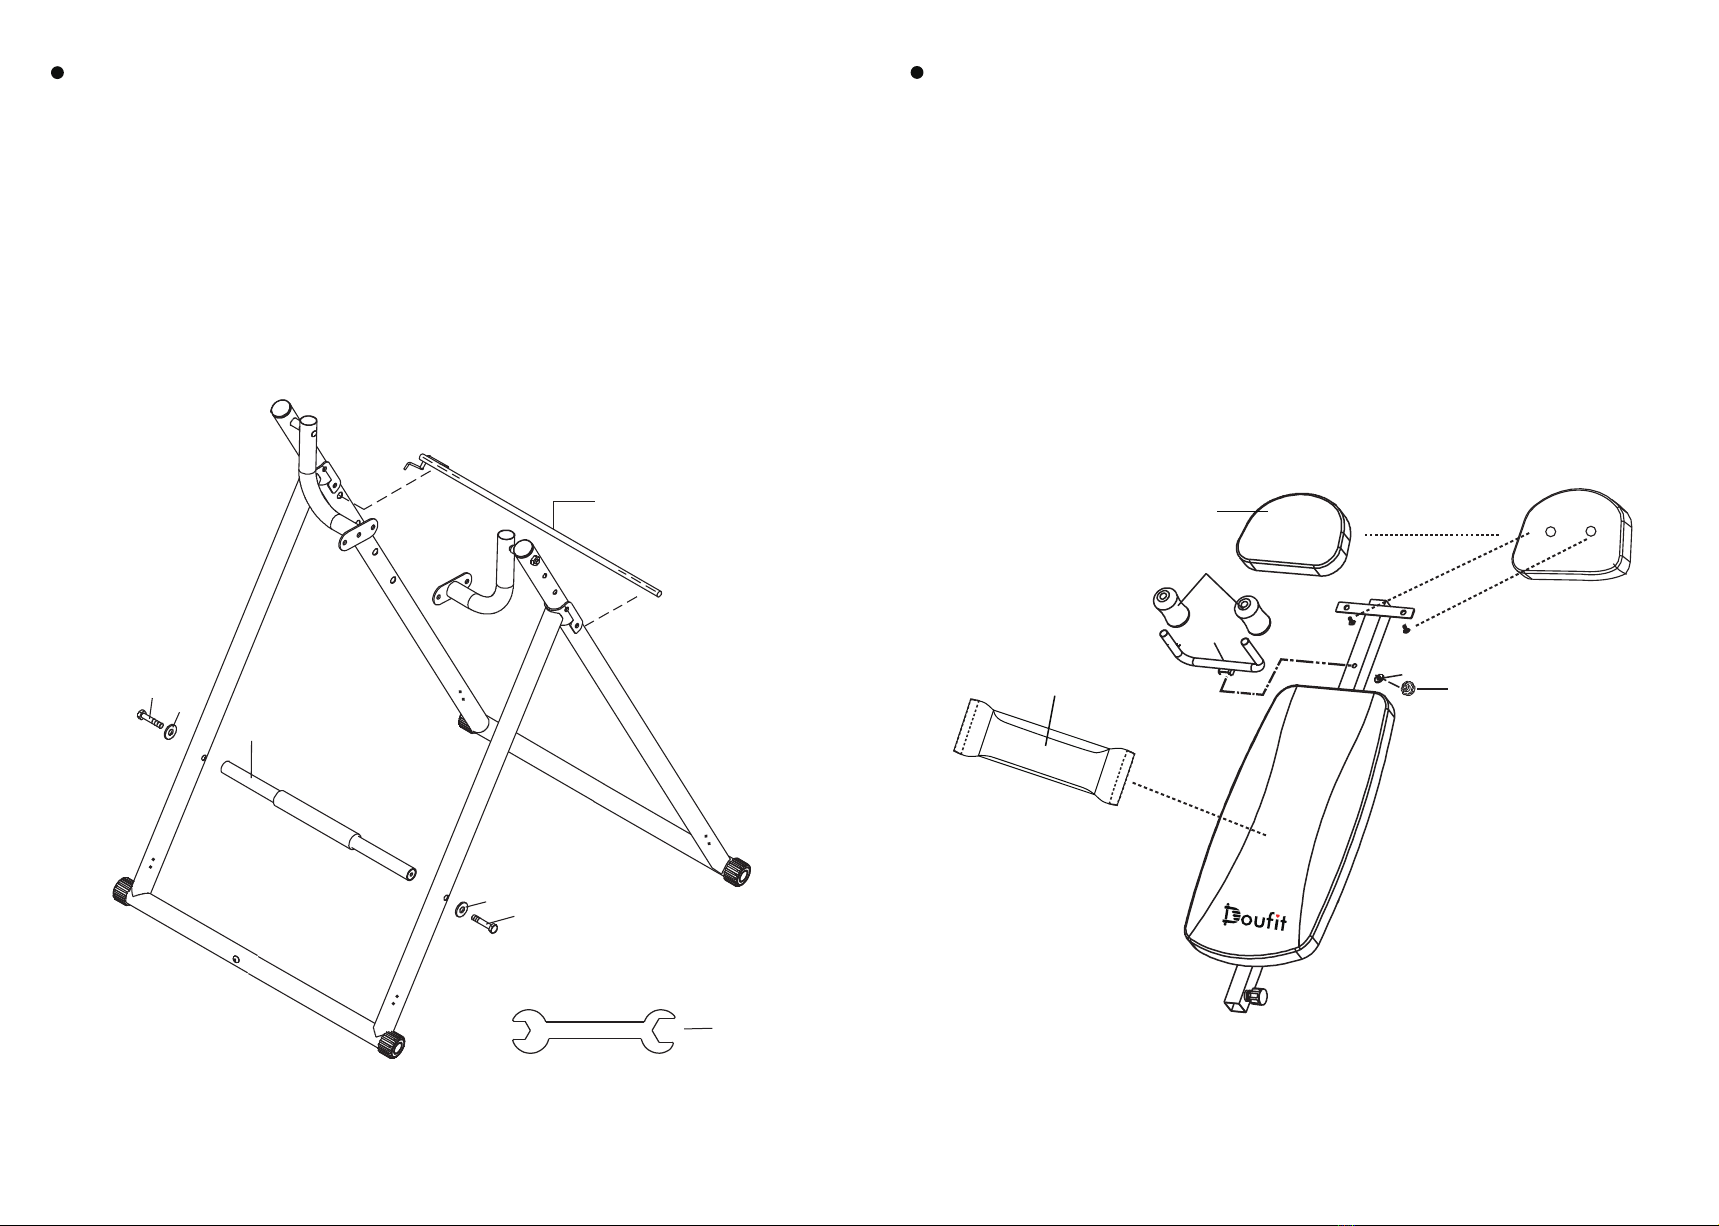
* Make sure the product is correctly assembled before using. Be sure all screws,nuts,
and bolts are tightened before using.
* Do not operate this product if it is damaged.
* Keep hands, feet, hair and clothes away from any moving parts. Do not insert any
object into any opening.
* Please don’t make inversion exercise until you make sure that your ankles are
clamped tightly and you feel comfortable.
* For children, elderly or disable people, they can only use it under guardianship.
Catalogue
Precautions
1
2
4
10
11
Precautions
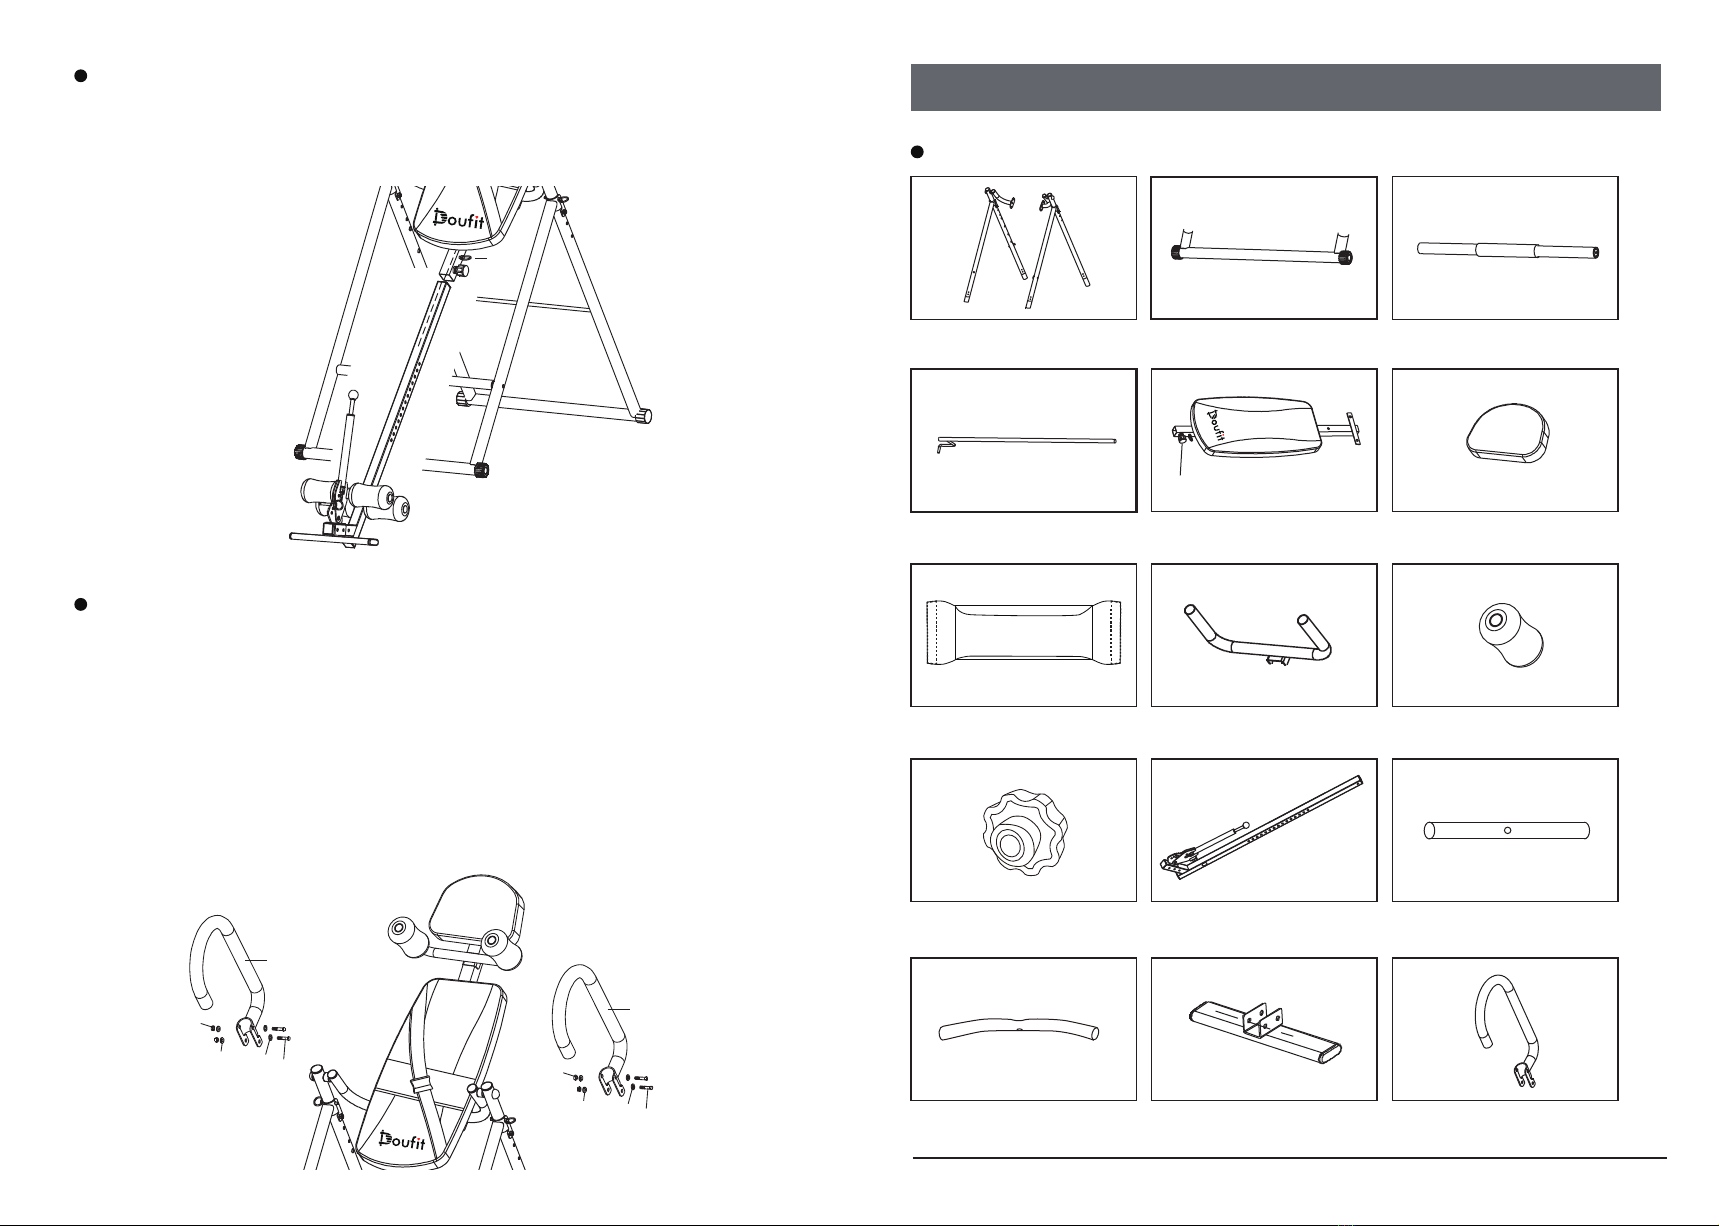
Parts List
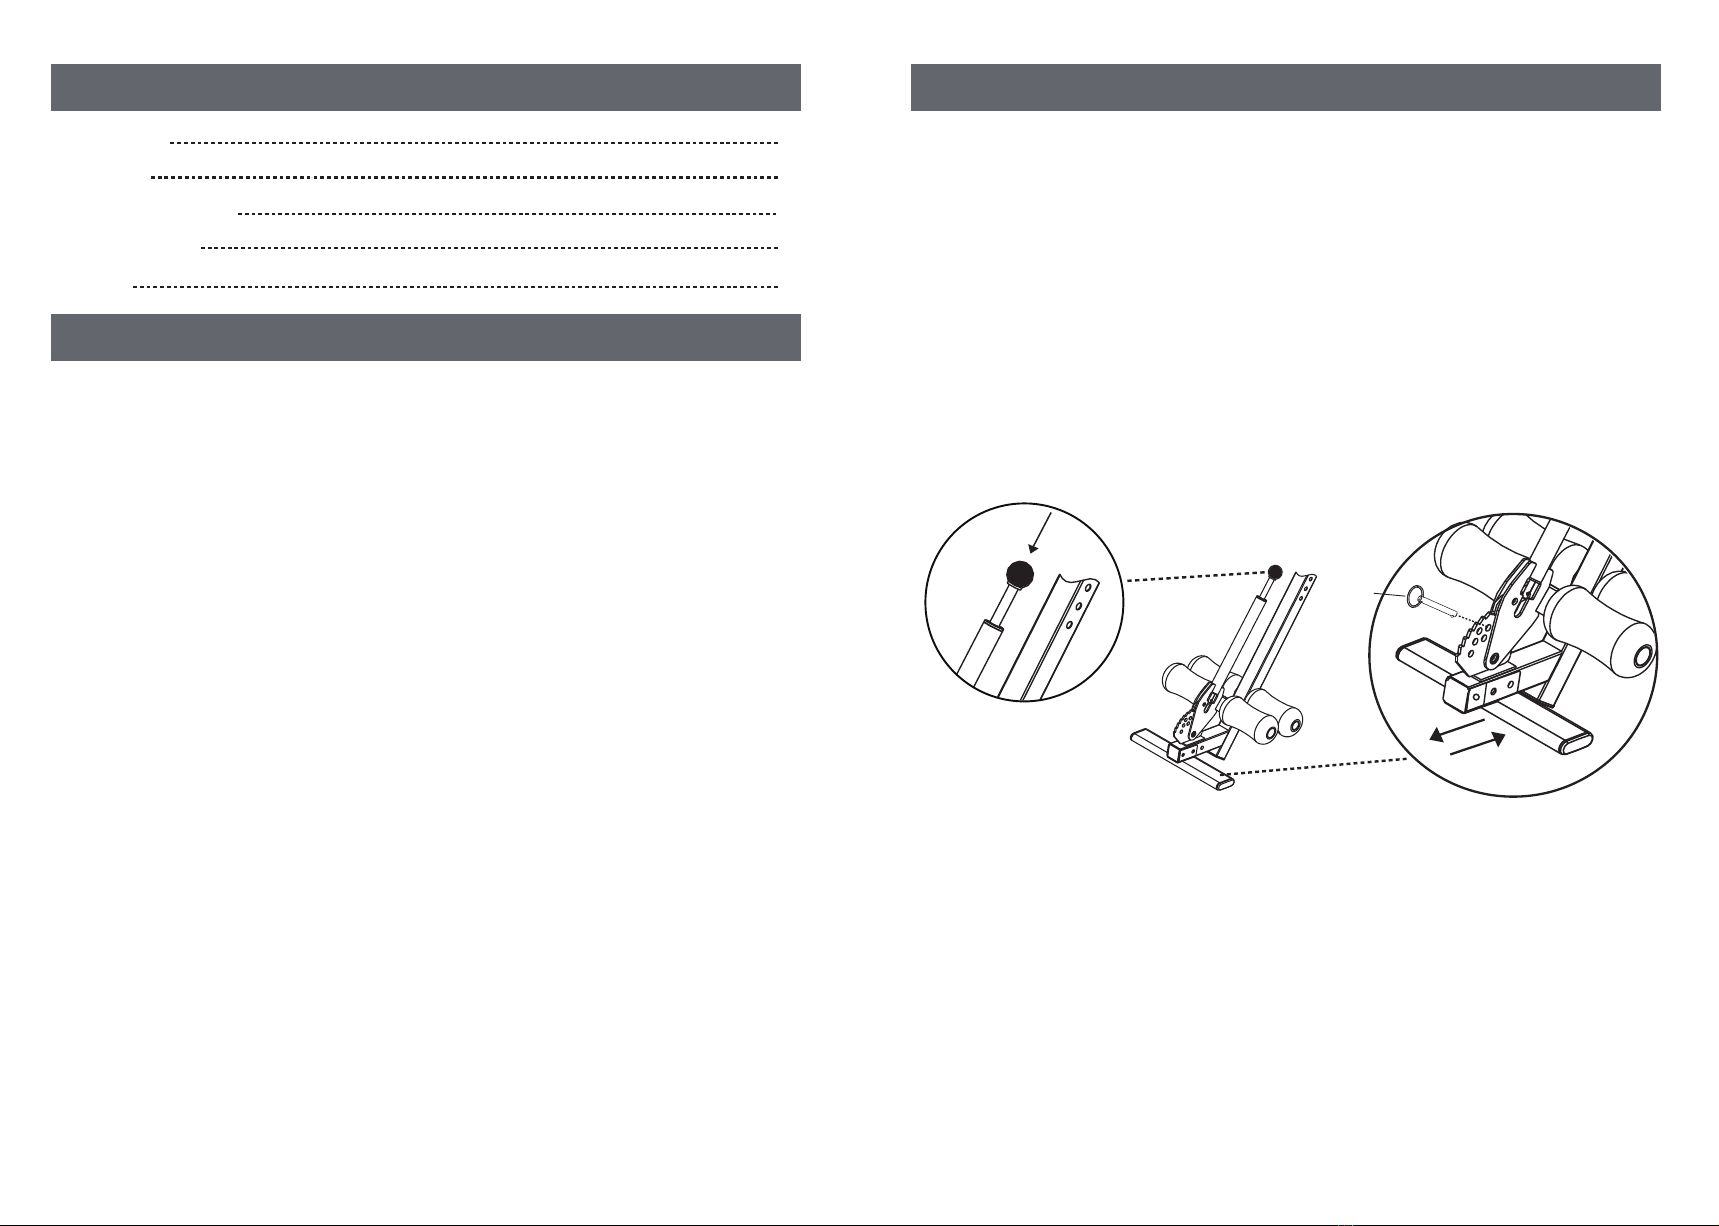
Assembly Method
Usage Method
Service
1 10
Usage Method
1. Please place the product on a flat and dry place to prevent skidding.
2. You can insert the rear preventing bar to control the inversion angle you
want.
3. Unscrew the knob and adjust the height adjustment according to your
height. And then screw the knob back and insert the detent pin.
4. Please press the ankle handlebar to adjust the ankle holder to fix your
ankle. And then insert a detent pin to the hole of the gear plate.
5. Before you inverse, please fasten backrest belts. Place you hands on the
handles and slowly lie your back on the backrest.
6. After you feel comfortable and finish the above step, you can move your
hand to start the inversion exercise and increase the angle gradually.
7. If you feel nauseous, please return slowly; Don’t return too fast, or you
will be dizzy.
8. When you can’t return by moving your hands, you can grab the handles
or support frame to return.
9. When you finish the exercise, you can pull the detent pins from both
sides and fold the inversion table to save space.
10. Please exercise in moderation and do not exceed your body's load.
11. It is recommended that using the inversion table for five to ten minutes
each morning and evening. For the beginner, they are recommended from
ten seconds.
16
Press