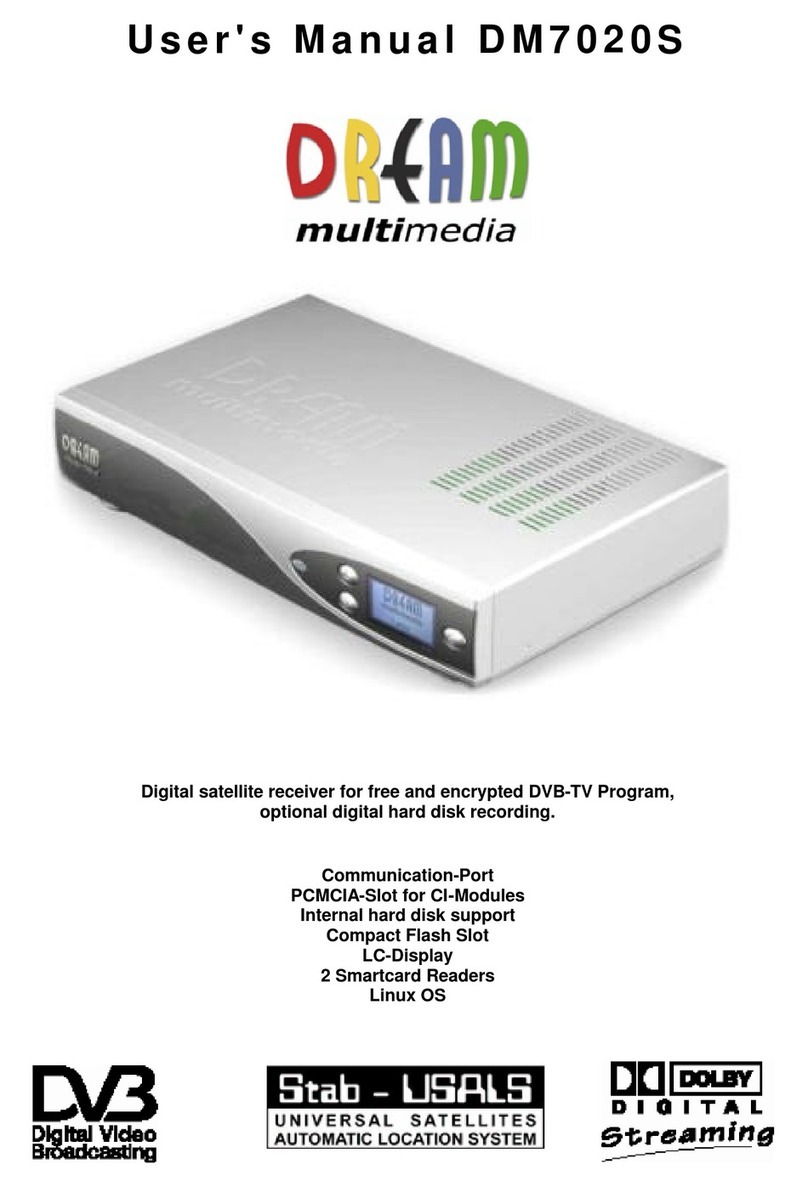
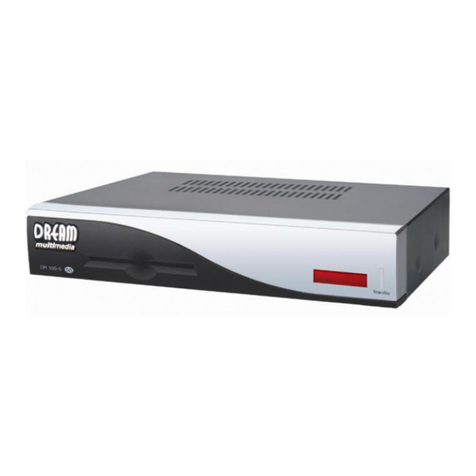
DREAM MULTIMEDIA DM 500-S User manual

Dreambox DM 500S
User’s Manual
Digital satellite receiver for free and encrypted DVB-TV Programs
Communication-Port
Smartcard Reader
Linux OS
Rev.1.0_rel.1.05_dd_eng

- 2 -
1. Contents
1. Contents ..................................................................................................................................................... - 2 -
2. Views .......................................................................................................................................................... - 4 -
3. Description Frontview ................................................................................................................................. - 5 -
3.1. Smartcard Reader ...................................................................................................................................... - 5 -
3.2. Standby Led................................................................................................................................................ - 5 -
3.3. RC Led........................................................................................................................................................ - 5 -
3.4. Standby on/off............................................................................................................................................. - 5 -
4. Description Rearview.................................................................................................................................. - 6 -
4.1. LNB In......................................................................................................................................................... - 6 -
4.2. LNB Out ...................................................................................................................................................... - 6 -
4.3. Video Out.................................................................................................................................................... - 6 -
4.4. Serial Port................................................................................................................................................... - 6 -
4.5. Audio Out (analogue).................................................................................................................................. - 6 -
4.6. TV Scart...................................................................................................................................................... - 6 -
4.7. Audio Out (digital) ....................................................................................................................................... - 6 -
4.8. Powersupply Socket ................................................................................................................................... - 6 -
4.9. Network Port............................................................................................................................................... - 6 -
5. Safety Instructions ...................................................................................................................................... - 7 -
6. Delivering.................................................................................................................................................... - 8 -
7. Installation................................................................................................................................................... - 8 -
8. Remote Control........................................................................................................................................... - 9 -
9. Important Notes about Condition .............................................................................................................. - 10 -
10. Remote Control describtion ...................................................................................................................... - 11 -
11. Dreambox switching on/off........................................................................................................................ - 12 -
12. Sleeptimer................................................................................................................................................. - 13 -
13. OSD- Mainmenu ....................................................................................................................................... - 13 -
14. Infobar....................................................................................................................................................... - 14 -
14.1. Infobar - EPG (Electronic Program Guide)................................................................................................ - 15 -
14.2. Infobar - Subservices................................................................................................................................ - 15 -
14.3. Infobar - Audio Track ................................................................................................................................ - 16 -
14.4. Infobar - Plugins........................................................................................................................................ - 16 -
15. Setup - OSD Language............................................................................................................................. - 17 -
16. Setup - Time Zone .................................................................................................................................... - 17 -
16.1. Setup - Time Correction............................................................................................................................ - 17 -
17. Satellite Configuration............................................................................................................................... - 18 -
18. Satfind....................................................................................................................................................... - 18 -
19. Motor Setup .............................................................................................................................................. - 19 -
20. Automatic Transponder Scan ................................................................................................................... - 20 -
21. Automatic Multisat Scan ........................................................................................................................... - 21 -
22. Manual Transponder Scan........................................................................................................................ - 21 -
23. Transponder Edit ...................................................................................................................................... - 22 -
24. Service Organising - create new Bouquet................................................................................................. - 23 -
25. Service Organising - Add services to Bouquet.......................................................................................... - 24 -
26. Service Organsing - Edit Bouquets........................................................................................................... - 25 -
27. Parental Lock............................................................................................................................................ - 26 -
27.1. Parental lock enable / disable ................................................................................................................... - 26 -
27.2. Setup lock enable / disable....................................................................................................................... - 26 -
28. Services locking / unlocking...................................................................................................................... - 27 -
29. A/V Settings.............................................................................................................................................. - 28 -
30. OSD Settings............................................................................................................................................ - 29 -
30.1. Skin Setup ................................................................................................................................................ - 29 -
30.2. Available Skins ......................................................................................................................................... - 30 -
30.3. TuxText position ....................................................................................................................................... - 31 -
- 3 -
Notice: The Dreambox DM500S is CE certified and fulfills all requirements of the EU-Standards.
Issued: June 2004 Rev.1.0
Software: Release 1.05
Alterations are subject to change without notice. E. & O. E.
Dream-Multimedia-Tv and Dreambox DM500S are registered trademarks of
Dream-Multimedia-Tv GmbH, Pierbusch 24 D-44536 Lünen Germany
www.dream-multimedia-tv.de
31. Teletext - Software Decoder (TuxText) activating..................................................................................... - 31 -
32. Expert Setup............................................................................................................................................. - 33 -
32.1. Communication (Network, LAN Setup) ..................................................................................................... - 34 -
32.2. Communication (Network, WAN (DSL) Setup) ......................................................................................... - 35 -
32.3. NGrab Streaming Setup............................................................................................................................ - 35 -
32.4. Software Update over Internet .................................................................................................................. - 36 -
32.5. Software Update manual .......................................................................................................................... - 36 -
32.6. Remote Control......................................................................................................................................... - 36 -
33. Information - Streaminfo / About ............................................................................................................... - 37 -
34. DreamUp - Software upgrade................................................................................................................... - 38 -
34.1. DreamUp - Preparing DreamUp ............................................................................................................... - 39 -
34.2. DreamUp - Establish a Connection........................................................................................................... - 40 -
34.3. DreamUp - Backup Software .................................................................................................................... - 42 -
34.4. DreamUp - Erasing Software .................................................................................................................... - 44 -
34.5. DreamUp - Flashing Software................................................................................................................... - 46 -
35. Technical Data.......................................................................................................................................... - 49 -
36. Contact & Support Information.................................................................................................................. - 51 -
37. Warranty card ........................................................................................................................................... - 52 -

- 4 -
2. Views
Frontview:
Rearview:

- 5 -
3. Description Frontview
3.1. Smartcard Reader
Plug in your Dreamcrypt Smartcard with the gold chip face downwards and inwards into the Smartcard
Reader.
Dreamcrypt is a trademark of Dream-Multimedia-Tv GmbH
3.2. Standby Led
The Standby Led lits red, if the Dreambox is in Standby state.
3.3. RC Led
The green RC Led indicates received commands from the Remote Control.
3.4. Standby on/off
This Button switches the Standby-Mode on or off.

- 6 -
4. Description Rearview
4.1. LNB In
Connect the coaxial cable from your LNB here. Please switch the power off from the the Dreambox first.
4.2. LNB Out
Connect an analogue receiver here. Remember to shutdown your Dreambox into Standby-Mode, if you
wish to view analogue TV.
4.3. Video Out
This Port provides the CVBS (Color Video Blanking Signal).
4.4. Serial Port
The Serial Port is mentioned to update the Operation system. Please connect a serial nullmodem cable
here. See passage DreamUp - Software upgrade.
4.5. Audio Out (analogue)
Connect your Dreambox with an appropriate RCA/Cinch cable to your HiFi-Amplifier (e.g. AUX or Tape
socket).
4.6. TV Scart
Connect your TV with an appropriate Scartcable to your Dreambox.
4.7. Audio Out (digital)
Connect your Dreambox with an appropriate optical (Toslink) cable to your HiFi-Amplifier or DSP. The
Dreambox provides sample rates from 16, 22.05, 24, 32, 44.1, 48 kHz. The AC3 signal is also available at
this socket, if the selected channel transmits Dolby Digital signals.
4.8. Powersupply Socket
Plug in here the Powersupply.
4.9. Network Port
The Network Port is an Communication Port, used to communicate with the Dreambox via HTTP, FTP,
NFS, Telnet and Samba to access your recorded movies or to upload channel lists. This Port is also
mentioned to update the Operation system. Please connect an appropriate patchcable.
See passage DreamUp - Software upgrade.

- 7 -
5. Safety Instructions
Please read the Safety Instructions completely and carefully, before using the Dreambox. The
Manufacturer takes no responsibility of incorrect handling of the Dreambox.
- Allow enough space around the Dreambox for sufficient ventilation.
- Do not cover the Dreambox’s ventilation openings with items such as newspapers, tablecloths,
curtains etc.
- Do not expose the Dreambox to dripping or splashing liquids.
- Do not place naked flame sources, such as lighted candles, on the Dreambox.
- Do not place any objects filled with liquids, such as vases, on the Dreambox.
- Do not connect or modify cables when the Dreambox is powered.
- Do not remove the cover. Risk of electric shock!
- Do not stick any metallic items into the slots or ventilation openings.
- Please note that the only way to isolate the Dreambox completely from the mains power supply is to
unplug the mains powercord!
- If you do not use your Dreambox for a longer time, please disconnect it from the mains power.
- Please disconnect your Dreambox from the mains power during thunder or heavy storms.
- Connecting to the dish (LNB):
Disconnect the mains powercord before connecting or disconnecting the coaxial cable.
- Connecting to the TV:
Disconnect the mains powercord before connecting or disconnecting the Scartcable.
- Disconnect the mains powercord if the powercord is damaged.
- Disconnect the mains powercord if the Dreambox gets in contact with moisture or moisture has
penetrated inside.
- Disconnect the mains powercord if you see any damage to the casing.
- Grounding:
The dish must be grounded.
The grounding system must match SABS 061.
- Cleaning:
Disconnect the mains powercord before cleaning the cover. Use a slightly damp cloth without
cleaning agents.
- Connect the Powersupply only to suitable sockets 110-230V/50-60Hz. Do not allow overloads to
occur.
WARNING!
Modifications and changes to the Dreambox lead to loss of warranty.

- 8 -
6. Delivering
The box of your DM 500S should contain the following items:
1 receiver Dreambox 500S
1 powersupply
1 remote control
1 user’s manual (newest release @ http://www.dream-multimedia-tv.de )
2 batteries (1,5V Microcell / AAA )
Optional parts:
1 wireless keyboard
7. Installation
- Insert 2 AAA (1,5V) batteries, taking care to observe the + and - markings indicated inside, into the
Remote Control.
- Before using the Dreambox, please read the Safety Instructions.
- Connect the LNB with an appropriate coaxial cable to LNB In at your Dreambox.
- Connect the Dreambox with an appropriate scart cable to your television screen.
- Plug in the Powersupply into the Powersupply socket 12V/1A.
- If you use a switchable power socket, please shutdown your Dreambox into standby, before
switching off the power socket.
- If you turn on your Dreambox for the first time, you will see the setup wizzard. The setup wizzard will
guide you through the first time installation. You will be asked for your Tv norm, the regional settings
and your language. Please choose and follow the instructions on the screen.
- Please notice that the videoformat is set by default to CVBS.
See passage A/V Settings.

- 9 -
8. Remote Control
Power-Button
INFO-Button
Volume-Mute-Button
OK-Button
Volume (+) Button
Arrow-right-Button
Option-Buttons
MENU-Button
EXIT-Button
Channel-up-Button
Volume (-) Button
Numeric-Keyboard
Arrow-left-Button
Channel-down-Button

- 10 -
9. Important Notes about Condition
All Functions of the Dreambox will be controlled via an OSD-Menu (On-Screen-Display). This makes the
Condition of the Dreambox very easy for you. Possible Options are assigned by four colored dots or
beams (red, green, yellow, blue) in the OSD-Menu and are activated with the Option-Buttons on the
Remote Control.
Depending on the chosen Menu, these Options do change.
Pressing the EXIT-Button
cancels all Operations.
During Menu and Channellist
navigation the following Buttons
are used to navigate:
Channel-up-Button = upwards
Channel-down-Button = downwards
Volume (-) Button = left
Volume (+) Button= right
Pressing the OK-Button enters
a Menu and a TV or Radio
service.
Navigation-Buttons

- 11 -
10. Remote Control describtion
This Button switches your Dreambox on or off.
See passage Dreambox switching on / off.
Enter a Service number directly from the Numeric-Keyboard. The Service numbers are shown on the left
side of the Servicelist.
In the OSD-Mainmenu are numbers shown in front of the Option or Function, in this case you can enter
the desired number to access the Option or Function directly without moving the Cursorbeam to it.
These Buttons enable to jump back- or forwards through the Playlist. The Playlist contains the last
chosen Services and Movies, which have been selected.
Once having opened the Servicelist, you are able to jump at the Beginning or the End of the Servicelist or
to the next Marker.
This Button mutes the Volume. A crossed Speaker Symbol will appear on the TV Screen. Pressing it
again or the Volume +/- Buttons, turns on the Audio.
This Button exits all Menus and aborts Operations.
These Buttons increase (+) or decrease (-) the volume.
This Button shows the EPG Information. Pressing this Button twice shows the Streaminformation-Menu.
These Buttons control the Cursor beam inside the Menus to reach the desired Option or Function.
This Button shows the Channellist if no OSD-Menu is shown. This button enters a chosen OSD-Menu
Option or Function.
These Buttons activate the desired Options.
INFO-Button
Volume +/- Button
Arrow-Right-Button
Arrow-Left-Button
Numeric-Keyboard
Option-Buttons
Volume-Mute-Button
POWER-Button
EXIT-Button
Navigation-Buttons
OK-Button

- 12 -
This Button shows the OSD-Mainmenu or the Servicemenu inside an opened Channellist.
This Button switches a Channel forward.
This Button switches a Channel backward.
11. Dreambox switching on/off
Use the Power-Button to switch the Dreambox on or off. Unplug the Mains powercord to make the
Dreambox completely powerless.
The Power-Button only works if no OSD-Menu is shown on the TV screen!
Press the Power-Button once to switch the Dreambox into Standby-Mode.
Press the Power-Button for at least 3 seconds. The Shutdown / Standby Menu appears.
Use the Navigation-Buttons up and down to
choose an option. Press the OK-Button to activate.
reboot now:
The Dreambox restarts the Operationsystem.
goto standby:
The Dreambox shuts down into Standby-Mode.
The red Led lits.
set sleeptimer:
See passage Sleeptimer.
Channel-down-Button
Channel-up-Button
MENU-Button

- 13 -
12. Sleeptimer
Press the Power-Button for at least 3 seconds, select “set sleeptimer” to enter this menu.
Define a max. duration of 240 minutes. Define if
the Dreambox should shutdown or should go into
standby by setting a check into one of the
checkboxes beside shutdown and standby with the
OK-Button.
Press the green Option-Button to set Sleeptimer.
13. OSD- Mainmenu
If no OSD-Menu is shown on the tv screen, the MENU-Button enters the OSD-Mainmenu.
Through this OSD-Mainmenu it is possible to activate the main options and functions. Use ether the
Navigation-Buttons followed by the OK-Button or press the desired number to enter the Option or
Function.
To change the view of the OSD-Mainmenu go to Setup -> System Settings -> OSD Settings and check
the checkbox “Show Mainmenu like Listbox”. Exit all menus and reenter the OSD-Mainmenu.
TV mode:
Switches into TV-Mode.
Radio mode:
Switches into Radio-Mode.
Timer:
Opens the Timer window. All programmed
Timerevents are available from here to edit or
delete.
Setup:
Opens the Setup window. All relevant adjustments
are available from here.
Information:
Opens the Information window. You will get here
information about the currently selected service,
called Streaminformation and about the Dreambox.

- 14 -
14. Infobar
The Infobar appears and disappears by pressing the INFO-Button once, if no OSD-Menu is shown on
your tv screen. The Infobar shows all nessesary Information about the selected Service.
„Crypted“ appears orange, if the transmitted Service is crypted.
„Aspect Ratio“ appears orange, if the Service is transmitted in 16:9, the usal Aspect Ratio is 4:3.
„Dolby Digital Program“ appears orange, if the Service is transmitted with Dolby Digital Audiostream.
Channelnumber Channelname
Actual Program Overall Time
Actual TimeRemain Time
Upcomming Program
EPG available
Subservices available
Crypted
Audiotrack available
Teletext / Plugins
Aspect Ratio
Dolby Digital Program

- 15 -
14.1. Infobar - EPG (Electronic Program Guide)
The red dot in the Infobar appears if the selected program transmits EPG informations.
Press the red Option-Button to enter the EPG.
Press the OK-Button to view detailed Information.
Press the EXIT-Button to exit this menu.
14.2. Infobar - Subservices
The green dot in the Infobar appears if the selected program provides Subservices.
Press the green Option-Button to enter the menu
„multipile services“.
Use the Navigation-Buttons up and down to choose
a service. Press the OK-Button to enter the service.
enable quickzap:
Press the green Option-Button to enable the
quickzap mode. You can now choose a multipile
Service using the Navigation-Buttons left or right
without entering this menu. Press the green Option-
Button to bring up this menu and press the green
Option-Button again to deactivate the quickzap
mode.
add to bouquet:
Press the yellow Option-Button to add the selected
Service to a Bouquet of your choice. See passage
Service Organising.

- 16 -
14.3. Infobar - Audio Track
The yellow dot in the Infobar appears if the selected Service transmittes multipile Audio-Tracks.
Use the Navigation-Buttons left or right to choose
the different Audio-Modes, Left-Mono, Stereo,
Right-Mono. Press the OK-Button to activate.
Use the Navigation-Buttons up or down to choose
another Audio-Language. Press the OK-Button to
activate.
14.4. Infobar - Plugins
The blue dot in the Infobar appears permanently
Use the Navigation-Buttons up or down to choose a
Plugin. Press the OK-Button to activate.
Teletext - Software Decoder:
This Option activates the Teletext - Software
Decoder. See passage Teletext - Software Decoder
(TuxText) activating.
start/stop Ngrab recording:
These Functions are still under development. They
are used to record a Service over the Network.

- 17 -
15. Setup - OSD Language
Press the MENU-Button to enter the OSD-Mainmenu.
Go to Setup -> System Settings -> OSD Language.
Use the Navigation-Buttons up or down to choose
your language. Press the OK-Button to activate. Exit
all menus and reenter.
16. Setup - Time Zone
Press the MENU-Button to enter the OSD-Main menu.
Go to Setup -> System Settings -> Time Settings -> Timezone Configuration.
Press the OK-Button to open the Dropdownlist. Use
the Navigation-Buttons up or down to search for
your Time Zone. Press the OK-Button to select.
use automatically daylight saving time:
Check or uncheck the Checkbox with the OK-
Button. If checked, the Time will be automatically
adjusted for daylight saving changes.
Press the green Option-Button to save.
16.1. Setup - Time Correction
Press the MENU-Button to enter the OSD-Mainmenu.
Go to Setup -> System Settings -> Time Settings -> Time Correction.
By entering this menu, please wait a second. The
Dreambox tries to get the actual Time. The
Transponder Time and Date will be automatically
updated.
If this fails, enter the new Time and Date manually.
Press the green Option-Button to set the new Time
and Date.

- 18 -
17. Satellite Configuration
Press the MENU-Button to enter the OSD-Mainmenu.
Go to Setup -> Service Searching -> Satellite Configuration.
Navigate to the upper Dropdownlist and choose
your appropiate Satellite Configuration and press
the OK-Button. Choose your Satellites the Dish is
adjusted to and press the green Option-Button to
save configuration.
This Configuration might differ from yours.
18. Satfind
Press the MENU-Button to enter the OSD-Main menu.
Go to Setup -> Service Searching -> Satfind.
Choose from the lower Dropdownlists your preferred
satellite and transponder.
Adjust the Dish towards the desired satellite until
you have a high value on the Signal strength AGC
and on the Signal quality SNR indicator. The BER
should always indicate a value of zero if the Satellite
is locked and synced.
SNR: Signal to Noise Ratio
This Indicator shows the Quality of the Signal.
AGC: Automatic Gain Control
This Indicator shows the Strengh of the Signal.
BER: Bit Error Rate
This Indicator shows the Errors Rate of the Signal.

- 19 -
19. Motor Setup
Press the MENU-Button to enter the OSD-Mainmenu.
Go to Setup -> Service Searching -> Motor Setup.
Before proceeding with the Motor Setup refer to
passage Satellite Configuration and choose from
the upper Dropdownlist “many satellites via DiSEqC
Rotor” and press the OK-Button, if you setup a
Motor for the first time.
All possible satellites will be listed. Press the green
Option-Button to save this configuration.
After saving the Configuration, choose (3) Motor
Setup from the Menu Service Searching and press
the OK-Button. The Menu Motor Config appears.
Refer to the Rotors Manual for correct values
degrees/second. If unsure, set a check in front of
“Use Motor Input Power” and enter the maximum
current the Motor is using for turning to the Dish.
Visit the Website http://www.heavens-above.com to
figure out your geographical location. Enter the
values for Longitude and Latitude and press the
green Option-Button to save.
Proceed to passage Automatic Multisat Scan.

- 20 -
20. Automatic Transponder Scan
Press the MENU-Button to enter the OSD-Main menu.
Go to Setup -> Service Searching -> Automatic Transponder Scan.
The Automatic Transponder Scan scans one
satellite after one which is configured.
Select the first satellite to scan and press the OK-
Button.
Now choose to scan only Free services or not by
setting a check or not. If your LNB is not a C-Band
LNB, then let the check in the Checkbox in front of
“no circ polariz.”
Press the green Option-Button to start scan.
This window appears after scanning the satellite.
Press the OK-Button to proceed to the next satellite
scan.
Table of contents
Other DREAM MULTIMEDIA Receiver manuals

DREAM MULTIMEDIA
DREAM MULTIMEDIA Dreambox DM 100 User manual

DREAM MULTIMEDIA
DREAM MULTIMEDIA Dreambox DM7000S User manual

DREAM MULTIMEDIA
DREAM MULTIMEDIA Dreambox DM 7025 User manual

DREAM MULTIMEDIA
DREAM MULTIMEDIA DM8000 HD PVR DVD User manual

DREAM MULTIMEDIA
DREAM MULTIMEDIA DM8000 HD PVR DVD User manual

DREAM MULTIMEDIA
DREAM MULTIMEDIA DREAMBOX DM 800 HD PVR User manual

DREAM MULTIMEDIA
DREAM MULTIMEDIA DREAMBOX DM 600 PVR User manual

DREAM MULTIMEDIA
DREAM MULTIMEDIA Dreambox DM 7025 User manual

DREAM MULTIMEDIA
DREAM MULTIMEDIA Dreambox DM7000S User manual

DREAM MULTIMEDIA
DREAM MULTIMEDIA Dreambox DM7020S User manual