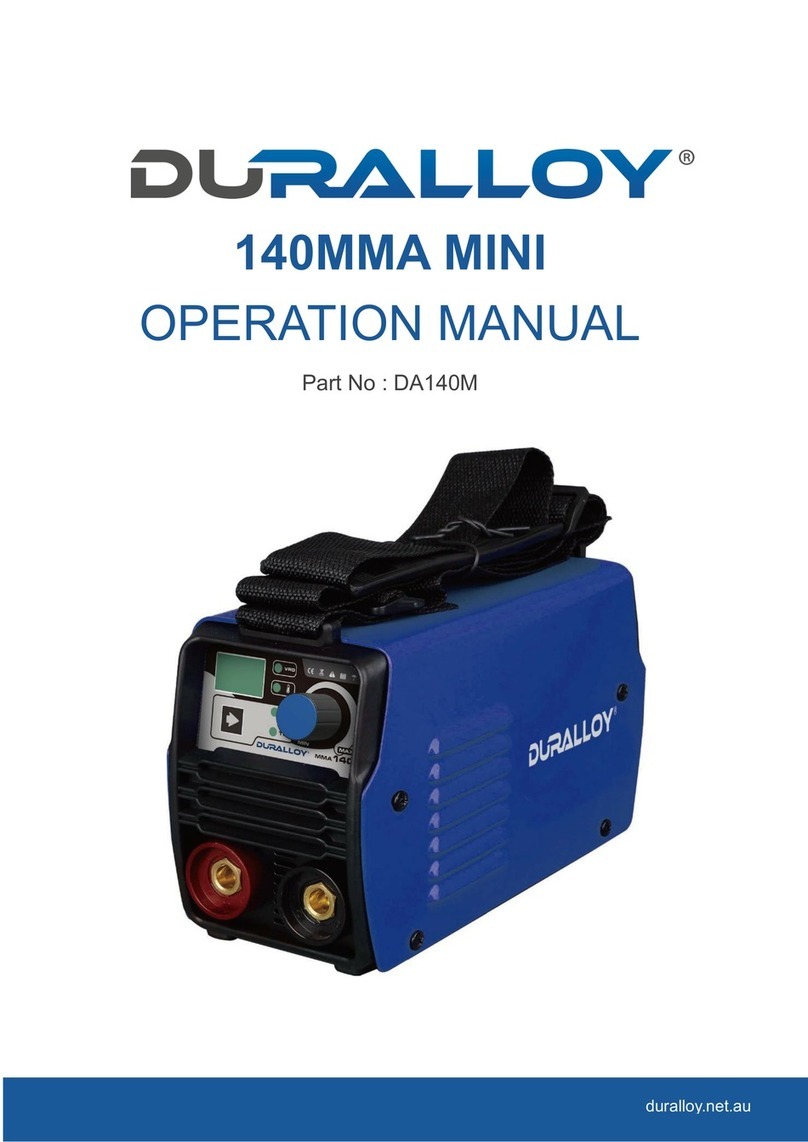
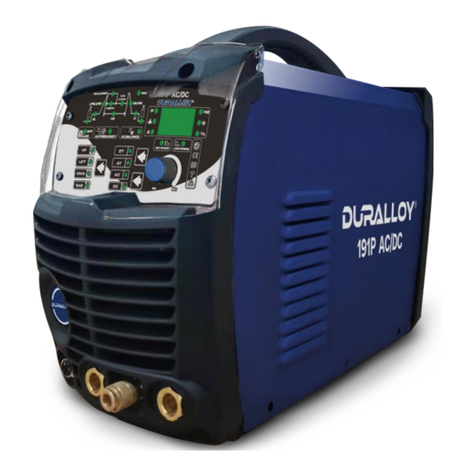
Duralloy CUT 40 PFC MV User manual

CUT 40 PFC MV
OWNER’S MANUAL
www.duralloy.net.au | 1300 369 456

Congratulations on your new DURALLOY®product!
The DURALLOY range uses latest technology design and engineering to produce welding products
that combine market leading value and features with durability. Designed for discerning operators who
seek professional results and product quality without the price tag of a full professional setup. Design
emphasis is placed on simple, functional design and operation. DURALLOY product is subject to
stringent quality control and designed and manufactured to EN60974-1.2012 standards.
Common use of DURALLOY products include:
• Light Engineering
• Automotive
• Home / Hobby Engineering
• Farming
• Industrial Maintenance & Repairs
For industrial welding solutions, check out the DURALLOY at www.duralloy.net.au
DURALLOY is a market leading provider of innovative power equipment solutions to a wide range of
industries across Australia. Key product categories are; welding equipment, power generators and
cleaning equipment.
www.duralloy.net.au | 1300 369 456
2
CUT 40PFC MV
OWNER’S MANUAL

www.duralloy.net.au | 1300 369 456
CONTENTS
Know Your Machine
Quick Start Guide
Wiring Diagram
Care & Maintenance
Troubleshooting
Safety
Warranty
3
CUT 40PFC MV
OWNER’S MANUAL

CUT 40PFC MV
OWNER’S MANUAL
PLASMA 7KG
www.duralloy.net.au | 1300 369 456
EN60974-1.2012
CUT 40PFC MV
240V Inverter Plasma Cutter
PART NO: DACUT40P
3 YEAR
WARRANTY
4
PFC TECHNOLOGY
Most DURALLOY® Welding Machines feature
PFC Technology for maximum electrical
eciency and consistent weld output.
PILOT ARC CONTROLLER
Increases cutting capabilities and speed.
Extends tip’s life. Ideal for grid cutting.
PROTECTIONS
Equipped with temperature, voltage and
current sensors for greater protection.
GENERATOR FRIENDLY
Designed to work from power generators
(8.5Kva).
COMPRESSOR REQUIREMENT
• 12cfm Compressor
• 4 bar (60PSI)
FEATURES
• Wide input voltage - 90VAC - 275VAC
• Generator friendly (8.5kVA)
• High Duty Cycle -30 Amps @ 100%
• IP23 Rating
• Protective Front Fascia Cover
• Air Test function
• 6M PT60 Plasma Torch with Central Adaptor
• Built-in Regulator
• Extension lead friendly up to 100m
• Weight 7kg
SPECIFICATIONS
Power Supply 90VAC - 275VAC
Supply Plug 15 Amps
Frequency 50/60Hz
1-110/120/130V ± 10% 1-220/230/240V ± 10%
Input Power 3.8kW 4.9kW
Input Current 34.5A 22.6A
Duty Cycle
40oC 10min
30A 35%
22A 60%
20A 100%
40A 50%
36A 60%
30A 100%
Cutting Current 20 - 30A 20 - 40A
Severance Cut for
Carbon Steel ≤ 20mm ≤ 25mm
Production Cut
• Carbon Steel
• Stainless Steel
• Aluminium
• Copper
≤ 15mm
≤ 15mm
≤ 12mm
≤ 8mm
≤ 20mm
≤ 20mm
≤ 16mm
≤ 12mm
Net Weight 7kg
Dimensions 480mm x 146mm x 278mm
Insulation Class H
Protection Class IP23
Cooling Auto Fan
Power Factor 0.99
APPLICATIONS
• Boat Building
• General Fabrication
• Automotive Crash Repair
• Aluminium Fabrication
• Stainless Fabrication
• On-site Fabrication
MATERIALS
• Mild Steel
• Aluminium
• Stainless Steel
PACKAGE INCLUDES
• Power Source
• 6M PT60 Plasma Torch
• 3M Earth
• Owner’s Manual

KNOW YOUR MACHINE
More detailed explanations of function on following pages.
1. Cutting Current Control Knob.
2. Power Indicator. Lights when input power connected and
machine switched on
3. Power Error/ Overload Indicator*
4. Torch System Error Indicator*
5. Cutting Power Indicator. Lights when cutting power circuit
activated
6. Air Control Run/ Set Switch *
7. Earth Lead Connection Socket.
8. Plasma Torch Euro/ Central Connector
Rear View
9. Air Pressure Regulator Outlet Pressure Gauge
10. Air Pressure Regulator Knob
11. Compressed Air Inlet
12. Air Condensate Filter/ Trap Bowl
13. Air Filter Condensate Drain Tube
www.duralloy.net.au | 1300 369 456 5
1
42 35
6
11
12
13
8
9
10
7
CUT 40PFC MV
OWNER’S MANUAL

FURTHER CONTROLS EXPLAINED
Overload/ Error Indicator (3)
Lights when over voltage, over current or electrical
overheating (due to exceeding duty cycle) is detected and
protection is activated.
When protection is activated, welding output will be disabled until
the safety system senses the overload has reduced suciently
and indicator lamp goes out. May also trigger if machine
experiences an internal power circuit failure.
Torch System Error Indicator (4)
Lights when issue with torch system or air supply detected
and cutting output is disabled as a result. Flashing light means
that torch shield cap is not installed. Continuous light means
likely damaged or missing torch consumables or insucient air
pressure supply to the torch.
Compressed Air Testing/Setting Switch (6)
When positioned as ‘set’ compressed air control valve is open
continuously. This is useful for testing and setting the air pressure
without having to activate the trigger circuit. ‘Run’ position is
normal operation.
TIPS & TRICKS
Air Regulator Pressure Adjustment
Correct air pressure is critical for plasma cutting. Incorrect air
pressure will cause poor cut quality, lack of cutting power,
damage to the plasma torch and consumables and potentially
damage the power source. Optimum air pressure is between 0.45
and 0.5 MPa (65-75psi). Air pressure should be set with the air
flowing through the torch, as the pressure with the air flowing will
normally be less than static pressure, due to flow losses through
the torch system. To unlock the pressure regulator knob in order
to adjust it, pull the knob upwards. Once the pressure is set
correctly, push the knob down again to lock it into place.
Air Filter/ Water Separator
As with correct air pressure, clean, dry air is also critical for
plasma cutting machine performance and reliability. The
DURALLOY CUT 40PFC MV is supplied with an air filtration/
moisture separator to assist with providing suitable air supply.
The moisture separator is self-draining, the water drain tube exits
out the bottom of the clear condensate bowl. It is normal to see
moisture coming from this tube periodically. If excessive amounts
of water or oil are being produced in the condensate bowl and
drain line, the compressed air supply should be checked for
issues.
www.duralloy.net.au | 1300 369 456
Pilot Arc System
The DURALLOY CUT 40PFC MV use a pilot arc system to
establish the main cutting arc. A pilot arc system is a circuit where
the return is back through the torch head and cable. This means
it can create a small arc with some cutting power without making
any electrical connection with the main machine earth. This is
especially useful for starting cuts on material that does not have a
good initial earth connection, such as paint, rust, scale.
Once the pilot arc is established and power is flowing back
through the main earth, the pilot arc is switched o and the main
arc started. Please note the pilot arc circuit is only designed to
operate for short periods of time as an auxiliary starting system,
so it has a safety protection that only allows the pilot arc to run for
short periods at a time. In addition to this, these models also have
a plot arc controller system if the main arc cuts out and the torch
remains to be triggered, the pilot arc will reignite. This is useful for
cutting discontinuous workpieces like mesh or grids.
It is very important to recognise that plasma torch consumables
wear as part of normal operation and should be replaced in a
timely manner. Operating a torch with worn consumables will
cause poor cutting results and possible damage to the torch
and machine itself. Damage caused by untimely replacement of
consumables will not be covered by warranty.
Use the following guidelines to determine when consumables
should be replaced:
Cutting Tips: The cutting tip has a small calibrated orifice that the
plasma passes through. If the orifice becomes partially blocked,
deformed or enlarged, the cutting tip should be replaced.
Electrodes: The electrode has a small silver ‘hafnium’ insert in the
end of the tip. This is what generates the plasma ions. Once the
hafnium insert is gone or is damaged the tip must be replaced.
Swirl Ring/Retaining Cap: These should be replaced if broken,
chipped, cracked or badly heat damaged.
Tips and electrodes: These should wear reasonably evenly and
it is normal practice to replace them both together. If a new tip
is inserted with a worn electrode the tip will wear much more
quickly than if the electrode was also replaced at that same
time. If tips or electrodes are wearing much faster than the other
component it is likely to be caused by one of the following: poor
operator technique, incorrect air supply or damaged torch head.
It is also very important to only use genuine DURALLOY
consumables and parts for the XT4000 torch. They are
engineered to suit the machine and non-genuine items may
cause lack of performance, short life span, torch and machine
damage and void warranty.
6
CUT 40PFC MV
OWNER’S MANUAL

Duty Cycle Rating
Cutting duty cycle is the percentage of actual cutting time that
can occur in a ten minute cycle. E.g. 20% at 40 amps - this means
the plasma cutter can operate at 40 amps for 2 minutes and
then the unit will need to be rested for 8 minutes. All duty cycle
ratings are based on an ambient air temperature of 40°C with
50% humidity, which is the international standard for such a rating.
In an environment with temperatures exceeding 40°C, the duty
cycle will be less than stated. In ambient temperature less than
40°C, duty cycle performance will be higher.
QUICK START GUIDE
PLASMA CUTTER INSTALLATION
Electrical Connection
The EZICUT 40 and ADVANCECUT 40 are designed to operate
on a 15A 230V AC power supply.
The AdvanceCut Multivoltage technology (not including EZICUT
40) allows the machine to operate on a very wide range input
voltages down as low as 90V. This means that limited capacity
power supplies and long extension leads may be used without
damaging the plasma cutter.
However, as the supply voltage decreases, the maximum output
current and duty cycle will also decrease. To utilise the full output
capacity of the machine using an extension cord, it should be a
heavy duty version with a minimum cable core size of 2.5mm2.
It is recommended to use the Euroquip industrial duty 15A
extension lead, part number; 16895.
The EZICUT 40 does not have PFC/ multivoltage technology.
This means if an extension cord must be used, it should be a
heavy duty version with a minimum cable core size of 2.5mm2.
It is recommended to use the Euroquip industrial duty 15A
extensionlead, part number; 16895.
Compressed Air Requirements
A reliable and consistent supply of clean dry compressed air is
essential for proper operation. Although the machine contains
its own internal air supply filtration system it is recommended the
compressed air supply should have external filtration in the line
feeding the machine, both a standard water trap (sintered bronze
filter) and also a coalescing filter (for oil in air). The air requirement
is a minimum of 120 l/min (4.5cfm) Free Air Delivery (FAD) at 75psi
pressure. This normally means the compressor must be a belt
drive model or if a direct drive it must have a motor power of
2.5HP or greater.
The air must be dry and free of oil and moisture (normally a
symptom of older, worn out compressors). The air hose must also
be of sucient size (3/8”/10mm minimum) to supply the machine
www.duralloy.net.au | 1300 369 456
Operating Environment
Adequate ventilation is required to provide proper cooling for the
DURALLOY CUT 40PFC MV. Ensure that the machine is placed on
a stable level surface where clean cool air can easily flow through
the unit. The has electrical components and control circuit boards
which may be damaged by excessive dust and dirt, so a clean
operating environment is important for reliable product life.
BASIC OPERATION
1.1 Connect the earth cable quick connector to the earth
connection socket (7) Connect the earth clamp to the work
piece. Contact with the work piece must be firm contact with
clean, bare metal, with no corrosion, paint or scale at the
contact point.
1.2 Connect the plasma torch to the machine central connector
(8) ensuring the collar is done up firmly.
1.3 Connect the machine to suitable mains power using the mains
input power lead. Switch the mains power switch to ‘on’ to
power up the machine.
1.4 Connect the compressed air supply to the filter/ regulator inlet
(11). Check the air pressure (10). Trigger the air flow using the
‘set’ function (6), check the air pressure again and adjust if
necessary. Return the switch to ‘run’ position.
1.4 Select the output current using the current control knob (1).
You are now ready to plasma cut!
7
CUT 40PFC MV
OWNER’S MANUAL

www.duralloy.net.au | 1300 369 456
8
CUT 40PFC MV
OWNER’S MANUAL
WIRING DIAGRAM

Keep your plasma cutter in top condition
The EZICUT / ADVANCECUT 40 does not require any special
maintenance, however the user should take care of the machine
as follows:
• Regularly clean the ventilation slots.
• Keep the casing clean.
• Check all cables before use.
• Check work leads/clamps and torches before use.
• Replace worn earth clamps that do not provide a good
connection.
• Replace worn consumable parts in a timelymanner.
• Use a soft cloth or brush to clean electrical components.
• Do not use liquid cleaning products, water or especially
solvents.
• Do not use compressed air to clean electrical components as
this can force dirt and dust further into components, causing
electrical short circuits.
• Check for damaged parts. Do not use the plasma cutter with
damaged parts.
• A damaged plasma cutter must be carefully checked by a
qualified person to determine that it will operate properly.
Check for breakage of parts, mountings and other conditions
that may aect its operation. An authorised service centre
should properly repair a damaged part. Have your machine
repaired by an expert.
This appliance is manufactured in accordance with relevant safety
standards. Only experts must carry out repairing of electrical
appliances, otherwise considerable danger for the user may
result. Use only genuine replacement parts. Do not use modified
or non-genuine parts.
Storing the Plasma Cutter
When not in use the plasma cutter should be stored in the dry
and frost-free environment.
WARNING!
Before performing cleaning/maintenance, replacing
cables / connections , make sure the welding machine is
switched o and disconnected from the power supply.
www.duralloy.net.au | 1300 369 456
CARE & MAINTENANCE
Amperage Guide
PLASMA CUTTING GUIDE
9
CUT 40PFC MV
OWNER’S MANUAL
Material Thickness (mm) 0.5 2 4 6 8 10
Output Current Dial Position (7) 2-4 4-6 5-7 7-8 8-9 10
Cutting Guide
Eect of Cutting Speed
Electrical Connection
The DURALLOY CUT 40PFC MV is designed to run on a standard
15A 230V AC power supply. If an extension cord must be used, it
should be no longer than 10m and be a heavy duty industrial 15A
version with a minimum cable core of 2.5mm2.
Operating Environment
Adequate ventilation is required to provide proper cooling for the
DURALLOY CUT 40PFC MV. Ensure that the machine is placed
on a stable level surface where clean cool air can easily flow
across the unit. The DURALLOY CUT 40PFC MV has electrical
components and control circuit boards which will be damaged
by excessive dust and dirt, so a clean operating environment is
essential.
Compressed Air Requirements
A reliable and consistent supply of clean dry compressed air is
essential for proper operation of the DURALLOY CUT 40PFC
MV Although the machine contains its own filtration system, it is
recommended the compressed air supply have external filtration
in the line feeding the EZICUT 40 / ADVANCE CUT 40, both a
standard water trap (sintered bronze filter) and, a coalescing
filter (for oil in air). The EZICUT 40 / ADVANCE CUT 40 requires
a minimum of 120 L/min (4.5cfm) Free Air Delivery (FAD) at 75psi
pressure.
This normally means the compressor must be a belt drive model
or if a direct drive, must have a motor power of 2.5HP or greater.
The air must be dry and free of oil and moisture (normally a
symptom of older, worn out compressors). The air hose must also
be of sucient size (3/8”/10mm minimum) to supply the machine.

CUTTING WITH THE
DURALLOY CUT40 PFC MV
After turning the Power Switch (12) to the ON position and making
control and air pressure adjustments, proceed as follows:
1. Hold the tip of the Torch within 3-4mm the work piece, at
about 15- 30° angle to avoid damaging the tip.
2. Depress the torch switch. (Air and the high frequency spark
should energize)
3. As the high frequency spark jumps to the work piece, the
main plasma arc will ignite and start cutting.
4. After starting the cut, the tip can be dragged along the
work piece if cutting up to 3mm thick material. When cutting
material greater than 3mm, maintain a 3.2mm tip-to-work
(stando) distance.
5. When ending a cut, the torch switch should be released and
lifted o the work piece just before the end of the cut to
minimize double-arcing which can damage the tip. This is to
prevent the high frequency arc starting from reigniting after
cutting arc extinguishes.
6. In the post-flow mode, the arc can be restarted immediately
by depressing the torch switch.
Piercing Technique
www.duralloy.net.au | 1300 369 456
10
CUT 40PFC MV
OWNER’S MANUAL
NOTE: Keep moving while cutting. Cut at a steady speed without pausing.
Maintain the cutting speed so that the arc lag is 10° to 20° behind the
travel direction. Use a 5° - 15° leading angle in the direction of the cut.
OPERATING TECHNIQUES
1. Piercing - Materials (up to 3.2mm/1/8in. thick) may be pierced
with the torch touching the work. When piercing thicker
materials (up to 4.8mm stainless or carbon steel) at an angle,
position the torch 0.5mm (.02”) above the work piece.
It is advisable when piercing thicker materials to drill a small
pilot/starting hole in the work piece which makes it a lot
easier and gives increased tip life. Start the cutting arc, then
immediately raise the torch to 1.6mm (1/16”) stand-o and
move the torch along the cut path. This will reduce the chance
of spatter from entering the torch and prevent the possibility
of welding the tip to the plate. The torch should be angled at
about 30° when starting to pierce, and then straightened after
accomplishing the pierce.
2. Grate Cutting - For rapid restarts, such as grate or heavy
mesh cutting, do not release the torch switch. This avoids the
2 second pref-low portion of the cutting cycle.
3. Edge Starting - For edge starts, hold the torch perpendicular
to the work piece with the front of the tip near (not touching)
the edge of the work piece at the point where the cut is to
start. When starting at the edge of the plate, do not pause
at the edge and force the arc to ‘reach’ for the edge of the
metal.
CUTTING SPEED GUIDE
Material Thickness (mm) Cutting Speed (mm/s)
Carbon Steel
(AISI 1020)
1.6 150
3.2 50
6.4 20
Stainless Steel
(AISI 304)
1.6 140
3.2 40
6.4 15
Aluminium
(6061)
1.6 190
3.2 85
6.4 30
Note: The speeds given here are typical for best quality cuts. Your actual
speeds may vary depending on material composition, surface condition,
operator technique, etc. If cutting speed is too fast, you may lose the
cut. With slower speeds excessive dross may accumulate. If speed is too
slow, the arc may extinguish. Air cutting typically produces a rough face
on stainless steel and aluminium.

4. Drag Cutting - Position torch tip slightly above work piece,
press torch switch and lower torch tip forward work piece until
contact is made and cutting arc is established. After cutting
arc is established, move the torch in the desired direction
keeping the torch tip slightly angled, maintaining contact with
the work piece. Avoid moving too fast as would be indicated
by sparks radiating from the topside of the work piece. Move
the torch just fast enough to maintain sparks concentration at
the underside of the work piece and making sure the material
is completely cut through before moving on. Adjust drag
speed as desired/ required.
5. Direction of Cut - The plasma gas stream swirls as it leaves
the torch to maintain a smooth column of gas. This swirl eect
results in one side of a cut being more square than the other.
Viewed along the direction of travel, the right side of the cut is
more square than the left.
www.duralloy.net.au | 1300 369 456 11
CUT 40PFC MV
OWNER’S MANUAL
To make a square-edged cut along an inside diameter of a circle, the
torch should move counter clockwise around the circle. To keep the
square edge along an outside diameter cut, the torch should travel in a
clockwise direction.
6. Quality Cuts – Dross (slag) is the excess material that spatters
and builds up on the underside of the work-piece as you cut.
Dross occurs when the operating procedure and technique
is less than optimal. It will require practice and experience
to obtain cuts without dross. Although less than optimal cuts
will contain dross, it is relatively easy to remove by breaking
it o using pliers or chipping o with a chisel or scraping or
grinding the finished cut as needed and is generally only a
minor inconvenience.
A combination of factors contributes to the build-up of dross.
They include; material type, material thickness , amperage
used for the cut, speed of the torch across the work-piece,
condition of the torch tip, input line voltage, air pressure,
etc. Generally there is an inversely proportional relationship
between output current and speed of cut. Do not use
more output current than is necessary and adjust speed of
cut toward minimizing dross build-up on underside of cut.
Experiment with adjusting current and speed to minimize
dross.
When dross is present on carbon steel, it is commonly
referred to as either ‘high speed, slow speed, or top dross’.
Dross present on top of the plate is normally caused by too
great a torch to plate distance.
‘Top dross’ is normally very easy to remove and can often
be wiped o with a welding glove. ‘Slow speed dross’ is
normally present on the bottom edge of the plate. It can vary
from a light to heavy bead, but does not adhere tightly to the
cut edge, and can be easily scraped o. ‘High speed dross’
usually forms a narrow bead along the bottom of the cut edge
and is very dicult to remove. When cutting troublesome
steel, it is sometimes useful to reduce the cutting speed to
produce ‘slow speed dross’. Any resultant clean up can be
accomplished by scraping, not grinding.
ESTABLISH THE CUTTING ARC AS QUICKLY AS POSSIBLE.

www.duralloy.net.au | 1300 369 456
12
CUT 40PFC MV
OWNER’S MANUAL
TROUBLESHOOTING
PROBLEM CAUSE SOLUTION
Torch will not come on • Power switch OFF
• Air supply is not of sucient volume or
pressure
• Work piece ground clamp not attached.
• Turn power switch to the ON position
• Check air supply (60–80 PSI, 3.5cfm required)
• Attach to work piece or to steel table with work
piece securely clamped to table
Sparks are shooting
upward instead of down
through the material.
• Plasma torch is not piercing the material
• Torch may be too far away from the
workpiece
• Material may not be earthed properly
• Travel speed too fast
• Increase current
• Decrease the distance of your torch to the
workpiece
• Check connections for proper earth
• Reduce speed
Beginning of cut not
completely pierced
• Possible earth connection problem • Check all connections
Dross build-up on parts of
cuts
• Tool/material building up heat
• Cutting speed too slow or current too high
• Worn torch parts
• Allow material to cool then continue cut.
• Increase speed and/or reduce current until dross is
reduced to minimum
• Inspect and repair or replace worn parts
Arc stops while cutting • Cutting speed too slow
• Torch is too high, away from material
• Worn torch parts
• Workpiece earth cable disconnected
• Increase speed until problem solved
• Lower torch to recommended height
• Inspect and repair or replace worn parts
• Connect workpiece earth clamp to work piece or
steel table.
Insucient penetration
• Cutting speed too fast
• Torch tilted too much
• Metal too thick for plasma capacity
• Worn torch parts
• Slow down travel speed
• Adjust tilt
• Several passes may be necessary
• Inspect and repair or replace worn parts
Arc sputters/flares • Water in the air supply • Install air drier or additional filtration
Consumables wear quickly
• Exceeding unit capability
• Excessive ARC starting HF use
• Improperly assembled torch
• Inadequate air supply, pressure too low
• Faulty air compressor
• Material too thick, increase angle to prevent blow
back into torch tip
• Do not operate HF ARC starting for more than 3
seconds - you can also start with torch in contact
with metal or within 1/16” of metal
• See section ‘Replacing Consumables’
• Check air filters, increase air pressure
• Check air compressor operation and make sure
input air pressure is at least 100 PSI
Circuit breaker/fuse trips
while operating
• Extension cord being used is not heavy
duty
• Use a heavy duty extension cord (2.5mm diameter)

Store and Retain this Manual
Retain this manual for the safety warnings and precautions,
assembly, operating, inspection, maintenance and cleaning
procedures. Write the product serial number at the rear of this
manual and keep this manual and the receipt in a safe and dry
place for future reference.
Important Safety Information
Failure to follow the warnings and instructions may result in
electric shock, fire, serious injury and/or death. Save all warnings
and instructions for future reference.
www.duralloy.net.au | 1300 369 456
SAFETY
This is the safety alert symbol to alert you to potential personal
injury hazards. Obey all safety messages that follow this symbol
to avoid possible injury or death.
DANGER!
Indicates a hazardous situation which, if not avoided, will
result in death or serious injury.
WARNING!
Indicates a hazardous situation which, if not avoided,
could result in death or serious injury.
CAUTION
Used with the safety alert symbol, indicates a hazardous
situation which, if not avoided, could result in minor or
moderate injury.
NOTE: used to address practices not related to personal injury.
General Safety Warnings
1. Maintain labels and nameplates on the plasma cutter. These
carry important information. If unreadable or missing, contact
DURALLOY for a replacement.
2. Avoid unintentional starting. Make sure the plasma cutter is
setup correctly and you are prepared to begin work before
turning on the plasma cutter.
3. Unplug before performing maintenance. Always unplug the
plasma cutter from its electrical outlet before performing any
inspection, maintenance, or cleaning procedures.
4. Never leave the plasma cutter unattended while energised.
Turn power o before leaving the plasma cutter unattended.
5. Do not touch live electrical parts. Wear dry, insulating gloves.
Do not touch the electrode or the conductor tong with bare
hands. Do not wear wet or damaged gloves.
6. Protect yourself from electric shock. Do not use the plasma
cutter outdoors. Insulate yourself from the work piece and the
ground. Use non-flammable, dry insulating material if possible,
or use dry rubber mats, dry wood or plywood, or other dry
insulating material large enough to cover the area of contact
with the work or the ground.
7. Avoid inhaling dust. Some dust created by power sanding,
sawing, grinding, drilling, cutting, welding and other
construction activities, contain chemicals known to cause
cancer, birth defects or other harm. Your risk from these
exposures varies, depending on how often you do this type
of work. To reduce your exposure to these chemicals, work
in a well-ventilated area, and work with approved safety
equipment, such as dust masks that are specially designed to
filter out microscopic particles.
8. People with pacemakers should consult their physician(s)
before using this machine.
WARNING!
Electromagnetic fields in close proximity to a heart pacemaker
could cause interference, or failure of the pacemaker. The use
of a plasma cutter is NOT RECOMMENDED for pacemaker
wearers. Consult your doctor.
9. Ensure that the unit is placed on a stable location before
use.
WARNING!
If this unit falls while plugged in, severe injury, electric
shock, or fire may result.
10. Transportation Methods Lift unit with the handles provided, or
use a handcart or similar device of adequate capacity. If using
a fork lift vehicle, secure the unit to a skid before transporting.
CAUTION
Disconnect input power conductors from deenergized
supply line before moving the welding power source.
11. Exercise good work practices.The warnings, precautions,
and instructions discussed in this instruction manual cannot
cover all possible conditions and situations that may occur. It
must be understood by the operator that common sense and
caution are factors which cannot be built into this product, but
must be considered by the operator.
13
CUT 40PFC MV
OWNER’S MANUAL

Plasma Cutter Safety Instructions & Warnings
WARNING!
Protect yourself and others from possible serious injury or
death. Keep children away. Read the operating/Instruction
manual before installing, operating or servicing this
equipment. Have all installation, operation, maintenance,
and repair work performed by qualified people.
If an operator does not strictly observe all safety rules and take
precautionary actions, Plasma Cutter products and processes can
cause serious injury or death, or damage to other equipment or
property.
Safe practices have developed from past experience in the use
of welding and cutting. These practices must be learned through
study and training before using this equipment. Some of these
practices apply to equipment connected to power lines; other
practices apply to engine driven equipment.
Anyone not having extensive training in welding and cutting
practices should not attempt to use these machines.
Safe practices are outlined in the European Standard EN60974-1
entitled: Safety in welding and allied processes.
WARNING!
Only use safety equipment that has been approved by
an appropriate standards agency. Unapproved safety
equipment may not provide adequate protection. Eye and
breathing protection must be AS/NZS compliant for the
specific hazards in the work area.
DANGER!
Always wear AS/NZS compliant safety glasses and full
face shield fitted with appropriate filter shade number.
(Refer Filter Table in this safety section)
CAUTION
Heavy-duty work gloves, non-skid safety shoes and
hearing protection used for appropriate conditions will
reduce personal injuries.
CAUTION
Have the equipment serviced by a qualified repair person
using identical replacement parts. This will ensure that the
safety of the power tool is maintained.
www.duralloy.net.au | 1300 369 456
Personal Safety
CAUTION
Keep the work area well lit. Make sure there is adequate
space surrounding the work area. Always keep the work
area free of obstructions, grease, oil, trash, and other
debris. Do not use equipment in areas near flammable
chemicals, dust, and vapours. Do not use this product in a
damp or wet location.
1. Stay alert, watch what you are doing and use common sense
when operating equipment. Do not use a tool while you are
tired or under the influence of drugs, alcohol or medication. A
moment of distraction when operating equipment may result
in serious personal injury.
2. Do not overreach. Keep proper footing and balance at
all times. This enables better control of the power tool in
unexpected situations.
Arc Rays can Burn Eyes and Skin
DANGER!
Arc rays from the welding process produce intense heat
and strong ultraviolet rays that can burn eyes and skin.
1. Use a Welding Helmet or Welding Face Shield fitted with a
proper shade filter (refer AS 60974-1, AS/NZS 1337.1 and AS/
NZS 1338.1 Safety Standards) to protect your face and eyes
when welding or watching. (See Filter Table later in this
section)
2. Wear approved safety glasses. Side shields are
recommended.
3. Use protective screens or barriers to protect others from flash
and glare; warn others not to watch the arc.
4. Wear protective clothing made from durable, flame-resistant
material (wool and leather) and foot safety protection.
5. Never wear contact lenses while welding.
Noise Can Damage Hearing
CAUTION
Noise from some processes can damage hearing. Use AS/
NZS compliant ear plugs or ear mus if the noise level is
high.
14
CUT 40PFC MV
OWNER’S MANUAL

Work Environment Safety
CAUTION
Used with the safety alert symbol, indicates a hazardous
situation which, if not avoided, could result in minor or
moderate injury.
1. When possible, move the work to a location well away from
combustible materials. If relocation is not possible, protect the
combustibles with a cover made of fire resistant material.
2. Remove or make safe all combustible materials for a radius of
10 metres around the work area. Use a fire resistant material
to cover or block all doorways, windows, cracks, and other
openings.
3. Enclose the work area with portable fire resistant screens.
Protect combustible walls, ceilings, floors, etc., from sparks
and heat with fire resistant covers.
4. If working on a metal wall, ceiling, etc., prevent ignition of
combustibles on the other side by moving the combustibles
to a safe location. If relocation of combustibles is not possible,
designate someone to serve as a fire watch, equipped with a
fire extinguisher, during the welding process and well after the
welding is completed.
5. Do not weld or cut on materials having a combustible coating
or combustible internal structure, as in walls or ceilings,
without an approved method for eliminating the hazard.
6. After welding, make a thorough examination for evidence of
fire. Be aware that visible smoke or flame may not be present
for some time after the fire has started. Do not weld or cut in
atmospheres containing dangerously reactive or flammable
gases, vapours, liquids, and dust. Provide adequate ventilation
in work areas to prevent accumulation of flammable gases,
vapours, and dust.
7. Do not apply heat to a container that has held an unknown
substance or a combustible material whose contents, when
heated, can produce flammable or explosive vapours. Clean
and purge containers before applying heat. Vent closed
containers, including castings, before preheating, welding, or
cutting.
www.duralloy.net.au | 1300 369 456
Electricity Can Kill
DANGER!
Touching live electrical parts can cause fatal shocks or
severe burns. The electrode and work circuit is electrically
live whenever the output is on.
The input power circuit and machine internal circuits are also live
when power is on. In semi-automatic or automatic wire welding,
the wire, wire reel, drive roll housing, and all metal parts touching
the welding wire are electrically live. Incorrectly installed or
improperly grounded equipment is a hazard.
1. Do not touch live electrical parts.
2. Wear dry, hole-free insulating gloves and body protection.
3. Insulate yourself from the work and the ground using dry
insulating mats or covers.
4. Disconnect input power before installing or servicing this
equipment. Lock input power, disconnect switch open, or
remove line fuses so power cannot be turned on accidentally.
5. Properly install and ground this equipment according to
national, state, and local codes.
6. Turn o all equipment when not in use. Disconnect power to
equipment if it will be left unattended or out of service.
7. Use fully insulated electrode holders. Never dip the holder
in water to cool it or lay it down on the ground or the work
surface. Do not touch holders connected to two welding
machines at the same time or touch other people with the
holder or electrode.
8. Do not use worn, damaged, undersized, or poorly spliced
cables.
9. Do not wrap cables around your body.
10. Connect work piece to a good electrical ground.
11. Do not touch the electrode while in contact with the work
(ground) circuit.
12. Use only well-maintained equipment. Repair or replace
damaged parts as soon as practical.
13. In confined spaces or damp locations, do not use a plasma
cutter with AC output unless equipped with a voltage reducer.
Arc rays from the welding process produce intense heat and
strong ultraviolet rays that can burn eyes and skin. Use the
following table to select the appropriate shade number for a
Welding Helmet or Welding Face Shield.
15
CUT 40PFC MV
OWNER’S MANUAL

www.duralloy.net.au | 1300 369 456
Fumes And Gases
WARNING!
Welding produces fumes and gases. Breathing these
fumes and gases can be hazardous to your health.
1. Keep your head out of the fumes. Do not breathe the fumes.
2. If inside, ventilate the area and/or use an exhaust at the arc to
remove welding fumes and gases.
3. If ventilation is poor, use an approved air-supplied respirator.
4. Read the Safety Data Sheets (SDS) and the manufacturer’s
instruction for the metals, consumables, coatings, and
cleaners.
5. Work in a confined space only if it is well ventilated, or while
wearing an air-supplied respirator. Shielding ga es used for
welding can displace air causing injury or death. Be sure the
breathing air is safe.
6. Do not weld in locations near degreasing, cleaning, or
spraying operations. The heat and rays of the arc can react
with vapours to form highly toxic and irritating gases.
7. Do not weld on coated metals, such as galvanized, lead, or
cadmium plated steel, unless the coating is removed from the
weld area, the area is well ventilated, and if necessary, while
wearing an air- supplied respirator. The coatings and any
metals containing these elements can give of toxic fumes if
welded.
16
CUT 40PFC MV
OWNER’S MANUAL
Fire & Explosive Risks
WARNING!
Sparks and spatter fly o from the welding arc. The flying
sparks and hot metal, weld spatter, work piece, and hot
equipment can cause fires and burns.
Accidental contact of electrode or welding wire to metal objects
can cause sparks, overheating, or fire.
1. Protect yourself and others from flying sparks and hot metal.
2. Do not weld where flying sparks can strike flammable
material.
3. Remove all flammables within 10m of the welding site.
4. Be alert that welding sparks and hot materials from welding
can easily go through small cracks and openings to adjacent
areas.
5. Watch for fire, and keep a fire extinguisher nearby.
6. Be aware that welding on a ceiling, floor, bulkhead, or partition
can cause fire on the hidden side.
7. Do not weld on closed containers such as tanks or drums.
8. Connect the work lead/clamp to the job as close to the
welding area as practical to prevent welding current from
travelling long, possibly unknown paths and causing electric
shock and fire hazards.
9. Do not use a plasma cutter to thaw frozen pipes.
10. Remove the stick electrode from the holder or cut o the
welding wire at the contact tip when not in use.
Sparks & Hot Metal
WARNING!
Chipping and grinding causes flying metal, and as welds
cool they can throw o slag.
1. Wear an AS/NZS approved face shield or safety goggles. Side
shields are recommended.
2. Wear appropriate safety equipment to protect the skin and
body.
www.duralloy.net.au | 1300 369 456 17
CUT 40PFC MV
OWNER’S MANUAL
www.duralloy.net.au | 1300 369 456
18
3 year Warranty*
Duralloy Industrial Supply warrants the original retail purchaser
that the Duralloy Welding and Cutting machines purchased will
be free from defects in materials and workmanship for a period
of 3 years* from the date of purchase by the customer. If a defect
in material or workmanship becomes evident during this period,
Duralloy Industrial Supply will at its option;
• Repair the product (or pay for the repair of the product)
• Replace the product
In case of warranty claim the product should be returned to the
original place of purchase, with proof of purchase.
Any handling and transport costs (or other expenses) incurred in
claiming warranty are not covered by this warranty. The warranty
schedule is:
• Duralloy Power source only* 3 years
• Duralloy Regulator 3 months
• MIG Torches 3 months
• TIG Torches 3 months
• Plasma Torches 3 months
• Ancillary Equipment 3 months
WARRANTY
Duralloy Welding Equipment / Plasma Cutting Range
The Obligation of Duralloy Industrial Supply under this warranty is
limited to the circumstance set out above and is subject to:
• The customer being able to provide proof of purchase of
the relevant equipment.
• A defect in either material or workmanship.
• The customer returning the product to Duralloy Industrial
supply or an authorized repair agent.
• The product not having been altered or tampered with.
• The product not having been used outside the normal
operating parameters of this equipment.
• The product to be in good condition and not damaged
which may cause a fault
All goods come with a guarantee that cannot be excluded under
the Australian Consumer laws. You as a consumer are entitled to
a replacement or a refund for a major failure .You are also entitled
to have the goods repaired or replaced if the products fail to be
of acceptable quality.
This Warranty Provided by:
Duralloy Industrial Supply ABN 81 831 839 268
2 Hollylea Road Leumeah NSW 2560
1300 369 456
CUT 40PFC MV
OWNER’S MANUAL
www.duralloy.net.au | 1300 369 456 19
CUT 40PFC MV
OWNER’S MANUAL

www.duralloy.net.au | 1300 369 456
Table of contents
Other Duralloy Welding System manuals