Check the level of electrolyte in the
batteries, if using acid batteries.
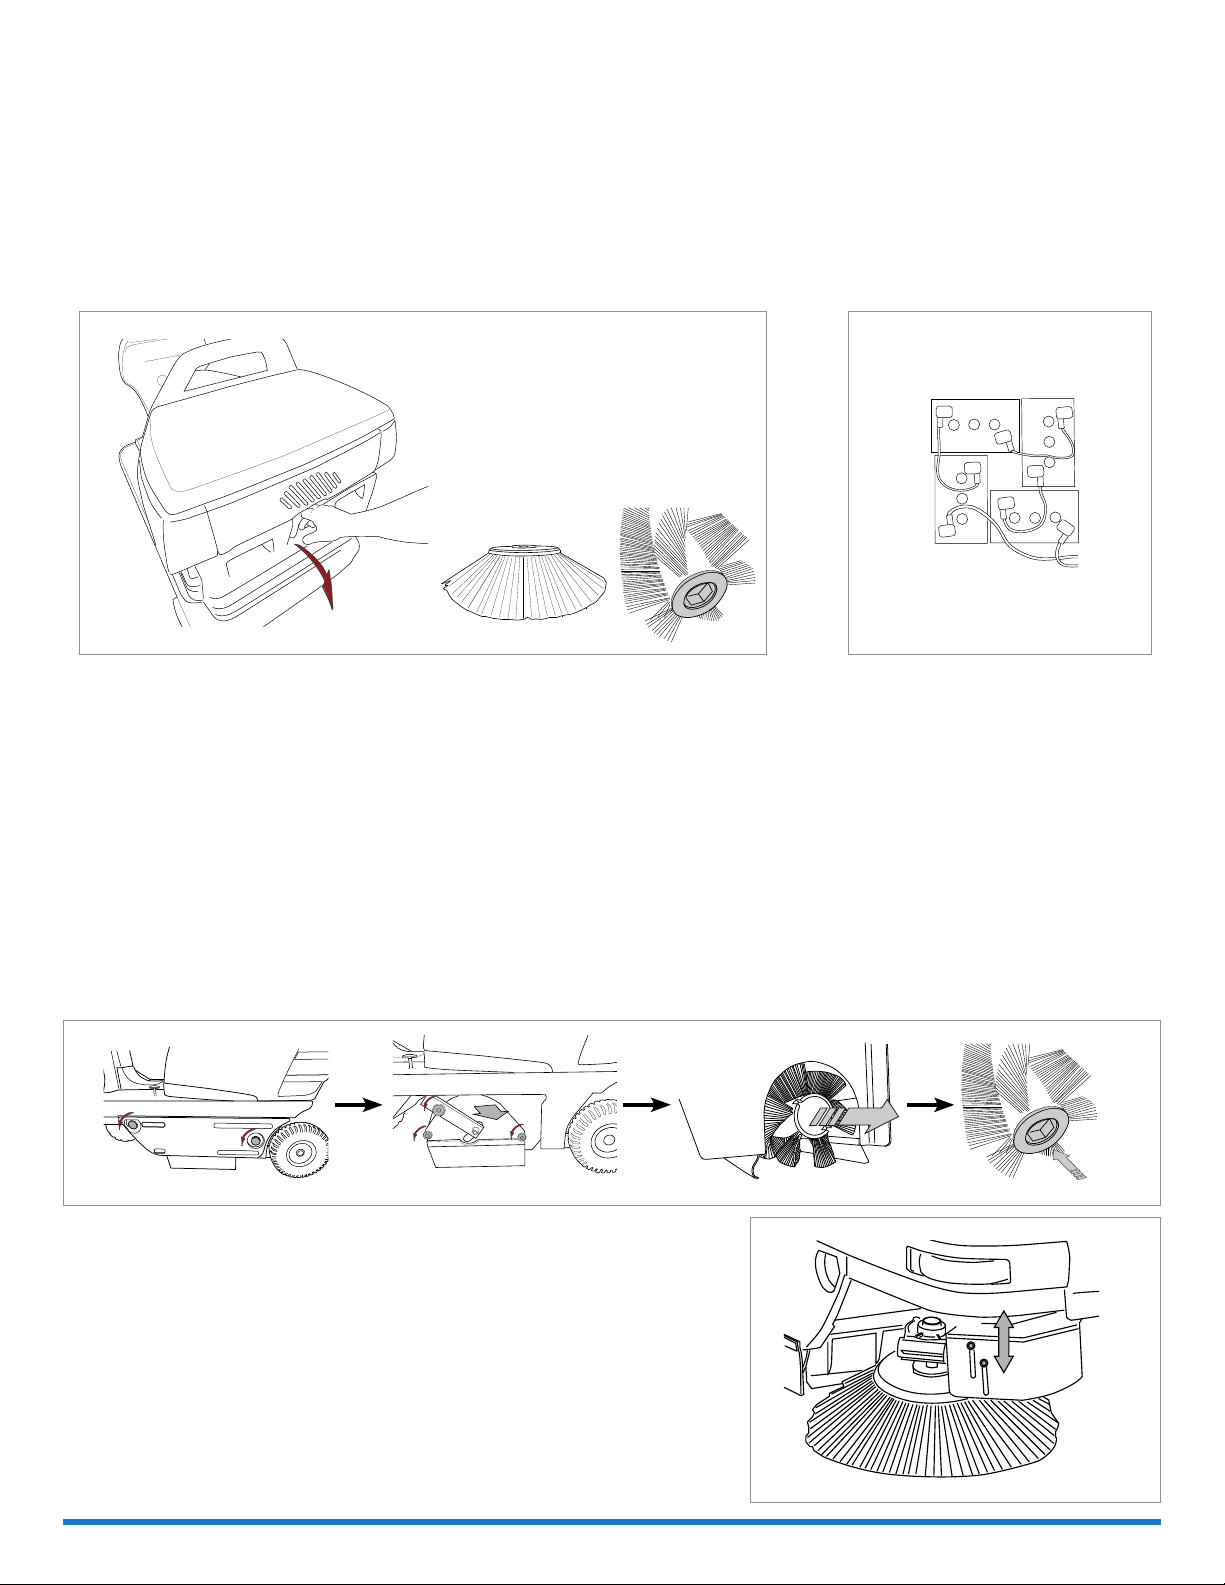
INSPECTING AND REPLACING THE CENTRE BRUSH
Unscrew the knob and open the door on the left of the machine.
Unscrew the three knobs securing the brush compartment cover.
Pull out the brush cover compartment.
Remove the brush, holding it on the plastic core.
Remove the adapter from the core of the old brush and t it to the new brush, taking care to keep the bristles aligned in the same
direction.
Fit the new brush and make sure that the adapter is inserted on the drive hub.
Replace the brush compartment cover using the knobs, following the dismantling operations in reverse order.
1050 B-DP Quick Guide
INSPECTING AND REPLACING THE CENTRE BRUSH
• Unscrew the knob and open the door on the left of the machine.
• Unscrew the three knobs securing the brush compartment cover.
• Pull out the brush cover compartment.
• Remove the brush, holding it on the plastic core.
• Remove the adapter from the core of the old brush and t it to the new brush, taking care to keep the bristles
aligned in the same direction.
• Fit the new brush and make sure that the adapter is inserted on the drive hub.
• Replace the brush compartment cover using the knobs, following the dismantling operations in reverse order.
ADJUSTING SIDE BRUSH HEIGHT
• Move the side brush to the working position.
• Loosen the adjustment screws on the brush motor support.
• Manually move the brush to the required position.
• Tighten the adjustment screws.
Emptying the bin:
• Release the bin lock.
• Pull out the rear bin by means of
its handle.
• Take the bin (which is tted with
wheels) to the rubbish collection
point and empty it.
Daily maintenance:
When you have nished cleaning,
proceed as follows:
• Turn the machine off.
• Activate the parking brake.
• Raise the side brushes to prevent
damage.
• Recharge the batteries if
necessary, using the connector
provided.
Empty the debris bin
Check and remove any debris
wrapped around the side brushes and
on the centre brush.
Weekly maintenance:
Check the level of electrolyte in the
batteries, if using acid batteries.
Check that the suction lter is tight
and clean.
2
PLDC03834
IP Cleaning S.p.A. - Viale Treviso, 63 30026 Summaga di Portogruaro - www.ipcworldwide.com
+
+
+
+
+
-
-
-
-
-
Battery
EMPTYING THE BIN
ADJUSTING SIDE BRUSH HEIGHT
Move the side brush to the working position.
Loosen the adjustment screws on the brush motor support.
Manually move the brush to the required position.
Tighten the adjustment screws.
Release the bin lock.
Pull out the rear bin by means of its handle.
Take the bin (which is tted to the wheels) to the rubbish
collection point and empty it.
WEEKLY MAINTENANCE
Dustbane Products Ltd., 1000 Last Mile Dr., Ottawa, ON K1G 6Y1 • Tel: 1-800-387-8226 Fax: 1-800-363-5309 www.dustbane.ca


