8
USING YOUR DYSON APPLIANCE
PLEASE READ THE ‘IMPORTANT SAFETY INSTRUCTIONS’ IN THIS DYSON
OPERATING MANUAL BEFORE PROCEEDING.
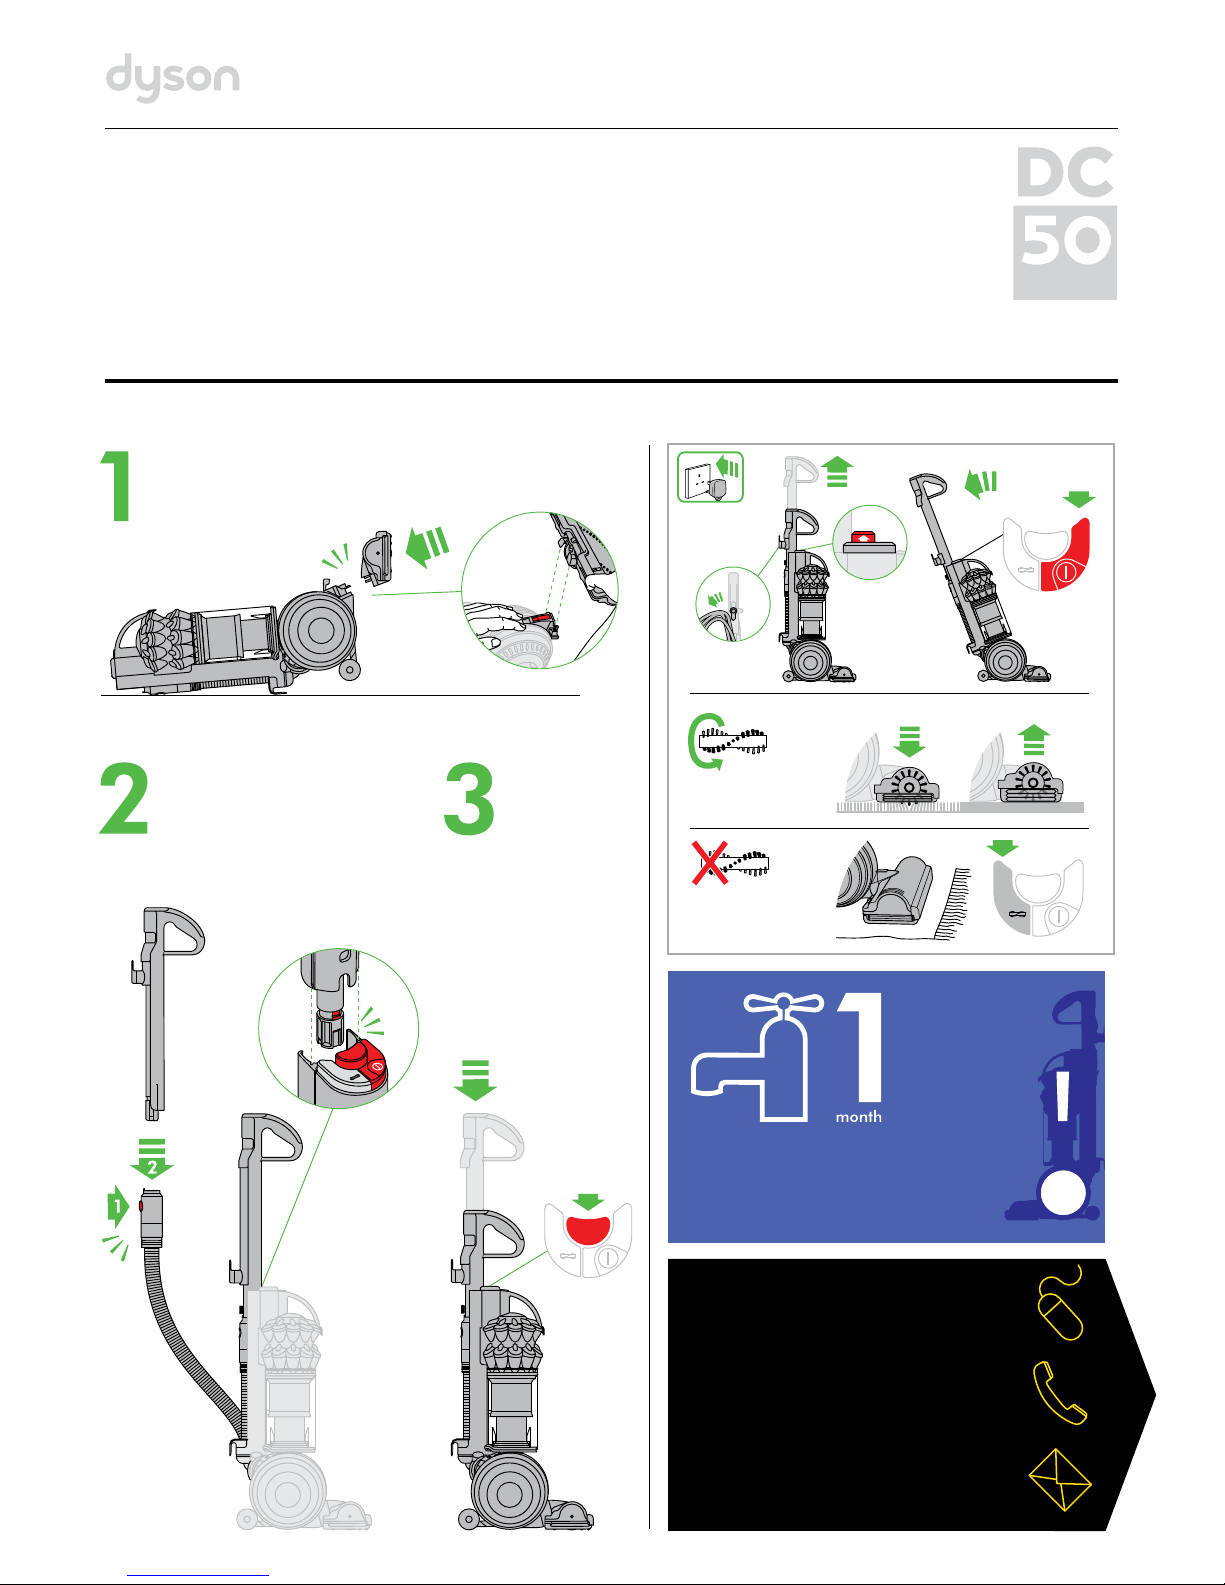
ASSE M B LY
• Lietheapplianceonitsback.
• Thecleanerheadfitsontotheconnectionsunderneaththefrontpartoftheball.
Slidethecleanerheadupintothechannelseithersideoftheairway.Pushfirmly:
thecleanerheadwillclickintoplaceandtheredlatchwillengage.
• Standtheapplianceupstraight.
• Placethehandleandwandassemblyintothegroovesinthetopoftheducton
theappliance.
• Pushtheredhandlereleasebuttondown.Slidethehandledowninthegrooves
forabout10cm.Letgoofthebutton.Pullupthehandlegentlyuntilitclicksinto
place–theredhandlereleasebuttonwillpopup.
• Connectthewandandthehose.Makesuretheyareseatedintherecessof
thehandle.
• Pushtheredhandlereleasebuttondownwhilstpressingtheredbuttononthe
hose.Slidethehandledownintoplaceinthemachine.Theredhandlerelease
buttonwillremaindown.Thisisthestorageposition.
• Closethewandcap.
• Tofitthetoolholder,firstremovethecycloneandclearbinassembly:releaseit
bypressingtheredbuttonatthetopofthecyclone.
• Slidethetoolholderontothebackoftheappliance,justabovetheball,as
shown.Pressthetoolholderonwithyourthumbs,whileholdingthefrontofthe
appliancewithyourfingers.Thefittingistight,souseaconstant,firmpressure.
(Pleasenote:Thetoolholderisnotdesignedtoberemoved.)
• Refitthecycloneandclearbinunit.
• Attachthetools.
• Windthecablearoundthecablehooks.Securewiththeclip.
• Towatchashortonlinevideovisit:
UK–www.dyson.co.uk/dc50gettingstarted
ROI–www.dyson.ie/dc50gettingstarted
OPERATION
• Unwindthecable.
• Plugtheapplianceintothemainselectricitysupply.
• Touse,pullupthehandletoextendit.Theredhandlereleasebuttonwillpop
up.Reclinetheappliancebypullingbackwardsonthehandle.
• Toswitch‘ON’or‘OFF’presstheredpowerbutton,locatedasshown.
• Afteruse,returntheappliancetotheuprightposition,pushingitfirmlyinto
place.Thestabiliserwheelswillautomaticallylower.
• Toretractthehandle,makesurethehoseandwandareseatedintherecessof
thehandle.
• Pushtheredhandlereleasebuttondown.Slidethehandledownintoplacein
theappliance.
• Thenunplugtheappliance,coilthecablesafelyandputtheapplianceaway.
• Switch‘OFF’theappliance,unplugandensureitisuprightbefore:
– changingorusingtools
– removingthehoseorairwayinspectionparts.
• Usethecyclonecarryhandletocarrytheappliance.
• Thewandcanbeusedwhenthehandleisretractedorextended.
• Toreleasethewand,openthewandreleasecap.
• Pullthewandupandawayfromthehandle.
• Inuse,thetoolscanbeattachedtoeitherthehoseorthewand.
• Toattachthetoolstothehose,presstheredreleasebuttonintheconnecting
collarandremovethewandfromthehose.
• Torefit,removetoolsandplacethewandintothehoseuntiltheredbuttonclicks
intoplace.
• Presstheredbuttononthehose.Slidethewandintothehose.
• Makesurethewandandhoseareseatedintherecessofthehandle.
Thehosemustbecontracted.
• Ifthehandleisextended,holdthecollarwiththecablehookonitandslideit
downintherecessofthehandle–itwillclickintoplace.Makesurethetopof
thewandclicksintoplaceinthetopofthehandleatthesametime.Closethe
wandcap.
• Presstheredhandlereleasebuttondownandslidethehandledowninto
theappliance.
• Ifthehandleiscontracted(i.e.inthelowstorageposition),makesurethecollar
withthecablehookisseatedintherecessofthehandle.Slidethewanddown
intothehosesothetopofthewandclicksintoplaceinthetopofthehandleat
thesametime.
CARPETS OR HARD FLOORS
• Thebrushbarwillalwaysdefaultto‘ON’(spinning)eachtimeyouswitchthe
appliance‘ON’andreclineitforcleaning.
• Thebrushbarwillnotrotatewhentheapplianceisupright.
• Toswitchthebrushbar‘OFF’(e.g.fordelicaterugsandfloors):
– switchtheappliance‘ON’
– reclinetheappliance
– pressthebrushbar‘ON/OFF’button–thebrushbarwillstopspinning.
• Thebrushbarwillautomaticallystopifitbecomesobstructed.See‘Brushbar–
clearingobstructions’.
• Beforevacuumingyourflooring,rugsandcarpets,checkthemanufacturer’s
recommendedcleaninginstructions.
• Somecarpetsmayfuzzifarotatingbrushbarisusedwhenvacuuming.Ifthis
happens,werecommendvacuumingwiththebrushbarswitched‘OFF’and
consultingwiththeflooringmanufacturer.
• Thebrushbarontheappliancemaydamagesomecarpettypes.Ifyouare
unsure,turn‘OFF’thebrushbar.
LOOKING AFTER YOUR DYSON APPLIANCE
• Donotcarryoutanymaintenanceorrepairworkotherthanthatshowninthis
DysonOperatingManual,oradvisedbytheDysonHelpline.
• OnlyusepartsrecommendedbyDyson.Ifyoudonotthiscouldinvalidate
yourguarantee.
• Storetheapplianceindoors.Donotuseorstoreitbelow0°C(32°F).Ensurethe
applianceisatroomtemperaturebeforeoperating.
• Cleantheapplianceonlywithadrycloth.Donotuseanylubricants,cleaning
agents,polishesorairfreshenersonanypartoftheappliance.
• Ifusedinagarage,alwayswipethebaseplate,ballandstabiliserwheelswith
adryclothaftervacuumingtocleanoffanysand,dirtorpebblesthatcould
damagedelicatefloors.
VACUUMING
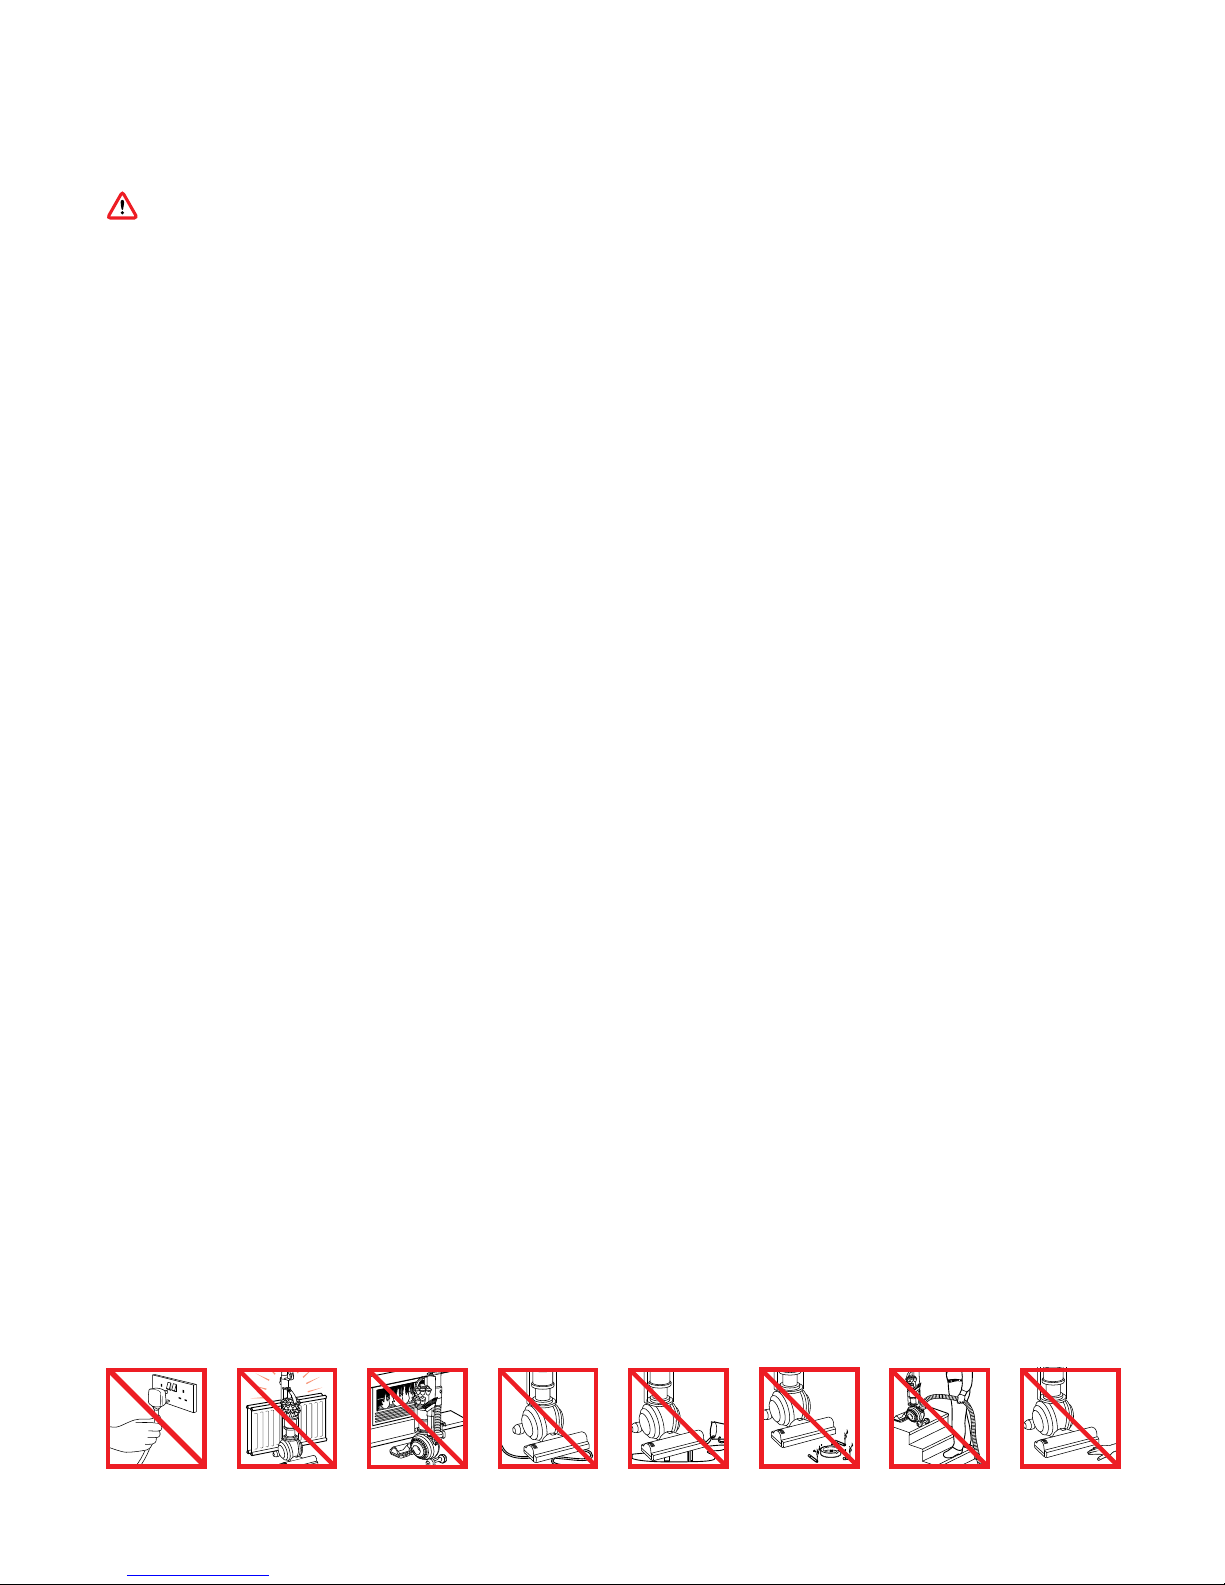
CAUTION:
• Donotusewithouttheclearbinandfiltersinplace.
• Finedirtsuchasplasterdustorflourshouldonlybevacuumedinvery
smallamounts.
• Donotusetheappliancetopickupsharphardobjects,smalltoys,pins,paper
clips,etc.Theymaydamagetheappliance.
• Whenvacuuming,certaincarpetsmaygeneratesmallstaticchargesinthe
clearbinorwand.Theseareharmlessandarenotassociatedwiththemains
electricitysupply.Tominimiseanyeffectfromthis,donotputyourhandorinsert
anyobjectintotheclearbinunlessyouhavefirstemptieditandrinseditoutwith
coldwater(see‘Cleaningtheclearbin’).
• Powerfulsuctioncancausethehoseto‘pullback’–pleasetakecare.
• Donotworkwiththeapplianceaboveyouonthestairs.Whencleaningstairsit
isrecommendedthatthehandleisnotextendedandthatyouuseatoolonthe
endofthehoseratherthanthewand.
• Donotputtheapplianceonchairs,tables,etc.
• Beforevacuuminghighlypolishedfloors,suchaswoodorlino,firstcheckthat
theundersideofthefloortoolanditsbrushesarefreefromforeignobjectsthat
couldcausemarking.
• Donotleavethecleanerheadinoneplaceondelicatefloors.
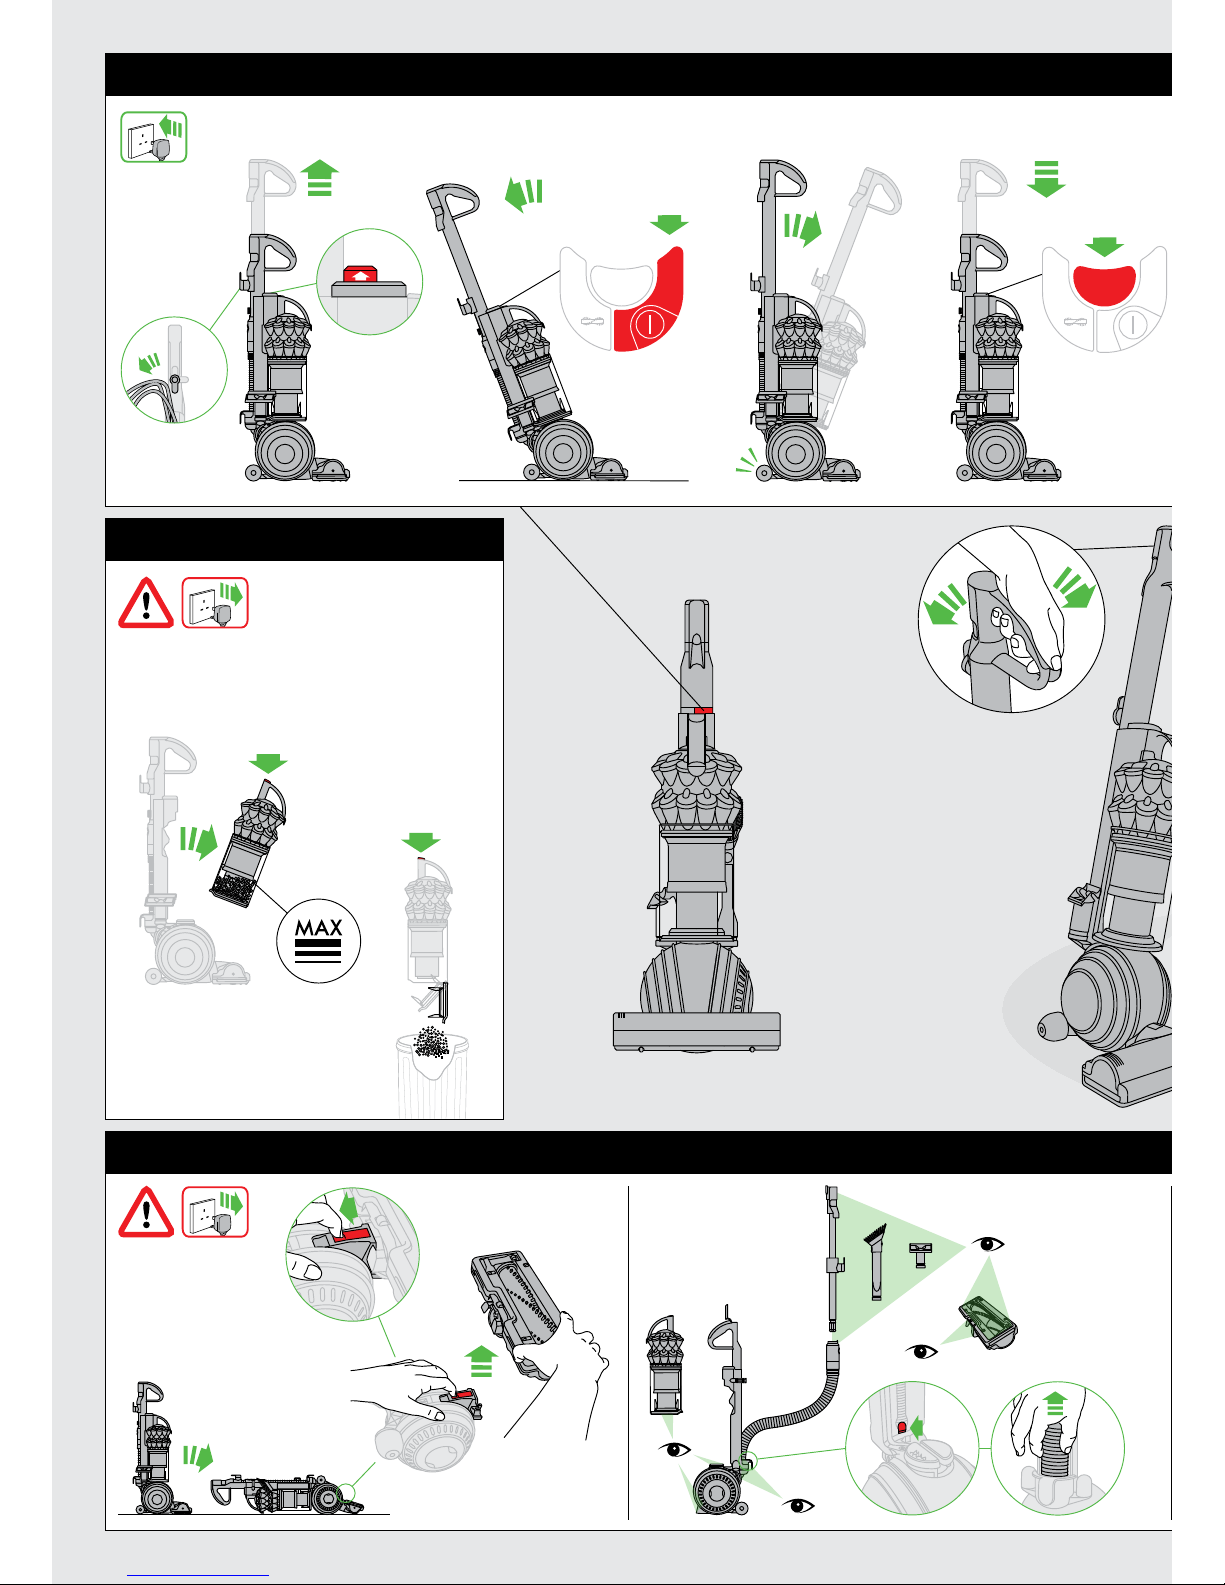
EMPTYING THE CLEAR BIN
• EmptyassoonasthedirtreachestheleveloftheMAXmark–donotoverfill.
• Switch‘OFF’andunplugbeforeemptyingtheclearbin.
• Toremovethecycloneandclearbinunit,pressdownontheredbuttononthe
topofthecarryinghandleonthecyclone.
• Toreleasethedirt,pressallthewaydownonthesameredbuttononthetopof
thecarryinghandleonthecyclone.
• Tominimisedust/allergencontactwhenemptying,encasetheclearbintightlyin
aplasticbagandempty.
• Removetheclearbincarefullyfromthebag.
• Sealthebagtightly,disposeasnormal.
• Torefit:
– ensuretheairwayinthebinbaseisclearofdustanddirt
– closetheclearbinbasesoitclicksintoplace
– pushthecycloneandclearbinunitintothemainbodyoftheappliance;itwill
clickintoplace
– ensurethecycloneandclearbinunitissecure.
Forafreefactsheetvisit:www.dyson.co.uk/technology/allergy
CLEANING THE CLEAR BIN
• Removethecycloneandclearbin(instructionsabove).
• Toseparatethecycloneunitfromtheclearbinpresstheredbuttontoopen
theclearbinbase.Thisexposesasmallsilverbuttonbehindtheredopening
mechanism.Pressthesilverbutton(onitsribbedarea)andseparatethecyclone
unitfromtheclearbin.
• Cleantheclearbinwithcoldwateronly.
• Ensuretheclearbiniscompletelydrybeforereplacing.
• Donotusedetergents,polishesorairfreshenerstocleantheclearbin.
• Donotputtheclearbininadishwasher.
• Donotimmersethewholecycloneinwaterorpourwaterintothecyclones.
• Cleanthecycloneshroudwithadryclothordrybrushtoremovelintanddust.
• Torefit:
– fitthecycloneshroudintotheclearbinsothatthesilverbuttonclicks
andengages
– closetheclearbinbasesoitclicksintoplace
– pushthecycloneandclearbinunitintothemainbodyoftheappliance;
itwillclickintoplace
– ensurethecycloneandclearbinunitissecure.
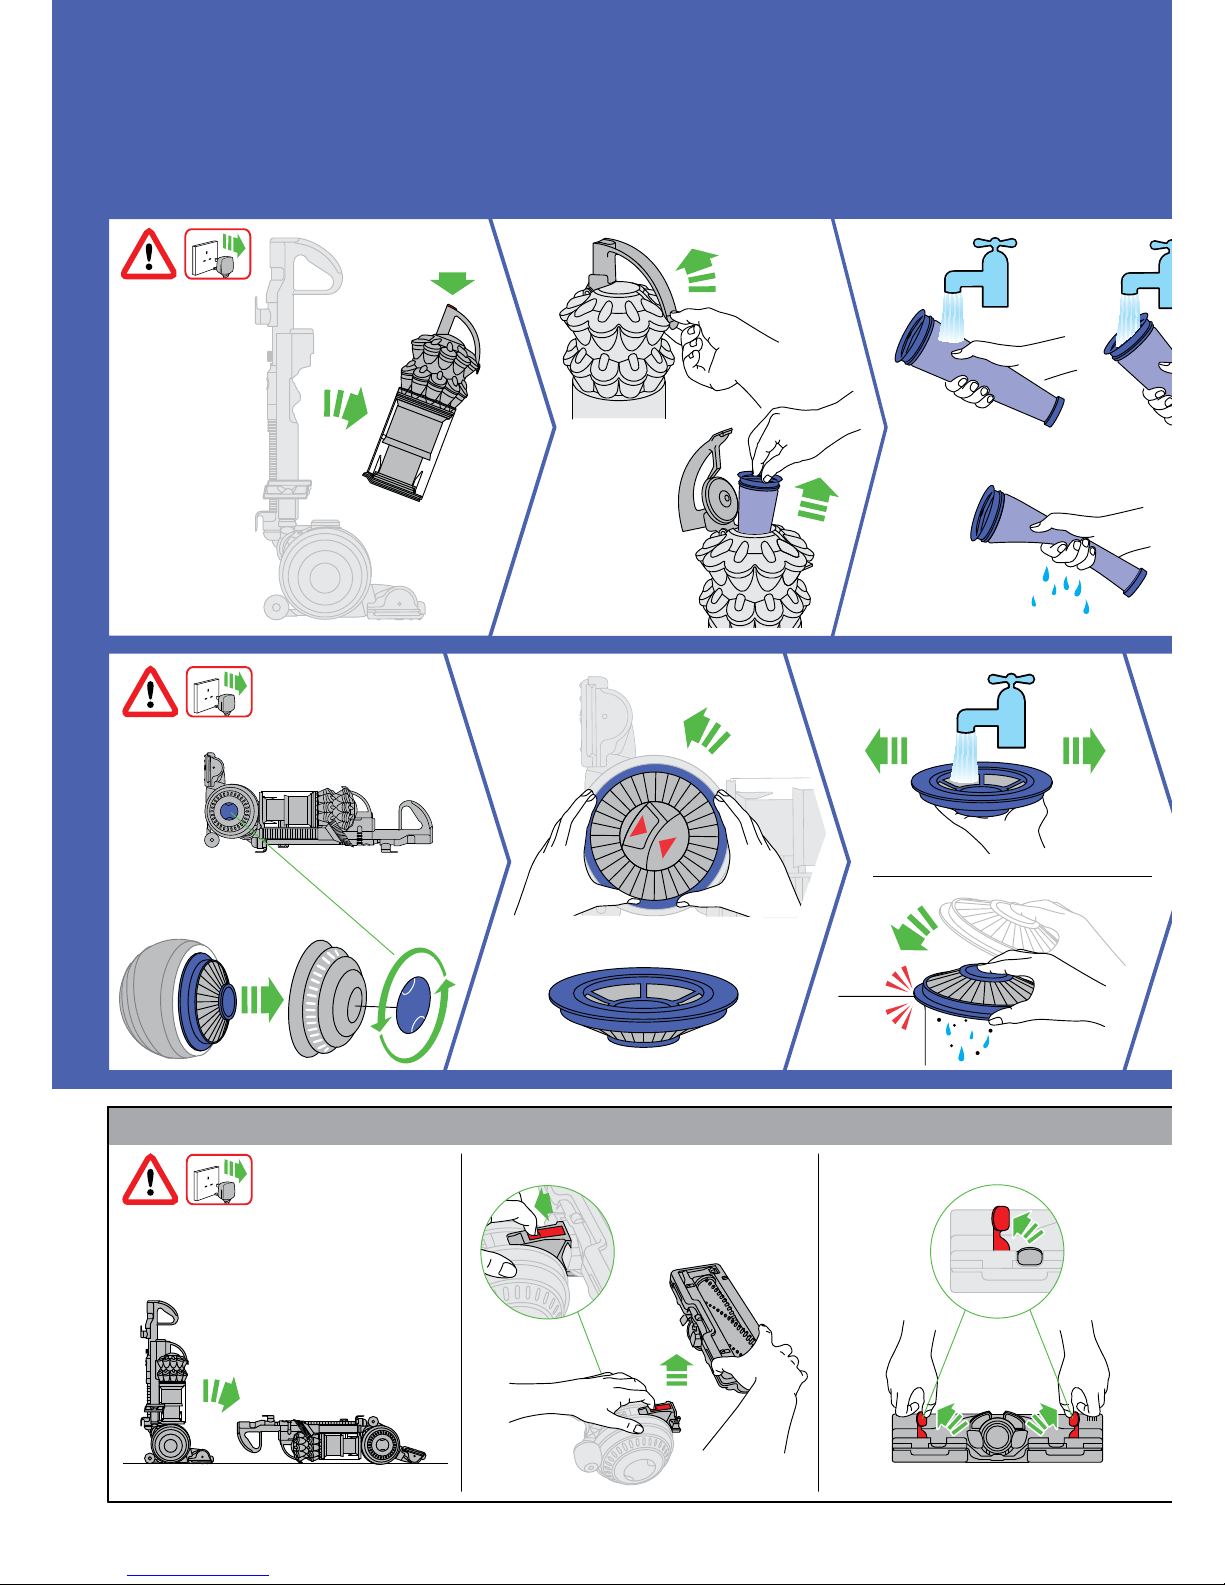
WASHING YOUR FILTERS
• Yourappliancehastwowashablefilters,locatedasshown.
• Checkandwashthefiltersonceamonthtomaintainperformance.
• Switch‘OFF’andunplugbeforecheckingorremovingthefilters.
• Thefiltersmayrequiremorefrequentwashingifvacuumingfinedust.
• Washwithcoldwateronly.Donotusedetergents.
• Donotputthefiltersinadishwasher,washingmachine,tumbledryer,oven,
microwaveornearanakedflame.
Filter A
• Removethecycloneandclearbin(instructionsabove).
• Releasethecatchonthefrontofthecyclonehandle.Swingthehandleback.
• Liftoutthefilter.
• Washthefilterwithcoldwateronly.Holdunderatapandrunwaterthroughthe
openenduntilthewaterrunsclear.Turnupsidedownandtapout.
• Squeezeandtwistwithbothhandstomakesuretheexcesswaterisremoved.
• Runwaterovertheoutsideofthefilteruntilthewaterrunsclear.
• Squeezeandtwistwithbothhandstomakesuretheexcesswaterisremoved.
• Standthefilteronitswide,openendtodry.Leavetodrycompletelyfora
minimumof24hours.
• Replacethefilterintothecyclone.Swingthehandlebackintoplace.Ensurethe
latchclickstoengageandissecure.Fitthecycloneandclearbinunitontothe
appliance(instructionsabove).
Filter B
• Lietheapplianceonitsside.
• ToremovefilterB:
– turnthebluecentrallockingdialontheoutercoveroftheballanti-clockwise
untilthecoverisreleased
– liftoffthecover
– turnthefilterone-quarteranti-clockwisetorelease.
• Washthefilterwithcoldwateronly.
• FilterBshouldberinsedandtappedoutuntilthewaterrunsclear,thentapped
outagaintoensureallexcesswaterisremoved.(Tapontheplasticrim,notthe
filtermaterial.)Leavetodrycompletelyforaminimumof24hours.