Dyson Radix Cyclone 8 DC07 brush control User manual

Important
•This appliance is not intended for
use by young children or infirm
persons without supervision.
•Young children should be
supervised to ensure they do not
play with the appliance.
•Check that your electricity supply
corresponds to that shown on the
rating plate. The appliance must
only be used as rated.
•If the supply cable of the
appliance is damaged, disconnect
the appliance from the socket
outlet immediately. The supply
cable must be replaced by the
manufacturer or its service agent
or a similarly qualified person in
order to avoid a hazard.
•Do not use the cleaner if the cable
or plug are damaged or if the
cleaner has been damaged,
dropped or has come into contact
with water or any other liquid. In
these cases, contact the Helpline.
For your safety
Do not pull on
supply cable.
Do not use cleaner
above you on stairs.
Do not place hands
under brushbar
when in use.
Do not use cleaner
to pick up water or
any other liquid.
Do not use cleaner
near naked flames.
Do not leave cleaner
near heat sources.
Do not run over
supply cable.
Do not use cleaner
to pick up burning
objects of any kind.
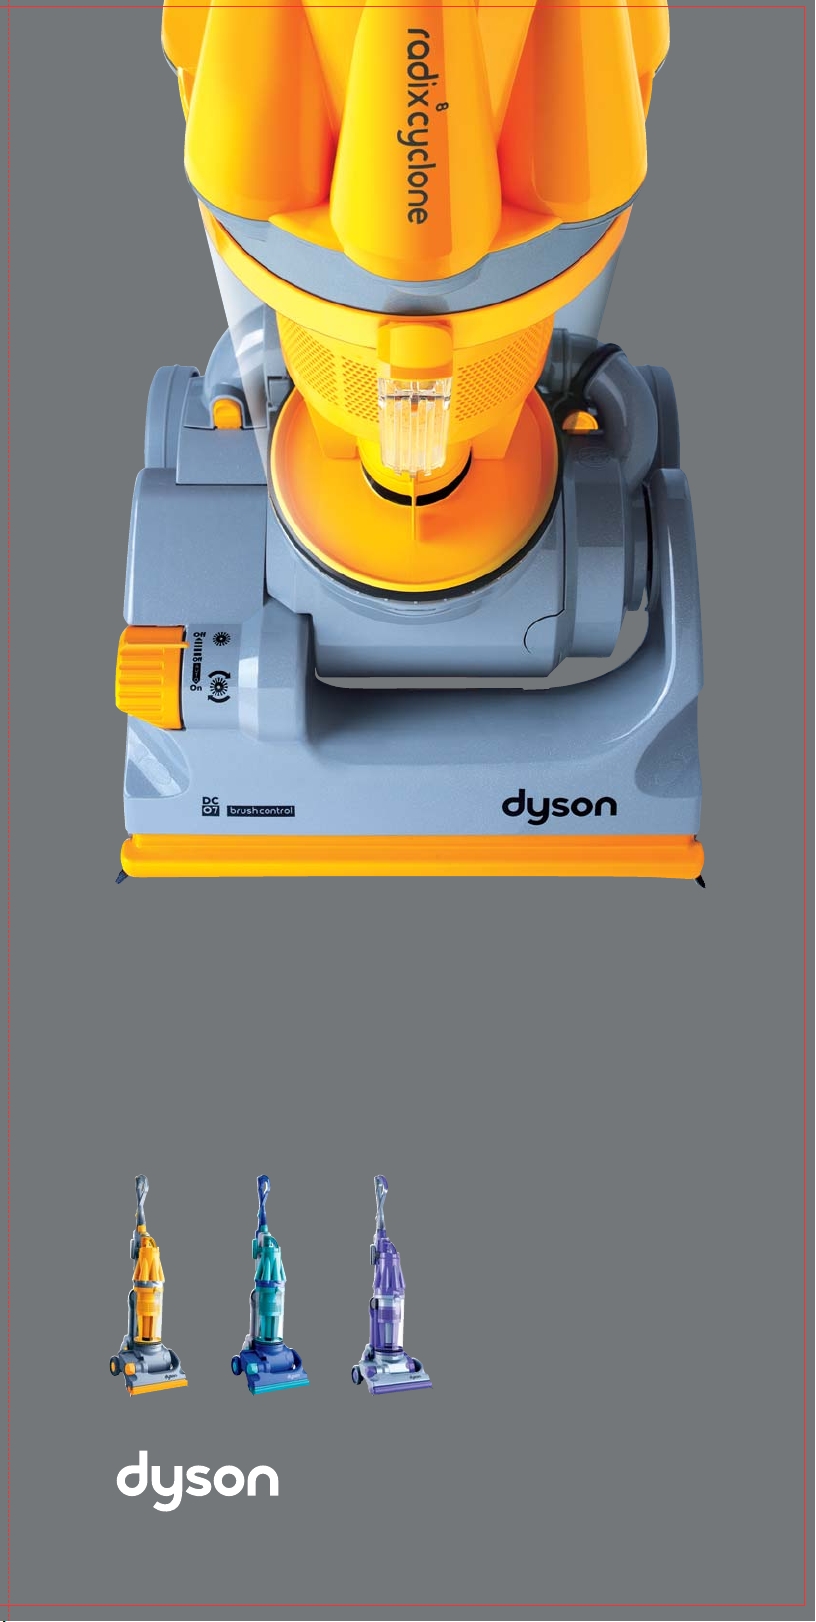
DCO7 accessories
AU 1800 239766
Unit 8, 7-11 Parraweena Road,
Taren Point, Sydney NSW 2229.
NZ 0800 397 667
Avery Robinson Ltd, 151D Marua Road,
Ellerslie, Auckland.
Visit the Dyson website for product
information and to order accessories
and spares.
Dyson Customer Care
Every new Dyson domestic
vacuum cleaner has a 2 year
guarantee.
If you have a query about your
Dyson, call the Dyson Customer
Helpline with your serial number
and details of where/when you
bought the cleaner.
Most queries can be solved
over the phone by one of our
factory-trained Helpline staff.
If your cleaner needs attention
from our engineers, we aim to
have it repaired and tested
within 3-5 working days.
Your serial number can be
found on your rating plate
which is underneath the
machine beneath the wheels.
Note your serial number for
future reference:
helpline
DYSON LIMITED MALMESBURY SN16 ORP ENGLAND UK
230-240V 50Hz
1200 W
FOR PATENT INFORMATION SEE OPERATING MANUAL 02422-01-04
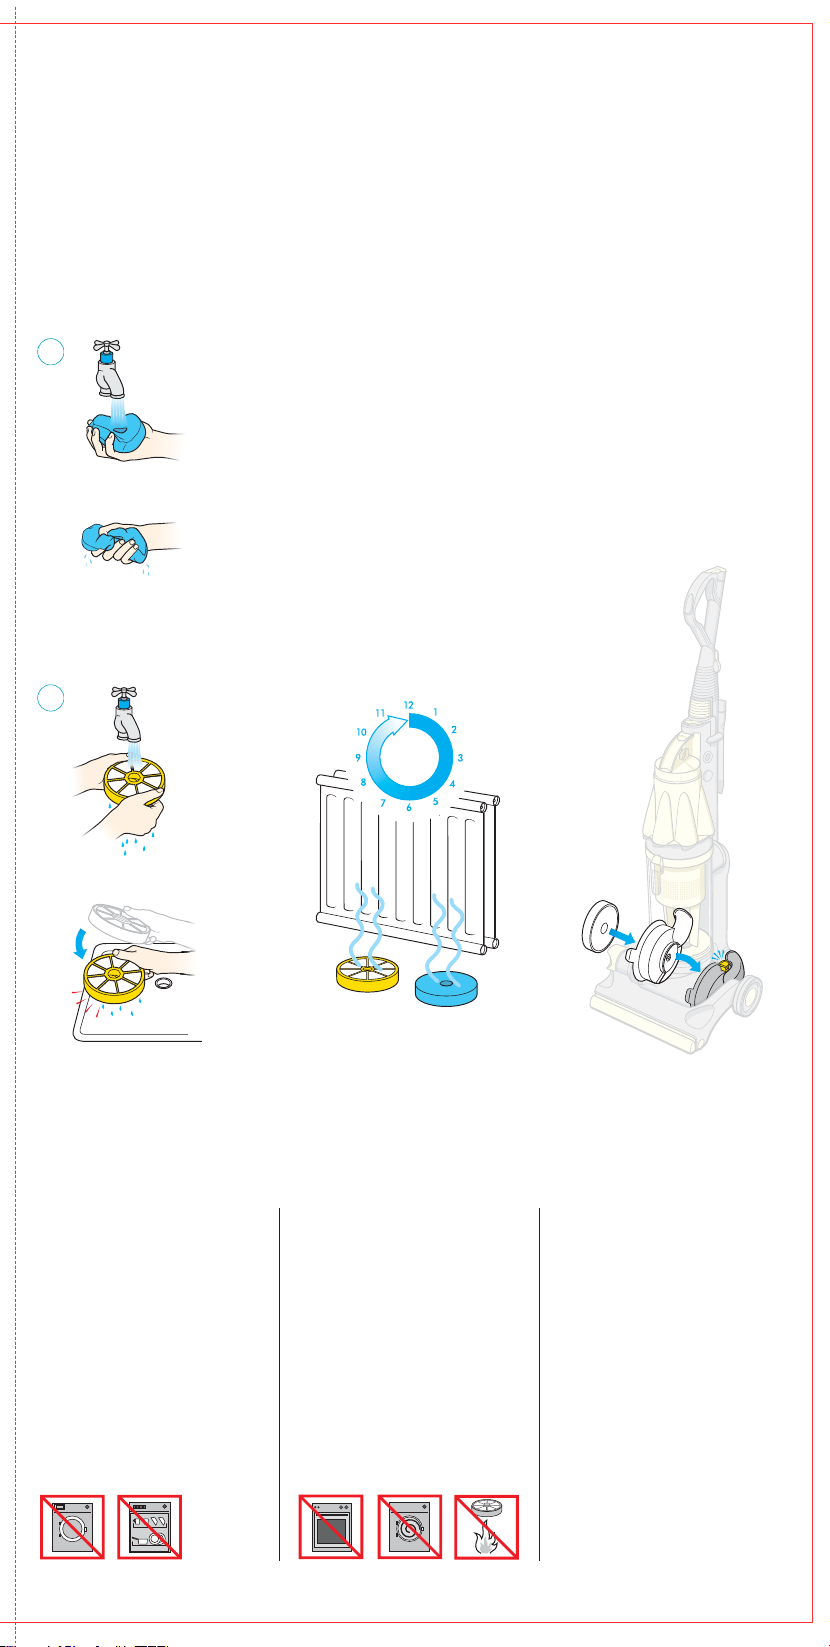
Zorb carpet-cleaning powder
(750g)*
Millions of tiny sponges absorb
dirt from the carpet, keeping
new carpets looking new with
none of the drawbacks of wet
cleaning.
•When vacuuming, certain carpets
may generate small static charges
in the clear bin. These are entirely
harmless and are not associated
with the mains supply. To minimise
any effect from this, do not put
your hand or insert any object into
the clear bin unless you have first
emptied it and rinsed it out with
cold water.
•Do not continue to use the cleaner
if any part appears to be faulty,
missing or damaged.
•Do not carry out any maintenance
work other than that shown in this
manual or advised by the Helpline
and do not put anything into the
openings or moving parts of the
machine.
•Only use parts produced or
recommended by Dyson; failure
to do so could invalidate your
guarantee.
PN.04482-02-02 JN.7810 15.11.02
*item not approved by British Allergy Foundation.
The following items can be used with your DCO7. For further
information please see the order form, or visit the Dyson website
at www.dyson.com.au or www.dyson.co.nz
European conformity information:
a sample of this product has been tested and found to be in conformity with the
following European Directives: 73/23/EEC Low Voltage (Safety) Directive,
93/68/ EEC CE Marking Directive and 89/336/EEC EMC Directive.
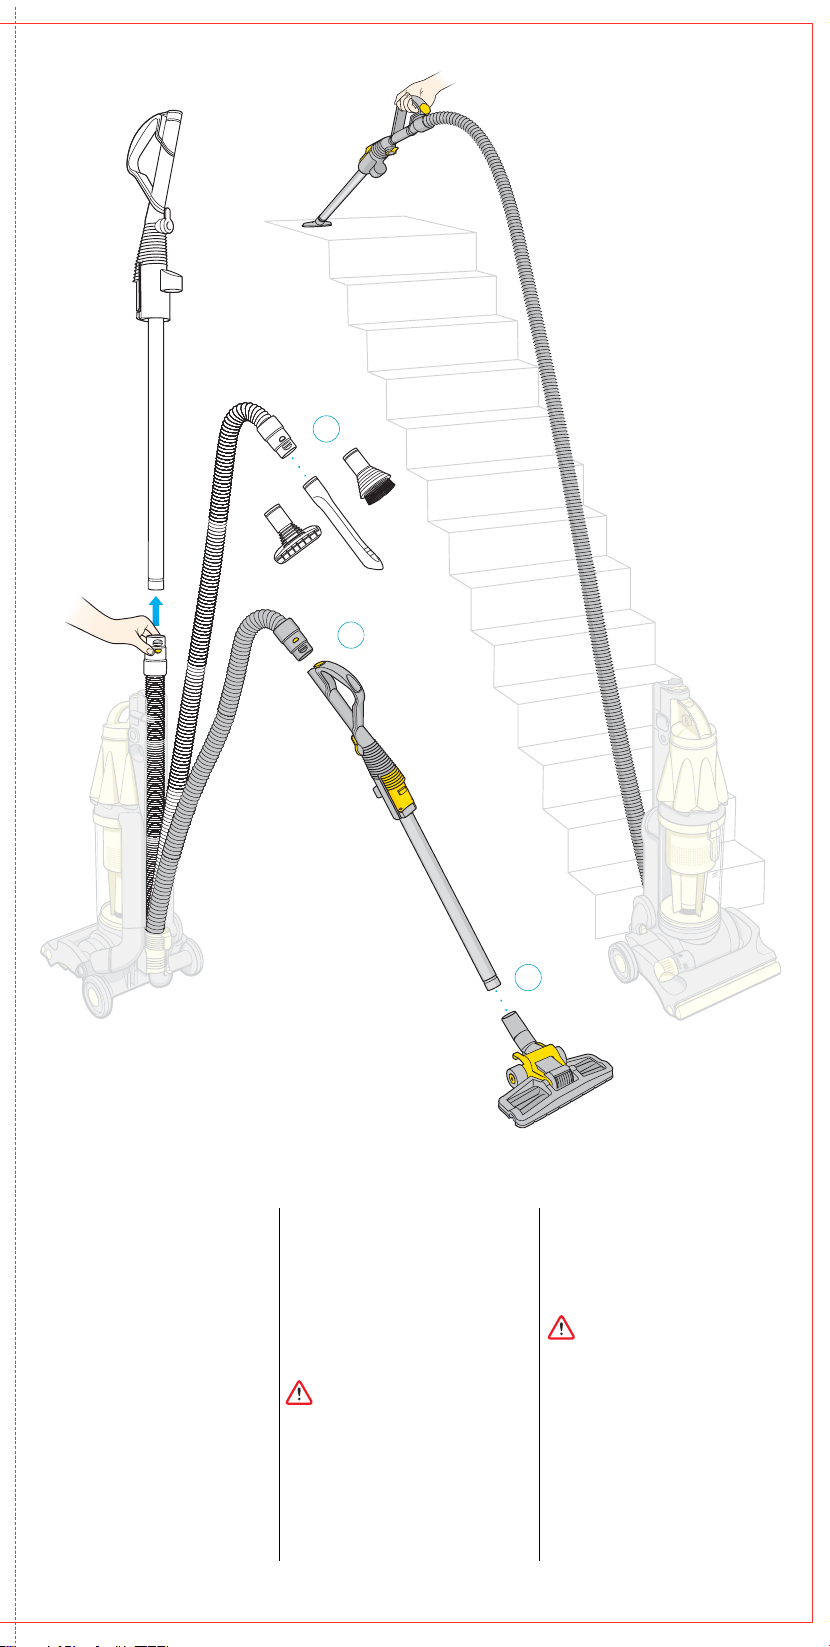
Mini Turbobrush
Rotating brushbar powered by
constant airflow improves pick-up
of pet hairs and other fibres.
Ideal for cleaning in confined
areas, e.g. car, stairs, upholstery.
<297mm>
www.dyson.com.au
www.dyson.co.nz
This product is protected by the following
Intellectual Property Rights:
Patent/Patent Application Nos:
EP1066115, EP0489565, EP0636338,
EP0800359, EP0800360, EP1098586,
EP1119281, EP1119282, EP1121043,
AU32024/01/EP01904105.2, US07/555,953,
US6425931, US09/806,918, US6442791,
US09/806,930, CA 2313177, CA 2325953,
AU30432/99, AU744298, AU744408,
AU744362, AU637272, AU697029,
AU14947/99, AU30432/99, AU50510/99,
AU30432/99, EP1066115, US6425931,
AU744408, EP1119282, US09/806,918,
AU744298, EP1119281, US6442791,
AU744362, EP1121043, US09/806,930,
GB 2342283, GB 2342282, WO 02/067742,
WO 02/067753, WO 02/067751, GB 0104662.2,
GB 0109390.5, GB 2372468, WO 02/067750,
GB 2372469, WO 02/067756, GB 2374305,
PCT/GB02/01378, GB 0109402.8,GB 2372435,
WO 02/067757, GB 2372470, WO 02/067754,
WO 02/067752, GB 2372436.
Design registrations: GB 2099793, AU146419,
US29/147,074
Equivalent patents, registered designs and
applications exist in other countries. Equivalente
patente, registriertes Design und
Patentanmeldungen bestehen auch in anderen
Ländern. Des brevets équivalents, ainsi que des
designs et des applications déposés, existent
dans d’autres pays.

Please read this guide carefully before use.
User guide

Assembling DCO7
1Place the machine on its
side, remove the u-bend.
Slide hose into runners at
back of machine and
push down until it clicks.
Click the u-bend back
into place.
2Press wand release button
and slide wand down into
hose.
DCO7
Lower cable winder
Airway inspection
(U-bend)
U-bend release clip
Hose
Wand cap
Upper cable winder
Wand
Wand release button
On/off switch
Filter housing
Valve release clips
Soleplate
Bin emptying trigger
Cyclone release catch
Shroud release catch
Shroud
Filter release catch
Ready-to-go hose release
Airway inspection valve
Stair tool
Crevice tool
Brush tool
1
2
Floortool
<297mm>

mbling DCO7
Tilt machine forward and
slide out U-bend airway
inspection B. Check inside
for blockages.
Squeeze valve release
catches to remove airway
inspection valve C. Check
inside for blockages.
Lie cleaner on its front.
1Undo coloured fasteners
using a coin and remove
soleplate.
2Clear the brushbar
obstruction, carefully
cutting away any
threads.
Replace soleplate and tighten
fasteners.
1
2
B
C

Where to look for blockages
Check that tools are clear of
blockages.
Remove bin assembly from
machine.
Remove wand and check
inside for blockages.
Press hose release button A
from front of machine and
slide hose out with lower
cable winder from rear.
Check inside hose for
blockages.
Important
Please note that clearing
blockages is not covered by
your cleaner’s guarantee.
Turn power off and unplug
before starting to clear any
blockages.
NB Should any part of the
machine become blocked
it may overheat and stop
due to the thermal cut-out
being triggered. Unplug
from mains and leave to
cool down for at least
30 minutes.
A
<297mm>

Slot wand into top of machine
and click into place.
Wind cable anti-clockwise
around cable winders and
secure with clip.
Click tools into place.

Using your DCO7
Plug in at mains and press
on/off switch.
To start vacuuming, push
cleaner head down with foot
and pull handle towards you.
Ensure machine is in upright
position before using tools.
Press wand release catch 1to
release ready-to-go hose and
slide wand to end of hose.
AWand mode
Slide back wand cap and
place tools directly on to
wand handle.
Using the tools
NB You can twist the brush and
stair tool heads to make
cleaning easier.
Anti-jam brushbar
1Manual brush off
for delicate rugs and floors.
2Brush off
when upright.
3Auto brush on
for normal cleaning.
1
2
3
A
1
Ensure hair and loose
clothing are kept clear of
wand cap/brushbar when
machine is switched on.
<297mm>

Repeat steps 1and 2until
water runs clear.
Allow 12 hours for filter to dry.
Make sure it is completely dry
before replacing in machine.
Replace in filter housing and
click back into machine.
12 hrs
1
2

Washing the lifetime pre-motor filter
Press filter release catch and
remove filter housing from
machine.
Filter should be washed every
six months. Circle your two
washes.
Remove filter from housing.
Only blue foam and yellow
cage should be washed.
Wash in cold water only.
Turn power off and unplug
before removing filter.
<297mm>

Stair cleaning
Always work with the
machine at the bottom of
the stairs.
Powerful suction can
cause the hose to ‘pull
back’ in use – please
take extra care when
cleaning stairs.
Reverse wand by inserting
wand handle into hose.
CReversed wand mode
Fix tools or floortool on
to end of wand. For hard
to reach areas.
Ensure wand cap is closed,
unless using with tools.
Press wand release button and
remove wand.
BHose mode
Fit tools directly on end of
hose. For confined spaces
such as car cleaning.
B
C
C

Option 2
AEmpty directly into dustbin.
BEnsure bin base is closed
securely and replace bin
assembly on to machine.
Emptying the clear binTM
Important
Bin must be emptied when
dust reaches MAX mark.
Press cyclone release catch
with thumb to remove bin
assembly.
Option 1 (recommended for
asthma/allergy sufferers).
Wipe outside of clear bin
with a damp cloth before
emptying.
APlace bin in bag and pull
bin emptying trigger to
release dust into bag.
BLet dust settle, then close
bin base securely before
removing from bag. Seal
bag and replace bin
assembly on to machine.
Turn power off and unplug
before emptying the bin. 1
A
B
A
B
2
<297mm>

Clean shroud with a cloth or
dry brush to remove fluff and
debris.
To replace bin, first click
rear bin catch 1and then
front bin release catch 2
into place.
Ensure bin base is closed
securely and replace bin
assembly on to machine.
Ensure bin is empty and bin
base is open. Then press
shroud release catch to
remove bin.
Cleaning the shroud (if necessary)
Optional •You may rinse the clear bin
with water.
• Do not use detergents.
• Do not immerse the whole
cleaner in water.
• Ensure it is completely dry
before replacing.
1
2
The British Allergy Foundation considers that this product may in
proper use reduce exposure to both House Dust Mite (Der p 1) and
Cat Allergen (Fel d 1). It is strongly recommended that a sensitive
person should take care when emptying the clear binTM.
We recommend the manufacturers' emptying instructions should
be strictly followed.
Assessment carried out by BAF indicate that an individual's
exposure can be reduced but this does not mean that an
individual's allergic symptoms will necessarily diminish. BAF's
opinion applies only to the products and allergen stated. The
product should be used only for its intended purpose and strictly in
accordance with the manufacturers' instructions at all times.
Exposure to allergen can be dangerous. If you believe that you
may suffer from an allergy you should seek medical advice.
The British Allergy Foundation is a national charity (Charity Reg.
No. 1003726) founded in 1991 with the aim of improving
awareness, prevention and treatment of allergy.
The Foundation continually strives to help sufferers to help
themselves, often seeking to avoid or reduce exposure to
relevant allergens. The Seal of Approval scheme forms a part of
this initiative.
Table of contents
Other Dyson Vacuum Cleaner manuals

Dyson
Dyson DC44 User manual

Dyson
Dyson DC32 User manual

Dyson
Dyson 4236580 User manual

Dyson
Dyson DC30 User manual

Dyson
Dyson V11 User manual

Dyson
Dyson DC02 User manual

Dyson
Dyson 360 Heurist Operating instructions

Dyson
Dyson DC24 Blueprint Limited Edition User manual

Dyson
Dyson DCo7 User manual

Dyson
Dyson V7 Motorhead User manual

Dyson
Dyson DC11 Telescope User manual

Dyson
Dyson Dc45 User manual

Dyson
Dyson V11 User manual

Dyson
Dyson DC19T2I User manual

Dyson
Dyson DC50 Ball Compact User manual

Dyson
Dyson BIG BALL User manual

Dyson
Dyson DCO3 Absolute User manual

Dyson
Dyson DC44 User manual

Dyson
Dyson DC43H User manual

Dyson
Dyson DC 62 User manual