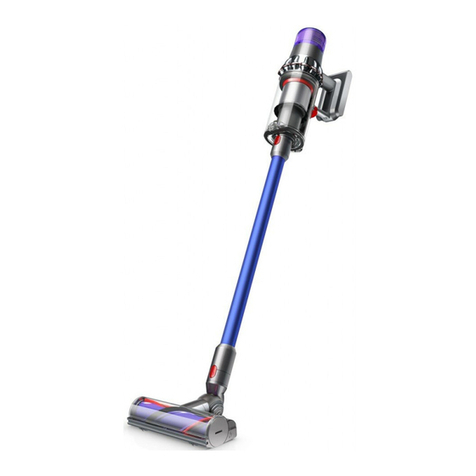
Dyson V6 Absolute User manual

dyson v6
OPERATING
MANUAL
ASSEMBLY
DC
58
clik
I
I
I
I
[
~
11]
:S
I
I
I
CJ
I
I
L_
Charging
. -
Recarga.
Fully
charged.
.::·-·::.
Totalmente
cargada
. •
..
: ·
••
----,
p
l l
~
0
3.5~
3
Not
charging
-
too
cold/too
hot.
6
No
cargo
-
demasiado
frfo
/
demasiado
caliente
.
Not
charging
(contact
Dyson
Helpline).
No
cargo
(Comunfquese
con
Ia
Linea
Directa
de
Asistencia al Cliente).
4

IMPORTANT SAFETY INSTRUCTIONS
BEFORE
USING THIS
MACHINE
READ
ALL
INSTRUCTIONS
AND
CAUTIONARY MARKINGS
IN THIS
MANUAL
AND
ON
THE
MACHINE
When using
an
electrical appliance, basic precautions should always be followed, including
the following:
& WARNING
These
warnings
apply
to
the
machine,
and
also
where
applicable,
to
all
tools, accessories,
chargers
or
mains
adaptors.
TO
REDUCE
THE
RISK
OF
FIRE,
ELECTRIC
SHOCK,
OR
INJURY:
1.
This Dyson machine
is
not intended
for
use
by persons (including children) with reduced physical,
sensory
or
reasoning capabilities,
or
lack
of
experience and knowledge, unless they have been given
supervision
or
instruction concerning
use
of
the machine by a person responsible
for
their safety.
2.
Do not allow to be used as a
toy.
Close attention
is
necessary when used by
or
near children.
Children should be supervised to ensure that they
do
not play with the machine.
3.
Use
only
as
described in this Dyson Operating Manual. Do not carry
out
any maintenance other
than that shown in this manual,
or
advised by the Dyson Helpline.
4. Suitable
for
dry
locations ONLY. Do not use outdoors
or
on wet surfaces.
5. Do not handle any
part
of
the plug
or
machine with wet hands.
6. Do not
use
with a
damaged
cord
or
plug. If the supply cord
is
damaged
it must be replaced by
Dyson,
its
service
agent
or
similarly qualified persons in order to avoid a hazard.
7.
If the machine
is
not working
as
it should, has received a sharp blow, has been dropped,
damaged,
left outdoors,
or
dropped
into water,
do
not
use
and
contact the Dyson Helpline.
8. Contact the Dyson Helpline when service
or
repair
is
required.
Do
not disassemble the machine as
incorrect reassembly
may
result in an electric shock
or
fire.
9.
Do
not stretch the cord
or
place the cord under strain. Keep the cord away
from
heated
surfaces. Do not close a
door
on the cord,
or
pull the cord around sharp edges
or
corners. Arrange
the cord away
from
traffic areas and where it will not be stepped on
or
tripped over. Do not run
over the cord.
10.
Do
not unplug by pulling on the cord.
To
unplug, grasp the plug, not the cord. The use
of
an
extension cord
is
not recommended.
11
.
Do
not
use
to pick up water.
12.
Do
not
use
to pick up
flammable
or
combustible liquids, such
as
gasoline,
or
use in areas where
they
or
their vapors
may
be present.
13.
Do
not pick up anything that
is
burning
or
smoking, such
as
cigarettes, matches,
or
hot ashes.
14. Keep hair, loose clothing, fingers, and all parts
of
the body away from openings and moving
parts.
Do
not point the hose, wand
or
tools
at
your
eyes
or
ears
or
put them in your mouth.
15.
Do
not put any object into openings. Do not
use
with any opening blocked; keep free
of
dust, lint,
hair, and anything that
may
reduce airflow.
16.
Use
only Dyson recommended accessories and replacement parts.
17.
Do
not
use
without the clear bin and filter(s) in place.
18. Unplug from the outlet when not
in
use
for
extended periods and before maintenance
or
servicing.
19.
Use
extra care when cleaning on stairs.
20.
Do
not install, charge
or
use
this machine outdoors, in a bathroom
or
within 10 feet
(3
meters)
of
a
pool. Do not use on wet surfaces and
do
not expose to moisture, rain
or
snow.
21.
Use
only Dyson chargers
for
charging this Dyson machine.
Use
only Dyson batteries: other types
of
batteries may burst, causing injury to persons
and
damage
.
22
.
Do
not incinerate this machine even
if
it
is
severely damaged. The battery
may
explode in a fire.
23. Always turn 'OFF' the machine before connecting
or
disconnecting the motorized brush bar.
2
24.
FIRE
WARNING-
Do
not apply any fragrance
or
scented product to the filter(s)
of
this machine.
The chemicals in such products are known to be
flammable
and can cause the machine to
catch fire.
25.
WARNING
: This product contains chemicals known to the State
of
California to cause cancer,
birth defects
or
other reproductive harm. Wash hands after handling.
READ
AND
SAVE
THESE
INSTRUCTIONS
THIS DYSON MACHINE
IS
INTENDED
FOR
HOUSEHOLD
USE
ONLY
Do
-
not
use
near
open
flames.
Do
not
store
or
charge
near
heat sources.
Do not pick up water
or liquids.
Do
not
pick
up
burning objects.
Do
not
put
hands
near
the brush
bar
when the
mach
ine is in use.
3

INSTRUCCIONES
DE
SEGURIDAD
IMPORTANTES
ANTES
DE
UTILIZAR
ESTA
MAQUINA,
LEA
TODAS
LAS INSTRUCCIONES Y LA
INDICACIONES
DE
PRECAUCION
QUE
VIENEN
TANTO
EN
ESTE
MANUAL
COMO
EN
LAMAQUINA
Cuando
se
usa un
aparato
electrico, deben seguirse las precauciones basicas
para
reducir
riesgos
de
incendio, descarga electrica y lesiones personales, que incluyen lo siguiente:
&
PELIGRO
Estas
advertencies
se
aplican
a Ia
maquina,
a
todas
las
herramientas
y accesorios,
asl
como
a
lo
que
corresponda
a
cualquier
cargador
o
adaptador
de
alimentaci6n.
PARA
DISMINUIR
EL
RIESGO
DE
PROVOCAR
UN
INCENDIO,
RECIBIR
UNA
DESCARGA
ELECTRICA 0 LESIONES:
1.
Este
aparato Dyson
no
esta destinada para el uso
por
parte de personas (incluso nif\os) con
capacidades fisicas, cognitivas o mentales reducidas, o con falta de experiencia y conocimiento,
salvo
que
hubieran recibido supervision o instrucciones acerca del uso del aparato
por
parte
de
una
persona responsable
por
su
seguridad.
2.
No
permita que
se
utilice
como
un juguete.
Es
necesaria
Ia
atencion
de
un adulto cuando
es
utilizada
por
o cerca a un nino.
Los
nif\os deben ser supervisados
para
asegurarse de que
no
jueguen con
Ia
maquina.
3. Utilicela solamente
como
se
describe en este
manual
de
funcionamiento Dyson.
No
realice ningun
otro mantenimiento que
no
sea
el
mostrado en este manual, o el recomendado
por
Ia linea
de
ayuda de servicio al cliente Dyson.
4. Adecuada SOLAMENTE para lugares secos.
No
utilice para aspirar
agua
u otros lfquidos.
5.
No
manipule el enchufe o de
Ia
maquina con las monos mojadas.
6.
No
lo use
si
el
cable o el enchufe estan danados.
Si
se
ha
danado
el
cable
de
corriente, debera
ser reemplazado
por
Dyson, uno
de
sus
representantes de servicio u otra persona igualmente
capacitada a fin
de
evitar un peligro.
7.
Si
Ia maquina
no
funciona como
es
debido, ha recibido un golpe fuerte o
se
ha caido, danado,
dejado a Ia intemperie, o sumergido en agua,
no
lo utilice y comuniquese con Ia linea de ayuda
de
servicio al cliente Dyson.
8.
Comunlquese con Ia linea de ayuda de servicio al cliente Dyson cuando
se
requiera mantenimiento
o reparacion.
No
desmonte Ia maquina, yo que un montaje incorrecto puede provocar descargas
electricas o incendios.
9.
No
estire el cable ni permita que ejerza presion. Mantengalo alejado
de
superficies
calientes.
No
apriete el cable cuando cierre
Ia
puerto ni tire del cable en bordes o puntas filosas.
Acomode el cable
de
tal
modo
que quede alejado de areas transitadas y lugares
donde
se
lo pise o
cause tropiezos.
No
pise el cable con Ia maquina.
10.
No
desconecte Ia
maquina
tirando del cable. Para desconectar,
tome
el enchufe y
no
el
cable.
No
es
recomendable utilizar una extension
de
cable.
11.
No
utilice para aspirar
agua
u otros lrquidos.
12.
No
aspire liquidos inflamables o combustibles
como
gasolina, ni Ia utilice en areas
donde
pueda
haber
este tipo
de
lfquido.
13.
No
aspire nada que
se
este
quemando
o que emita humo,
como
cigarrillos, fosforos o
cenizas calientes.
14.
Mantenga
el cabello, ropa suelta, los dedos y cualquier otra parte del cuerpo alejados de las
aberturas y de las partes moviles.
No
apunte con
Ia
mangu
era, Ia empunadura o los accesorios a
los ojos u orejas, ni
se
los meta en Ia boca.
15.
No
obstruya las aberturas de Ia
maquina
con ningun objeto.
No
utilice
Ia
maquina
si
tiene
alguna
abertura obstruida; mantengalas libres
de
polvo, pelusas, cabellos o cualquier otra coso que pueda
reducir Ia circulacion del aire.
16. Utilice solamente los accesorios y las piezas de repuesto recomendadas
po
r Dyson.
4

17.
No
utilice
si
el compartimiento cubo transparente y
el
filtro/los filtros no estan colocados en
su
Iugar.
18. Desconectelo del tomacorriente
si
no lo va a utilizar durante mucho tiempo y antes de
realizar mantenimiento.
19.
Tenga mucho cuidado cuando utilice
Ia
maquina sobre una escalera.
20.
No
instale, recargue o utilice esta
maquina
en exteriores, en un
bono
o a una distancia
menor
a 10 pies
(3
metros) de una piscina.
No
lo utilice sobre superficies mojadas, ni lo exponga a
humedad, lluvia o nieve.
21. Utilice solo cargadores Dyson para recargar esta
maquina
Dyson. Utilice solo baterfas Dyson:
otros tipos de baterfas pueden explotar y causar lesiones personales y danos materiales.
22.
No
incinere esta maquina, aunque este muy
danado
.
El
fuego podrfa hacer explotar
Ia
baterfa.
23
. Siempre
apague
el aparato antes de conectar o desconectar el cepillo motorizado.
24
. ADVERTENCIA
DE
INCENDIO:
no aplique ninguna fragancia o producto
perfumado
a los filtros de
Ia
maquina.
Se
sabe que los qufmicos en estes productos son inflamables y pueden hacer que
Ia
maquina
se
incendie.
25
. ADVERTENCIA:
Este
producto contiene sustancias qufmicas reconocidas
por
el
estado de California
como
causantes de cancer, anomalfas congenitas y otros danos reproductivos. Lavarse las monos
despues de
manipular
el
producto.
LEA
Y
GUARDE
ESTAS
INSTRUCCIONES
ESTA
MAQUINA
DYSON
ES
PARA
USO
DOMESTICO
SOLAMENTE
No
gu
orde
Ia
m6q
uino
ce
rco
de
fu
entes de calor. No
guorde
o recorgue
Ia
m6quino cerca
de
fu
en
t
es
de colo
r.
No
aspire
oguo
o liquido
s.
No aspire objetos que se
esten
qu
e
mond
o. No c
ol
o
que
los monos
cerco
de
l cepillo
cuondo
el
operata
este
en funcionamiento.
5

Looking
for
blockages
Como
buscar
obstrucciones
&l
~
·
J
6
If you
hear
the
motor
pulsing,
there
is
a
blockage.
Please
look
for
blockages
in the
following
places.
Si
oye
que
el
motor
pulsa, significa
que
hay
una
obstrucci6n en
el
producto
. Busque obstrucciones en
los siguientes lugares:
f
).
..
I
I
l'
'
\'
\I
(.
\
""r
-
\'
k..
l§J
~
~
I?
J
\ \\
\
Power
mode
and
run
time
Modo
de
potencia
y
tiempo
de
funcionamiento
To
change
the
mode,
hold
the
trigger
[£?
down
and
press the
max
button.
Para
cambiar
el
modo,
mantenga
=
presionado
el
gatillo
y presione el
•"
'-
bot6n
maximo
0 +
mn
=
~
c:::
0"---j
'
I)
.\
[£?
'f
1
,)
0 + =
'
mn
"'
c:::
0"---j
•
ut
LJ
/j\
clik
/ I

Powerful suction.
Succion a
gran
potencia.
17
minutes.
17
minutos.
20
minutes.
20
minutos.
Max
mode
.
Modo
Maximo
.
6 minutes.
6 minutos.
Emptying
Como
vaciar
Diagnost
i
cs-
main
body
Diagn6stico
: estructura
principal
)
I
I I
<..'
\
<
;..'
'/
'/
j
,,
• r
t
r\
!
~
~
0
..
.o
..
·a
···
··
..
.
..
•··
: ·
..
Solid blue:
Max
'
ON'
.
Luz
azul solido:
modo
Maximo
encendido (ON).
Flashing blue: Low
battery
warning
.
Luz
azul intermitente: advertencia de baterfa
baja
.
Fast flashing blue:
No
power,
temporary
fault
(e.g. check filter
or
for
blockages).
Luz
azul intermitente rapida:
No
hay energfa,
folio
temporal
(p. ej.
comprobar
el
filtro o
detector obstrucciones).
Charging
Recarga
1
12
1
3.5~
3
(("
~""
\ n
f 1•
~'
I
{ (
-,
'
I\
\
.tl
-Fully charged.
Totalmente
cargada
.
c:::J
Charging
.
Recarga.
-
Not
charging-
too
cold/
too
hot
.
No
cargo -
demasiado
frfo/demasiado
caliente.
·:::-.:
:::·
Not
charging (contact Dyson Helpline).
No
cargo (Comunfquese con
Ia
Linea
Directa de Asistencia al Cliente).
Clearing
brush
bar
obstructions
Eliminaci6n
de
las obstrucciones del cepillo
1
0
2
(-
j
l
[]
fi
3
nt
i
( (
CID
"'
~
a
,r
t
((E~~
7

-
-
,.
,~
" {
*<-
r f \ t
' . r
t ' -t
\ r
\ \ /
I
.-
[ t
\\
\ '
\
1,
' I \ \
I
L.J..
\ \
' \ \
r j j" \ \
~\
I l \ \
I
~
-
h '
~~·
~
-
------
-~~~-.....
8

...
\,,~,,
.....
~
~
~
..,..
P"'
..
....
11
12 1
10
9 24
hrs
2
3
8 4
7 6 5
-
-
-
-
9

10
USING
YOUR DYSON
MACHINE
PLEASE
READ THE
"IMPORTANT
SAFETY
INSTRUCTIONS"
IN
THIS
DYSON
OPERATING
MANUAL
BEFORE
PROCEEDING.
OPERATION
Do
not
use
outdoors
or
on
wet
surfaces
or
to
vacuum
water
or
other
liquids
-
electric
shock
could
occur.
Ensure
the
machine
remains
upright
in use.
Dirt
and
debris
may
be
released
if
it
is
turned
upside
down.
Do
not
operate
while
checking
for
blockages
as
doing
so
could
result in
personal
injury
.
For
dome
stic
indoor
and
car
use
only
.
Do
not
use it
while
the
car
is
in
motion
or
while
driving
.
To
operate
the
max
mode
,
hold
the
trigger
down
and
press
the
max
button.
The
max
button
will
light
up.
To switch
off
max
mode
,
hold
the
trigger
down
and
press
the
max
button
again
.
Note
: The
machine
will
retain
the
last used
mode.
So
if
you use it in
ma
x
mode
and
do
not
disengage
it,
the
machine
will
operate
in
max
mode
when
it
is
next
used until you depress
the
max
button
to
disengage
it.
To watch a
short
online
video
visit:
www
.
dyson
.
com
/
DC58gettingstarted
CARPETS
OR HARD FLOORS
Before
vacuuming
your
flooring,
rugs
and
carpets
, check the
manufacturer's
recommended
cleaning
instructions.
The brush
bar
on
the
machine
can
damage
certain
carpet
types
and
floors.
Some
carpets will fuzz
if
a
rotating
brush
bar
is
used
when
vacuuming.
If
this
happens,
we
recommend
vacuuming
without
the
motorized
floor
tool
and
consulting
with
your
flooring
manufacturer.
Before
vacuuming
highly
polished
floors
, such as
wood
or
linoleum,
first
check
that
the
underside
of
the
floor
tool
and
its
brushes
are
free
from
foreign
objects
that
could
cause
marking.
LOOKING
AFTER
YOUR DYSON
MACHINE
Do
not
carry
out
any
maintenance
or
repair
work
other
than
that
shown
and
described
in this Dyson
Operating
Manual,
or
advised
by
the
Dyson
Helpline
.
Only
use
parts
recommended
by
Dyson.
If
you
do
not
this
may
invalidate
your
warranty.
Store the
machine
indoors.
Do
not
use
or
store it
below
37.4
°F
(3
°C). Ensure
the
machine
is
at
room
temperature
before
operating
.
Clean
the
machine
only
with
a
dry
cloth.
Do
not
use
any
lubricants
,
cleaning
agents
, polishes
or
air
fresheners
on
any
part
of
the
machine.
VACUUMING
Do
not
use
without
the
clear
bin
and
filter
in
place
.
Fine
dirt
such as
plaster
dust
or
flour
should
only
be
vacuumed
in very
small
amounts.
Do
not
use
the
machine
to
pick
up
sharp
hard
objects,
small
toys, pins,
paper
clips, etc. They
may
damage
the
machine.
When
vacuuming,
certain
carpets
may
generate
small
static
charges
in
the
clear
bin.
These
are
harmless
and
are
not
associated
with
the
central
electricity
supply
. To
minimize
any
effect
from
this,
do
not
put
your
hand
or
insert
any
object
into
the
clear
bin
unless
you
have
first
emptied
it.
Clean
the
clear
bin
with
a
damp
cloth
only. (See
'Cleaning
the
clear
bin'
.)
Use extra care
when
cleaning
on
stairs.
Do
not
rest
the
machine
on
chairs,
tables,
etc.
Do
not
press
down
on
the
nozzle
with
excessive
force
when
using the
machine
as
this
may
cause
damage.
Do
not
leave the
cleaner
head
in
one
place
on
delicate
floors.
On
waxed
floors
the
movement
of
the
cleaner
head
may
create
an
uneven
luster.
If
this
happens
,
wipe
with
a
damp
cloth,
polish
the
area
with
wax
,
and
wait
for
it
to
dry
.
EMPTYING
THE
CLEAR
BIN
Empty
as
soon
as
the
dirt
reaches
the
level
of
the
MAX
mark
-
do
not
overfill.
Ensure the
machine
is
disconnected
from
the
charger
before
empty
ing
the
clear
bin
.
Be
careful
not
to
pull
the
"ON"
trigger
.
To release
the
dirt
, push
the
red
button
by
the
clear
bin
. Press
once
to
open
the
bin
base. Press a second
time
to
release
the
clear
bin
from
the
main
body
of
the
machine
.
To
minim
i
ze
dust
/
allergen
contact
when
emptying,
encase the
clear
bin
tightly
in
a plastic
bag
and
empty.
Remove
the
clear
bin
carefully
from
the
bag.
Seal
the
bag
tightly,
dispose
as
normal.
Close
the
clear
bin
base
so
it clicks
into
place
and
is
secure.
CLEANING
THE
CLEAR
BIN
Ensure the
machine
is
disconnected
from
the
charger
before
removing
the
clear
bin
.
Be
careful
not
to
pull
the
"ON"
trigger
.
Push
the
red
button
by the
clear
bin
. Press
once
to
open
the
bin
base. Press a
second
time
to
release the
clear
bin
from
the
main
body
of
the
machine
.
Remove the
clear
bin
carefully.
Clean
the
clear
bin
with
a
damp
cloth
only.
Do
not
use
detergents,
polishes
or
air
fresheners
to
clean
the
clear
bin
.
Do
not
put
the
clear
bin
in a
dishwasher.
Clean
the
cyclone
shroud
with
the
brush
on
the
combination
tool
to
remove
lint
and
dust.
Ensure
the
clear
bin
is
completely
dry
before
replacing.
To
replace
the
clear
bin
, push
the
clear
bin
up
and
into
the
main
body
of
the
machine
. It will click
into
place
.
Close
the
clear
bin
base so it clicks
into
place
and
is
secure.
WASHING
YOUR
FILTER
Ensure
the
machine
is
disconnected
from
the
charger
before
remo
v
ing
the
filter.
Be
careful
not
to
pull
the
"ON"
trigger
.
Your
machine
has
one
washable
filter
,
located
as s
hown
.
To
remove
the filter,
lift
it
out
of
the
top
of
the
machine
.
Check
and
wash the
filter
regularly
according
to
instructions
to
maintain
performance
.
The
filter
may
require
more
frequent
washing
if
vacuuming
fine
dust
or
if
used
mainly
in "POWERFUL
SUCTION"
mode.
Wa
sh the
filter
with
cold
water
only.
Run
water
over
the
outside
of
the
filter
until
the
water
runs clear.
Squeeze
and
twist
with
both
hands
to
make
sure the excess
water
is
r
emoved
.
Lay the
filter
on
its side
to
dry
. Leave
to
dry
completely
for
a
minimum
of
24
hours
.
Do
not
put
the
filter
in a
dishwasher,
washing
machine,
tumble
dryer
,
oven
,
microwave
or
near
an
open
flame
.
To refit,
place
the
dry
filte
r
back
into
the
top
of
the
machine.
Make
sure it
is
seated
properly
.
To watch a
short
online
video
visit:
www.dyson
.
com
/
DC58filterwash
LOOKING
FOR BLOCKAGES
Ensure
the
machine
is
disconnected
from
the
charger
before
looking
for
blockages.
Be
careful
not
to
pull
the
"ON"
trigger.
Do
not
operate
while
checking
for
blockages
as
doing
so
could
result in
personal
injury.
Beware
of
sharp
objects
when
checking
for
blockages
.
If
you
cannot
clear
an
obstruction
you
may
need
to
remove
the
brush
bar
.
Use a coin to
unlock
the
fastener
marked
with
a
padlock
. Remove
the
obstruction
. Replace
the
brush
bar
and
secure it by
tightening
the
fastener
.
Ensure it
is
fixed
firmly
before
operat
i
ng
the
machine
.
Refit all
parts
securely
before
using.
Clearing
blockages
is
not
covered by
your
warranty
.
BLOCKAGES-
AUTOMATIC
CUT-OUT
This
machine
is
fitted
with
an
automatic
cut-out.
If
any
part
becomes
blocked
the
machine
may
automatically
cut
out
.
This will
happen
after
the
motor
pulses a
number
of
times
(i.e switches
on
and
off
in
quick
succession).
Leave
to
cool
down
before
looking
for
blockages.
Ensure
the
machine
is
disconnected
from
the
charger
before
looking
for
blockages.
Failure
to
do
so
could
result in
pe
r
sonal
injury.
Clear
any
blockage
before
restarting
.
Refit all
parts
securely
before
using.
Clearing
blockages
is
not
covered by
your
warranty.
DIAGNOSTICS -
MAIN
BODY
When
in use,
trigger
pressed:
0 Solid blue:
Max
'ON'.
0
.
..
o..
·a
··
·
·
··
..
··
·
Light
off:
Powerful suction.
Flashing blue: Low battery
warning
.
Fast flashing blue:
No
power,
temporary
fault
(e.g. check filter
or
for
blockages).

DIAGNOSTICS-
BATTERY
Wh
en in use,
tr
i
gge
r
pre
ssed:
-Solid blue: '
ON'
.
•
::·-·::.
Flashing blue:
No
power, charge battery.
...
: ·
..
......
·.
.· .
-Flashing
amber
:
No
power,
temporary
fault
(e.g.
too
hot
/cold).
Solid
amber:
Fault (contact Dyson Helpline).
Flashing red:
Fault
(
contact
Dyson helpl
ine
).
When
charging
battery
:
-
.:·:.i.·::.
...
: ·
..
-
.::
·- ·
::.
..
· : ·
..
Solid
blue:
Charging
.
Flashi
ng
blue
:
Not
charg
in
g-
Re
-
fit
charger
or
try
another
socket.
If
persist
s,
contact
Dy
s
on
Helpline
.
Lights
off
:
Charg
i
ng
compl
ete.
Solid
amber
:
Not
charg
i
ng,
temporary
fault
(e.g.
too
hot
/
cold
).
Flashing
red: Fault (con
tact
Dyson
helpline)
.
CHARGING
AND
STORING
This
machine
will switch "
OFF
"
if
the
battery
temperature
is
below
37.4
°F
(3°C). This
is
designed
to
protect
the
motor
and
battery
.
Do
not
charge
the
machine
and
then
move
it
to
an
area
with
a
temperature
below
37.4
°F
(3
°C)
for
storage
purposes
.
To
help
prolong
battery
life,
avoid
recharging
immediately
after
a
full
discharge
.
Allow
to
cool
for
a
few
minutes
.
Avoid
using
the
machine
with
the
battery
flush to a
surface
. This will
help
it
run
cooler
and
prolong
battery
run
time
and
life.
BATTERY
SAFETY INSTRUCTIONS
If
the
battery
need
s
replacing
please
contact
the
Dyson
Helpline
.
Use
only
Dyson
chargers
for
charging
this Dyson
machine
.
The
battery
is
a sealed
unit
and
under
normal
circumstances
poses
no
safety
concerns. In
the
unlikely
event
that
liquid
leaks
from
the
battery
do
not
touch
the
liquid
and
observe
the
following
precaut
ions:
-Skin
contact-
can cause
irritation
.
Wash
with
soap
and
water.
-
Inhalation-
can
cause
respiratory
irritation
. Expose to
fre
sh
air
and
seek
medical
advice.
-
Eye
contact
-
can
cause
irritation
.
Immediately
flush eyes
thoroughly
with
water
for
at
least
15
minutes
. Seek
med
ical
attention
.
-
Disposal-
wear
glove
s to
handle
the
battery
and
dispose
of
immediately
,
following
local
ordinances
or
regulations
.
,&
CAUTION
The
battery
used in
thi
s
dev
i
ce
may
pres
ent
a ri
sk
of
fire
or
chemical
burn
if
mistreated.
Do
not
disassemble,
short
contacts
,
heat
above
140
°F (
60
°C),
or
incinerate
. Keep
away
from
children
.
Do
not
dis
assemble
and
do
not
dis
po
se
of
in fire.
DISPOSAL
INFORMATION
Dyson
product
s
are
mad
e
from
high
grade
recyclable
materials
. Recycle
where
possible
.
The
battery
should
be
removed
from
the pr
oduct
before
disposal.
Dispose
of
or
recycle
the
battery
in
accordance
with
local
ordinances
or
regulations
.
DYSON
CUSTOMER CARE
THANK
YOU
FOR
CHOOSING
TO
BUY A
DYSON
MACHINE
If
you
have
a
question
about
your
Dyson
machine
, call
the
Dyson
Helpline
with
your
serial
number
and
details
of
where
and
when
you
bought
the
machine
.
Most
question
s
can
be solved
over
the
phone
by
one
of
our
Dyson
Helpline
staff
.
If
your
Dyson
machine
needs
service, call
the
Dyson
He
lpli
ne
so
we can discuss
tne
available
options
.
If
your
Dyson
machine
is
under
warranty,
and
it
is
a
covered
repair, it
will
be
repaired
at
no
cost.
Your serial
number
can be
found
on
your
rating
plate
which
is
on
the
main
body
of
the
machine
behind
the
clear
bin
.
PLEASE
REGISTER
AS
A
DYSON
MACHINE
OWNER
To
help
us ensure you receive
prompt
and
efficient
service,
please
register as a
Dyson
machine
owner
.
There
are
three
ways
to
do
this:
Online
at
www.dyson.com
Telephone
the
Dyson
Helpline
,
at
1-855-533
-
1098.
Complete
the
enclosed
Warranty
Form
and
mail
it
to
us
.
This
will
confirm
ownership
of
your
Dyson
machine
in
the
event
of
an
insurance
loss,
and
enable
us
to
contact
you
if
necessary.
2 YEAR LIMITED WARRANTY
TERMS
AND
CONDITIONS
OF
THE
DYSON
2 YEAR LIMITED WARRANTY
WHAT
IS
COVERED
Your Dyson
machine
is
warranted
against
original
defects
in
materials
and
workmanship
for
a
period
of
2 years
from
the
date
of
purchase,
when
used
for
normal
domest
ic
purposes
in
accordance
with
the
Dyson
Operating
Manual.
Please
retain
your
proof
of
purchase
.
If
you
do
not
have
your
proof
of
purchase
,
your
warranty
will
start
90
days
after
the
date
of
manufacture,
according
to
Dyson's
records
. This
warranty
provides,
at
no
extra
cost
to
you,
all
labor
and
parts
necessary
to
ensure
your
machine
is
in
proper
operating
condition
during
the
warranty
period
. The
replacement
of
any
part
of
your
machine
under
warranty
will
not
extend
the
period
of
warranty
.
Any
parts
which
are
returned
to Dyson
will
become
the
property
of
Dyson. Please call
the
Dyson
Helpline
at
1-855-533-1098
for
more
information
.
This
limited
warranty
is
subject
to
the
following
terms:
WHAT
IS
NOT
COVERED
Dyson shall
not
be
liable
for
costs,
damages
or
repairs
incurred
as a result of,
due
to,
or
from
:
Purchases
of
machines
from
unauthorized
dealers.
Careless
operation
or
handling
, misuse,
abuse
and
/
or
lack
of
maintenance
or
use
not
in
accordance
with
the Dyson
Operating
Manual.
Use
of
the
machine
other
than
for
normal
domestic
purposes
within
the
United
States, e.g.
for
commercial
or
rental
purposes
.
Use
of
parts
not
in
accordance
with
the
Dyson
Operating
Manual.
Use
of
parts
and
accessories
other
than
those
produced
or
recommended
by
Dyson
.
External sources such as
weather
,
electrical
outages
or
power
surges.
Repairs
or
alterations
carried
out
by
unauthorized
parties
or
agents
.
Clearing
blockages
from
your
machine
or
washing
of
the
filter.
Normal
wear
and
tear,
including
normal
wearing
parts
, such as
clear
bin,
filter,
brush
bar
,
and
power
cord
(or
where
external
damage
or
abuse
is
diagnosed)
,
carpet
or
floor
damage
due
to use
not
in
accordance
with
the
Dyson
Operating
Manual
or
failure
to
turn
the
brush
bar
off
when
necessary
.
Reduction in
battery
discharge
time
due
to
battery
age
or
use (where
applicable)
.
Damage
as a result
of
use
not
in
accordance
with
the
rating
plate
.
Use
of
this
mach
i
ne
on
rubble,
ash,
plaster
,
drywall
, li
quids
,
or
wet
surfaces.
Additionally,
this
limited
warranty
does
not
apply
to
any
machine
that
has
had
the serial
number
altered
or
removed
.
WARRANTY LIMITATIONS
AND
EXCLUSIONS
Any
implied
warrant
ies
relating
to
your
machine
including
but
not
limited
to
warranty
of
merchantability
or
warranty
of
fitness
for
a
particular
purpose,
are
li
mited
to
the
duration
of
this
warranty.
This
limitation
is
not
allowed
by
some
States
and
so this
limitation
may
not
app
ly
to
you.
Your
remedy
for
breach
of
this
warranty
is
limited
to
the
warranty
service
described
below
. Dyson will
not
be
liable
for
any
consequential
damages
or
incidental
damages
you
may
incur
in
connection
with
your
purchase
and
use
of
your
mach
ine. This
limitation
is
not
allowed
by
some
States
and
so this
limitation
may
not
apply
to
you
.
This
lim
ited
warranty
gives you speci
fic
legal
rights
. You
may
also
have
other
rights
which
vary
by State.
This
limited
warranty
is
not
transferable
.
11

12
WARRANTY
SERVICE
Please fill
out
and
return
the
Warranty
Form,
or
register
online
at
www.dyson.com
Before
service
can
t
oke
place,
the
terms
of
the
warranty
require
that
you
contact
the
Dyson
Helpline
with
your
model
name/number
, serial
number,
date
and
place
of
pu
rchase.
Please keep
your
purchase receipt in a safe
place
to ensure you
hav
e
this
information.
All
work
will
be
coordinated
by
Dyson
or
its
author
ized
agents.
Any
replaced
defective
parts
will
become
the
pr
operty
of
Dyson.
Service
under
this
warranty
will
not
extend
the
period
of
this
warranty.
If
your
machine
is
not
functioning
properly,
please
call
the
Dyson
Helpline
at
1-855-533-1098.
Most issues
can
be
rectified over the
telephone
by
our trained
Customer
Care
staff.
IMPORTANT DATA PROTECTION INFORMATION
If you choose to
opt-in
to receive
communications
from
us,
your
detai
ls
will
be
held
by Dyson
or
others
on
behalf
of
Dyson
so
that
we
con
assist you
more
quickly with
our
Dyson
He
l
pline
. From
time
to
time,
Dyson
may
send you special
offers
and
news
of
our
latest
innovations.
For
more
i
nformat
io
n
about
our
da
ta
collection
practices, please
refer
to
the
Dyson
pr
ivacy
policy
at
www.dyson.com/privocy
CONFORMITY
INFORMATION
This
dev
ice
complies
with
part
15
of
the
FCC
Rules.
Operation
is
subject
to
the
fo
l
lowing
two
conditions:
(1)
This
device
may
not
cause
harmful
interference,
and
(2) this device must
accept
any
interference
received,
including
interference
that
may
cause
undesired
operat
i
on.
This
equipment
has
been
tested
and
found
to
comply
with
the
l
imits
for
a Closs
B
digital
device,
pursuant
to
part
15
of
the
FCC Rules. These limits
are
designed
to
provide
reasonable
protection
against
harmful
interference
in a resi
dentia
l
installation.
This
equ
i
pment
generates,
uses
and
can
radiate
radio
frequency
energy
and
,
if
not
installed
and
used in
accordance
with the instructions,
may
cause
harmful
i
nter
fe
rence
to
radio
communications.
However, there
is
no
guarantee
that
interference
wil
l
not
occur
in a
particular
installation.
If this
equipment
does cause
harmful
i
nterference
to
radio
or
televisi
on
reception,
which
con
be
determined
by
turning
the
equipment
off
and
on,
the
user
is
encouraged
to
try
to
correct
the
interference
by
one
or
more
of
the
following
measures:
Reorient
or
relocate
the
receivi
ng
antenna
.
Increase the
separation
between
the
equipment
and
receiver.
Connect
the
equipment
into
an
outlet
on
a circuit
different
from
that
to
which
the
receiver is
connected.
Consult
the
dealer
or
an
experienced
radio/TV
technician
for
help
.
Changes
or
modificatio
ns
not
expressly
approved
by
the
party
responsible
for
compliance
could
void
the user's
autho
rity
to
operate
the
equipment.
PRODUCT
INFORMATION
Please note: Small
details
may
vary
from
those
shown.

USO
DE
SU
MAQUINA
DYSON
ANTES
DE
CONTINUAR,
SiRVASE
LEER
LAS
"INSTRUCCIONES
DE
SEGURIDAD
IMPORTANTES"
DE
ESTE
MANUAL
DE
FUNCIONAMIENTO
DYSON.
FUNCIONAMIENTO
No
Ia utilice en exteriores
ni
sabre
superf
icies
mojodas,
ni
para
aspiror
ague
u
otros
Hquidos,
yo
que
podrian
producirse
descargas
el
ectricas
.
AsegUrese
de
que
Ia
m6qu
i
no
est6
colocado
en posiciOn vertical ol utili
zarlo.
Es
posible
que
el
oparoto
expulse suciedad y residues
si
se coloca
en
posiciOn invertida.
No
pong
a a
funcionor
el a
pa
r
ade
cuondo
este veri
ficando
posibles obstrucciones.
SOlo
para
usa
domestico
y
para
outom6viles.
No
lo utilice
si
el
cache est6 en
movimiento
o
mien
tros
mone
jo.
Para
activar
el
modo
de
maximo
,
mantenga
presionado
el
gatillo
y pres
ione
el
bot6n maximo.
Se
encender6
el
bot6n maximo.
Para
desoct
i
vor
el
modo
de
maximo
,
mante
n
ga
presionodo
el
gati
l
lo
y vuelva
a
presionor
el
bot6n
de
maximo.
Nota:
el
oporato
funcionor6
en el Ul
timo
modo
en
que
se
utiliz6. Par Ia tanto,
si
lo
utilize en el
modo
de
maximo
y
no
lo
desoctivo, Ia
pr6x
i
mo
vez
que
Ia utilice, el
aparato
funcionar6
en el
modo
de
maximo
. Para de
sactivarlo
,
presione
el
bot6n
de
maximo
.
Para ver un breve
video
en
linea
, visite:
www.dyson.com/DC58getlingstarted
ALFOMBRAS 0
PISOS
Antes
de
aspirar
sus pisos, tapetes y
alfomb
r
as
, consulte las instrucciones
de
limpieza
que
recomienda
el
fabricante
.
El
cepillo
del
operata
puede
donor
algunos
tipos
de
pisos y
alfombras.
Algunos
ol
fombros
pr
oducir6n
pel
usa
si
se
utilize un
cepillo
gi
ratorio
durante
Ia
aspiroci6n.
En
tal coso,
recomendamos
as
pirar
sin
utilizer
Ia
herromienta
de
piso
motorized
a y
consultor
al
fabricante
del
piso.
Antes
de
aspiror
pisos
con
alto
grade
de
pulido,
como
los
de
m
adera
o lin61eo,
verifique
primero
que
el
lade
infer
i
or
del
accesorio
para
pisos y
sus
cepillos
no
tienen
objetos
extralios
que
puedan
producir
marcos
.
C6MO
CUIDAR
SU
MAQUINA
DYSON
No
realice ningUn ti
po
de
montenimiento
o r
eparociones
que
no
sean las
indicodos
y descritas en este
Manua
l
de
Funcionomiento
Dyson o
que
se
le
s
ugiero
en
Ia linea de
oyudo
de
Dyson.
Utilice
Unicamente
los piezos
que
recomiendo
Dyson. De
no
hocer
lo
podria
anular
su
garontio.
Almacene
Ia
m6quino
en un
espocio
cerr
odo
.
No
lo
utilice
si
Ia
temperatu
ra
es
menor
de
37.4° F
{3
° C).
Compruebe
que
Ia
m6quino
est6 a
temperatura
ambiente
antes
de
ponerlo
en
funcionomiento.
Limpie
m6quino
Unicomente con un
pane
seco.
No
utilice ningUn
lubriconte,
ogente
de
limpiezo,
pulidor
o
oromotizodor
en
ninguno
po
rte del
m6quina
.
PARA
ASPIRAR
No
Ia utilice
si
el
compartimiento
cuba
tronsporente
y el
filtro
no
est6n
colocodo
s en su
Iugar
.
La
suciedod
fino,
como
el
polvo
de
horina,
deber6
aspirarse
s61o
en
pequelio
s
contidades.
No
utilice Ia
m6quino
para
recoge
r
objetos
duros
cortantes, juguetes pequei'los,
olfileres, sujetopopeles, etc., yo
que
podrian
donor
Ia
m6quina.
Durante
el proceso
de
aspiraci6n,
es
posib
le
que
algunos
alfombros
generen
pequelias
cargos
est6ticos en el
cuba
transparente
o
tuba.
Son inofensivas y
no
est6n
asociada
s con el
sumini
s
tro
de Ia red electrica. A
fin
de
reducir
los
posibles efectos,
no
coloque
Ia
mono
ni i
ntroduzca
ningUn
objeto
en el
cube
tronsporente
si
aUn
no
se
voci6. Lave el
comportimiento
cuba
transparente
Unicamente
con
un
polio
hUmedo. iSee
"COmo
limp
i
or
el
cuba
transparente
"
.)
Tenga
mucho
cuidado
cuando
utilice
Ia
m6quino
sabre
uno
escolero.
No
recargue
Ia
m6quino
sobre sillas, mesas, etc.
No
presione
con
demasiada
fuerzo
Ia
boqu
i
llo
cuando
utilice Ia
m6quino
porque
esto
puede
provocor
do
nos.
No
deje
el cobezol
de
Ia
aspirodora
en un solo
Iugar
si
est6
sabre
pisos
delicodos.
En
los pisos
encerodos
, el
movimiento
de
Ia
m6quino
puede
generar
un lustre
disparejo.
Si
esto sucede, l
impie
con un
polio
hUmedo,
pula
el
6reo
con cera, y
aguarde
haste
que
se
seque.
C6MO
VACIAR
EL
CUBO TRANSPARENTE
Vade
el
comportimiento
cuando
Ia
basura
ll
egue
al
nivel
m6ximo
.
Evite
sobrecorgar
lo.
AsegUrese
de
desconectar
Ia
m6qu
ina
del
cargador
antes
de
vaciar
el
comportimiento
cube
transparente.
Tengo
cuidad
o
de
no
jal
ar
el
gatillo
de
encendido
("ON").
Pora liberar
Ia
suciedad, presi
one
el
bot6n
ro
jo si
tuado
all
ado
del
cube
transporente
. Presione
uno
solo vez
para
obrir
Ia bose
del
cuba. Presione
par
segundo
vez
para
quitar
el
cube
transporen
te
de
Ia
es
t
ructura
principal
del a
parole
.
Para
mini
mizar
el
contacto
con
polvo/alergenos
al
ef
ectuar
el
vociado,
introduzco
el
cuba
transporente
en
uno
balsa
de pl6stico y
vade
el contenido.
Quite
cuidodosamente
el
compartimiento
cuba
transparen
te de Ia
balsa
.
Se
lle
perfectomente
Ia
balsa
, el
iminelo
como
ocostumbra
hocerlo.
Cierre
Ia
bose
del
compartimiento
cuba
transporente
haste
que
hago
die
y
quede
segura
en
su
Iugar.
C6MO
LIMPIAR
EL
CUBO
TRANSPARENTE
AsegUrese
de
desconectar
Ia
m6qu
i
no
del
cargador
antes
de
quitar
el
comportimien
to
cuba
transparente
. Tenga
cuidado
de
no
j
olor
el
go
t
illo
de
encend
i
do
("ON"
).
Presione el
bot6n
raja
situodo
ol
lado
del
cuba
transparente
:
presione
una sola
vez
pa
ra
abri
r
Ia
base del cube.
Pr
esione
par
segundo
vez
para
quitar
el
cuba
tr
ansporente
de Ia estruct
ura
pr
i
ncipal
del
opara
to.
Extraiga
con
cuidod
o el
cuba
trans
parente.
Lave el
compartimien
to
cuba
transparent
e Unicomente con un
polio
hUmedo.
No
utilice
detergen
te,
liquido
para
encerar
ni des
odoront
e
de
ambi
entes
para
li
mpior
el
comportimien
to.
No
limp
ie el
compartimiento
en un lav
avaj
illos.
Limpie
Ia
tapa
de
l e
xtractor
de
polvo
con el
cepillo
de
Ia
herramien
ta
comb
i
nada
para
elim
i
nar
los pelusas y el
po
lva.
AsegUrese
de
que
el
compartim
i
ento
este total
mente
seco antes de col
ocarlo.
Para
volver
a coloc
or
el
cube
tronsporente
, levonte el
cube
tronsporente
y
col
6quelo
en
Ia
es
t
ructura
princ
i
pal
del
oparato
.
Ha
r6
un
clic
cuondo
este
bien
col
ocodo
en
su
Iugar.
Cierre
Ia base
del
comportimiento
cuba
transparente
haste
que
hoga
die
y
quede
s
egura
en
su
Iugar.
C6MO
LAVAR
EL
FILTRO
AsegUrese de desconec
tar
Ia
m6
q
uina
del
corgodor
ant
es
de qu
itor
el
fi
ltro.
Tenga cui
dado
de
no
jalar el
gat
i
llo
de
encendi
do
(
"ON
").
Esta
m6quino
tiene
uno
filtro, ubi
cado
s
como
se
muestro
en las ilustraciones.
Para
quitar
el f
iltro
,
extr6igolo
par
Ia
parte
super
i
or
del
a
pareto.
Revise y love el
filtro
con
per
i
odicidad
,
conforme
a las instrucci
one
s, para
montener
el
rendimiento.
Si
se
va
ospiror
polvo
fino
o
se
utilize
principalmente
en
el
modo
de
"SUCCI6N
A
GRAN
POTENCIA", ser6 neces
ario
laver
el
filtro
c
on
mayor
fr
ec
uencio
.
Utilice Unicomente
ague
frfa
para
laver el filtro.
Enjuague
Ia
parte
ext
er
i
or
del
filtro
con
ague
ha
ste
que
esto s
alga
comp
l
etamente
limpia.
EscUrralo y
gfrelo
con las des
mono
s
para
oseguror
se
de
eli
mi
n
or
el exceso
de
agua.
Coloque
el fi
ltro
de
costado
para
que
se
seque. Oe
je
lo se
cor
complete
mente
durante
24
heros
como
minima.
No
coloque
el filtro en el
lovovojillo
s,
el l
ovorropas,
Ia s
ecadora,
el
horne
, el
microondas
o cerca
del
fuego
.
Para
volver
a
colocorlo
, intr
oduzco
el f
iltro
seco
par
Ia
parte
superior
del
operata
. AsegUrese
de
colocarlo
en Ia posiciOn correcta.
Para ver un breve vi
deo
en linea, visite:
www.dyson.com/DC58filterwash
C6MO
BUSCAR OBSTRUCCIONES
AsegUrese
de
desconector
Ia
m6qu
ino
del
corgodor
antes de
inspeccionor
en
busca
de
obstrucciones. Tenga
cuidodo
de
no
jolar
el
gotillo
de
encend
i
do
(
"ON"
).
No
lo
pengo
en
func
ion
amiento
mientras verifica
si
hay obstrucciones.
Tenga cui
dado
con los
ob
jetos filosos
cuando
inspeccione las obstrucciones.
Si
no
puede
elimina
r Ia obstrucci6n,
es
posible
que
necesite qui
tar
el cepillo.
Ut
ilice
uno
mo
neda
para
libe
r
or
el sujetod
or
marcodo
co
n un
condado
.
Qu
ite Ia
obstrucci6n.
Vuelva a
colocar
el cepi
llo
y ojUstelo
con
el
sujetodor
. AsegUrese de
que
quede
bien
fijo
antes
de
utilizer el a
pareto
.
Reinstale
lodes
las
partes
correctomente
antes
de
utilizarlo
.
Su
garontia
limitoda
no
cubre Ia
elimino
c
i6n
de obstrucciones.
OBSTRUCCIONES: SISTEMA
DE
DESCONEXI6N
AUTOMATICA
Este
oporoto
es
t6
equipodo
con un sistema de desc
onexi6n
outom6ti
co.
Si
olguno
porte
se
bloquea,
es
probab
le
que
el
operata
se
desconecte
outom6ticamente.
Esto suceder6 despues
de
que
el
motor
vibre
varies
veces (
es
deci
r,
que
se
enciendo
y
opogue
seguidomente).
Deje
que
el
aporoto
se
enfrie
antes de
buscar
obstrucc
iones.
AsegUrese
de
desconectar
Ia
m6quina
del
cargodor
antes de
verificar
si
hoy
obstrucciones
.
Si
no
Ia hace,
pod
ria sufrir lesiones.
Elimine
cuolquier
obstrucci6n
antes
de
rei
nicior
el
funcionomiento.
Reinstale
todas
los
partes
corr
ectamente
antes de
ut
ilizorlo.
Su
go
r
antia
limitada
no
cubre
Ia
eliminaci6n
de obstrucciones.
13

~dyson
Dyson
customer
core
If you hove o question
about
your
Dyson
machine,
coli the
Dyson Helpline with
your
serial
number
and
details
of
where
and
when you
bought
the machine.
Servicio
de
atencion
al
cliente
Dyson
Si
tiene
olguno
dude
ocerca
de
su mclquina Dyson, !lome
o Ia lfneo de
oyudo
de
Dysonol con el
nUmero
de
serie e
informaciOn de
cu6ndo
y
d6nde
compr6
1a
m6quino
.
DYSON CONTACT DETAILS
Website: www.dyson.com
Dyson Helpline:
1-855-533-1098
(Mon-Fri Bam to Spm
CST;
Sot
9om
to
6pm
CST).
Servicio
de
otenci6n ol
diente
Dyson:
1-855-533-1
098
(tunes a viernes de 8 a.m. - 8 p.m., hero Centro;
s6bodos
de
9 a.m. - 6 p.m., h
ero
Centro).
JN.79663
PN.208652-24-02
06.01.16
www.dyson.com

X
I
I
I
I
I
WARRANTY FORM
CONTINUED
THANK
YOU
FOR
YOUR TIME .
~'

WARRANTY
FORM
Date
of
purchase
I
Fecho de compro
Serial
number
I
Numero de serie
Address
I
bireccion
Zip
Cade
I
C6digo postal
email
I
email
Telephone
I
T~l~fono
·
from time to time,
W'!t
~
d
like
to,
tell
you
.
a~t
new
:PYson
technology
tmcf services,or get
)lour
:opinion
about
your purchose.
'•
lf
you'd prefer
us
'NOT
to
keep
in touch, please tick
this
box.
De
vez
en cuondo, qveniomos de
ci
rle
ocerca,de
!o
nuevo
tecnologf(J
de
Dyson
y
serviciOs
o cooseguir
su
opini6n
oceiCa
de
su
compro. Marque esto Casillo
si
prefiere que
NO
mantengamos
confodo
con usted.
I I
3
EASY
WAYS
TO
REGISTER
I
3 MANERAS FACilES
DE
REGISTRARSE
X
'
'
'
'
'

Dyson,
Inc.
P.O.
Box l
09
Carlyle,
IL
62231 -0l
09
FIRST
CLASS
POSTAGE
REQUIRED
FRANQUEO
DE
PRIMERA
CLASE
REQUERIDO
dyson
Other manuals for V6 Absolute
10
Table of contents
Other Dyson Vacuum Cleaner manuals

Dyson
Dyson DC07 Origin User manual

Dyson
Dyson DC19T2 User manual

Dyson
Dyson DC 37C User manual

Dyson
Dyson DC23 Motorhead User manual

Dyson
Dyson Ball DC25 User manual

Dyson
Dyson DC26 User manual

Dyson
Dyson DC39c User manual

Dyson
Dyson DC07 All Floors User manual

Dyson
Dyson V7 Motorhead User manual

Dyson
Dyson 4236580 User manual

Dyson
Dyson DCO3 User manual

Dyson
Dyson DC55 User manual

Dyson
Dyson DC21 Motorhead User manual

Dyson
Dyson DC29dB User manual

Dyson
Dyson DC23 T2 User manual

Dyson
Dyson DC26 User manual

Dyson
Dyson DC32 User manual

Dyson
Dyson DC17 Asthma and Allergy User manual

Dyson
Dyson DC 01 User manual

Dyson
Dyson DC24 Blueprint Limited Edition User manual