14
K800000000EJ 020650A0 170512
4.1 Working principle
The gas sample istaken in through the sample probe, bya diaphragm suction pump inside the instrument.
The measuring probe hasa sliding cone that allowsthe probe to be inserted in holeswith a diameter of 11 mm to
16 mm and to adjust the immersion depth: the sampling point must be roughly in the center of the flue pipe/
stack.
The gas sample is cleaned of humidityand impurities by a condensate trap and filter positioned along the rubber
hose that connects the probe to the analyzer.
The gas components are then analyzed by the electrochemical sensors.
Oxygen (%O
2
) is measured with an electrochemical cell that acts like a battery which, over time, is apt to lose
sensitivity.
The toxicgases(CO, NO) are measured with electrochemical sensorsthat are not subject to natural deterioration
being intrinsicallylacking of oxidation processes.
The electrochemical cell guarantees high precision results in a time interval of up to about 60 minutes during
which the instrument can be considered very stable. When measurement is going to take a long time, we suggest
auto-zeroing the instrument again and flushing the inside of the pneumatic circuit for three minutes with clean air.
During the zero calibrating phase, the instrument aspiratesclean air from the environment and detectsthe cells’
drifts from zero (20.95% for the O2 cell), then compares them with the programmed values and compensates
them. The pressure sensor autozero must, in all cases, be done manually prior to measuring pressure.
The values measured and calculated by the microprocessor are viewed on the LCD display which is backlit to
ensure easy reading even when lighting is poor.
4.2 Measurement cells
The measurement cells are electrochemical cells made up of an anode, a cathode, and an electrolytic solution,
which depends on the type of gas to be analyzed. The gas penetrates the cell through a selective diffusion
membrane and generates an electric current proportional to the absorbed gas. Such current is measured,
digitalized, temperature-compensated, processed by the microprocessor, and displayed.
The gas shall not be at a pressure such to damage or destroy sensors. The maximum estimated allowed
pressure is ±100hPa gage.
The response timesof the measurement cellsused in the analyzer are:
O
2
= 50 sec. at 90% of the measured value
CO = 60 sec. at 90% of the measured value
NO = 40 sec. at 90% of the measured value
It is therefore suggested to wait 5 minutes(anyway not less than 3 minutes) in order to get reliable analysis data.
If sensors of poison gasesare submitted to concentrationshigher than 50% of theirmeasurement range formore
than 10 minutes continuously, they can show up to ±2% drift as well as a longer time to return to zero. In this
case, before turning off the analyzer, it is advisable to wait for the measured value be lower than 20ppm by
disconnecting the probe and letting the pump run in clean air.
4.3 Connecting the sample probe
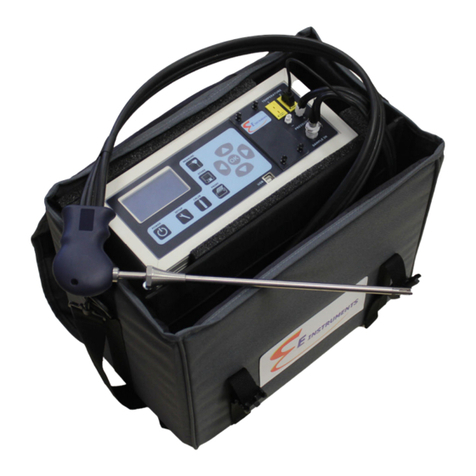
The sampling probe is made up of an INOX steel tube with a plastic hand grip and an internal K-type
thermocouple (Ni-NiCr) for measuring the fumes temperature up to 800°C. The probe is connected to the
analyzer through a double flexible hose, a filter group and a compensated cable for the thermocouple. The
polarized connector of the thermocouple is to be connected to the special outlet on the lower side of the
instrument. It isnot possible to perform a wrong connection thanksto the different width of contacts. Connect the
shorter tube of the probe to the filter group (fine dust/condensate trap) which, in turn, shall be connected to the
central connector of the instrument marked with letter “A”. Connect the longer tube, ending with a male
connector, to the negative pressure input of the instrument marked with letter “P-”. The different diameter of
connectors does not permit any wrong connections; thispermits to avoid anydamagesto the instrument.
4.4 Condensate trap and fine dust filter
The sample gasto be analyzed shall reach the measurement cellsafter being properly dehumidified and purified
from the residual combustion products. To this purpose, a condensate trap is used, which consists of a
transparent polycarbonate cylinder placed along the rubber hose of the sampling probe. Its purpose is to
decrease the air speed so that the heavier fine dust particles can precipitate and the vapor in the combustion
gasescan condensate.
The condensate trap must be always kept in the vertical position in order to prevent condensate from touching
the measurement cells. This is also the reason why it is important to periodically drain the trap, anyhow at the
end of each test (see chapter 'MAINTENANCE').
A replaceable low-porosity line filter is placed after the condensate trap aimed at keeping the solid particles
suspended in the gases. It is recommended to replace the filter whenever visibly dirty (see chapter
'MAINTENANCE').
4.0 OPERATION


