Before You Begin:
• Please read and save the instruction manual before attempting to use your gazebo.
• Set up the gazebo in an open area without debris to avoid damaging fabric.
• DO NOT set up the gazebo in heavy rain, wind or storm conditions, especially lightning storms.
• DO NOT use the gazebo for permanent shelter. It is designed for temporary use only.
• DO NOT leave children unattended in the gazebo.
• Keep your gazebo away from heat and flames at all times. DO NOT barbecue or build fires under
your gazebo.
• Do the set-up several times for better use.
• Keep the foam for storage purpose.
NOTE: It's normal that the folded structure appears to be
inside out
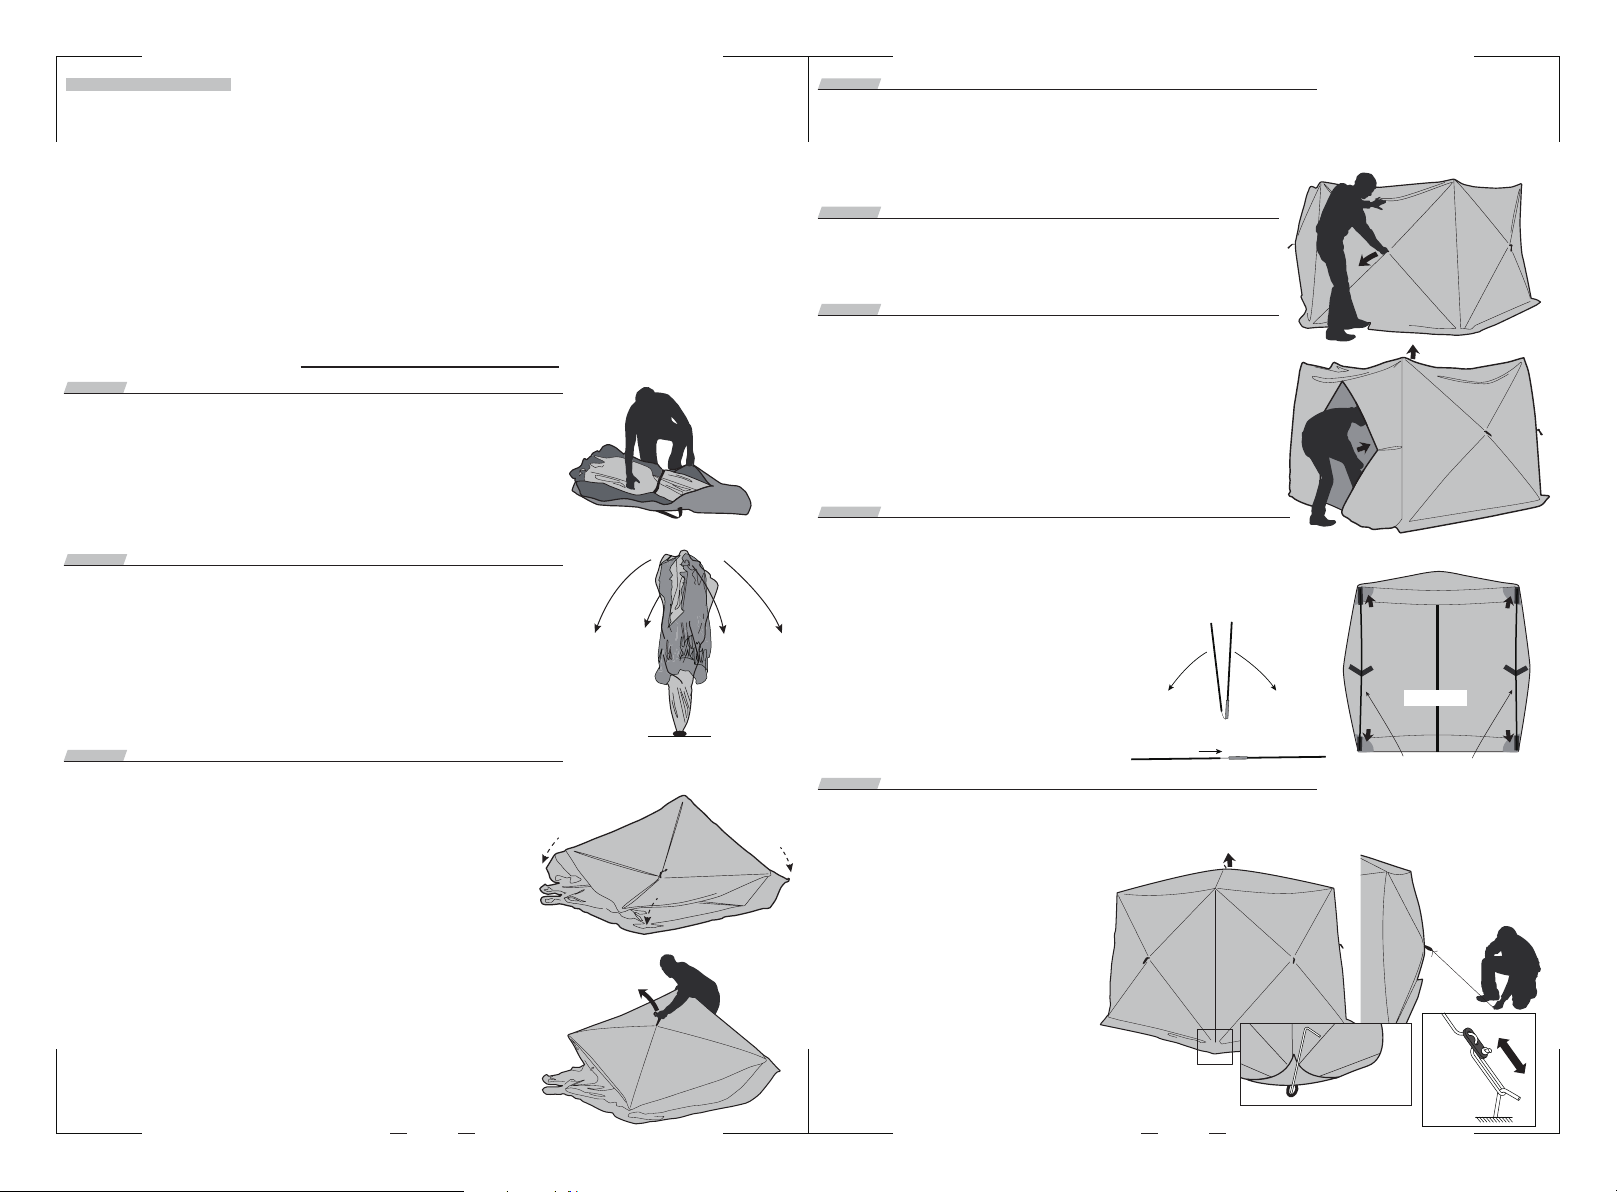
Step 1
Step 2
· Fully unzip the carry bag, take out the accessory pouch,
gazebo and protective cover. Untie all straps.
· Find a corner and follow the inner fiberglass rod to find the central hub. Grasp the top
edge with one hand. Pull the rope of the wall’s central hub outward quickly with your
other hand to pop the screen wall out.
· Repeat Step 4 for the other wall sections until all
sections are popped out to form an open gazebo.
· Stand gazebo on end, with the center hub on the ground.
Step 3
· With the folded gazebo standing on the center hub, flip the
rest of the hubs out to the side until you see the roof lying
up.
CAUTION: When opening the gazebo, DO NOT force to
open, please observe the poles for possible entanglement.
Step 4
· Unzip the door and go inside. The central connector
hub will be drooping. Push up one of the ceiling
supports near the center, or the center hub until the
ceiling pops up.
Step 6
· Connect two support rods to form two long rods.
Enter the gazebo and find the webbing pockets at
the upper and lower corners of both sides of the
door. Insert the lower rod end into lower
pocket, then gently bend the rod and
insert the opposite end into the upper
pocket. Repeat on other side. Secure
the support rods using the Velcro
on the wall fabric.
Step 7
· Adjust the opening of the gazebo to the desired location. Locate each of the 6 rings
located where the poles meet along the bottom wall of the gazebo. Use anchor
stakes through the rings to secure the
gazebo to the ground.
Step 8
Step 5
CAUTION: Care should be taken to prevent the hub
and poles from popping back onto the user.
NOTE: If it is the correct orientation, turn the gazebo
over. You will see the roof facing up and the fiberglass
poles are beneath the top fabric.
WARNING: During windy
conditions, tie guy ropes from
the webbing handles on the
wall center hubs to stakes
anchored into ground. Adjust
the tension of the rope by
adjusting the slider on rope.
Set Up The gazebo
Door Panel
Support Pole
Roof
Velcro Velcro
SCREEN WALL
Ground
SCREEN WALL
Inside View
Roof
Corner Loop
Expand and join together
21


