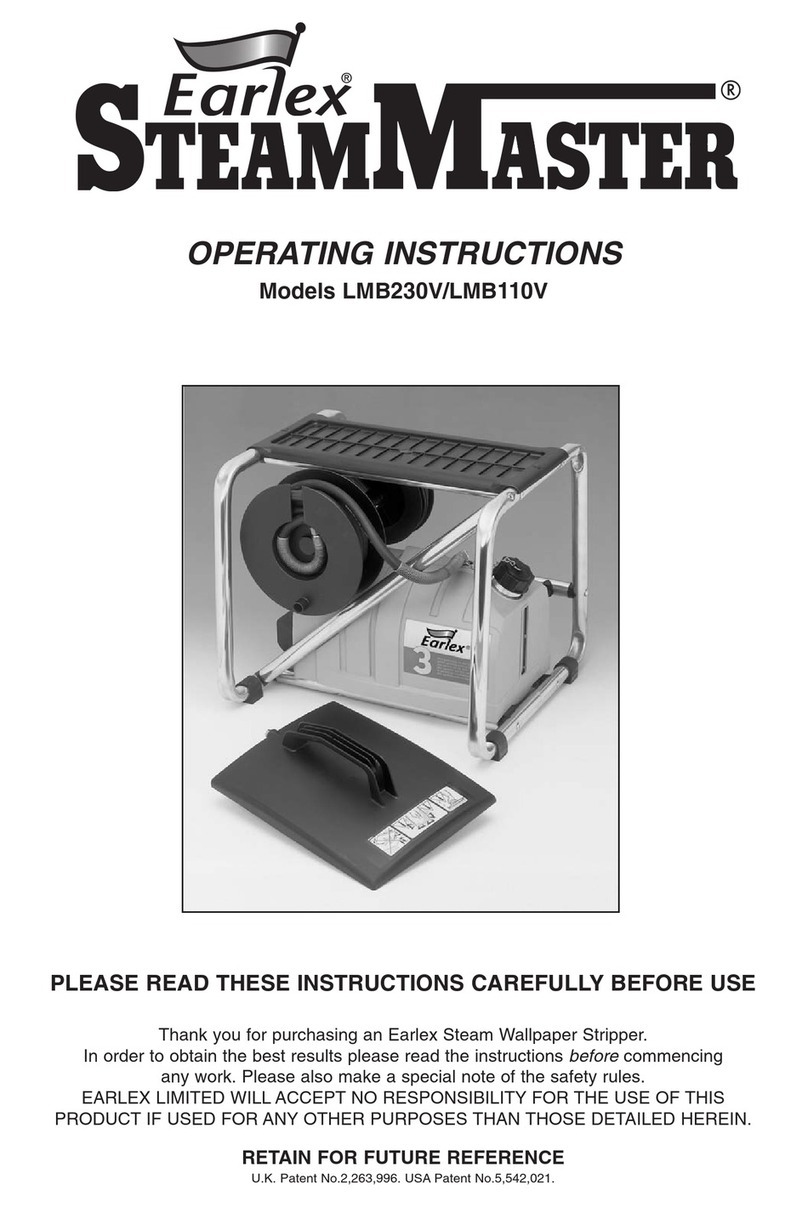
Earlex STEAMmaster LMB User manual

Professional Wallpaper Stripper
Operating Manual
EN/FR/DE/NL/ES/DK/SE/IT/PT
ASSEMBLED
IN USA

LMB
2
MAX
MIN
A B
D E
C
F
MIN
MAX
PS0303
PS0242
PS0124 BLAC
K
PS0036
PS0042
PS0038
PS0406 1760W x 110V
PS0404 2750W x 230V
PS0022
PS0128
PS0127
PS0006
PS0062
PSACC03
PS0044
PS0007
PS0072
PS0006
PS0022
PSACC02
PS0403
SSP
UK 230V / PS0029
EU 230V / PS0075
110V / PS0155
1
2

LMB
3
EN ..........................................................................4 - 15
........................................................................16 - 27
........................................................................28 - 39
........................................................................40 - 51
........................................................................52 - 63
........................................................................64 - 75
.......................................................................76 - 87
.......................................................................88 - 99
.....................................................................100 - 111
...................................112 - 114
FR
NL
ES
DK
SE
IT
PT
DE
++

EN
4
LMB
MANY THANKS FOR PLACING YOUR TRUST IN US
We would like to congratulate you on purchasing this Earlex product; we are sure that
you will enjoy working with it greatly.
Please read the Operating Manual carefully and observe the safety information before
starting the tool. Store the Operating Manual in a safe place close to the product in
case it needs to be used by someone else.
We would be happy to be of assistance if you have any questions, suggestions or
requests. Please contact us via the phone number included on the back page or via our
homepage, www.earlex.com.
Contents
1. Explanation of symbols used .....................................................5
2. Scope of delivery ................................................................5
3. General Safety Instructions ......................................................5
4. Safety Instructions for Steam Wallpaper Strippers .................................6
5. Additional Safety Instructions for model LMB .....................................7
6. Intended Use ....................................................................7
7. Protect your home...............................................................8
8. Extension leads EU/UK ...........................................................8
9. Main features....................................................................8
10. Preparation ....................................................................8
11. Operation ......................................................................8
12. Relling ........................................................................9
13. Storage ......................................................................10
14. Descaling ....................................................................11
15. Important Note regarding Product Liability! ...................................11
16. Correction of Malfunctions....................................................11
17. Technical Data................................................................12
18. Spare Parts ...................................................................12
19. Accessories...................................................................13
20. Environmental protection. . . . . . . . . . . . . . . . . . . . . . . . . . . . . . . . . . . . . . . . . . . . . . . . . . . . . 13
Warning (UK only)................................................................ 14
Guarantee .......................................................................15
EC Declaration of Conformity....................................................112

EN
5
LMB
1. Explanation of symbols used
This symbol indicates a potential danger to you or for the tool.
Under this symbol you can nd important information on how to
avoid injuries and damage to the power tool.
Beware of steam.
i
Indicates tips for use and other particularly useful information.
2. Scope of delivery
1Main unit
2Supply cord
3Steam hose 5m (plastic)
4Steamplates (A) large/(B) small
5Pressure-relief cap
6Operating manual
3. General Safety Instructions
Caution! Read all the instructions. Non-observance of the instructions below can cause
electric shock, re and/or serious personal injuries.
a) Keep your workplace clean and well lit. Disorderly or unlit workplaces
may result in accidents.
b) Never use the tool in hazardous areas that contain ammable liquids,
gases or dusts. Power tools generate sparks that can ignite dust or vapours.
c) Keep children other persons and animals away when using the power
tool. You can lose control of the tool if you are distracted.
d) The tool plug must t into the socket-outlet. The plug may not
be modied in any form. Do not use adaptor plugs together with
1
2
3
4A
Professional Wallpaper Stripper
Operating Manual
EN/FR/DE/ES/NL/DK/SE
IFYOU HAVEANY QUERIES WITH YOUR STEAM WALLPAPERSTRIPPER; OR NEED A REPLACEMENT
PART,DO NOTRETURN TO STORE. PLEASECONTACTWAGNER SPRAYTECH (UK) LTDON
01483454 666 (OFFICE HOURS)
ASSEMBLED
INUSA
6
5
4B

EN
6
LMB
protective-earthed tools. Unmodied plugs and suitable sockets reduce
the risk of an electric shock.
e) Avoid physical contact with earthed surfaces such as pipes, heating
elements, stoves and refrigerators. The risk through electric shock
increases if your body is earthed.
f) Never use outside when raining.
g) This appliance can be used by persons aged from 14 years and above
and persons with reduced physical, sensory or mental capabilities or
lack of experience and knowledge if they have been given supervision
or instruction concerning use of the appliance in a safe way and
understand the hazards involved.
h) If the supply cord is damaged, it must be replaced by the manufacturer
or its service agents to avoid a safety hazard.
4. Safety Instructions for Steam Wallpaper Strippers
Attention! When working with hot steam (min.100°C), there is a risk of serious scalding.
Hot steam and boiling water can emit when the safety valve is activated due
to overpressure in incorrect operation of the unit.
Only move with the carrying frame.The steam unit, hose and steamplate can
be very hot. Always wear suitable protective clothing / gloves.
Operate the unit only with pure water without agents or additives. Do not
switch the unit on when empty.
Never point the steamplate / bar at people, animals, at objects sensitive to temperature
or other electrical equipment. Always ensure that the unit is standing securely in a
horizontal position (on the oor).
Do not stand on or place objects on the steam hose. Never over-twist or make kinks in
the steam hose and never block the valve. Never pull on the steam hose or supply cord.
Every time the accessory is changed for lling / relling and emptying or when the steam
unit is not in use (including work pauses), pull the mains plug out of the socket-outlet.
Never overll the unit. Unplug the unit in the event of overlling or a fault. Use only EARLEX
original spare parts and accessories!
Caution! Danger of short-circuits! Cover socket-outlets and switches and do not subject
them to steam. Be careful of overhead dripping, when using on overhead areas tilt the
steamplate away from the face and body and regularly empty the steamplate of any
collected condensation. Do not allow water or steam to enter light switches or socket-
outlets. Always visually check that the hose and steamplate inlet are not blocked before
attempting to use. Do not strain, kink or trap the hose under heavy objects. Use only 4psi
EN
7
LMB
(0.3 bar) pressure cap as supplied. It is also a safety valve. NEVER block o this outlet.
NEVER remove the pressure cap when unit is boiling - switch o and wait for 5 minutes.
Do not use any caustic cleaners on the tank. Do not allow to boil dry. Do not overll the
reservoir. Never detach the hose whilst the unit is switched on.
The appliance shall not be unattended while it is connected to the supply mains. The
appliance is not to be used if it has been dropped, if there are visible signs of damage or if it
is leaking. Keep the appliance out of reach of children when it is energised or cooling down.
Under no circumstances should you attempt to repair a unit unless qualied and authorised
to do so.
5. Additional Safety Instructions for model LMB
When standing on the stripper always remain within the connes of the step/platform and
do not over-reach.
Maximum weight for standing on the unit is 127 kg (20 stone) and no more
than 1 person at a time.
Do not permit oil, grease or slippery material to accumulate on the step/platform.
Do not allow objects to accumulate on the step/platform.
Do not use a ladder or other device on the step to get greater heights.
Do not apply impact loads on the step/platform.
6. Intended use
Do not use this Stripper for any purposes other than those detailed in these instructions.
To ensure long life of the steam wallpaper stripper, clean your unit immediately and
thoroughly after each use.
Caution! - Check the state of your plaster before starting work.
Steam can loosen weak, porous or poorly bonded plaster - which also loosens readily if
cracked, holed or if steam plate is held in one position for too long after the
paper is soaked.
Weak plaster can normally be detected by tapping a few areas of the wall.
A hollow sound indicates that you should proceed only with extreme care -
stopping immediately if you hear a cracking sound or plaster starts to break
loose.
The steam stripper is safe for drywall/plaster board surfaces but whatever the
material, it is always wise to check a small area before starting work.

EN
8
LMB
7. Protect your home
To prevent marks from steam on carpets and soft furnishings it is recommended the
unit be placed on a hard at board. Ensure the unit will not slip or tilt. Dust sheets and
newspapers are not suitable.
•
Supply cord must be connected to a grounded (3 prong) mains socket-
outlet.
•
Arrange replacement of a worn or damaged supply cord.
NEVER repair a supply cord.
•
Removal of grounding pin VOIDS guarantee.
8. Extension Leads EU/UK
If you are using an extension lead it must be rated at a minimum of 15 Amps (EU) / 13
Amps (UK) - 230V unit and fully unwound. Do not operate with an extension lead rated
less than 15 Amps / 13 Amps as this will cause premature failure of the element which is
not covered by the guarantee.
9. Main Features
Earlex® Steamers are professional, fast-action steam wallpaper strippers. They have
many added features:
•
Each tank is individually pressure-tested.
•
Storage for the hose and supply cord.
•
Neon mains ON/OFF switch.
•
Cooler running steam hose.
10. Preparation
To achieve fast paper removal always gently score the areas to be
stripped. With heavily embossed, vinyl-coated or painted papers this
is essential. Either use a proprietary perforator tool or alternatively
score the paper with the edge of a wall scraper in a‘criss-cross’
pattern with 150mm (6 inch) spacing (Fig. 1, A).
As with all decorating work be sure to protect carpets and furniture
with covers.
11. Operation
•Place the unit on a at surface near the area to be stripped and remove the steamplate.
•
Fully uncoil the hose and supply cord.
•
Connect the thread on the steamplate to the end of the hose. This only needs to be

EN
9
LMB
hand tight. Do not overtighten (Fig. 1, B).
•
If the steamplate is tted with a metal swivel joint, tighten hose nut to thread
using two spanners. The steamplate can remain permanently attached to the hose
thereafter.
•
To ll the unit, remove the pressure cap and ll to the MAX water level. This must be
clean water, preferably hot.
Do not use additives - do not overll. (Fig. 1, C)
•
Replace the pressure cap, connect the supply cord from the unit to the socket-outlet
and switch on.
•
The mains switch on the unit has a neon light and will light when the unit is on.
Beware of Steam! The Earlex Steam Master® is designed for safe, fast removal
of wallpaper but you must be aware that steam is produced at 100ºC so be
careful, wear protective clothing and protect your hands with heat-resistant
gloves or mitts.
•
It will take between 10 and 20 minutes for the 230V unit or 25-35 minutes for the
110V unit to start producing steam depending on the temperature of the water used.
DO NOT leave unattended.
•
Once steam is being produced at the steamplate you are ready to commence
operation. Prior to the steam being produced a small amount of bubbling will occur at
the steamplate.
Caution! Beware of hot water discharge prior to steam emission.
•
When the steam has been produced, lift the steamplate above the level of the tank
outlet to allow condensed steam to run back down the hose and into the tank.
i
If you are right-handed hold the steamplate in your left hand and place at
against the wall where you wish to commence removal. If you are left handed
you may nd it easier to operate with the other hand.
•
Leave the steamplate against the wall for approximately 10 seconds.
•
Move the steamplate to the section immediately next to where you have just been
working and use a wallpaper scraper to remove the section that has just been
steamed (Fig. 1, D).
•
You may need to leave the steamplate against the wall for longer periods with some
papers or re-steam if not completely removed.
12. Relling
i
The 230V unit will operate for approximately 80-100 minutes and the 110V
unit will operate for approximately 195 minutes before requiring relling. The
water level is shown through the glass level indicator by a oating red bead
and should not be allowed to fall below MIN level (Fig. 1, C).

EN
10
LMB
•
Switch the unit o when this level has been reached. If you require further use of the
steamer, ensure unit is switched o and has stopped boiling.
•
Wait for 5 minutes.
Beware of Steam! The Steam is very hot - wear gloves and keep face clear.
•
Slowly unscrew the cap, any remaining trapped steam will be released from beneath
the cap.
•
Rell to the MAX water level as before (Fig. 1, C) and follow above instructions.
You must never allow the unit to boil dry. There is a safety thermal cut-out
device tted to the unit. If the unit is allowed to boil dry this will operate and
prevent further use.
•
Switch the unit o and allow it to cool for at least 5 minutes, rell with water and then
switch on again - the thermal cut-out should automatically reset.
•
If this has not reset allow a further cooling period.
13. Storage
•
When you have nished using the unit allow any remaining water to cool and then
empty the unit. We recommend ushing the tank out with clean water before storing.
Never leave water in the unit whilst being stored.
Storage Spools
•
The supply cord and hose must be fully unwound before commencing to operate the unit.
•
To recoil the supply cord, t the plug into the socket-outlet on the side of the spool and
then wind the supply cord onto the spool.
•
To recoil the hose, place the steamplate end of the hose into the side aperture of the
spool and then wind the hose onto the spool (Fig. 1, E).
Storage Steamplate
•
The handle of the steamplate is shaped to locate between the frame and the tank.
•
Slide the steamplate into position with the handle against the tank and the thread
towards the base (Fig. 1, F).
Model Boiler Capacity Steam Time
LMB 230V 7.5L 80 -100 Minutes*
LMB 110V 7.5L 195 Minutes*
*Approx. steam time before the safety cut-out operates.

EN
11
LMB
14. Descaling
iRegular descaling is key to your steamer functioning properly.
Depending on water hardness, descale the steam wallpaper stripper
after 10 – 15 lls. Units which are defective due to a lack of descaling
are excluded from the guarantee!
•
Use a standard proprietary descaling agent. Observe the manufacturer's instructions
for use!
•
Mix the descaling agent with water (ratio 1:1).
•
Fill the steam wallpaper stripper with around 3.5 litres of descaling solution.
•
Switch the steam wallpaper stripper on for 10 minutes.
•
Switch the steam wallpaper stripper o again and unplug.
•
Leave the descaling solution to work for 30 minutes.
•
Then fully empty the steam wallpaper stripper.
•
Thoroughly rinse the unit two to three times with clear water to remove all descaling
solution residue.
15. Important Note regarding Product Liability!
In accordance with an EC directive, the manufacturer is liable for this product only if all parts
originate from or were approved by the manufacturer and the tools are assembled and
operated correctly.The use of other accessories and spare parts can partially or completely
invalidate the liability.
16. Correction of Malfunctions
Malfunction Cause Remedy
Unit fails to boil •
The thermal cut-out has operated
•
Usage of an extension lead
➞Switch o, allow to
cool, rell with water
then switch on again
➞Check that the thermal
reset button has not
tripped out.
➞Check that the
extension lead is rated
at minimum of 15
Amps (EU)/ 13 Amps
(UK) - 230V unit only
and fully unwound.

EN
12
LMB
Malfunction Cause Remedy
Unit keeps cutting
out •
Water is below MIN level
•
Usage of an extension lead
•
Additives have been used
➞Rell water
➞See above
➞Refresh water
Steam escaping
from pressure cap •
Blockage in hose or steamplate
•
Build up around cap area
➞Remove blockage
➞Clean seating around
cap area
i
If the unit still will not operate return the unit to the dealer or authorised agent
for investigation.
17. Technical Data
Power source: 220-240 V ~ 50Hz Power consumption: 2750W
110 V ~ 50Hz 1760W
Steaming time: 80/195 Minutes Hose length: 5 m
Boiler capacity: 7.5L Unit weight: 9.4kg
Max persons: 1 Max standing weight: 127kg
18. Spare Parts (Fig. 2)
Spare Parts
Designation Quantity Order No.
C/sk screw-frame joints 16 PS0006
C/sk screw-tank to frame 4 PS0036
Elbow-steam outlet 1 PS0042
Filler cap assembly with chain 1 PS0303
Foot moulding 4 PS0062
Hexagon nut 4 PS0022
Lock nut M6 4 PS0127
Push clip seat/stand retention 4 PS0072
Prof s/plate 1 PS0242
Protective cover M6 2 PS0128
Reel steam hose 1 PS0044
Small steam plate 1 SSP
Stand/seat moulding 1 PS0007
Steam hose assembly 1 PS0038

EN
13
LMB
Spare Parts Elements/Assemblies
Designation Quantity Order No.
Heating Element 2750W 1 PS0404
Heating Element 1760W (110V) 1 PS0406
Prof cable / shield spares 1 PS0403
Prof tube connector spares 1 PSACC03
Replacement tank 1 PSACC02
Spare Parts Tank Cover
Designation Quantity Order No.
Tank Cover Black 1 PS0124
Spare Parts Cable Assemblies
Designation Quantity Order No.
Cable Assy UK 1 PS0029
Cable Assy EU 1 PS0075
Cable Assy 110V 1 PS0155
19. Accessories
Further information about the EARLEX range of products for decorative preparation is
available on www.earlex.com.
20. Environmental protection
The tool and all accessories and packaging have to be recycled in
an environmentally friendly manner. Do not dispose of the tool with
household waste. Support environmental protection by taking the tool
to a local collection point or obtain information from a specialist retailer.
Leftover paint and solvents shall not be emptied into drains, the sewage system
or disposed of as household rubbish. It has to be disposed of separately as
special waste. Please pay special attention to the instructions on the product
packaging.

EN
14
LMB
WARNING UK ONLY
Mains Connection 230V
The stripper is supplied fitted with a 13 Amp plug top and fuse. If a replacement fuse is
required this must be rated 13A and BS 1362 approved. If in doubt consult a qualified
electrician.
WARNING! This appliance must be earthed. For your total protection it is recommended
that a residual current device (RCD) rated at 30mA should be used in conjunction with
the stripper; load rating MIN 15 Amps, MAX 20 Amps.
If any electrical component is damaged or faulty, it must be replaced by the manufacturer
or its appointed service agents in order to avoid a safety hazard.
•
As the colours of the wires in the supply cord of this appliance may not correspond with
the coloured markings identifying the terminals in your plug, proceed as follows:
•
The wire which is coloured green and yellow must be connected to the terminal in the
plug which is marked with the letter E or by the earth symbol, or coloured green.
•
The wire which is coloured blue must be connected to the terminal which is marked
with the letter N or coloured black.
•
The wire which is coloured brown must be connected to the terminal which is marked
with the letter L or coloured red.
Mains Connection 110V
The stripper is fitted with a 16 Amp industrial plug for insertion into a suitable transformer
or generator supplying 110V a.c. outlet. If the supply cord becomes damaged it must be
replaced with our Part No. PS0155 to avoid a safety hazard.

EN
15
LMB
1 year guarantee
The guarantee runs for one year, counting from the date of sale (sales slip). It covers
and is restricted to free-of-charge rectication of faults which are demonstrably
attributable to the use of faulty materials in manufacture, or assembly errors; or free-
of-charge replacement of the defective parts. The guarantee does not cover incorrect
use or commissioning or tting or repair work which is not stated in our operating
instructions. Wearing parts are also excluded from the guarantee. We expressly reserve
the right to full the guarantee. The guarantee expires if the tool is opened up by
persons other than manufacturer service personnel. Transport damage, maintenance
work and loss and damage due to faulty maintenance work are not covered by the
guarantee. Under any guarantee claim, there must be proof of purchase of the tool
through submission of the original receipt. Wherever legally possible, we exclude all
liability for injury, damage or consequential loss, especially if the tool has been used
for a purpose other than that stated in the operating instructions, commissioned or
repaired other than in accordance with our operating instructions or if repairs are
performed by someone who is unqualied.We reserve the right to perform any repairs
in excess of those stated in our operating instructions. In case of guarantee or repair,
please refer to your point of sale.This guarantee does not aect your statutory rights.

FR
16
LMB
MERCI DE VOTRE CONFIANCE
Nous vous félicitons d'avoir acquis ce produit Earlex; nous sommes absolument
certains que vous aurez grand plaisir à travailler avec.
Veuillez lire le mode d'emploi et respecter les consignes de sécurité avant de mettre
en marche l'appareil. Veuillez conserver soigneusement le mode d'emploi en lieu sûr, à
proximité de l'appareil si une autre personne que vous deviez utiliser l'appareil.
Toutes vos questions, suggestions ou demandes sont les bienvenues. Veuillez nous
contacter soit par téléphone au numéro indiqué en dernière page, soit via notre site
Internet www.earlex.com.
Table des matières
1. Explication des symboles utilisés ...............................................17
2. Matériel fourni.................................................................17
3. Consignes de sécurité générales ...............................................17
4. Consignes de sécurité pour les décolleuses de papier peint .....................18
5. Consignes de sécurité supplémentaires pour le modèle LMB ....................19
6. Utilisation prévue.............................................................. 19
7. Protégez votre maison .........................................................20
8. Rallonges UE/R.-U. .............................................................20
9. Fonctionnalités principales.....................................................20
10. Préparation ..................................................................21
11. Utilisation ...................................................................21
12. Remplissage..................................................................22
13. Entreposage..................................................................23
14. Détartrage ...................................................................23
15. Remarque importante concernant la responsabilité associée aux produits!.....24
16. Dépannage .................................................................. 24
17. Caractéristiques techniques...................................................25
18. Pièces de rechange ...........................................................25
19. Accessoires...................................................................26
20. Protection de l'environnement................................................26
Avertissement (pour le Royaume-Uni uniquement) ...............................26
Garantie .........................................................................27
CE Déclaration de conformité ...................................................112

FR
17
LMB
1. Explication des symboles utilisés
Ce symbole indique un danger potentiel pour vous ou l'outil.
Ce symbole est accompagné d'informations importantes sur la
manière d'éviter des accidents corporels et des dommages pour
l'outil électrique.
Attention à la vapeur.
i
Ce symbole signale des conseils d'utilisation et d'autres remarques
particulièrement utiles.
2. Matériel fourni
1Dispositif principal
2Cordon d'alimentation
3Flexible à vapeur, 5 m (plastique)
4Plateaux à vapeur (A) grand/(B) petit
5Bouchon limiteur de pression
6Mode d'emploi
3. Consignes de sécurité générales
Attention! Veuillez lire la totalité des instructions d'utilisation. Le non-respect des
instructions ci-dessous peut provoquer une électrocution, un incendie et/ou
des dommages corporels graves.
a) Le lieu de travail doit rester propre et être bien éclairé. Des accidents
sont possibles si les lieux de travail sont en désordre ou mal éclairés.
b) Ne jamais utiliser l'outil dans des zones dangereuses contenant des
liquides inammables, des gaz ou des poussières. Les outils électriques
génèrent des étincelles qui peuvent enammer les particules de poussière ou
les vapeurs.
c) Aucune personne, adulte ou enfant et aucun animal ne doit
approcher de l'outil pendant son utilisation. Leur présence pourrait vous
distraire et vous faire perdre le contrôle de l'outil.
1
2
3
4A
Professional Wallpaper Stripper
Operating Manual
EN/FR/DE/ES/NL/DK/SE
IFYOU HAVEANY QUERIES WITH YOUR STEAM WALLPAPERSTRIPPER; OR NEED A REPLACEMENT
PART,DO NOTRETURN TO STORE. PLEASECONTACTWAGNER SPRAYTECH (UK) LTDON
01483454 666 (OFFICE HOURS)
ASSEMBLED
INUSA
6
5
4B

FR
18
LMB
d) La che électrique de l'outil soit être adaptée à la prise de courant. La
che ne doit être modiée en aucune façon. Ne pas utiliser de ches
d'adaptation avec des outils dotés d'un conducteur de protection.
Les ches non modiées et les prises de courant adaptées réduisent le risque
d'électrocution.
e) Éviter tout contact physique avec des surfaces mises à la terre telles
que des tuyaux, des éléments chauants, poêles et réfrigérateurs. Le
risque d'électrocution augmente si votre corps est mouillé
f) Ne jamais utiliser l'outil à l'extérieur lorsqu'il pleut.
g) Cet appareil peut être utilisé par des personnes de 14 ans et plus ainsi
que par des personnes dont les capacités physiques, sensorielles ou
mentales sont réduites ou par des personnes peu expérimentées sous
réserve qu'elles aient été formées à utiliser l'appareil dans des conditions
de sécurité et qu'elles comprennent les risques encourus.
h) Si le cordon d'alimentation est endommagé, il doit être remplacé
par le fabricant ou par un de ses techniciens SAV pour éviter tout risque
d'accident.
4. Consignes de sécurité pour les décolleuses de papier peint
Attention! Letravailavec dela vapeur chaude(min. 100°C) implique desrisques debrûlure
grave. L'appareil peut dégager de la vapeur chaude et de l'eau bouillante si
la soupape de sécurité est activée en raison de la surpression provoquée par
un mauvais fonctionnement de l'appareil.
Déplacer uniquement le cadre porteur. L'appareil à vapeur, le exible et le
plateau à vapeur peuvent être bouillants. Toujours porter des vêtements de
protection/gants appropriés.
Toujours utiliser l'appareil avec de l'eau pure, sans additifs ou agents. Ne jamais
allumer l'appareil lorsqu'il est vide.
Ne jamais diriger le plateau / la barre à vapeur vers des personnes ou animaux ou des objets
sensibles à la température ou d'autres équipements électriques. Toujours s'assurer que
l'appareil est en position stable à l'horizontale (sur le sol).
Ne pas marcher ou placer des objets sur le exible à vapeur. Le exible à vapeur ne
doit jamais être trop tordu ou plié et la soupape ne doit jamais être bloquée. Ne jamais tirer
sur le exible à vapeur ou le cordon d'alimentation. Il faut débrancher la che secteur de la
prise de courant à chaque changement de l'accessoire pour le remplissage/la recharge et la
vidange ou lorsque l'appareil à vapeur n'est pas utilisé (pauses incluses). Ne jamais dépasser
la limite de remplissage de l'appareil. Débrancher l'appareil en cas de surremplissage ou de

FR
19
LMB
défaut. Utiliser uniquement des pièces de rechange et des accessoires d'origine EARLEX!
Attention! Risque de court-circuit! Recouvrir les prises de courant et les interrupteurs
et ne pas les exposer à la vapeur. Faire attention aux gouttes qui tombent pour les
travaux au-dessus de la tête: écarter le plateau à vapeur du visage et du corps et évacuer
régulièrement la condensation qui s'est accumulée dans le plateau. Éviter impérativement
toute pénétration d'eau ou de vapeur dans les interrupteurs électriques ou les prises
de courant. Avant toute utilisation, vérier systématiquement que le exible et l'orice
d'admission du plateau à vapeur ne sont pas bouchés. Ne pas tordre, plier ou coincer le
exible sous des objets lourds. Utiliser uniquement un bouchon à soupape de pression
à 0.3 bar identique à celui fourni. C'est également une soupape de sécurité. NE JAMAIS
boucher cette prise. NE JAMAIS retirer le bouchon à soupape de pression lorsque
l'appareil est en ébullition – éteindre l'appareil et attendre 5 minutes. Ne jamais utiliser
de produits nettoyants caustiques sur le réservoir. Ne pas laisser bouillir jusqu'à
évaporation complète de l'eau. Ne pas trop remplir le réservoir. Ne jamais détacher le
exible pendant que l'appareil est sous tension.
L'appareil ne doit pas rester sans surveillance tant qu'il est raccordé à l'alimentation secteur.
Ne pas utiliser l'appareil s'il est tombé, présente des signes visibles de détérioration ou
s'il fuit. Tenir l'appareil hors de portée des enfants lorsqu'il est sous tension ou en train de
refroidir.
En aucun cas, vous ne devez essayer de réparer l'appareil à moins de détenir la qualication
et l'autorisation nécessaires.
5. Consignes de sécurité supplémentaires pour le modèle LMB
En position debout sur la décolleuse, toujours rester au niveau de la marche/plateforme et
éviter toute position en extension.
Le poids maximum autorisé sur l'appareil est de 127 kg et il ne peut y avoir
plus d'une personne à la fois.
Empêcher toute accumulation d'huile, de graisse ou de matériau glissant sur la
marche/plateforme.
Empêcher toute accumulation d'objets sur la marche/plateforme.
Ne pas placer d'échelle ou d'autre élément sur la marche pour gagner en hauteur.
Ne pas appliquer de charge dynamique sur la marche/plateforme .
6. Utilisation prévue
Ne pas utiliser cette décolleuse à des ns autres que celles indiquées dans ce mode
d'emploi.
Pour garantir la durée de vie de la décolleuse à papier peint à vapeur, le dispositif doit
impérativement être nettoyé soigneusement après chaque utilisation.

FR
20
LMB
Attention! - Vérier l'état du plâtre avant de commencer le travail.
La vapeur peut détacher les plâtres peu solides, poreux ou ayant mal pris. Ces
plâtres peuvent aussi se détacher s'ils sont ssurés, troués ou si le plateau à
vapeur est maintenu en place trop longtemps après l'imprégnation du papier.
Le plâtre peu résistant peut normalement être détecté en tapant légèrement
sur diérents endroits du mur. Si la zone plâtrée rend un son creux, vous devez
travailler avec une extrême prudence et vous arrêter immédiatement si vous
entendez un craquement ou si du plâtre commence à se détacher.
La décolleuse à vapeur est d'un usage sûr sur des murs secs/cloisons en
placoplâtre, mais il est toujours judicieux de vérier une petite zone avant
de commencer le décollement quel que soit matériau.
7. Protégez votre maison
Pour éviter les marques de vapeur sur les moquettes, tapis et les tissus d'ameublement, il
est recommandé de placer l'appareil sur une surface plane dure.Veillez à ce que l'appareil
ne risque pas de s'incliner ou de tomber. Les toiles de protection et les journaux ne sont
pas adaptés.
•
Le cordon d'alimentation secteur doit être raccordé à une prise de
courant mise à la terre (2 pôles + terre).
•
Remplacer le cordon d'alimentation s'il est usé ou endommagé.
NE JAMAIS réparer un cordon d'alimentation.
•
Le retrait de la broche de masse ANNULE la garantie.
8. Rallonges UE/R.-U.
Si vous utilisez une rallonge, elle doit être dimensionnée à au moins 15 A (UE) / 13 A (R.-
U.) – modèle 230 V et être entièrement déroulée. Ne pas utiliser un cordon dimensionné
pour un courant de moins de 15 A / 13 A car cela provoquera une défaillance prématurée
du dispositif, ce qui ne sera pas couvert par la garantie.
9. Fonctionnalités principales
Les appareils à vapeur Earlex® sont des décolleuses de papier peint professionnelles,
ultrarapides. De nombreuses fonctionnalités ont été ajoutées:
•
La pression de chaque réservoir a été testée.
•
Rangement pour le exible et le cordon d'alimentation
•
Interrupteur Marche/Arrêt lumineux.
•
Flexible à circulation de vapeur moins chaude.
Table of contents
Languages:
Other Earlex Kitchen Appliance manuals

Earlex
Earlex SS76 User manual

Earlex
Earlex STEAM DYNAMO PRO User manual

Earlex
Earlex VAP75 User manual

Earlex
Earlex Pro-Steam LCS176 User manual

Earlex
Earlex SS76 User manual

Earlex
Earlex WS125 User manual

Earlex
Earlex SS125 User manual

Earlex
Earlex SS200 User manual

Earlex
Earlex Super Steamer SS100 User manual

Earlex
Earlex SS76 User manual