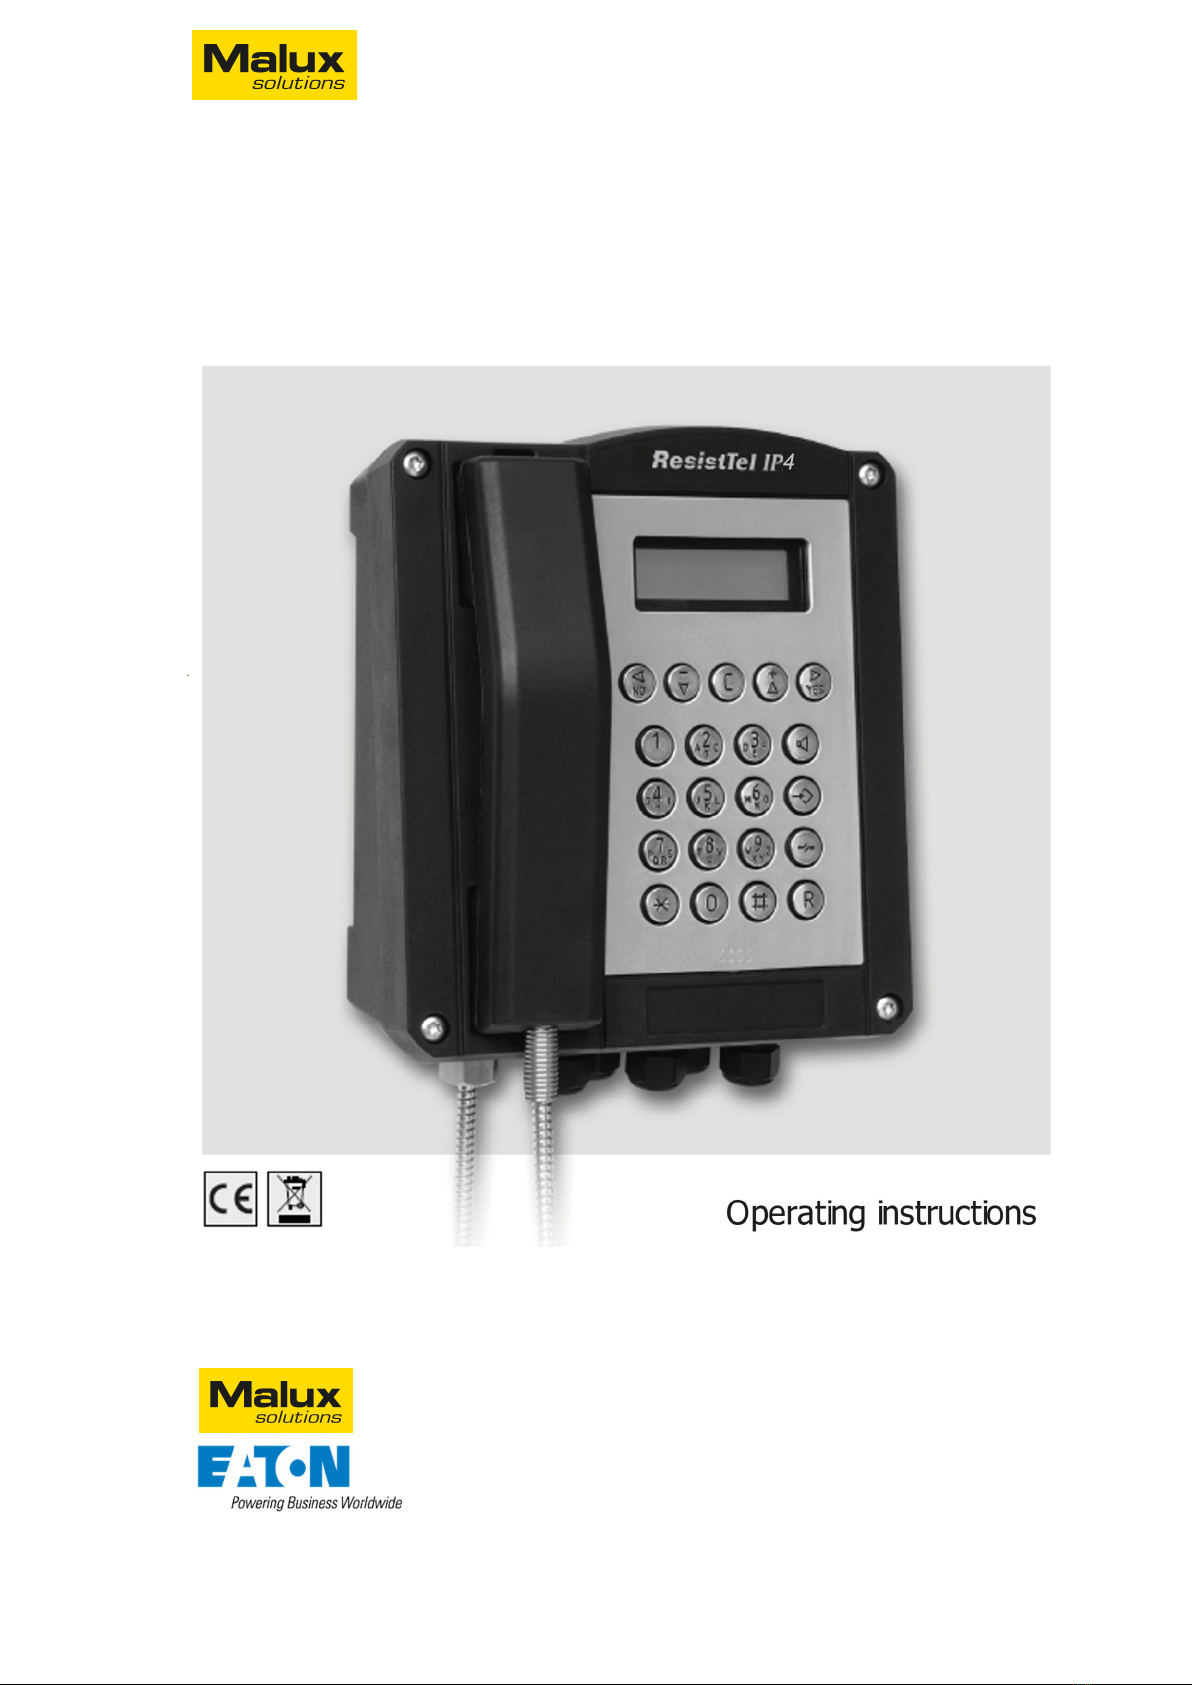
Operating instructions ResistTel IP4/IP162 03/22
5
5.1.3 Main menu – Messages ............................................................................................................ 39
5.1.4 Main menu – User settings ....................................................................................................... 39
5.1.4.1 Call diversion, optional .................................................................................................... 39
5.1.4.2 Presence (optional) ......................................................................................................... 41
5.1.4.3 Do not disturb ................................................................................................................. 41
5.1.4.4 Call waiting: On def. | On once | On mute | Off .............................................................. 42
5.1.4.5 display phone no. : On | Off ........................................................................................... 42
5.1.5 Main menu – Phone settings .................................................................................................... 43
5.1.5.1 Headset: Off | On............................................................................................................ 43
5.1.5.2 Direct dial ....................................................................................................................... 43
5.1.5.3 Lock phone ..................................................................................................................... 44
5.1.5.4 Change PIN ..................................................................................................................... 44
5.1.5.5 LCD contrast: 1|2|...| 15 ................................................................................................. 44
5.1.6 Main menu – User list .............................................................................................................. 45
5.1.6.1 Activate of users 1-6 ....................................................................................................... 45
5.1.6.2 register/deregister of users 2-6 (co-users) ....................................................................... 45
5.1.6.3 Registration of users 2-6 (co-users) ................................................................................. 45
Setting the VoIP Gatekeeper ..................................................................................... 46
5.1.6.3.1.1 VoIP Gatekeeper H323, TH323 & SH323 ............................................................... 46
5.1.6.3.1.2 VoIP Gatekeeper SIP, TSIP & SIPS ......................................................................... 46
Options Tones ........................................................................................................... 46
5.1.6.4 Set menu language and time format for users 1-6 ........................................................... 47
5.1.6.5 Set ring melody for users 1-6 ........................................................................................... 48
5.1.6.6 Set function keys for users 1-6 ........................................................................................ 49
Function keys dialogs in general ................................................................................ 49
Function "Destination no. " for selected key f ............................................................ 50
Partner function for selected key f ............................................................................ 50
"Park" function for selected key f .............................................................................. 51
Pickup function for selected key f .............................................................................. 51
Function "MWI" for selected key f ............................................................................. 52
Function "Call diversion" for selected key f ................................................................ 52
Function "Call group" for selected key f ..................................................................... 53
"Contacts" function for selected key f........................................................................ 53
"Register" function for selected key f ........................................................................ 53
Activate function for selected key f ........................................................................... 53
"Ringing off" function for selected key f..................................................................... 54
Function "Call waiting" for selected key f ................................................................... 54
Function "display phone no" for selected key f .......................................................... 55
Function "Transfer" for selected key f ........................................................................ 55
Redirect function for selected key f ........................................................................... 55
Function "Phone lock" for selected key f.................................................................... 55
"Headset" function for selected key f ........................................................................ 56
Function "Hotdesk" for selected key f ........................................................................ 56
Function "Create reg. " for selected key f................................................................... 56
Function "Delete reg. " for selected key f ................................................................... 57
Function "Switch user" for selected key f ................................................................... 57
"Recording" function for selected key f...................................................................... 57
Function "Boolean obj. " for selected key f ................................................................ 58
"Presence" function for selected key f ....................................................................... 58
Function "Prep. override" for selected key f .............................................................. 58
Function "Toggle" for selected key f .......................................................................... 59
Function "Message" for selected key f ....................................................................... 59
"Spare" function for selected key f ............................................................................ 59
5.1.7 Main menu – Administration .................................................................................................... 60
5.1.7.1 Information..................................................................................................................... 60