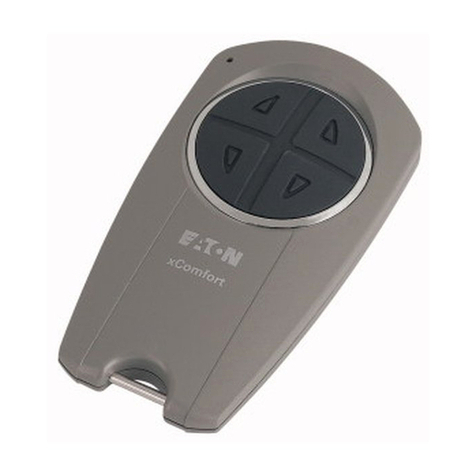
Eaton Xanura ABX4 User manual

Xanura™
Remote control, key ring, light, RF
type ABX4
MBO 1991 403-401 EA
Xanura™
Afstandsbediening, sleutelhanger, licht, RF
type ABX4
MBO 1991 403-401 EA
0165
0165
2 MBO 1991 403-401 EA
Xanura™ Afstandsbediening, RF type ABX4
Deze afstandbediening kan worden gebruikt voor het op
afstand besturen van uw huisautomatiseringsmodules.
Geschikt voor het aansturen van vier verschillende
adressen. Met dimfunctie.
Xanura™ RF-remote control device type ABX4
The remote control can be used to control home
automation modules from a remote location. Can be used
to control four different addresses. With dimming
function.
3MBO 1991 403-401 EA
Bediening
Algemeen
De afstandsbediening wordt af fabriek geleverd op lettercode A.
De bovenste 2 toetsen bedienen cijfercode 1, de volgende twee
toetsen cijfercode 2, daaronder 3, en daaronder 4. De twee
blauwe onderste toetsen zijn voor het dimmen van verlichting.
Gebruik
1. Plug een RF-interface (RIX) in een stopcontact
(of gebruik de CAX Communicatie Access).
2. Door kort op de linkertoets of rechtertoets te drukken
schakelt u de modules respectievelijk aan of uit. Dimactoren
kunnen in combinatie met de ABX4 worden gedimd; schakel
hiervoor eerst de betreffende actor aan. Hierna kan met de
onderste toetsen de lichtsterkte worden geregeld.
Wanneer u dimactoren met een andere lettercode of cijfercode
wilt bedienen, lees dan het volgende:
Operation
General
The remote control is supplied ex factory with letter code A.
The top 2 keys operate number code 1, the next two keys
number code 2, below that 3 and below that 4. The two lower
blue keys are used to dim the lighting.
Use
1. Insert a RF-interface (RIX) in a socket
(or use the CAX Communication Access).
2. The modules are switched on or off by briefly pressing the
left or right keys respectively. Dimmer actuators can be
dimmed in combination with the ABX4; always switch on the
relevant actuator first. The light intensity can then be
controlled with the lower keys.
If you want to operate the dimmer actuators with a different
letter or number code, read the following:

4MBO 1991 403-401 EA
A. Het veranderen van de lettercode
1. Druk op de bovenste toets AAN en houdt deze ingedrukt.
De rode LED flikkert kort. Na 3 seconden wordt de huidige
instelling weergegeven:
led knippert 1x bij ingestelde code A,
bij C knip pert de led 3 x, etc.
2. Laat de bovenste AAN toets los.
3. Druk nu voor de gewenste lettercode telkens kort op
dezelfde bovenste AAN toets (1 x = A; 2 x = B, 3 x = C, enz.).
De LED knippert bij iedere keer dat u de toets kort indrukt.
Belangrijk: houdt bij de laatste keer de AAN toets ingedrukt.
Na 3 seconden geeft de LED de ingestelde lettercode weer
door een aantal keren op te lichten (b.v. 3 x voor code C).
Laat nu de toets los.
Wanneer u het instellen niet in de juiste volgorde uitvoert, zal de
LED gedurende 1 seconde aanblijven en zullen de instellingen
niet veranderen.
A. Changing the letter code
1. Press and hold down the top ON key. The red LED will flash
briefly. The current setting is displayed after 3 seconds: LED
flashes 1x with code A, 3x with code C, etc.
2. Release the top ON key.
3. Now briefly press the same top ON key (1 x = A; 2 x = B,
3 x = C, etc.) for the desired letter code.
The LED will flash every time the key is pressed.
Important: keep the ON key held down with the last action.
After 3 seconds the LED indicates the set letter code by
lighting up a specific number of times (e.g. 3 times for
code C). Now release the key.
If the adjustment sequence is incorrect the LED will remain on
for 1 second and the settings will not change.
5MBO 1991 403-401 EA
B. Het veranderen van de cijfercode
Hierbij worden de bovenste toetsen ingesteld op een gewenste
cijfercode. De daaronder liggende toetsparen 2, 3 en 4 zijn
automatisch 1, resp. 2 en resp. 3 cijfercodes hoger dan de
bovenste. (bijv. u stelt in op cijfercode 6, dan zijn de daar
onderliggende toetsparen automatisch 7, 8 en 9).
1. Druk op de bovenste toets UIT en houdt deze ingedrukt.
De rode LED flikkert kort. Na 3 seconde wordt de huidige
instelling weergegeven: led knippert 1x bij ingestelde
cijfercode 1, bij cijfercode 3 knippert de LED 3 x, etc.
2. Laat de bovenste UIT toets los.
3. Druk nu voor de gewenste cijfercode telkens kort op dezelfde
bovenste UIT toets (1 x = 1; 2 x = 2, 3 x = 3, enz.).
De LED knippert bij iedere keer dat u de toets kort indrukt.
Belangrijk: houdt bij de laatste keer de toets ingedrukt. Na 3
seconden geeft de LED de ingestelde cijfercode weer door
een aantal keren op te lichten (b.v. 3 x voor code 3).
Laat nu de toets los.
B. Changing the number code
This sets the top keys to a desired number code. The lower key
pairs 2, 3 and 4 are automatically 1, 2 and 3 number codes
higher than the top ones (for example if you set number code 6,
the lower key pairs are automatically 7, 8 and 9).
1. Press and hold down the top OFF key.
The red LED will flash briefly. The current setting is shown
after 3 seconds: LED flashes once for number code 1,
three times for number code 3, etc.
2. Release the top OFF key.
3. Now briefly press the same top OFF key for the desired
number code (1 x = 1; 2 x = 2, 3 x = 3, etc.).
The LED will flash every time the key is pressed.
Important: keep the key held down with the last action.
After 3 seconds the LED indicates the set number code by
lighting up a specific number of times (e.g. 3 times for
code 3). Now release the key.
6MBO 1991 403-401 EA
Wanneer u de volgorde van handelen bij het instellen niet op de
juiste volgt, zal de LED gedurende 1 seconde aanblijven en
zullen de instellingen niet veranderen.
C. Het verwisselen van de batterij
De batterijhouder bevindt zich binnenin de afstandsbediening.
De achterzijde van de afstandsbediening kan gemakkelijk
geopend worden met uw nagels of een kleine schroevendraaier.
Schuif de batterij uit de houder op de printplaat en vervang de
batterij. Gebruik 2 x type CR2016. Let hierbij op de polariteit
(bovenzijde is +).
Dit product mag worden gebruikt binnen alle lidstaten
van de Europese Unie. De zendfrequentie 433,92 MHz is
nog niet geharmoniseerd.
If the adjustment sequence is incorrect the LED will remain on
for 1 second and the settings will not change.
C. Changing the battery
The battery holder is located inside the remote control. The back
of the remote control can easily be opened using your nail or a
small screwdriver. Slide the battery out of the holder on the PCB
and replace the battery. Use 2 x type CR2016. Check the
polarity (+is at the top).
This product has been approved for use in all European
Union Member States. The transmission frequency
433.92 MHz has not been harmonised yet.

7 MBO 1991 403-401 EA
wij Eaton Electric N.V.
Europalaan 202, 7559 SC Hengelo, Nederland
verklaren dat het product:
Xanura™ huisautomatisering
bestaande uit:
• Afstandsbediening, sleutelhanger, licht, RF, type ABX4
voldoet aan de bepalingen van artikel 3, Annex IV van de
R&TTE richtlijn 99/5/EC
en dat onderstaande normen zijn toegepast voor:
Radio: EN 300 220-1
EMC: ETS 300 683
Elektrische veiligheid: EN 60 950
datum Steven Castelein
29-03-04 Directeur Eaton Electric N.V.
EG - verklaring van overeenkomst
we Eaton Electric N.V.
Europalaan 202, 7559 SC Hengelo, The Netherlands
declare that the product:
Xanura™ home automation unit
consisting of:
• Remote control device, key ring, light, RF, type ABX4
complies with the definitions in 3, Annex IV of the R&TTE guideline 99/5/EC
and that the following standards have been applied:
Radio: EN 300 220-1
EMC: ETS 300 683
Electrical safety: EN 60 950
date Steven Castelein
29/03/04 Director Eaton Electric N.V.
EU - Declaration of Conformity
8MBO 1991 403-401 EA
Technische specificaties
Batterij 2 x 3 Volt lithium CR2016
RF frequentie 433,92 MHz
Uitgezonden vermogen 5600 µV/m @ 3 m
Bereik 20 meter (open veld)
Keuringen CE (R&TTE: Radio, EMC en laagspanning)
Afmetingen 85 x 40 x 7 mm
Gewicht 20 gram
Technical specifications
Battery 2 x 3 Volt lithium CR2016
RF frequency 433.92 MHz
Transmission capacity 5600 µV/m @ 3 m
Range 20 metres (open terrain)
Certification CE (R&TTE: Radio, EMC and low voltage)
Dimensions 85 x 40 x 7 mm
Weight 20 grams
9MBO 1991 403-401 EA
Ongestoorde werking van het Xanura-systeem
Elektronische apparaten en systemen kunnen gevoelig zijn voor
signalen van andere apparaten, die elektromagnetische storing
veroorzaken. Binnen de Europese Unie zijn afspraken gemaakt over
de immuniteit (gevoeligheid) van de apparatuur voor signalen en
ook de emissie (storing) van deze apparatuur. Als de apparaten/
toepassingen in een omgeving voldoen aan de daarvoor geldende
normen, zullen ze elkaar niet storen (ze zijn dan "Elektro Magnetisch
Compatibel").
Voor residentiële omgevingen, waar het huisautomatiserings-
systeem Xanura wordt toegepast, is de Europese norm voor
immuniteit vastgelegd in de EN 61000-6-1. Apparatuur die voldoet
aan deze norm is bestand tegen de elektromagnetische emissie
van overige apparaten die voldoen aan de Europese norm
EN 61000-6-3 (residentiële omgevingen). Ervaring heeft geleerd dat
in woonhuizen apparatuur kan voorkomen dat een EMC-
emissieniveau heeft boven de in EN 61000-6-3 vastgestelde
niveaus. Deze apparatuur kan de correcte werking van de Xanura-
modules verstoren. De immuniteit van de Xanura inbouwmodules is
om die reden opgewaardeerd en gelijkwaardig geworden aan de
EN 61000-6-2, de strengere Europese norm voor immuniteit in
industriële omgevingen.
Desalniettemin dient het toepassinggebied van Xanura
beperkt te blijven tot residentiële omgevingen.
Undisturbed functioning of Xanura home automation
Electrical equipment and systems can be sensitive to signals from
other equipment, which causes electro magnetic disturbance. In
the European Union, countries agreed upon laws for the immunity
(sensitivity) of signals of other equipment as well as equipment
emission (disturbance). When equipment or applications in a certain
surrounding comply with the valid standards, they will not disturb
each other's operations (they are called "Electro Magnetic
Compatible").
For residential surroundings, where the home automation system
Xanura is being applied, the European standard for immunity is
standardised in EN 61000-6-1. Equipment that complies with this
standard is resistant to electro magnetic emission of other equip-
ment, which complies with the European standard EN 61000-6-3
for residential surroundings. Experience has shown that in domestic
surroundings, equipment is being used which has an EMC-emission
level that is above the levels stated in EN 61000-6-3. This equip-
ment can disturb the correct functioning of the Xanura-modules.
The immunity of the Xanura built-in modules is therefore revaluated
and equivalent to EN 61000-6-2 (the more severe European
standard for immunity in industrial surroundings).
Nevertheless, the application area for Xanura will remain
restricted to residential areas.
© 2005 Eaton Electric N.V. Partial or complete reproduction is granted with written permission of Eaton Electric N.V.
MBO 1991 403-401 EA/SWB/SG/April 2005
© 2005 Eaton Electric N.V. Gedeeltelijke of gehele overname van de inhoud is mogelijk na schriftelijke
toestemming van Eaton Electric N.V. MBO 1991 403-401 EA/SWB/SG/April 2005
Eaton Electric N.V.
P.O. Box 23
7550 AA Hengelo
The Netherlands
Tel.: 074 246 70 00
Fax: 074 246 33 02
www.et-installateur.nl
www.xanura.com
Eaton is niet verantwoordelijk voor het disfunctioneren van
het Xanura-systeem als gevolg van in het gebouw
aanwezige apparatuur met emissiewaardes boven de
maximale toegestane niveaus zoals die gelden in
residentiële, commerciële en lichtindustriële omgevingen en
zijn vastgelegd in de EN 61000-6-3.
Toepassing Geldende Europese norm Xanura-huis
automatisering*
Immuniteit van Emissie van Immuniteit- en
de apparatuur de apparatuur emissienorm
Residentieel 61000-6-1 61000-6-3 Compatibel/
Commercieel voldoet
Licht-industrieel
* Voorwaarde daarbij is dat het gehele Xanura-systeem wordt geïnstalleerd
volgens de geldende instructies door een gecertificeerde en getrainde
Xanura-dealer.
Eaton is therefore not responsible for the disfunctioning
of the Xanura system as a consequence of equipment in
the building with emission levels that exceed the
maximum allowed levels set as standard for residential,
commercial and semi-industrial surroundings stated in
EN 61000-6-3.
Application area Valid European Standard Xanura- home
automation*
Immunity of Emission of Immunity and
equipment equipment
emission standards
Residential 61000-6-1 61000-6-3 Compatible/
Commercial meets the
Semi-industrial requirements
* Condition is that the total Xanura-system is installed in accordance with
valid instructions supplied by a certified and trained Xanura dealer.
Eaton Electric N.V.
Postbus 23
7550 AA Hengelo
Tel.: 074 246 70 00
Fax: 074 246 33 02
www.et-installateur.nl
www.xanura.com
Other Eaton Remote Control manuals

Eaton
Eaton xComfort CHSZ-02/02 User manual

Eaton
Eaton Power Defense PD3 Manual

Eaton
Eaton xComfort CHSZ-12/03 Manual

Eaton
Eaton Power Defense PD4 Manual

Eaton
Eaton Power Defense PD2 Manual

Eaton
Eaton xComfort CHSZ Series User manual

Eaton
Eaton HHPRG-MS User manual

Eaton
Eaton ATC-300+ User manual

Eaton
Eaton TS110 User manual

Eaton
Eaton Xanura ABX1 User manual
Popular Remote Control manuals by other brands

Daikin
Daikin BRC1H82W Installation and operation manual

Gyration
Gyration Media Center Remote manual

Viessmann
Viessmann Vitotrol 350 Installation and service instructions

RIB
RIB SUN 2CH instructions

Travis Industries
Travis Industries GreenSmart SKU 99300699 (NG) Instalation instructions

Hitachi
Hitachi RC-R008 user manual