manuals.online logo
Brands
  1. Home
  2. •
  3. Brands
  4. •
  5. Eaton
  6. •
  7. Switch
  8. •
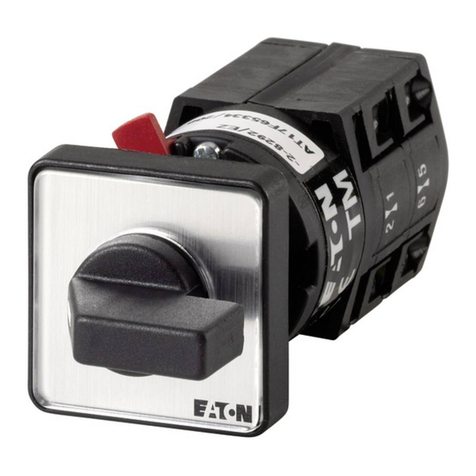
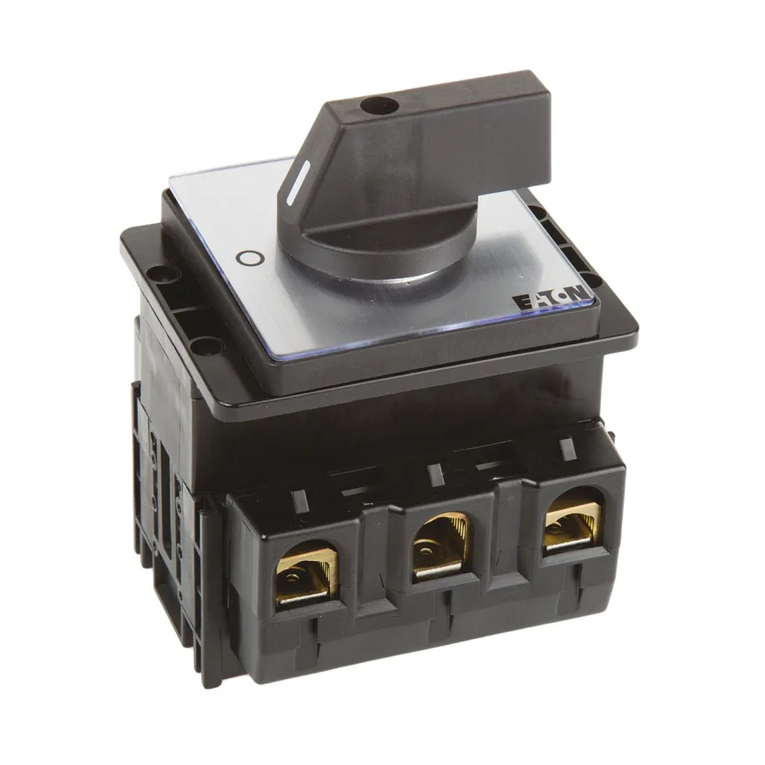
  9. Eaton S-T0 Manual

Eaton S-T0 Manual

Electric current! Danger to life!
Only skilledor instructedpersons may
carry out the following operations.
Lebensgefahr durch elektrischenStrom!
Nur Elektrofachkräfte undelektrotechnisch
unterwiesene Personen dürfen die im Folgenden
beschriebenen Arbeiten ausführen.
Tension électrique dangereuse !
Seules les personnes qualifiées et averties doivent
exécuter les travaux ci-après.
¡Corrienteeléctrica! ¡Peligro de muerte!
El trabajo a continuación descrito debe ser realizado
por personas cualificadas y advertidas.
Tensione elettrica: Pericolo di morte!
Solo persone abilitate e qualificate possono eseguire
le operazioni di seguito riportate.
触触电电危危险险!!
只允许专业人员和受过专业训练的人员进行
下列工作。
Электрический ток!Опасно для жизни!
Только специалисты или проинструктированные
лица могут выполнять следующие операции.
en
de
fr
es
it
zh
ru
Emergency On Call Service:Local representative (www.eaton.eu/aftersales)or +49 (0)180 5223822 (de,en) 1/3
Instruction Leaflet
Montageanweisung
Notice d’installation
Instrucciones de montaje
Istruzioni per il montaggio
安安装装说说明明
Инструкция по монтажу
01/18 IL03801019Z
(AWA115-465)
S-T0
NOTICE
When cutting axle to length, observe construction!
ACHTUNG
Beim Ablängen der AchseBauform beachten!
ATTENTION
Tenir compte du modèle lors du raccourcissementde l’axe !
CUIDADO
¡Alprolongar el eje prestar atención a la forma constructiva!
AVVISO
Duranteil taglio a misura dell’asse, prestare attenzione al tipo di forma!
注意
将轴锯短时,要注意其结构!
ВНИМАНИЕ
При уменьшении длины оси учитывать конструктивную форму!
Switching –Schalten – Commande – Conectar –Commutazione –开开关关–Выключатель
To operate, insertkey into lock and turn about 40° to left or right. Push in cylinder “A” about 3 mm (0.12”) and
continue turning key into desired switch position.
Zum Schalten den Schlüssel in dasSchloss einführen, ca. 40° nach rechts bzw. nach links drehen.
Zylinder „A“ ungefähr 3 mm (0.12”) eindrücken und den Schlüssel in die gewünschte Schaltstellungweiter drehen.
Pour commander l’appareil, introduire la clé dans la serrure et la tourner de 40° environ versla droite ou la gauche.
Enfoncer le cylindre « A » de 3mm(0.12”) env., puis continuer àtourner la clé pour l’amener dans la position souhaitée.
Para conectar introducir la llave en la cerradura y girarla aprox. 40° hacia la derechay/o izquierda.
Introducir el cilindro “A” unos 3mm(0.12”) y seguir girando la llave en la posición de conexióndeseada.
Perla commutazione, inserire la chiave nella serratura, ruotare di ca. 40° versodestra o verso sinistra.
Premere il cilindro “A” di circa3mm(0.12”) e ruotare di nuovo la chiavenella posizione di commutazione desiderata.
将钥匙插入锁中,向右或向左转动大约 40°以打开锁。 将气缸 “A” 向下压大约 3mm(0.12”) ,将 钥匙再次转到所需的打开位置。
Для переключения вставить ключ в замок,повернуть примерно на 40° вправо или влево.
Вдавить цилиндр «A» примерно на 3mm(0.12”) иснова повернуть ключ в требуемое положение переключения.
Removing the key – Abziehbarkeit des Schlüssels– Possibilité de retrait de la clé – Extraibilidad de la llave – Estraibilità della chiave –
拔拔出出钥钥匙匙–Извлекаемость ключа
When “A”jumps out (about
3 mm
(0.12“)), turn key until it aligns with the arrow and then withdraw.
Wenn „A“ heraus springt (ca.
3 mm
(0.12“)), den Schlüssel drehen bis er mit dem Pfeil fluchtet und dann abziehen.
Lorsque « A » refait saillie (
3 mm
(0.12“) env.), tourner la cléjusqu’à ce qu’elle soitalignée avec la flèche, puis la retirer.
Si “A” sale despedido (unos
3 mm
(0.12“)), girar la llave hasta quequeda alineada con la flecha y a continuación extraerla.
Se “A” fuoriesce (ca.
3 mm
(0.12“)), ruotare la chiave fino a cheè allineata con la freccia, quindi estrarre.
如果 “A”突出(大约
3 mm
(0.12“)), 转动钥匙直到钥匙对准箭头并将其拔出。
Если «A»выскакивает (примерно
3 mm
(0.12“)),повернуть ключ,пока он не будет установлен соосно со стрелкой,
после чего извлечь его.
en
de
fr
es
it
zh
ru
en de fr es it zh ru
en
≦3 mm
(≦0.12”)
A
de
fr
es
it
zh
ru
en de fr es it
zh ru
en
≦3 mm
(≦0.12”)
A
de
fr
es
it
zh
ru
2/3 Emergency On Call Service: Local representative (www.eaton.eu/aftersales)or +49(0) 1805223822 (de, en)
01/18 IL03801019Z
Exchanging locking wheel
a
–Auswechseln des Sperrrades
a
–Remplacement de la roue de blocage
a
–Cambio de la rueda de trinquete
a
–
Sostituzione della ruota di blocco
a
–
更更换换大大齿齿轮轮
a
–Замена блокировочного колеса
a
T0…/EZ/S, T0…/EZ/OFS/S
T3…/EZ/S, T3…/EZ/OFS/S
P1…/EZ/S, P1…/EZ/OFS/S
Removing thekey and locking wheel a– Abziehbarkeit des Schlüssels und Sperrrad a– Possibilité de retrait de la clé et roue de blocage a–
Extraibilidad de la llave y rueda de enclavamiento a–Estraibilità della chiave e ruota di blocco a–拔拔出出钥钥匙匙和和大大齿齿轮轮a–
Извлекаемость ключа и блокировочного колеса a
The numberand arrangement of notches bdeterminesthe position of “A”(or the switch position) in which the key can be withdrawn.
Die Anzahl und Anordnung derNuten bbestimmt die Position von „A“ (bzw. die Schaltstellung), in denen der Schlüssel abziehbar ist.
Le nombreet la dispositiondes encoches bdétermine la position de « A» (ou la position de commutation) dans laquelle la clé peut être retirée.
El número y la disposición de las ranurasbdetermina la posición de “A” (o bienla posición de conexión) en la que puede extraersela llave.
Il numero e la disposizione delle scanalature bdeterminano la posizione di “A” (ovvero la posizione di commutazione), nella quale la chiave può essere estratta.
槽b的数量和布局决定 “A” 的位置(打开位置),在这个位置可以打开钥匙。
Количество и расположение пазов bопределяет положение «A» (или положение переключения), вкотором можно извлечь ключ.
detachable
beiliegend
jointe
adjunto
in dotazione
附上
прилагаемый
Optional equipment VR-T0
Notches can be filed in positions markedc
Sonderausstattung VR-T0
Nuten können nach Bedarfentsprechend derMarkierungen c
eingefeilt werden.
Roue de blocage spéciale VR-T0
Les encoches peuvent être le caséchéant limées selon les
repères c
Equipamiento especialVR-T0
En caso necesario, lasranuraspueden pulirse según lasmarcas
c
Equipaggiamento speciale VR-T0
All’occorrenza,le scanalature possono essere limate
conformementealle marcature c
特殊配置 VR-T0
根据需要可以将槽嵌入标记 c
Специальная комплектация VR-T0
При необходимости можно обработать пазы напильником
согласно меткам c
built-in
eingebaut
intégrée
incorporado
incorporato
安装
встроенный
release – lösen – desserrage –
soltar – sblocco–松开 –
отсоединить
replace – auswechseln – remplacer –cambiar –
sostituzione –更换 –заменить
Number of spacers
Anzahl der Distanzscheiben
Nombre d’entretoises
Número de tubos separadores
Numero di distanziatori
垫圈数量
Количество дистанцирующих вставок
⌀22.5 ⌀22.5
with front plate –mit Frontschild –
avec plastron–con placa frontal –
con targhetta frontale – 带前面板 –
с передней панелью
without front plate – ohne Frontschild –
sans plastron – sin placa frontal –
senza targhetta frontale – 不带前面板 –
без передней панели
a
361.5 - 2.4 mm
(0.06 - 0.09“)
252.5 - 3.4 mm
(0.1 - 0.13“)
143.5 - 4.4 mm
(0.14 - 0.17“)
034.5 - 5 mm
(0.18 - 0.2“)
en de fr
es it zh
ru
en
de
fr
es
it
zh
ru
en
de
fr
es
it
zh
ru
①
②
①
③
en
de
fr
es
it
zh
ru
en
de
fr
es
it
zh
ru
①
②
①
③
en de fr es
it zh ru
1 2 3 ①
en de fr
es it zh
ru
en de fr es
it zh ru
ST 2.9 x 16
1Nm(8.85 lb-in)
0
21
3.2 mm
(0.16”)
22.5 mm
(0.89”)
12.5 mm
(0.49”)
≦5.5 mm
(≦0.22”)
ZFS(NT)..T0
a
sawn off
abgesägt
scié
serrado
segato
锯断
отпилено
en
de
fr
es
it
zh
ru
en
de
fr
es
it
zh
ru
en de
fr es
it zh
ru
en de
fr es
it zh
ru
Emergency On Call Service:Local representative (www.eaton.eu/aftersales)or +49 (0)180 5223822 (de,en) 3/3
01/18 IL03801019Z
EatonIndustries GmbH, Hein-Moeller-Straße 7-11, 53115 Bonn, Germany
©1980 by Eaton IndustriesGmbH, www.eaton.eu/documentation All RightsReserved
01/18 IL03801019Z ETN
Printed in Great Britain (01/18)
T0…/E/S
T3…/E/S
P1…/E/S
T0-…/Z/S
T3-…/Z/S
P1-…/Z/S
T0…/I1/S
T3…/I2/S
P1…/I2/S
0
21
≦5 mm
(≦0.2”) ST 2.9 x 16
1Nm(8.85 lb-in)
ZFS(NT)...T0
a
≦5.5 mm
(≦0.22”)
a + 5.5 mm
(a + 0.22”)
0
21
T0… = 50 mm (1.97”)
T3… = 65 mm (2.56”)
ST 3.9 x 19
1Nm(8.85 lb-in)
Fig. 1
Fig. 2
M4
M4 ZFS(NT)...T0
≦5 mm (≦0.2”)
9 mm (0.35”)
ST 3.9 x 25
1Nm(8.85 lb-in)
≦5.5 mm
(≦0.22”)
0
21
ST 3.9 x 25
1Nm(8.85 lb-in)
ZFS(NT)..T0
≦5.5 mm
(≦0.22”)

Other Eaton Switch manuals

Eaton RS2 Series Manual

Eaton

Eaton RS2 Series Manual

Eaton H-T6-160 Series Manual

Eaton

Eaton H-T6-160 Series Manual

Eaton RMQ-Titan M22 Series Manual

Eaton

Eaton RMQ-Titan M22 Series Manual

Eaton T5B Series Manual

Eaton

Eaton T5B Series Manual

Eaton T0-4 SE2 Series Manual

Eaton

Eaton T0-4 SE2 Series Manual

Eaton Cutler-Hammer BIHI User manual

Eaton

Eaton Cutler-Hammer BIHI User manual

Eaton TR7735 User manual

Eaton

Eaton TR7735 User manual

Eaton P1-32/IGF1/SVD-SW/HI11/ATEX22 User manual

Eaton

Eaton P1-32/IGF1/SVD-SW/HI11/ATEX22 User manual

Eaton Greengate NeoSwitch ONW-D-1001-MV-W User manual

Eaton

Eaton Greengate NeoSwitch ONW-D-1001-MV-W User manual

Eaton Cutler-Hammer SPB User manual

Eaton

Eaton Cutler-Hammer SPB User manual

Eaton Power Xpert PXES4P Series User manual

Eaton

Eaton Power Xpert PXES4P Series User manual

Eaton T6-160-6/V/SVB/HI11 Manual

Eaton

Eaton T6-160-6/V/SVB/HI11 Manual

Eaton STS 2000A User manual

Eaton

Eaton STS 2000A User manual

Eaton Cutler-Hammer CHGENLC100ATS1SE User manual

Eaton

Eaton Cutler-Hammer CHGENLC100ATS1SE User manual

Eaton TRIPP LITE U360-004-IND User manual

Eaton

Eaton TRIPP LITE U360-004-IND User manual

Eaton P5-125/E Manual

Eaton

Eaton P5-125/E Manual

Eaton P3-/XM Manual

Eaton

Eaton P3-/XM Manual

Eaton Crouse-hinds series User manual

Eaton

Eaton Crouse-hinds series User manual

Eaton Crouse-hinds series User manual

Eaton

Eaton Crouse-hinds series User manual

Eaton XNH00-1-A160-BT Manual

Eaton

Eaton XNH00-1-A160-BT Manual

Eaton COOPER POWER SERIES User manual

Eaton

Eaton COOPER POWER SERIES User manual

Eaton GHG 261 User manual

Eaton

Eaton GHG 261 User manual

Eaton LBS Series Installation and operating instructions

Eaton

Eaton LBS Series Installation and operating instructions

Eaton ATHA Manual

Eaton

Eaton ATHA Manual

Popular Switch manuals by other brands

Sapcon COAT-ENDURE instruction manual

Sapcon

Sapcon COAT-ENDURE instruction manual

Rockwell Automation Allen-Bradley Guardmaster 440G-LZ user manual

Rockwell Automation

Rockwell Automation Allen-Bradley Guardmaster 440G-LZ user manual

Cisco Catalyst 2960 Series Configuration guide

Cisco

Cisco Catalyst 2960 Series Configuration guide

KSB AS5 Installation and operating manual

KSB

KSB AS5 Installation and operating manual

ASL INTERCOM LP01 Configuration guide

ASL INTERCOM

ASL INTERCOM LP01 Configuration guide

ATEN VanCryst VM0404H user manual

ATEN

ATEN VanCryst VM0404H user manual

CTS WPS-2006 Series user guide

CTS

CTS WPS-2006 Series user guide

Techly IDATA DP-KVM4 user manual

Techly

Techly IDATA DP-KVM4 user manual

Sonoff RE5V1C Application guide

Sonoff

Sonoff RE5V1C Application guide

ALFAtron ALF-SMW42S manual

ALFAtron

ALFAtron ALF-SMW42S manual

SMC Networks LFE series Installation and maintenance manual

SMC Networks

SMC Networks LFE series Installation and maintenance manual

Atop EH3305 Series installation guide

Atop

Atop EH3305 Series installation guide

Digital Products Ring-it! Quick reference guide

Digital Products

Digital Products Ring-it! Quick reference guide

Popp 011801 Quick start manual

Popp

Popp 011801 Quick start manual

KTI KGS-1620 installation guide

KTI

KTI KGS-1620 installation guide

NETGEAR ProSafe GSM5212P Hardware installation guide

NETGEAR

NETGEAR ProSafe GSM5212P Hardware installation guide

Avaya MX10 user guide

Avaya

Avaya MX10 user guide

enphase EP200G-NA-02-RSD Instruction to use

enphase

enphase EP200G-NA-02-RSD Instruction to use

manuals.online logo
manuals.online logoBrands
  • About & Mission
  • Contact us
  • Privacy Policy
  • Terms and Conditions

Copyright 2025 Manuals.Online. All Rights Reserved.