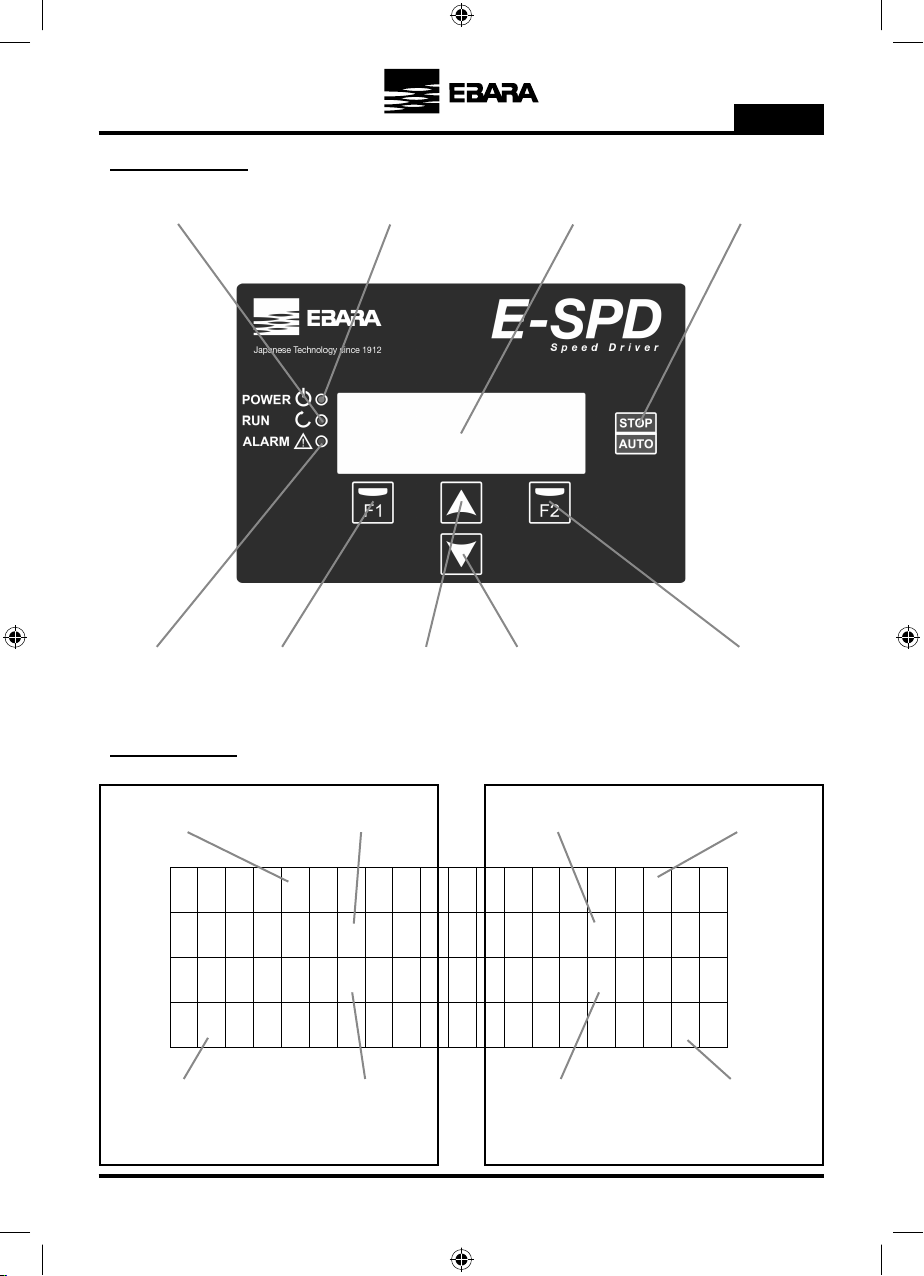
EBARA E-SPD Series Instructions for use

E-SPD
INVERTER FOR PUMPS
Instruction and maintenance manual.................................................................................................. 3
EN
INVERTER PER ELETTROPOMPE
Manuale di istruzioni e manutenzione .............................................................................................. 31
IT
VARIATEUR POUR POMPES ÉLECTRIQUES
0DQXHOG·LQVWUXFWLRQVHWGHPDLQWHQDQFH ......................................................................................... 59
FR
INVERTER FÜR PUMPEN
Gebrauchs - und wartungsanleitung................................................................................................. 87
DE
INVERSOR PARA BOMBAS ELÉCTRICAS
Manual de instrucciones y mantenimento .......................................................................................115
ES
Handleiding voor gebruik en onderhoud......................................................................................... 227
NL
Manual de instruções e manutenção.............................................................................................. 255
PT
FALOWNIK DO POMP
,QVWUXNFMD2EVãXJLL.RQVHUZDFML..................................................................................................... 367
PL
ơƦƛƞƩƫƧƩƝƤƸƶƤƞƣƫƩơưƞƪƣƧƜƧ
ƩnjǃLJƻLJƽNJNjƻLJLjLJǖǃNJLjDŽnjƹNjƹǏǁǁǁNjƾǎdžǁǐƾNJǃLJDžnjLJƺNJDŽnjƿǁƻƹdžǁǗ.............................................. 395
RU
0DQXDOGHLQVWUXFūLXQLũLvQWUHūLQHUH................................................................................................ 423
RO
.XOODQ×PYHEDN×PN×ODYX]X............................................................................................................ 451
TR
3
25
47
69
91
113
135
157
179
201
223
INVERTER FOR PUMPS
Instruction and maintenance manual.............................................................................................................
INVERTER PER ELETTROPOMPE
Manuale di istruzioni e manutenzione ..........................................................................................................
VARIATEUR POUR POMPES ÉLECTRIQUES
Manuel d’instructions et de maintenance .....................................................................................................
INVERTER FÜR PUMPEN
Gebrauchs - und wartungsanleitung .............................................................................................................
INVERSOR PARA BOMBAS ELÉCTRICAS
Manual de instrucciones y mantenimento ....................................................................................................
INVERTER VOOR ELEKTRISCHE POMPEN
Handleiding voor gebruik en onderhoud .......................................................................................................
INVERSOR PARA BOMBAS ELÉTRICAS
Manual de instruções e manutenção ............................................................................................................
FALOWNIK DO POMP
Instrukcja Obsługi i Konserwacji ........................................................................................................
ИНВЕРТОР ДЛЯ ЭЛЕКТРИЧЕСКИХ НАСОСОВ
Инструкция по эксплуатации иобслуживанию .........................................................................................
INVERTOR PENTRU POMPE ELECTRICE
Manual de instrucțiuni și întreținere ..............................................................................................................
ELEKTRİK POMPALARI İÇİN İNVERTER
Kullanım ve bakım kılavuzu ..........................................................................................................................


3
EN
EN
INDEX
1. Presentation .....................................................................................................................................................................................
2. Safety rules .......................................................................................................................................................................................
3. Technical data ..................................................................................................................................................................................
4. Product identification .................................................................................................................................................................
5. Sizeandweight................................................................................................................................................................................
6. Storage ................................................................................................................................................................................................
7. Installation and assembly ........................................................................................................................................................
8. Electrical connections ..................................................................................................................................................................
9. Screen format ..................................................................................................................................................................................
10. Main screen ......................................................................................................................................................................................
11. Operation mode ..............................................................................................................................................................................
12. Start-upwizard ................................................................................................................................................................................
13. Setup menu .......................................................................................................................................................................................
14. Warning management ................................................................................................................................................................
15. Alarms ..................................................................................................................................................................................................
16. Maintenance and repair ............................................................................................................................................................
17. Warranty ...........................................................................................................................................................................................
18. Disposal and environmental aspects .................................................................................................................................
Technical data ..................................................................................................................................................................................
Declaration of conformity ........................................................................................................................................................
4
4
5
5
5
5
6
8
10
10
11
11
15
20
22
24
24
24
245
249

4
EN
1. PRESENTATION
The following product is an electronic device for the control and protection of pump systems according to the fre-
quency of the pump’s power supply. The inverter can be connected to any pump to manage its operation and main-
tain a constant pressure. In this way, the pump or pump system is only activated when needed, avoiding unnecessary
waste of energy and prolonging its useful life.
The following symbols have been used in this instruction booklet:
Risk of harm to people or property. Electrical risk.
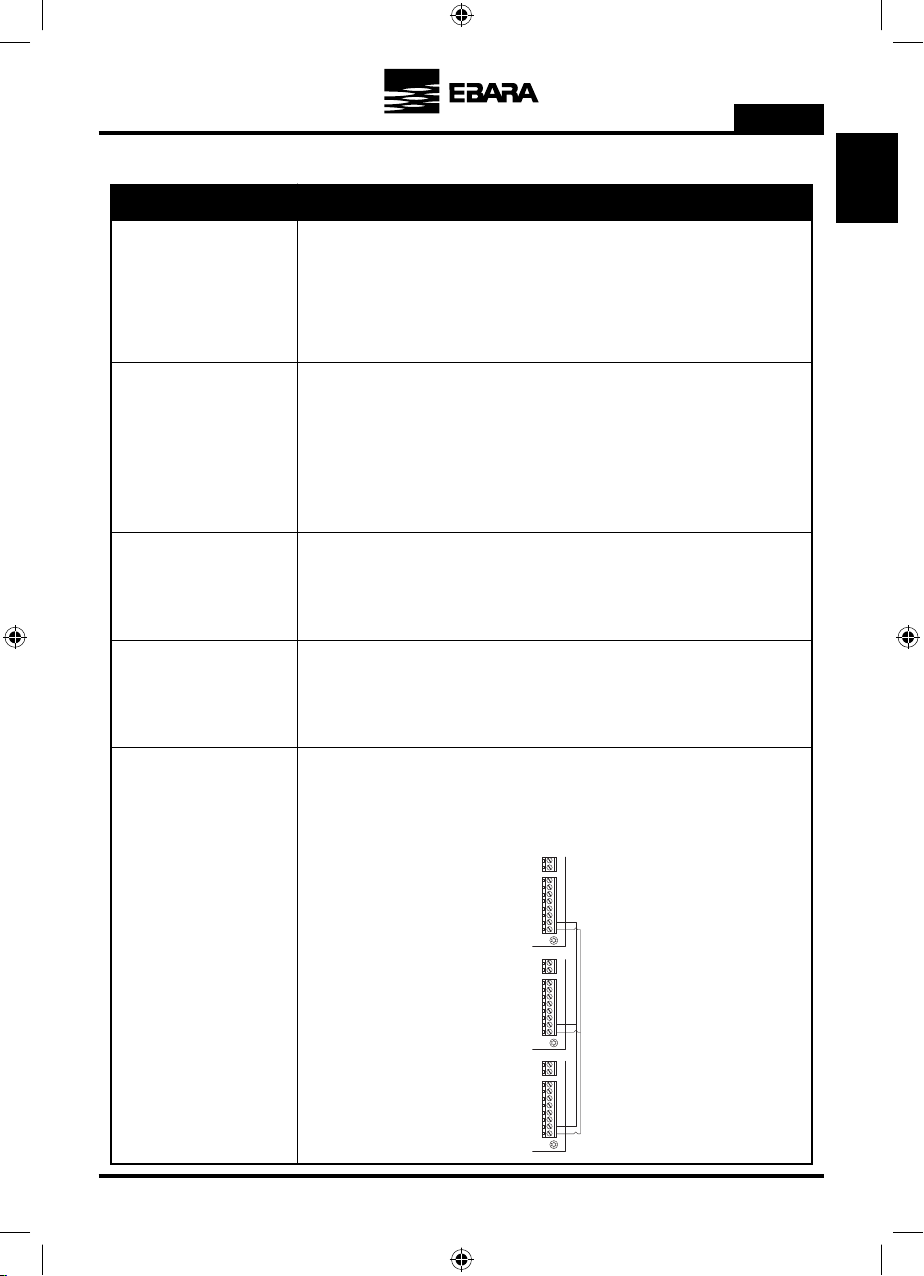
2. SAFETY RULES (ADD ELECTRICAL AND WARNING SYMBOLS)
Before installing and using the product:
- Carefully read the whole of this manual before using the device for the first time and keep it for future reference.
The user must strictly observe the accident prevention regulations in force in their respective country. Check at the
time of receipt of the product that there is no damage to the product and/or missing components. If so, contact the
supplier immediately.
- Check that the data indicated on the plate is what is required and appropriate for the installation, and in
particular that the nominal current of the motor is compatible with the data indicated on the specifications plate
of the frequency converter.
- The installation and maintenance must be carried out solely and exclusively by authorised personnel, responsible
for making the electrical connections in accordance with the current safety regulations.
- The frequency converter must not be used by people with reduced physical, sensory or mental capabilities,
or without the due experience or knowledge, except if a person responsible for their safety has explained the
instructions and supervised their operation of their frequency converter.
- Do not let children play with the frequency converter.
- Do not use the product in a manner other than that specified in the following instruction manual.
- The manufacturer accepts no liability for damage caused by improper use of the product and shall not be held
responsible for damage caused by maintenance or repairs carried out by unqualified staff and/or with non-original
replacement parts.
This device is intended for use in a residential environment. If this device is used in an industrial envi-
ronment, it may not opérate.
Use of this device in a residential environment may cause electromagnetic interference. In this case, the
user may be required to take appropiate measures.
Inverter may product the very high surge voltaje on the motor. When the motor is applied this tight
surge voltaje repeatly, the motor will be caused deterioration of insulation by accumulating the stress of
surge. Please make sure the motor specification that can be driven by inverter.
- This inverter does not incorpórate electric gradual termal protection functions.
Residual Risks:
- Before removing the cover of the frequency converter for any maintenance work, ensure you disconnect the mains
voltage and wait 5 minutes for the electronic circuit board to discharge any residual voltage inside.
- Never disconnect the frequency converter while the motor is rotating. This action can cause irreparable damage
to the frequency converter and affect the other electronic systems connected to the same electric grid.

5
EN
EN
Product
family
Power
Watts (W)
Frequency converter power supply:
M=Single phase T=Three phase
4. PRODUCT IDENTIFICATION
220-240 V single phase
230 V Three phase
50/60 Hz
11 A
20 A
IP 55*
2
2B
S1
IT, TN-C, TN-S, TT
400 V Three phase
400 V Three phase
50/60 Hz
11 A
12 A
IP 55*
2
2B
S1
IT, TN-C, TN-S, TT
Power supply voltage (V)
Motor voltage (V)
Working frequency (Hz)
Maximum current at frequency converter output (A)
Maximum current at frequency converter input (A)
Protection rating
Protection degree
Type of Action
Opeation
Grounding systems distribution
E-SPD MT 2200
E-SPD TT 4000
Dimensions Volume Weight
330 x 230 x 170
330 x 230 x 170
0,013 m3
0,013 m3
3.5 kg
3.5 kg
3. TECHNICAL DATA
Nominal values:
Limits of use:
- Minimum ambient temperature: -10ºC
- Maximum ambient temperature: +40ºC
- Variation in the supply voltage: +/- 10%
- Humidity range: 5% to 95% without condensation and vapor
- Maximum altitude: 2.000 meters
*The auxiliary fan supplied for wall mounting has a protection rating of IP54
E-SPD MT 2200 E-SPD TT 4000
E-SPD M T 2200
6. STORAGE
The product must be stored in a covered and dry place, away from sources of heat and protected from dirt and
vibrations, moisture, heat sources and possible mechanical damage. Do not place heavy objects on top of the
packaging.
5. SIZE AND WEIGHT
- Although the pump is not operational (red POWER LED blinking), the electrical supply must still be cut off to the
whole frequency converter for any maintenance work.
If there are any anomalies in the installation, the frequency converter can be stopped manually using the button
AUTO/STOP for this purpose.
Motor output:
T=Three phase

6
EN
E-SPD MT 2200
E-SPD TT 4000
8
46
19
76
35
120
Section of frequency converter input (mm2)
Maximum distance (metres)
1.5 2.5 4
12
49
28
81
51
134
Section of frequency converter output (mm2)
Maximum distance (metres)
1.5 2.5 4
7. INSTALLATION AND ASSEMBLY
Before installing the frequency inverter, carefully read the whole of this manual and consult the
safety regulations in force in the country in which it will be used.
The installation must be carried out by a qualified technician.
a) Installation of the frequency converter:
- It must be installed in a well ventilated area, protected from damp and direct exposure to the sun and rain.
- Before making the electrical connections, ensure the cable used to provide power to the frequency converter is
not live.
- Carefully verify the electrical data indicated in the specifications plate of the frequency converter before connecting
the electric current.
- The electric power cables to the frequency converter, and from the frequency converter to the pump, must be of the
correct size for the nominal consumption of the motor and the length of cable required, according to the regulations
in force in the country in question. A table with the maximum recommended lengths according to the cross-section
of the electrical cable can be found below.
- Each interface cable lenght should be shorter tan 3 meters.
- Use the appropriate cable glands to attach the cable.
- Also ensure that the grid has electrical protection; a high-sensitivity differential switch (30 mA, class A for
domestic applications, Class B for industrial applications) is particularly recommended.
The type B should be installed for all the residual current-operated protective or monitoring from an
inverter up to the supply voltage.
- In addition to the differential switch, it is advisable to install magnetothermal protection and a voltage disconnect
switch to control the power supply to each frequency converter individually.
Ground must be connected properly. If the ground is not connected, the electric shock or fire might be
happened.
b) Installation of pressure units with a frequency converter:
- The multiple pump unit must always consist of pumps that are the same and that, therefore, have the same power
and hydraulic performance. Failure to comply with this point can cause the pump system to malfunction.
- For the frequency converter to work, it is essential to use a pressure transducer (4-20 mA).

7
EN
EN
- The location of the pressure transducer must always be as close as possible to the pump unit, as close as possible
to the membrane expander, and always after the general retention valve of the pump unit It is essential to install
a general cut-off valve for the pump unit, after the physical location of the pressure transducer.
- If there is more than one pressure transducer in a multiple pump unit (more than one frequency converter with
a pressure transducer connected), the network of interconnected frequency converters will decide automatically,
and with prior reliability tests of the readings of the existing transducers, which is the transducer that will be used
as the general pressure sensor for the whole group.
- If the designated transducer functions erroneously, the set of frequency converters will decide to automatically
change the principal transducer for another that provides more precise readings. The rest of the transducers will
remain on standby ready to be used when required.
c) Installation on a motor:
- Replace the cover of the motor terminal box with the motor support adapter (parts 5 and 11a) provided.
- Break the 3 holes of the metal radiator of the power circuit (part 4) with a screwdriver. The 3 holes are visible
on the inside of the radiator (add the image).
- Screw the metal radiator to the motor support adapter with the help of the 2 screws provided for this purpose
(parts 9 and 11b).
-Tighten the appropriate cable glands to guarantee the declared protection rating (part 10).
- Carry out the electrical connections between the power circuit and the motor using the electric cables supplied
(item 6).
- Connect the power circuit to the cover + control circuit (part 1) using the flat cable.
- Screw the assembly together (part 13).
d) Installation on a wall bracket:
WARNING: For installation on the wall, point 2 of the previous section regarding installation on a motor should
not be carried out, since the 3 holes in the metal radiator would not ensure the adequate protection rating.
- Fix the wall bracket to the wall through the 3 rear holes of the wall bracket (part 7).
- Place the fan at the base of the wall bracket, ensuring upwards airflow (part 8).
- Place the inverter assembly inside the wall bracket, ensuring that the 2 ends of the metal radiator are inside
the wall bracket.
- Fix the inverter to the wall bracket using the 2 side screws drilled into the metal radiator (part 14).

8
EN
a) Power connections
8. ELECTRICAL CONNECTIONS
*For 230/400 V motors
Three-phase 230 Vac (DELTA connection*)
Three-phase 400 Vac (STAR connection*)
Motor
E-SPD MT 2200
E-SPD TT 4000
Single phase 230 V
Three-phase 400 V
Power supplyModel
L
POWER SUPPLY
RELAY OUTPUT 2
RELAY OUTPUT 1
FAN
DIGITAL INPUT 2
DIGITAL INPUT 1
PRESSURE TRANSMITTER
RS485 COMUNICATION
FRONT PANEL
UVW
TT3
MT2
MOTOR 230/400Vac
MOTOR 230/400Vac
MT2
230Vac 1~
N
R
POWER SUPPLY
TT3
400Vac 3~
S
T
8. ELECTRICAL CONNECTIONS
B
A
B
A
E-SPD MT 2200
E-SPD TT 4000
It is necessary to install a magnetic core (A).
You will find it in the accessories box. It must be fixed to:
MT) the power cable of the frequency inverter, as closeas
possible to the cable gland, TT) the cable between frequency
inverter and motor, as close as possible to the frequency inverter
connector, until a CLICK (B) is heard.
MT 2200
MT 2200
TT 4000
TT 4000

9
EN
EN
FRECUENCY CONVERTER 2
1
2
FRECUENCY CONVERTER 1
1
2
FRECUENCY CONVERTER 8
1
2
b) Signal connections
Outputs relay 1 and 2
Outputs that act according to how the parameters 5.14 and 5.15 respectively have been
programmed.
These outputs are potential free and have a maximum load of 5 amperes at 230 Vac.
When wall-mounted, as there is no cooling from the motor’s own fan, the ventilation
system of the wall mounting shall be used for this cooling.
This output is 24 Vdc and it is activated whenever the frequency converter is giving a
voltage output; its maximum load is 9 W.
You can connect any potential free contact that will perform the functions programmed in
parameters 5.12 and 5.13 respectively to these inputs.
NOTE: Do not apply voltage to these inputs!
Connection of the pressure transducer (always 4-20 mA), maintaining the correct polarity
shown in the connections diagram of the transducer itself.
Fan
Digital inputs 1 and 2
Transducer
The various frequency converters that you wish to communicate should be interconnected
at these terminals (maximum 8). They are connected point to point. The “1” terminals
must be connected together in the same way as the “2” terminals.
RS485 communication
Signal Description

10
EN
9. SCREEN FORMAT
10. MAIN SCREEN
Current data Programmed data
Pump operation LED Frequency converter voltage LED Main display Manual stop button
Right selection buttonLower buttonRaise buttonLeft selection buttonAlarm LED
H z 4 8 . 9 ( 4 8 . 8 )
A m p 0 8 . 3 ( 0 8 . 9 )
B a r 0 5 . 5 ( 0 5 . 5 )
1 4 : 5 7 M e n u
Current rotation frequency Instant consumption
Current time Current pressure
Nominal Consumption Stop frequency
Working pressure Access to the menu

11
EN
EN
E s p a n o l
E n g l i s h
F r a n c a i s
O K
12. START-UP WIZARD
The first time you connect the voltage to your unit, a start-up wizard will run in which you can configure the basic
parameters to be able to start up the pump unit. This wizard only runs on one of the units regardless of the total
that are connected.
While using this wizard the red LED will blink indicating that this process is under way.
F2
11. OPERATION MODE
The operation mode of the frequency converter will continuously seek to minimise the electricity demand, at the
same time guaranteeing minimum wear to the pumps.
a) Single pump unit:
By the direct reading of the pressure transducer, the variable speed drive is responsible for managing the rotation
speed of the electric motor of the pump, guaranteeing the mains pressure remains fixed and unaltered, regardless
of the instantaneous demand for flow required. When the demand for flow is at its greatest, the pressure of
the water network decreases. In this point the pressure transducer, which continuously informs the frequency
converter of the current pressure, causes the frequency converter to make the electric motor rotate more quickly,
guaranteeing the established working pressure. In contrast, when the demand for flow decreases, the frequency
converter makes the electric motor rotate more slowly so the pressure of the water network remains unaffected.
b) Unit with several pumps (Multi frequency converter):
When there is a network of two or more frequency converters connected together, the system decides in an alternate
and orderly manner which pump must start up first, when there is demand for flow. Once this pump starts to rotate,
if it stops because there is no more demand for flow, the system will start up a different pump the next time it starts
up, rotating all the pumps that comprise the network of frequency converters so that all the pumps in the frequency
converter network are started up the same number of times.
If a pump is running and reaches maximum rotational speed and the network pressure does not reach the
established working pressure, the system will decide whether to start up one more pump, to support the first one
or however many are running at that time. At that time the network of frequency converters will calculate the
rotational speed of the motors that guarantee the minimum electricity demand at the same time as maintaining
the working pressure.
Similarly, and with this same premise of maximum energy savings, the system will continually calculate when it
can disconnect each pump that is running at any time.

12
EN
F2
F2
F2F1
F2F1
F2
The system automatically indicates the number of frequency converters
(x) that are connected to your network. It is an indicative parameter
and cannot be modified.
With F1 you can repeat the automatic search if the value shown “x” is
different from the real value.
If you perform various searches and the value still does not coincide,
there is probably a connection error in the network of frequency
converters.
Before carrying out this point, you must use the graphic sign on the
pump motor to check its rotation direction, as it may be clockwise or
anti-clockwise depending on the pump model.
In this point you can see how the motor makes a sequence of slow
turns so you can easily see whether the rotation direction is correct. It
performs 6 rotation tests and stops the motor.
F1 restarts the rotation test.
If the rotation direction is not correct, select NO with the arrows and
restart the test by pressing F1 to verify that the rotation direction has
been changed successfully.
Once you have verified that the rotation direction is correct, select YES
and then accept it with F2.
Use the arrow keys to increase or decrease the value that is blinking
and use F2 to change to the next value. The sequence of values is:
DAY →MONTH →YEAR →HOUR →MINUTES
The lower left part of the display indicates the day of the week
calculated automatically according to the date entered.
When you modify the last value (minutes) you can accept the changes
by pressing F2.
NOTE: At any point of the date you can go back to the previous value
by pressing F1.
F2
C3
CE
E
T
0
3
A
/
F
O.
OO
C
E
2
d
1
N
R
EN
T
T
/
a
0
U
I
S
A
0
N
FO
DFNT
F
A
1
y
R
M
1
A
9
e
ITI
D
N
A
6
A
E
E
1
c
A
O
A
k
G
T
-
S
:
S
R
seeWdn
C
3
CE
E
T
0
3
A
/
F
O.
OO
C
E
2
d
1
N
R
EN
T
T
/
a
0
U
I
S
A
0
N
F
O
DFNT
F
A
1
y
R
M
1
A
9
e
I
TI
D
N
A
6
A
E
E
1
c
A
x
A
t
G
T
-
S
:
S
R
seeWdn
A
3
CE
E
T
O3
O
BF
T.
OO
C
A
U
l
1
IR
EN
T
T
T
e
A
C
E
S
A
T
t
OO
RFYS
F
I
1
s
O
S
T
A
T
a
NT I
E
O
A
N
A
R
T
A
c
A
O
A
K
A
T
O
S
R
S
R
teaRpe
R
3
CE
R
T
O
t
3
e
O
B
a
F
R
T.
OO
D
A
U
l
1
p
-S
EN
N
T
T
e
A
e
W
E
S
A
T
t
UT
RFOA
F
I
1
s
I
S
T
A
T
a
PA I
N
O
A
X
A
Z
T
A
c
A
r
A
t
A
T
O
S
R
S
A
R
3
CE
R
0
O
t
3
e
N
B
a
F
R
T
.
OO
D
.
U
l
1
p
-S
EN
N
Z
T
e
A
e
W
M
S
A
T
p
UT
LFFP
F
O
1
s
I
P
T
A
T
t
PA I
O
O
A
X
A
Z
S
A
c
A
O
A
K
A
U
O
S
R
e
A
H
3
CE
P
W
O
o
3
a
F
B
r
F
S
E.
OO
R
I
U
l
1
l
A0
EN
N
Z
T
e
A
i
R
S
S
A
T
p
S1
LFRO
F
A
1
s
T
R
T
A
T
t
TT I
D
O
A
T
A
-
D
A
c
A
O
A
K
A
I
O
S
R
e
U

13
EN
EN
F2
We must follow the instructions indicated on the screen exactly.
• Open propulsion: You must open the general propulsion of the
system to cause consumption of flow.
• Click on OK: Once the propulsion is fully open, accept it using F2.
Once you have pressed F2, the pump will start up
In this point you must enter the nominal consumption of the motor,
increasing or decrease the value using the arrow keys and validating
with F2.
NOTE: The nominal consumption is indicated on the specifications
plate of the motor. You must choose the correct value, for example if
you connect a frequency converter MT 2200 select the value 230 V and
for TT 4000 400 V.
F2
Use the arrow keys to enter the maximum range for the pressure of
the transducer connected.
This value is indicated on the specifications plate of the pressure
transducer, and must always be between 4 and 20 mA.
Validate this with F2.
F2
Use the arrow keys to enter the pressure at which you want the unit
to work.
You must take great care that this value is always within the working
curve of the pump, and always try to avoid the extremes of the curve,
in other words with flows near 0 or very low pressures.
Validate this with F2.
F2
Once you have reached this point, the frequency converter will
program itself to know when it no longer has any demand for flow and
should stop. To do this it will ask for help to understand the features
of the installation to which it is connected.
F2
OC
C
L
P
W
o
3
i
F
/
c
F
M
P1
2
S
R
A
l
1
e
ES
E
I
E
I
e
-
r
R
U
A
9
p
p
N-
-FSO
O
S
T
s
O
s
A
K
9
t
t
RI N
R
1
A
R
A
P
e
c
c
A
O
a
A
K
r
P
0
S
c
e
e
U
33
CR
R
K
O
o
3
a
R
B
r
F
S
FS
OE
C
P
T
l
1
l
RT
WN
H
R
O
e
A
i
W
K
R
A
T
p
EO
OFSR
F
E
.
s
S
S
T
A
T
t
QP I
S
T
A
S
A
E
U
A
c
A
O
A
K
.
O
A
S
R
e
A
R
3
CR
R
K
O
o
3
a
R
B
r
F
S
T.
OE
D
I
1
l
1
l
-S
WN
N
N
4
e
A
i
W
S
a
A
T
p
UT
OFC R
F
G
.
s
I
S
r
A
T
t
PA I
P
O
A
0
A
Z
U
A
c
A
O
A
K
A
E
B
S
R
e
A
R
3
CL
R
N
O
o
3
a
A
B
r
F
S
T.
OE
D
S
1
l
1
l
-S
TN
N
D
0
e
A
i
W
S
a
A
T
p
UT
RFCR
F
U
.
s
I
C
r
A
T
t
PA I
E
O
A
0
A
Z
A
A
c
A
O
A
K
A
R
B
S
R
e
A
R
3
CE
R
T
O
o
3
a
O
B
r
F
S
T.
OO
D
O
U
l
1
l
-S
EN
N
R
5
e
A
i
W
E
m
A
T
p
UT
MFCR
F
A
.
s
I
N
p
A
T
t
PA I
U
O
A
0
A
Z
T
A
c
A
O
A
K
A
R
A
S
R
e
A

14
EN
START-UP WIZARD IN SYSTEMS WITH TWO OR MORE PUMPS
In systems with two or more pumps, the start-up wizard will run in the unit that has the transducer connected,
and only that unit will indicate the first screen of the wizard. if there is more than one pump with a transducer
connected, the system will decide automatically which unit of those that have a transducer will be used to run the
wizard.
Once the wizard has finished in the unit selected, the other units on the network will be fully programmed with
the same data. It will only remain to run the rotation test of its wizard and the slave pumps will have the red
warning light on and an indication on the screen of the rotation direction test. Once their rotation tests have been
performed, it will go directly to the main screen and the assembly will be fully programmed.
F2
F2F1
At this point you must close the propulsion gradually (using a
minimum of 5-7 sec) until the flow consumption is zero. At this
moment the pressure of the installation must be pressure entered
previously in the wizard.
Once the propulsion has been closed and the working pressure
established, press F2 to accept.
The option “Accept” will only appear if we reach the work pressure
that we have indicated. In the case of not reaching the set pressure
without water consumption, the “Accept” option will not be displayed.
The stop frequency calculated is indicated, this is: for the working
pressure indicated, when the pump drops below this frequency it does
not generate any flow so the motor then stops. Press F1 to return to
the initial stop frequency search screen. Accept by pressing F2.
It shows a text for a few seconds indicating that the wizard has finished
successfully before showing the main screen.
NOTE: All the data entered or calculated in the wizard can be modified later through the unit menu.
• Wait 10 seconds: It displays a ten-second countdown after which the
next step to take will be indicated.
This countdown will not start if the indicated pressure is above what
we have set in the set pressure. If once the countdown starts the
pressure increases too much, the counter will show the 10 seconds
again until the pressure does not decrease.
Automatic
E3
CE
A
E
U3
E
SF
E.
OO
S
F
C
d
1
WR
EN
T
I
C
a
0
R
D
L
A
0
N
IT
EFIH
F
N
E
y
D
M
L
A
9
e
ZH I
S
F
A
S
A
I
E
Y
c
A
O
A
k
A
E
U
S
:
S
H
teaRpe
O3
CE
C
E
03
E
/F
P.
OO
Y
4
2
d
1
ER
EN
T
3
/
a
0
Q
I
S
A
0
N
FS
EF5z
F
.
1
y
U
M
1
A
9
e
RT I
H
N
A
6
A
E
E
1
c
A
O
A
k
E
-
S
:
S
N
teaRpe
S
3
CE
I
S
S3
E
SF
E.
OO
O
L
P
d
S
T
C
EN
N
O
R
a
S
P
N
O
A
S
N
PL
EFLT
F
W
E
y
U
D
K
A
S
e
RO I
Y
S
A
S
A
L
E
S
c
A
O
A
k
O
A
S
S
S
S
S
seeWdn
R3
CE
R
T
W
o
3
a
O
B
r
F
S
T.
OO
D
O
A
l
1
l
-S
EN
N
R
I
e
-
i
W
E
s
A
T
p
UT
MFCR
F
A
T
s
I
N
e
A
T
t
PAI
U
7
A
0
A
Z
T
c
c
A
O
A
K
A
R
A
S
R
e
A
z0H5l.e0.rs4tAA Bar2a
oicMerz0H5.0

15
EN
EN
MENU
1. PARAMETERS 2. DISPLAY 3. LOG 4. MANUAL 5. ADVANCED PARAM. 6. FINE TUNING
1.1 WORKING PRESSURE
1.2 MOTOR CURRENT
1.3 ROTATION DIRECTION
1.4 STOP FREQUENCY
1.5 START-UP
DIFFERENTIAL
2.01 MODULE
TEMPERATURE
2.02 ANALOGUE SIGNAL
2.03 VOLTAGE HOURS
2.04 HOURS WORKED
2.05 START-UP NUMBER
2.06 DIGITAL INPUT 1
2.07 DIGITAL INPUT 2
2.08 RELAY 1 OUTPUT
2.09 RELAY 2 OUTPUT
2.10 SOFTWARE VERSION
2.11 CONS. POWER OF
PUMP
2.12 CONS. POWER OF
NETWORK
5.01 LANGUAGE
5.02 UNITS OF PRESSURE
5.03 MAXIMUM NUMBER OF
PUMPS ON
5.04 TRANSDUCER FULL-SCALE
VALUE
5.05 WORKING PRESSURE 2
5.06 PRINCIPAL STOP DELAY
5.07 MINIMUM WORKING
FREQUENCY
5.08 MAXIMUM WORKING
FREQUENCY
5.09 AUXILIARY OPERATING
FREQUENCY
5.10 MINIMUM AUXILIARY
OPERATING DELAY
5.11 MINIMUM AUXILIARY STOP
DELAY
5.12 DIGITAL INPUT 1
5.13 DIGITAL INPUT 2
5.14 RELAY OUTPUT 1
5.15 RELAY OUTPUT 2
5.16 SCHEDULE PROGRAM 1
5.17 PROGRAM START TIME 1
5.18 PROGRAM STOP TIME 1
5.19 SCHEDULE PROGRAM 2
5.20 PROGRAM START TIME 2
5.21 PROGRAM STOP TIME 2
5.22 LOW WATER LEVEL ALARM
ACTIVE
5.23 LOW WATER LEVEL ALARM
DELAY
5.24 BURST PIPE ALARM
5.25 VOLTAGE ALARM ACTIVE
5.26 PARAMETER LOCK
5.27 SET DATE AND TIME
5.28 STOP ADJUSTMENT INPUT
WIZARD
5.29 FACTORY SETTINGS
6.01 PROPORTIONAL
CONSTANT
6.02 INTEGRAL CONSTANT
6.03 SWITCHING
FREQUENCY
6.04 STOP SWITCHING
RANGE
6.05 STOP SWITCHING
SPEED
6.09 ALARMS RESET
6.10 RESET NUMBER OF
START-UPS
13. SETUP MENU

16
EN
1. PARAMETERS
Par. Description Units Programming
Default Min. Max.
Wizard 0.5 FS
Notes
1.1 WORKING PRESSURE Bar Pressure you wish to maintain in the system.
Wizard 0.1 111.2 MOTOR CURRENT Amp
Current of the motor in amperes. Taking into account
whether your motor is wired as three phase 230V or
three phase 400V.
011.3 ROTATION DIRECTION You can change the rotation direction of the motor by
modifying this parameter from 0 to 1 or vice versa.
Wizard 0.1 99.91.4 STOP FREQUENCY Hz
The system will stop when the frequency converter has
been working for a certain time (see parameter 5.06)
below this frequency.
0.5 0.3 31.5 START-UP DIFFERENTIAL Bar
This is the differential that enables you to reduce the
pressure to start the pump using the value entered in
parameter 1.1.
2. DISPLAY
Par. Description Units Notes
2.01 MODULE TEMPERATURE ºC This indicates the temperature the electronic module of the unit is at.
2.02 ANALOGUE SIGNAL mA This indicates the value in mA of the pressure transducer. This data will be 4 mA for 0 Bar
and 20 mA for the upper limit of the transducer connected.
2.03 VOLTAGE HOURS Hours
This indicates the total number of hours the unit has been connected to an electricity grid.
2.04 HOURS WORKED Hours
This indicates the total number of hours worked (providing an output voltage) of the frequency converter.
2.05 START-UP NUMBER This indicates the total number of start-ups from zero that the unit has made.
2.06 DIGITAL INPUT 1 This indicates whether digital input 1 is ON or OFF.
2.07 DIGITAL INPUT 2 This indicates whether digital input 2 is ON or OFF.
2.08 RELAY 1 OUTPUT This indicates whether the relay 1 output is ON or OFF.
2.09 RELAY 2 OUTPUT This indicates whether the relay 2 output is ON or OFF.
2.10 SOFTWARE VERSION Version of the unit software.
2.11 CONS. POWER OF PUMP W Instantaneous power consumed in output terminals toward pump.
2.12 CONS. POWER OF GROUP W Power consumed instantaneously by all of the pumps.
3. LOG
Wizard: This parameter is the one entered or calculated in the start-up wizard.
FS: Full-scale value of the transducer (entered in the start-up wizard).
F1
When you access the log menu you will find a list in chronological
order of alarms that have been triggered in your unit, indicating the
date and the time they occurred
Use the arrows and to move forward or back to view the
different alarms that have been triggered.
Press F1 to exit this menu.
A3
CE
A
A
0
o
3
X
F
/
o
F
E
L.
OO
R
V
2
l
1
I
A0
EN
N
O
/
e
0
T
F
E
U
A
1
p
R1
LFTG
F
L
1
s
0
R
1
A
9
t
MAI
A
A
A
6
A
4
D
2
c
A
a
A
r
A
E
-
S
:
e
A

17
EN
EN
4. MANUAL
The system is prepared to carry out speed and operation tests manually through this menu. When you access this
menu, regardless of the status of the system, the unit from which you are accessing stops its functions and therefore
stops the pump.
When you access this menu this screen appears:
F2F1
F1
5. ADVANCED PARAM.
Par. Description Units Programming
Default Min. Max.
Spanish
Spanish
English
French
Italian
Portuguese
German
Dutch
Polish
Romanian
Turkish
Russian
Notes
5.01 LANGUAGE You can select between different languages for the
menu and the warnings.
Bar Bar - Psi5.02 UNITS OF PRESSURE Bar Units of working pressure and display.
8185.03 MAXIMUM NUMBER OF
PUMPS ON
Maximum number of pumps that can function in the
system simultaneously.
Wizard 5 305.04 TRANSDUCER FULL-SCALE
VALUE Bar Value of the transducer at 20 mA.
** 0.5 FS5.05 2 WORKING PRESSURE Bar
Second working pressure for installations that require it.
** As a default value it will show 4 bar.
10 0 1005.06 PRINCIPAL STOP DELAY Sec
Time from the moment the main pump is working at a
speed below the stop frequency (parameter 1.4) until
it stops fully.
ATTENTION:
Improper use of manual mode can cause overpressures in the installation.
U4
CE
A
A
0
o
3
X
F
/
o
F
E
A.
OO
R
0
4
l
1
I
LM
EN
N
.
.
e
0
T
N
0
U
A
1
p
R
A
LFHO
F
0
0
s
F
s
1
A
9
t
M
NI
z
a
A
B
A
0
)
2
c
A
O
A
n
A
(
r
S
:
e
4
U4
C)
A
4
0
o
3
f
F
/
r
F
O
A.
OO
R
2
4
l
1
f
LM
EN
N
.
.
e
0
i
N
0
U
A
1
p
R
A
LFHO
F
0
6
s
F
s
1
A
9
t
M
NI
z
a
A
B
A
0
g
2
c
AA
n
A
(
r
S
:
e
4
Where you can see the frequency, an operation timer and the pressure
at that precise moment read by the transducer.
Press F1 to exit this menu.
When you press ON (with the F2 key) you will start the motor and
you can increases or reduce the frequency using the arrow keys. At
the same time you can see how the countdown begins for 2 minutes of
operation. If you do not press any keys, after 2 minutes the motor will
stop automatically. If you press the F2 key during the countdown, it
will be increased to 15 minutes, 30 minutes, 1 hour, 2 hours, 4 hours,
8 hours and 24 hours for each press.
Press F1 to exit, stop the motor and return to the wait screen of this
menu.
+

18
EN
Programming
Par. Description Units Default Min. Max. Notes
25 10 505.07 MINIMUM WORKING
FREQUENCY Hz Minimum frequency at which you allow the pump to
work.
50 25 655.08 MAXIMUM WORKING
FREQUENCY Hz Maximum frequency at which you allow the pump
to work.
50 25 505.09 AUXILIARY OPERATING
FREQUENCY Hz When the pump in operation reaches this frequency it
sends a command to the auxiliary to start up.
2 1 2005.10 MINIMUM AUXILIARY
OPERATING DELAY Sec Time from the moment the condition of parameter 5.09
occurs until the auxiliary pump starts.
21105.11 AUXILIARY STOP DELAY Sec
Time from when a system of two or more pumps
is working below parameter 1.4 until the auxiliary
pumps stop.
Unused
Unused
External stop
External stop INV
2nd setpoint
2nd setpoint INV
Flow Sensor NC
5.12 DIGITAL INPUT 1
Unused See parameter 5.125.13 ENTRADA DIGITAL 2 See parameter 5.12
OFF
OFF
Alarm (NO)
Alarm (NC)
On
External stop
Dry running
Clock (NO)
Clock (NC)
5.14 RELAY 1 OUTPUT
The aim of this parameter is to enable signals remotely.
OFF: The relay is never activated.
Alarm (NO): The relay closes before an alarm.
Alarm (NC): The relay opens before an alarm.
Running: The relay is energised when the unit is
running.
External stop: The relay is energised when there
is an external stop. (For this condition we must have
programmed a digital input as “·Start/Stop”).
Dry running: The relay is energised if the converter
detects dry running.
Clock (NO): The relay closes depending on the time
data programmed in parameters 5.16 to 5.21.
Clock (NC): The relay opens depending on the time
data programmed in parameters 5.16 to 5.21.
OFF
OFF
Alarm (NO)
Alarm (NC)
On
External stop
Dry running
Clock (NO)
Clock (NC)
5.15 RELAY 2 OUTPUT See parameters 5.14
We can use the digital input as a system start-stop by
closing the input circuit, or by opening it if we select
the INV option.
It can also be used as a second set pressure in the same
way. Closing the circuit of the programmed input, the
system will ignore the second set pressure (parameter
5.05). The operation described is the reverse if we choo-
se the INV option.
“Flow Sensor NC” can be selected when a flow sensor
is available, which will stop the pump when the contact
is opened.
Selecting “Unused” will not affect the system.

19
EN
EN
Par. Descripción Ud. Programación
Defecto Min. Max. Notas
OFF
OFF
M-Su
M-F
Sa-Su
M ….. Su
5.16 SCHEDULE PROGRAM 1
In this parameter you can choose not to have a
schedule program (OFF) or the days of the week that
you want this program to run. You can choose between
whole weeks (M-Su), weekdays (M-F), weekends (Sa-
Su) or individual days.
The schedule program will act on the output relay
programmed for this purpose.
00:00 00:00 23:595.17 PROGRAM START TIME 1 Start time of schedule program 1.
00:00 00:00 23:595.18 PROGRAM STOP TIME 1 Stop time of schedule program 1.
00:00 00:00 23:595.20 PROGRAM START TIME 2 Start time of schedule program 2.
00:00 00:00 23:595.21 PROGRAM STOP TIME 2 Stop time of schedule program 2.
YES YES NO
5.22 LOW WATER LEVEL ALARM
ACTIVE
Parameter for enabling or disabling the low water
level alarm.
In the case of being active and cause notice, the
drive will start attempts by the following sequence:
5 minutes, 15 minutes, 1 hour, 6 hours or 24 hours.
The display shows the remaining time start attempt.
Pressing F2 we force the reset of the notice, still
unfinished countdown.
If after the 24-hour notice is detected again dry
running, the drive will lock indefinitely until you
press F2.
51995.23 LOW WATER LEVEL ALARM
DELAY Sec Time from when the system calculates a low water level
until the moment the alarm is activated for this reason.
YES YES NO5.24 BURST PIPE ALARM Parameter for enabling or disabling the burst pipe
alarm.
YES YES NO5.25 VOLTAGE ALARM ACTIVE Parameter for enabling or disabling the alarm due to
a power cut.
NO NO YES5.26 PARAMETER LOCK
YES: Editing the values of the parameters is locked.
NO: Editing the values of the parameters is locked.
To change this parameter from YES to NO, you must
previously enter the password 1357.
NO NO YES5.27 SET DATE AND TIME
When you change this parameters to “SI” this screen for
editing the date and time will appear. Once editing is
completed, the parameter returns to “NO”.
NO NO YES5.28 STOP FREQUENCY SEARCH
WIZARD
If you change this parameter from “NO” to “YES” the
stop frequency search wizard will be launched.
NO NO YES5.29 FACTORY SETTINGS
To reset the unit and leave it with the factory settings,
change this parameter to “YES” and after you have entered
the code 1357 the unit will launch the start-up wizard.
OFF5.19 SCHEDULE PROGRAM 2 Like parameter 5.16 but for a second schedule program.
OFF
M-Su
M-F
Sa-Su
M ….. Su

20
EN
6. FINE TUNING
Par. Description Units Programming
Default Min. Max.
100 0 999
Notes
6.01 PROPORTIONAL CONSTANT
100 0.1 9996.02 INTEGRAL CONSTANT
7.7 2.5 16.06.03 SWITCHING FREQUENCY kHz
11646.05 STOP SWITCHING SPEED
NO NO YESALARMS RESET
If you change this parameter from “NO” to “YES”
you will reset the alarms log and the parameter
automatically returns to “NO”.
NO NO YESRESET NUMBER OF START-UPS
If you change this parameter from “NO” to “YES” you
will reset the number of start-ups and the parameter
automatically returns to “NO”.
0.1 0.0 0.56.04 STOP SWITCHING RANGE Bar
The POWER LED blinks.
The pump to which the frequency
converter is connected is not operative
for automatic running.
Check that there is no manual shutdown
(AUTO/STOP button on the keypad),
a remote stop (auxiliary input active
remote stop) or a general stop of the
network of frequency converters (occurs
when any general critical parameter is
being modified).
The RUN LED blinks. The frequency converter is in the process
of stopping the pump.
WARNING REASON EXPLANATION / SOLUTION
14. WARNING MANAGEMENT
One of the main principles of the frequency converter is to try to avoid the failure of the hydraulic supply. To do
this, the frequency converter has systems that, in the event any reading for the pressure/consumption of the motor
is outside of the established limits, it may partially lose its ability to try to avoid the frequency converter locking
and, therefore, avoid the failure of the hydraulic supply.
A clear example is an excessive consumption of the electric motor. In this specific scenario, the frequency converter
will limit the rotational speed of the motor to avoid its deterioration, maintaining the consumption of the motor
equal to the nominal consumption, thus the hydraulic installation will continue to receive flow from the pump, not
at the working pressure established, but at a somewhat lower pressure.
A table specifying the current state of the system operation, according to visual warnings that are shown using both
the LEDS and the main screen can be found below:
6.09
6.10
This manual suits for next models
3
Table of contents
Other EBARA Inverter manuals
Popular Inverter manuals by other brands

Hilti
Hilti UNIRAC POLETOPS 5000 Series installation manual

Schwarzbeck
Schwarzbeck IGUF 2910 S manual

Beijer Electronics
Beijer Electronics BFI-E3 Series Start-up

Omron
Omron 3G3MX2 Series quick start guide

Srne
Srne MC Series user manual

thermital
thermital TSOL 25/4 FLEX Installer, technical assistance centre and user manual

SolarEdge
SolarEdge StorEdge SE5K-RWS installation guide

Power One
Power One AURORA PVI-10.0/12.5-OUT-xx Operation and installation manual

Heiko
Heiko JS025-A1 Service manual

Tektronix
Tektronix TG700 Programming manual

Ingeteam
Ingeteam Ingecon Sun Smart U Installation and operation manual

Parker
Parker AC30 series Technical manual