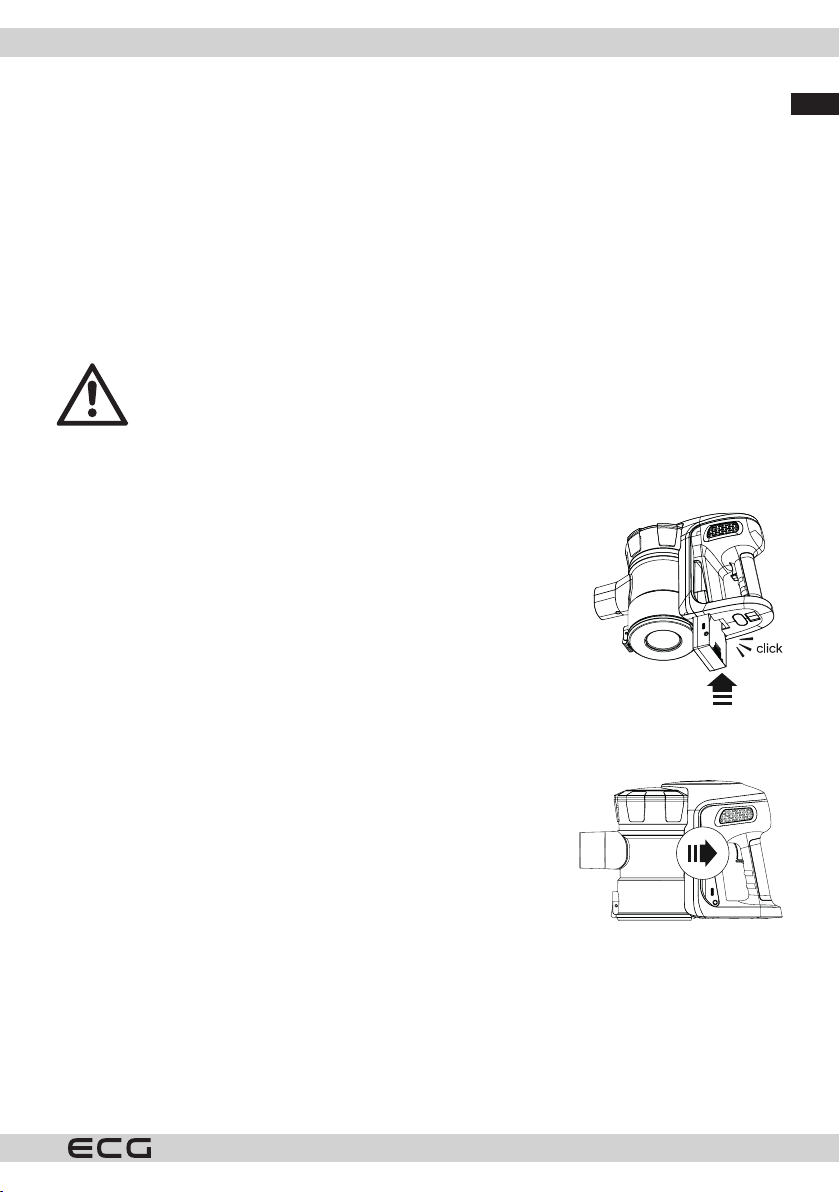
9. Zámek otáčení
10. Víko ltru
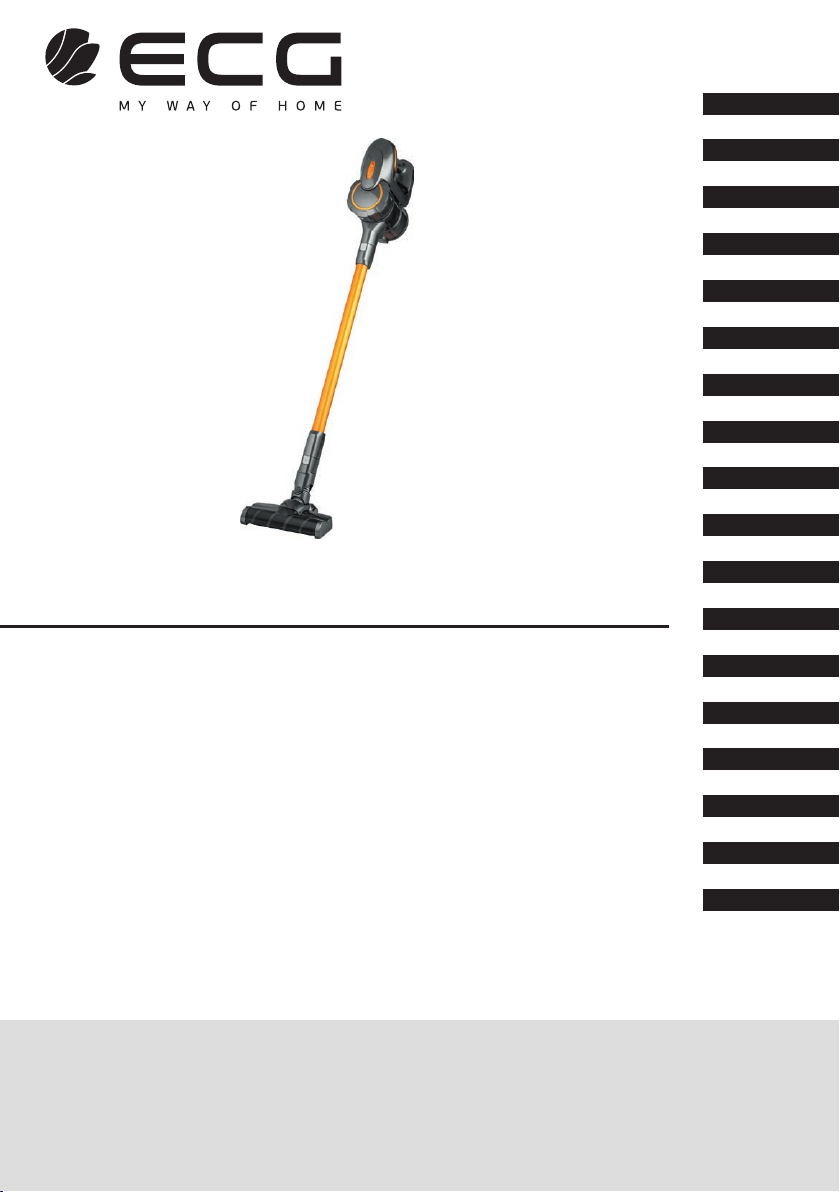
Nástavce vbalení:
A. Kartáč na čalounění
B. Motorizovaný kartáč
C. Adaptér
(obrázek je pouze ilustrační)
Eesti keel
Tolmuimeja:
1. Tolmumahuti vabastusnupp
2. Pikendustoru vabastusnupp
3. Harja vabastusnupp
4. Motoriseeritud hari
5. Aku vabastusnupp
6. ON/OFF (sees/taara) nupp
7. Aku
8. Tolmumahuti avamisnupp
9. Pöördlukk
10. Filtrikate
Kaasasolevad tarvikud:
A. Polstri hari
B. Motoriseeritud hari
C. Adapter
(pilt on illustratiivne)
Español
Aspiradora:
1. Botón de desbloqueo del
recipiente para polvo
2. Botón de desbloqueo del tubo
de extensión
3. Botón de desbloqueo del
cepillo
4. Cepillo motorizado
5. Botón de desbloqueo de la
batería
6. Botón ON/OFF (Encendido/
Apagado)
7. Batería
8. Botón para abrir el recipiente
para polvo
9. Bloqueo giratorio
10. Cubierta del ltro
Accesorios incluidos:
A. Cepillo para tapizados
B. Cepillo motorizado
C. Adaptador
(imagen solo anes ilustrativos)
Français
Aspirateur :
1. Touche de déverrouillage du
bac à poussière
2. Touche de déverrouillage du
tube de rallonge
3. Touche de déblocage de la
brosse
4. Brosse motorisée
5. Touche de déblocage de la
batterie
6. Touche ON/OFF (marche/arrêt)
7. Piles
8. Touche d’ouverture du bac à
poussière
9. Verrouillage de rotation
10. Couvercle du ltre
Accessoires fournis :
A. Brosse d’ameublement
B. Brosse motorisée
C. Adaptateur
(image uniquement à titre
indicatif)
Hrvatski
Bosanski
Usisivač:
1. Gumb za oslobađanje
spremnika za prašinu
2. Gumb za otpuštanje produžne
cijevi
3. Tipka za oslobađanje četke
4. Električna četka
5. Tipka za oslobađanje baterije
6. Tipka ON/OFF
7. Baterija
8. Gumb za otvaranje spremnika
za prašinu
9. Zaključavanje okretanja
10. Poklopac ltra
Nastavci upaketu:
A. Četka za namještaj
B. Električna četka
C. Adapter
(slika je samo za ilustraciju)
Italiano
Aspirapolvere:
1. Pulsante per sganciare il
contenitore per la polvere
2. Pulsante di sgancio del tubo di
prolunga
3. Pulsante di sgancio della
spazzola
4. Spazzola motorizzata
5. Pulsante di sgancio della
batteria
6. Pulsante ON/OFF
7. Batteria
8. Pulsante per aprire il
contenitore per la polvere
9. Blocco rotazione
10. Copertura del ltro
Accessori inclusi:
A. Spazzola per tappezzeria
B. Spazzola motorizzata
C. Adattatore
(l’immagine ha solo nalità
illustrativa)
Latviešu valoda
Putekļsūcējs:
1. Putekļu tvertnes atvienošanas
poga
2. Pagarinājuma caurules
atvienošanas poga
3. Birstes atvienošanas poga
4. Motorizētā birste
5. Akumulatora atvienošanas
poga
6. ON/OFF poga
7. Baterija
8. Poga putekļu tvertnes
atvēršanai
9. Pagriešanas aizslēgs
10. Filtra pārsegs
Iekļautie piederumi:
A. Polsterējuma birste
B. Motorizētā birste
C. Adapteris
(attēls ir paredzēts tikai
ilustratīviem nolūkiem)
Lietuvių kalba
Dulkių siurblys:
1. Dulkių talpyklės atkabinimo
mygtukas
2. Teleskopinio vamzdžio
atlaisvinimo mygtukas
3. Šepečio atlaisvinimo mygtukas
4. Motorizuotas šepetys
5. Maitinimo elemento
atlaisvinimo mygtukas
6. ON/OFF (įjungimo / išjungimo)
mygtukas
7. Maitinimo elementas
8. Dulkių talpyklės atidarymo
mygtukas
9. Sukamasis užraktas
10. Filtro dangtelis
Į komplektą įeinantys priedai:
A. Šepetys baldų apmušalams
B. Motorizuotas šepetys
C. Adapteris
(paveikslėlis tik kaip iliustracija)
Magyar
Porszívó:
1. Porgyűjtő edény kioldó gomb
2. Hosszabbító szívócső kioldó
gomb
3. Szívófej kioldó gomb
4. Motoros szívófej
5. Akkumulátor kioldó gomb
6. ON/OFF gomb
7. Akkumulátor
8. Porgyűjtő edény kinyitó gomb
9. Forgás blokkoló
10. Szűrő fedél
Tartozékok acsomagolásban
A. Kárpitosbútor szívófej
B. Motoros szívófej
C. Adapter
(az ábra csak tájékoztató
jellegű)
Polski
Odkurzacz:
1. Przycisk zwalniający pojemnik
na kurz
2. Przycisk zwalniający rurę
przedłużającą
3. Przycisk zwalniający szczotkę